Modern Embroidery Ideas for Small Apartments Bordado tips to elevate tiny spaces with stylish stitched décor
My layout and scale tips
Measure walls and furniture first
I start by walking the room and noting exact measurements: each wall, doorways, and the space where the embroidery will live. I also measure existing furniture that might block or crowd the piece. This helps me choose a design that fits without making the room feel crowded. I keep a simple sketch with whole numbers to compare sizes quickly when testing layouts. If I’m unsure, I measure twice and trust the numbers over the moment’s vibe.
Pick hoop and frame sizes to match space
Choosing the right embroidery hoop for your project balances fabric tension with room presence. I pick a hoop that fits the space without dominating it. A small room benefits from a modest hoop and clean frame, while a larger wall can handle something more substantial. I think in phrases like fits the wall, not the sofa, and consider how the frame rests with nearby furniture so nothing looks cramped.
Use paper templates to test placement
Before threading the needle, I cut brown paper templates of the design and tape them to the wall. This lets me see how the finished piece will feel and adjust height, width, and orientation without nails. I test several placements—centered on a light switch, above a console, or between two pictures—and recheck until it sings.
My minimalist embroidered wall art ideas
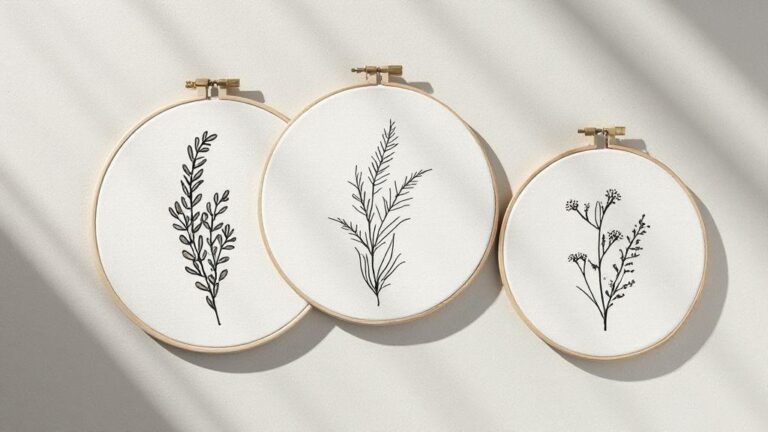
I keep things simple and cozy with clean lines, soft textures, and a restrained color palette. A single motif or small scene—like a crescent moon, a tiny tree, or a few leaves—lets negative space do the talking. I stitch with a few basic stitches and limited colors to make each piece calm and intentional. When I hang them, I rotate with the seasons to keep the wall fresh without shouting for attention.
I choose breathable fabrics and non-glaring threads. Plain cotton fabrics provide a quiet backdrop, and I limit myself to 1–2 colors to maintain a uniform mood. The goal is to invite a moment of pause, not fill the space. If unsure, I start with a simple outline and add only a few tiny stitches to imply shape. A small, deliberate mark can carry a lot when the rest is left generous with space.
Finished pieces feel contemporary when framed in a light hoop or mounted flat with a slim border. The best minimalist embroideries read as textiles first, art second, blending with modern furniture and softening sharp angles without competing with decor.
Minimalist embroidered wall art for tiny spaces examples
Tiny spaces shine with compact, focused embroidery. A 4×6 inch panel with a single line drawing—a simple wave or spiral—reads modern and warm. A row of three tiny stars in soft gray creates rhythm without crowding. A small botanical outline with a few leaves also reads as nature-inspired and modern.
Geometric hints work well too: a clean triangle or curved crescent occupies a compact area without feeling busy. Outline in a single color and leave interiors blank for an airy look. These pieces become subtle focal points on a hallway wall or above a small desk.
Neutral colors and lots of negative space
Neutral tones like ivory, taupe, and charcoal keep the wall calm. Use a single contrasting color and leave large areas unstitched or lightly filled. Negative space frames the stitch and makes the motif deliberate. If two colors are used, one is for the motif and the other for the quiet background. The result is serene and rewards closer inspection.
When planning, draw a light outline and question each stitch: does it add meaning or just fill space? If the latter, cut it. I want every thread to count, echoing a calm, modern vibe that works with white walls, wood, or steel accents. These pieces pair well with simple decor and can be swapped as styles shift.
DIY embroidered cushions for small apartments
I love turning a tiny living space into something cozy with a few thoughtful touches. Embroidered cushions add color and personality without occupying more space. They can feel like a quick room reset—swap stitches, switch patterns, and the vibe changes. Simple designs and careful sewing make a big impact on a budget.
I start with easy projects that don’t require a designer’s toolkit. A hoop and a few basic stitches, plus affordable fabrics, go a long way. I keep colors classic to match most decor and use leftover fabrics to stay budget-friendly. Beginners can start with small repeatable motifs—stripes or tiny flowers—to see progress fast.
For compact homes, choose durable fabrics that wash well and cushions with plain backs for easy cover swaps. Removable covers, simple patterns, and a clean finish make your space feel polished even in a studio or one-bedroom.
DIY embroidered cushions for small apartment patterns
Patterns that are easy to reproduce but carry personality work well in small spaces. Repeatable motifs like a line of tiny leaves or a geometric band help create a cohesive look across cushions. Limiting the color palette to two or three shades keeps the space calm and easy to mix with furniture. Trace patterns onto cotton or linen for steady lines, and stitch along guides to stay neat.
Pattern choice also considers scale: too-large motifs can dominate a tight sofa. Place embroidery toward one corner for balance when the cushion sits on a chair or bed. A tiny accent—a single flower or a short row of diamonds—adds texture without overpowering. A few well-placed cushions with consistent motifs create a unified look.
To keep whimsy without clutter, match pattern combos to existing drapes or rug lines. Mix plain cushions with embroidered ones for dynamic balance. The goal is personality with control, especially in small rooms where every inch matters.
Choose slim inserts and flat stitches
Slim inserts keep cushions neat and prevent bulging, which helps embroidery sit flatter and stitches stay crisp. If upgrading, looser inserts work too, but slim is the easiest and most affordable for beginners.
I prefer flat stitches—they lie flush and read clearly from a distance. Use backstitch for clean lines and satin stitch for solid fills, avoiding overly dense stitching that stretches fabric. If fabric shifts, a light spray of water or a dab of fabric glue helps hold it in place temporarily. Maintain even tension to avoid warping.
Flat stitches also wash well. Finish with an invisible knot to prevent threads from poking through. This keeps cushions tidy, important when space is limited.
Use removable covers for easy washing
Removable covers are a time saver in small homes. Measure the insert and choose a cover with a bit of extra room. A zipper or wide envelope opening makes swapping covers easy without catching threads. Line the inside with light fabric to prevent dye transfer or pilling.
Keeping inserts separate from covers simplifies maintenance. Wash covers in cool water and air dry, then fluff the inserts to restore loft. A simple routine keeps cushions clean, embroidery fresh, and the room feeling like mine.
How I hang and display stitched pieces
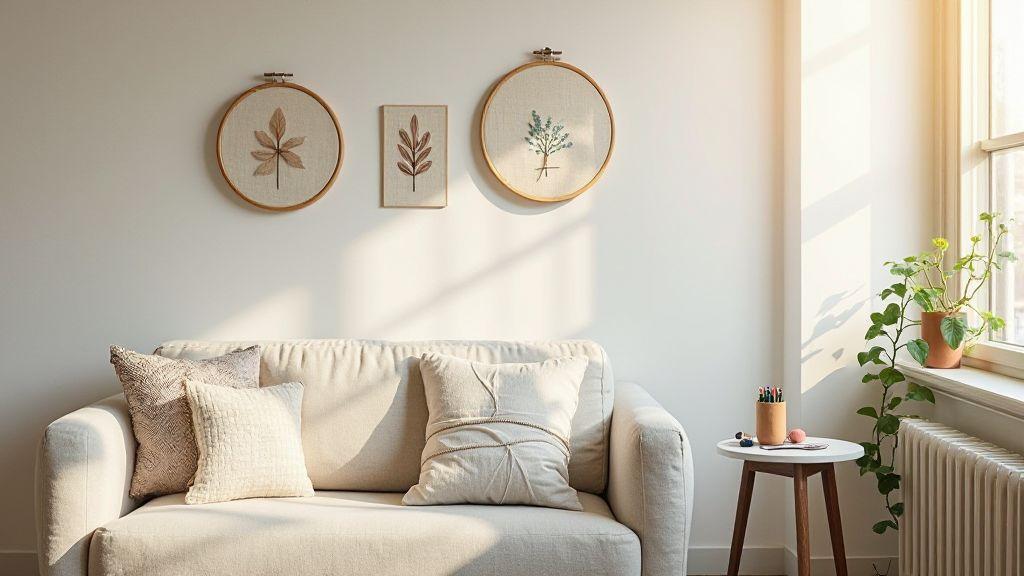
I hang stitched works where I can enjoy them daily, with good light but away from direct sun. Group by color or size so the display feels intentional. Use removable adhesive hooks for light frames or a lightweight wire with crimps for a gallery-like look. The stitching should stay the star, not the hardware.
For larger pieces, a minimal approach works best: a thin metal rod with clips creates a tidy line that’s easy to swap. Framing a few favorites with white space around them can also look fresh. A cohesive, easy-to-update display helps me refresh the space as I finish new projects.
When displaying multiple pieces, measure spacing and mark hook locations with painter’s tape to avoid crooked lines. Rotate pieces seasonally to keep the display lively and relevant.
Embroidery hanging ideas for small walls like rails and clips
Rails and clips are ideal for small walls: light, flexible, and affordable. Space clips evenly and keep height consistent so the display reads deliberate. Let the threads show and let the stitch texture stand out against a neutral wall.
Clips enable a vertical line of embroidery or a tiny gallery by stacking frames. A single rail can hold three to five pieces in a row on a tight wall. Keep frame or rail colors simple so the work remains the focus.
If showing a long fabric strip, clip the top and bottom to keep it flat and crisp. Have spare clips handy to adjust layouts as you add pieces.
Vertical groupings save floor space
A vertical stack saves floor space and creates impact on a single tall wall or narrow hallway. Mix frameless and framed pieces for texture, leaving small gaps so each work breathes. Lay out on the floor first if you’re unsure of order to avoid extra holes.
Lightweight hardware and anchors
Use lightweight hardware for most displays. Plastic anchors work for light frames; small picture hangers with wires are handy for several small pieces. Adhesive hooks save walls from nails. Check weight ratings and upgrade to metal hooks with sturdy wire for heavier items. For rails, choose a thin, sturdy rod and clip system that stays durable over time.
Compact patterns and stitch choices I use
I favor small, tight patterns that read clearly in limited space. Simple shapes with textured emphasis create a modern look without crowding. Group stitches to keep fabric smooth, like a tiny quilt you carry in a hoop.
Stitch options include satin, backstitch, and French knots. Satin fills give smooth color blocks, backstitch keeps edges crisp, and French knots add tiny focal texture. Use a balanced mix to avoid crowding. In practice, outline with backstitch, fill with satin where needed, and add a few knots for focal points. If spacing feels off, choose a single clear symbol instead of a busy motif. The result is a neat, modern look that reads as embroidery, not a tangle of threads.
Compact embroidery patterns modern decor motifs
Compact patterns in modern decor motifs emphasize clean lines: tiny leaves, abstract squares, or single-line icons stay legible when scaled down. Tight satin fills and sharp backstitch edges keep the motif defined. A small contrast of French knots adds subtle texture. Use lightweight fabrics like linen or cotton and frame simply to honor the minimalist vibe.
Simple geometric and tiny botanical designs
Geometric shapes and tiny botanicals balance modern and organic aesthetics. Use backstitch for outlines and satin fills for color blocks. Tiny French knots or seed stitches add subtle texture in leaves or centers. Limit the palette to two or three tones for cohesion.
I map the pattern, decide fill versus outline, and place a single knot in a tiny bud to catch the light. This yields a design that feels sophisticated from afar and charming up close.
Prefer satin, backstitch and French knot
Satin fills, backstitch outlines, and French knots are the trio I rely on for compact pieces. They provide polished color blocks, crisp edges, and tiny tactile accents without bulk. Space them thoughtfully to keep texture balanced and readable from a distance.
Materials, storage and space-saving projects I recommend
I keep embroidery gear simple and handy. A small, clear bin holds fabrics in a few colors, floss in main shades, a needle set, scissors, and a tiny pincushion. Choose fabrics that don’t fray easily and threads that complement each other. For space-saving projects, pick small kits that fit in a drawer or tote. A compact hoop, a few skeins of floss, a mini pattern, and folded towels as a soft work surface keep things efficient. Plan one simple pattern with a limited palette to stay light and fast.
Storage should be visible and accessible. Label jars by color family and keep them in a shallow drawer. Use a foldable cutting mat that stores almost flat. Slim thread cards stack neatly on a shelf, and hoops store flat to avoid warping. Keeping everything within arm’s reach makes starting and finishing a small project quick.
I reuse containers from other crafts for stamps or needles and carry a compact bag for off-site projects. The phrase Modern Embroidery Ideas for Small Apartments often anchors my approach, reminding me to stay neat and portable.
Small-space embroidery decor tips for kits and tools
When designing for small walls or narrow desks, choose compact patterns with bold lines and minimal color changes. Mount patterns on lightweight boards and swap designs quickly with simple pinstud systems. A slim peg rail near my workspace holds scissors, a needle case, and the active hoop, keeping the main surface clear. For display, frame small pieces with a thin mat and a simple frame, or loop finished pieces onto a fabric strip attached to a corkboard to create a mini gallery.
Store pattern packaging in a labeled folder by name and color scheme. Work on light-colored cloth so threads pop and the pattern is easy to see, keeping the process calm and inviting. For travel or quick sessions, choose kits with pre-printed guides or printable patterns.
Store hoops flat and stack slim thread cards
Store hoops flat to prevent bending. Nest smaller hoops inside larger ones and lay them in a shallow drawer or on a shelf. If you have vertical space, slide a tray behind a door so hoops slide in and out. For threads, slim color cards are ideal—label colors and numbers, then stack in a small tin. Group by color family to keep things tidy and portable.
Label colors clearly to reduce mistakes and improve efficiency. When traveling, carry a few essential cards in a slim case. This keeps the system light and easy to use, so your embroidery nook stays calm and ready for any Modern Embroidery Ideas for Small Apartments project.
Care, laundering and long-term storage
Care for fabrics and threads is simple: hand wash fabrics if needed and lay flat to dry. Avoid harsh detergents and wringing. Press lightly and store fabrics in breathable containers. Threads stay vibrant when washed only if necessary, and dry away from direct heat. If a thread dulls, replace it rather than forcing a worn color.
For long-term storage, keep fabric pieces in labeled, acid-free envelopes in a cool, dry place. Rotate items every few months to prevent aging in place. Hoops stay dry and flat, wrapped in a soft cloth to reduce friction. When transitioning between projects, use a labeled tote to pull out needed pieces without disturbing the rest.
I treat my embroidery like a friend who sticks around. Gently cared for, it rewards me with neat pieces ready to display or gift. This approach keeps materials usable and space free of clutter, making it easy to pursue Modern Embroidery Ideas for Small Apartments each week.

I’m Sophie Caldwell, the author behind granaboom.com, and I believe hand embroidery is one of the simplest, most relaxing ways to create something beautiful with your own hands. I started this blog to help beginners learn hand embroidery without feeling overwhelmed by complicated instructions or “perfect” results.
Here you’ll find beginner-friendly guides to decorative embroidery stitches, along with clear step-by-step practice ideas and patterns you can use to build confidence. My focus is on making the learning process easy: simple explanations, helpful stitch combinations, and small projects that look polished even when you’re just starting out.
Welcome to granaboom.com—grab your hoop, choose a few colors, and let’s stitch one line at a time.