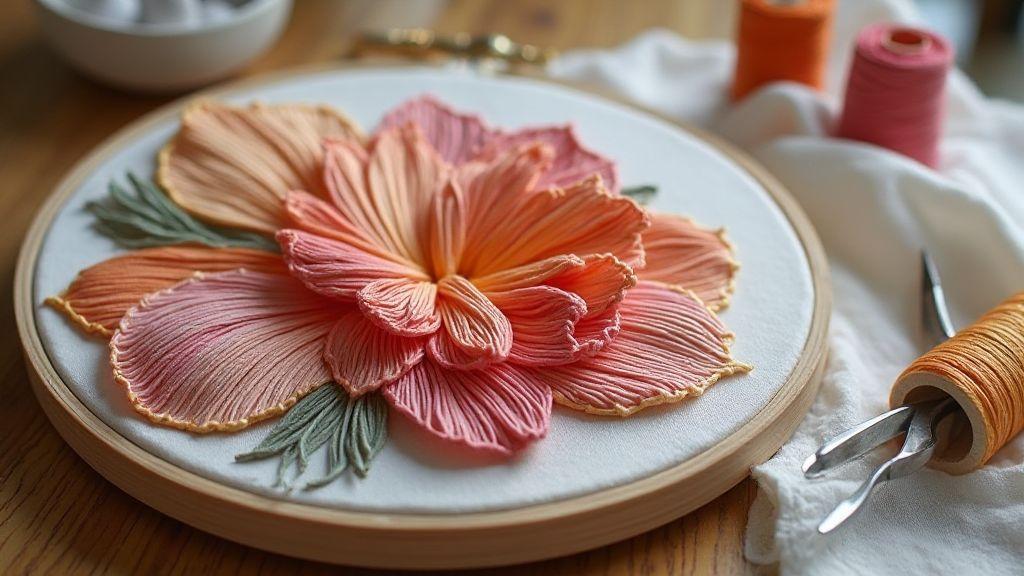
How to Master the Satin Stitch Step by Step and Create Flawless Bordado Embroidery Every Time
My Satin Stitch Needle and Thread Guide
I love satin stitch for its smooth, glossy look, and I’ve learned tricks to prevent tangling and gaps. The goal is threads that glide, needles that cut cleanly, and fabric that shines without puckering. This guide shares practical tips from years of stitching to help you enjoy a steady, reliable satin stitch.
Choosing thread and floss types
The finish changes with thread choice. For a classic, shiny satin, choose a high-sheen embroidery floss or viscose rayon; they lay flat and catch the light. For a softer, matte finish, use cotton embroidery floss—more forgiving on rougher fabrics. Practical tip: test a small swatch first, as brands vary on the same fabric. For color planning and shading, see how to choose the right colors for shaded embroidery.
Color matters too. Pick colors that contrast slightly with the fabric so the satin edge reads cleanly. On busy fabrics, opt for a simple, solid color to avoid competing tones. For prep, thread through a bit of sizing or conditioner and lay floss flat to reduce twist. If using multiple strands, separate gently and pull taut but not stretched to keep stitches even and smooth.
Picking needles for smooth satin stitch
Needle shape and size can make or break satin stitches. I prefer a sharp, fine needle that glides through without snagging. A size 10–12 embroidery needle works well on most cotton or linen fabrics. On tight weaves, switch to a finer needle to minimize fabric trauma. For delicate fabrics, consider a micro or beading needle for special projects. Always test a stitch on scraps to ensure the needle won’t leave noticeable holes. For a deeper dive into needle options, consult Embroidery needles explained— which type should you use.
Threading technique matters too. Use a single length of floss or a few strands, depending on how bold you want the line. Avoid long tails that fray; start with a clean end and secure the thread with a small backstitch in a hidden area to keep the satin surface smooth.
Best fabric choices for bordado
Choose fabrics with a stable weave and some bite—cotton, linen, or polyester blends work well. Light to medium weights hold satin stitches without puckering. If fabric is too loose, stitches sink and edge becomes unclear; if too stiff, thread frays or needles skip. Beginners benefit from a plain weave in a light color so stitches read clearly.
Also consider the fabric’s finish. A smooth, even surface helps satin lay flat; on busy patterns, a plain fabric helps the satin stand out. Stabilize the back with a light wash-away or tear-away stabilizer to prevent shifting and keep lines neat when working multiple passes. For guidance on fabrics suitable for hand embroidery, see the article on the best fabrics for hand embroidery and which ones to avoid.
How to Master the Satin Stitch Step by Step: My Prep
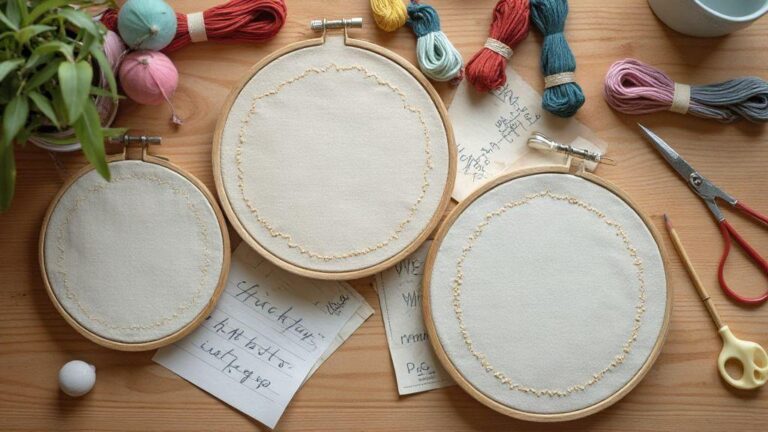
Getting ready saves time and avoids tangles. I lay out a clean hoop, choose satin floss, and pick a smooth fabric. I press gently to remove wrinkles and mark a light guide on the back with a water-soluble pen. I plan a small practice shape first to feel tension and observe how the thread sits on the surface. I select needle size and thread length (shorter lengths knot less easily), keep my hands relaxed, and set a steady tempo so stitches lie flush and neat.
I also plan a simple transfer: center the pattern, use faint lines, secure with a light touch, and ensure the design guides every stitch. This prep makes the satin look polished from the start and helps you master the satin stitch step by step.
For fundamentals like the running stitch and other essential stitches, you can explore the running stitch—the first stitch every embroiderer should master.
Hooping and satin stitch step by step transfer
Choose a hoop that fits without cramping the design. Center the pattern and transfer lines with a light touch—water-soluble pen or clean transfer paper. Secure the fabric and test the tension; adjust until steady. Thread the needle, anchor with a small initial stitch at the edge, then start with long, even stitches along the guideline, letting them lie flat. Fill in methodically, keeping stitches neat and parallel so the satin shine remains uninterrupted.
When moving between sections, re-check design lines, keep stitches flat, and trim loose tails as you go. If puckering appears, adjust tension gently to even it out. A steady hand and plan keep satin stitches bright and clean. For step-by-step transfer tips, see How to Use Transfer Paper for Embroidery Step by Step and, if you prefer pencils, Iron-On Transfer Pencils for Embroidery Patterns.
If you want to see a concise technique reference, consider the satin stitch step-by-step guide How to Master the Satin Stitch Step by Step.
Simple starting stitches for beginners
Begin with the basic satin stitch: pull up a single thread at the edge, then lay the stitch in smooth, straight lines. Keep the thread taut enough to lie flat but not so tight it puckers the fabric. Practice filling curved paths in small, even rows, adjusting needle angle to keep the surface smooth. For thicker shapes, use a back-and-forth lattice of short, close stitches to achieve a dense, shiny surface. Slow down to maintain uniform stitches and even sheen. For fundamentals, you can also explore the traditional starting techniques via basic border patterns.
Small starter shape practice
Choose a tiny leaf or circle. Center it, keep the fabric taut, and follow transfer lines. Begin with a clean anchor and fill with even satin stitches, pausing to ensure each line sits flat. If gaps appear, tweak stitch length and fill them in. Consistent surface testing helps you develop control over edges and fill. If you’re curious about borders, see repeat pattern for borders and edges.
My Satin Stitch Tension Tips for Flawless Results
Tension controls whether satin stitches sit smooth or puck er. Test thread grip before you start, keep your hands steady, and lock in a comfortable tension with a gentle pull. Aim for even, glossy rows without puckering, even on busy fabrics or dark threads. Adjust by eye first, then with a scrap-test run. If shine is uneven or gaps appear, nudge needle pressure and recheck stitch length. Don’t rush—slow, deliberate moves pay off. A light stabilizer on the back can help crisp satin rows on challenging fabrics. Remember: different fabrics and threads behave differently, so tailor tension to each project.
If you want to dive deeper, you’ll see how How to Master the Satin Stitch Step by Step becomes more than a tutorial—it becomes a trusted method.
Satin stitch tension tips to avoid puckering
Start with a clean, stable surface. If the fabric shifts, puckering follows. Use a light stabilizer or spray starch to hold fibers in place before you begin. Keep the thread path steady and avoid pulling hard. If puckering appears, back off tension a notch and re-stitch a small section to confirm the change helps. Basting the satin area lightly locks edges in place before final stitching. For dense designs, use a fine needle and shorter stitches to reduce fabric strain. Balance fabric give with thread bite for best results.
If puckering continues, consult the border techniques for structured guidance, or try a quick tension check patch like the one described in Quick tension test patch.
Flawless satin stitch techniques for even rows
Maintain a consistent stitch length and train your eye to gauge spacing. Practice on scraps to ensure rows stay even. If a row drifts, slow down, recheck needle angle and fabric tension. Align satin rows to the fabric’s grain for a controlled, smooth appearance. Test a short patch after long runs to confirm tension consistency. If needed, adjust and recheck.
Quick tension test patch
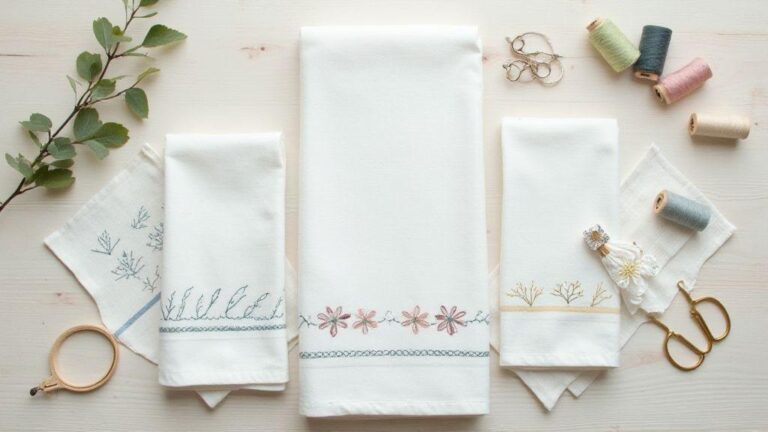
Keep a small scrap nearby. Stitch a short satin line, then gently pull along the edge to check flatness and uniformity. If it rises or curls, tweak tension and re-test until the patch lies perfectly flat. This quick check saves rework later. For more border ideas, see simple border patterns for embroidering towels and linens.
How I Use the Satin Stitch Long and Short Method
I use long-and-short stitches to build smooth shading and control density like painting with thread. Plan light-to-dark transitions, lay long stitches for highlights, and shorter ones for shadows. Keep fabric taut in a hoop so stitches stay flat and avoid blurry shading. If a stitch runs too long or short, adjust immediately for consistency.
I often blend two or three shades of the same color for gentle transitions. Layering helps soften edges; light, even tension keeps blends seamless. Maintain a small color palette for quick swaps to avoid jarring jumps. Start with a light base and layer darker shades to build depth without muddying the colors. For color and shade planning, see How to Choose the Right Colors for Shaded Embroidery and How to Blend Two Floss Colors for a Seamless Gradient Effect.
When to choose satin stitch long and short method
Use long-and-short shading when the fabric is tight and you want subtle transitions. It’s ideal for skin tones, soft gradients, or gentle shading. For bold blocks, consider solid satin or different shading methods to avoid overly gentle transitions. For curved shapes, longer stitches along the curve taper toward the edges to keep the surface flat. On fabrics with strong texture or edges, limit the length range to prevent visible stripes.
High-count fabrics benefit from precise long-and-short work; looser linens may require slightly longer stitches with layered shading. The rule of thumb: soft looks call for shading with longer-to-shorter transitions; crisp edges may need a different approach or adjusted plan. For successful outlines and borders, you may also explore the split stitch for ultra-smooth outlines.
Layering stitches for smooth shading
Layering adds depth. Start with a base light color in long stitches, then add a second layer of a slightly darker shade to create shadows. Two careful passes beat three hurried ones. Align the direction of stitches so light falls consistently. Increase stitch density in shadows and space stitches in highlights to create a natural gradient. If midtones show through, shift some stitches longer or shorter to smooth transitions. Avoid overworking a single spot; step back and then continue. Layering is about listening to where the light wants to go.
Blending threads like a pro
Blending keeps colors from looking patchy. Choose adjacent shades and stitch in fine, overlapping passes with light tension. Test on scrap first. Use short tacking stitches at color edges to anchor transitions. For smoother blends, repeat layering with a slightly lighter shade on top to soften harsh lines. Keep a ready palette of near-shades to avoid jarring color jumps. Practice blending on simple shapes until transitions disappear into the fabric, then apply that skill to your projects. For further guidance on blending, see How to Blend Two Floss Colors for a Seamless Gradient Effect.
How I Do Perfect Satin Stitch Finishing
Finishing isn’t just filling a shape; it’s neat edges, flat fabric, and color pop. Plan outlines before filling, test fabric creep by gently tugging the edge, and stitch with consistent direction to avoid a stair-step look. If the back shows crowding, tighten the thread slightly and readjust upcoming stitches. For metallics or variegated threads, keep a portion of the thread smooth to avoid tangles. Lay stitches in curves to follow the shape and rework any off-line stitch. Finish with a light press on the back to set the satin without flattening shine. For edging and outline confidence, see The Chain Stitch: How to Create Beautiful Lines and Outlines.
Perfect satin stitch finishing steps I use
Outline the area, then fill with long, even stitches that glide in a consistent direction. If the back crowding appears, tighten slightly and re-align upcoming stitches. Check for gaps and adjust shallow stitches quickly. Avoid over-stuffing the needle; less is more for a crisp finish. When finishing a row, secure the thread beneath the surface with a small knot and trim cleanly. Re-check the overall shape and re-stitch any misalignments. If color bleeds are possible, test on scrap first and ensure threads lay flat. Finally, gently press the area before moving on to help the satin settle. For layout ideas and borders, see Simple Border Patterns for Embroidering Towels and Linens.
Satin stitch for beginners neat edges
Treat each stitch as a line with uniform length and even spacing. Start from a clean guideline to keep edges straight and avoid looping thread under the needle. Practice on scraps: lay long stitches along curves and adjust tension to prevent ridges. If edges curl, lengthen the stitch slightly or adjust needle angle. End with a secure knot beneath the fabric and trim close to the surface for neat edges. For outlining techniques, see The Chain Stitch: How to Create Beautiful Lines and Outlines.
Pressing and framing finished work
Press on the wrong side with low heat and a light touch, placing a cloth between the iron and the work to avoid flattening the satin’s shine. For large pieces, press in sections to maintain shape. Frame with a light touch, using a foam-core mat and simple frame to prevent edge distortion. Check from multiple angles to ensure satin reflects light evenly and edges stay crisp. For transfer and layout ideas, explore the Lightbox Method: Tracing Patterns onto Fabric Like a Pro.
How I Troubleshoot Satin Stitch A Bordado Satin Stitch Tutorial
I share what actually goes wrong and how I fix it. Start by checking fabric tension and hoop setup; puckering or uneven stitches mean re-tightening and re-threading. Keep a notebook of fabric types and needle choices to spot trouble patterns. If a line looks wonky, gently pull it out and re-stitch. When handling threads, cut longer tails and clip frayed ends before the next pass. If filled areas flatten or sit unevenly, slow down and use shorter thread paths with evenly spaced passes. Different fabrics require different tension; stay calm and adjust as you go. For quick fixes, see Satin Stitch Troubleshooting Tips I Reliably Use.
How to master satin stitch quick fixes
If a line looks flat or uneven, re-time stitch length to a slightly shorter setting and re-stitch. For inconsistent color fills, re-thread and reseat the needle to avoid nubs. Keep scrap patches nearby to test tension and stitch length before working the actual piece. If a line caves or bunches, lift and reseat the fabric, switch to a smaller needle or reduce hoop tension. A longer thread path for a couple of stitches can smooth transitions before returning to the regular path. For a broader range of troubleshooting ideas, see Satin Stitch Troubleshooting Tips I Rely On.
Satin stitch troubleshooting tips I rely on
Always verify needle, thread, fabric, and hoop harmony before stitching. If a line arches, slow down and guide the thread with your non-dominant hand. When changing colors, thread a new color only after finishing the current section to avoid color bleed. Clean the needle eye to remove lint. Keep the satin line slightly longer than needed and trim back after finishing the segment to allow adjustments. If gaps appear, re-stitch the line in the same direction. Practice on scraps to find the right tension before applying it to the main piece. For border and outline refinements, you can also consult The Split Stitch for ultra-smooth outlines.
Quick repair moves for finished pieces
If a finished line snags, carefully pull the offending thread and re-stitch over it with the same color. Avoid removing large sections; patching small areas is faster and keeps the piece cohesive. For uneven edges on a completed project, lift the edge with a fine embroidery needle and re-seat the stitch, then brush the surface gently. If the satin area has loosened, secure the end with a tiny back-and-forth knot on the back and weave it into the fabric to prevent unraveling. For border ideas, see Border Pattern resources like How to Create Repeat Patterns for Borders and Edges.
How to Master the Satin Stitch Step by Step: Quick Recap
If you’re new to satin stitching, follow the proven steps: prep well, choose the right thread and needle, hoop securely, and transfer faint guidelines. Build up with simple starting stitches, then practice shading with the long-and-short method and careful layering. Master tension to avoid puckering, test on scraps, and finish with neat edges and a gentle press. For a focused guide, remember How to Master the Satin Stitch Step by Step as your ongoing reference—it’s not just a tutorial, it’s a method you can trust. If you’re curious about foundational stitches like the running stitch, see the running-stitch—the first stitch every embroiderer should master. For border ideas, try simple border patterns for embroidering towels and linens. And for borders and repeat patterns, explore how to create repeat patterns for borders and edges.

I’m Sophie Caldwell, the author behind granaboom.com, and I believe hand embroidery is one of the simplest, most relaxing ways to create something beautiful with your own hands. I started this blog to help beginners learn hand embroidery without feeling overwhelmed by complicated instructions or “perfect” results.
Here you’ll find beginner-friendly guides to decorative embroidery stitches, along with clear step-by-step practice ideas and patterns you can use to build confidence. My focus is on making the learning process easy: simple explanations, helpful stitch combinations, and small projects that look polished even when you’re just starting out.
Welcome to granaboom.com—grab your hoop, choose a few colors, and let’s stitch one line at a time.