Best Embroidery Kits for Absolute Beginners to Start Bordado Easily with Complete, Beginner Friendly Supplies and Simple Patterns
Picking the Best Embroidery Kits for Absolute Beginners
Embarking on embroidery can feel like stepping into a cozy craft room for the first time. The right starter kit is half the battle. The best embroidery kits for absolute beginners should feel friendly, with clear instructions and all the essentials included, so you can finish a small project quickly and stay motivated. If you’re after the Best Embroidery Kits for Absolute Beginners, you’ll want beginner-friendly language, simple diagrams, and a project you can complete in one sitting. For a comprehensive starter checklist, see The Complete Beginner’s Shopping List for Hand Embroidery. For budget-friendly options, explore budget-friendly embroidery kits that are actually worth it.
A good starter kit should explain the basics without talking down to you, use sturdy hoops, easy-to-thread needles, and color-coded floss. A plain, smooth fabric helps stitches show clearly. If you’re curious about fabric types, including when to reach for Aida cloth, see What is Aida Cloth and When Should You Use It. Most importantly, include a small practice piece so you can test stitches before the real pattern. The better the kit, the sooner you’ll feel comfortable trying new stitches and ideas on your own. A hoop choice tips: how to choose the right embroidery hoop for your project for speed.
If you’re shopping, look for beginner-friendly language, clear diagrams, and a simple project you can finish quickly. A well-made starter kit saves time and avoids missing pieces, and I still reach for a beginner kit when I want to try something new without hunting for every little item. The Best Embroidery Kits for Absolute Beginners should help you start confidently and keep you motivated. For a quick reference on what to look for in a kit, consult The Complete Beginner’s Shopping List for Hand Embroidery.
What a complete starter embroidery kit includes
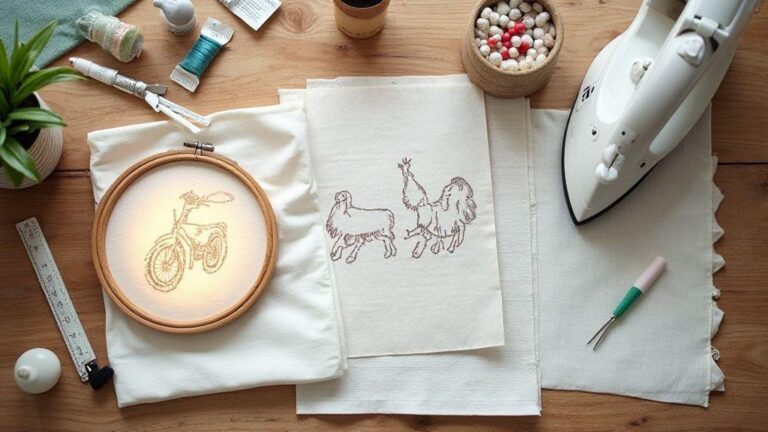
A complete starter kit should arrive with everything you need to start right away: a small hoop or frame, embroidery floss in several colors, a blunt-tipped needle, and a few simple patterns you can finish in one sitting. The instructions should be straightforward, with step-by-step pictures or a quick skim guide.
Along with the basics, expect an easy-to-stitch fabric like cotton or evenweave. A small practice piece helps warm up your stitches before the final design. A color chart or labeled threads help you know which color goes where. Extras like a tiny pair of scissors and a needle threader save time and reduce frustration. Some kits also offer a short video or extra tips—visual demos can make the first project feel achievable rather than overwhelming. For a quick reference on fabric options, see The Best Fabrics for Hand Embroidery and Which Ones to Avoid and for hoop selection, How to Choose the Right Embroidery Hoop for Your Project.
Why easy embroidery kits for beginners speed learning
Simple kits break the process into small, doable steps. With a straightforward project, you can practice stitches in quick, satisfying bursts. A tidy, labeled kit helps your hands remember the motions, and fewer parts mean less time spent hunting for pieces. Clear instructions with friendly diagrams let you learn by doing and receive immediate feedback by comparing your stitches to the guide.
Beginner-friendly kits build confidence: finishing a small project provides a quick win and fuels curiosity to try new stitches. Easy kits act as stepping stones to more complex designs and keep you excited about embroidery. For a primer on essential stitching, see How to Do a Perfect Backstitch Every Single Time and The Running Stitch: The First Stitch Every Embroiderer Should Master.
Quick checklist for first purchase
- Look for clear instructions with labeled visuals and a simple pattern.
- Include a hoop, a few floss colors, a blunt needle, and an easy fabric piece.
- Prefer kits with a small practice piece and a quick-start guide or video.
- Optional extras like scissors or a threader are nice but not required.
Must-Have Beginner Embroidery Supplies and Tools
Embroidery is simpler than it looks once you have the basics. A good starter kit saves money and time, letting you focus on stitching rather than hunting for pieces. Here are the essentials I use and how I organize them.
Beginner embroidery supplies and tools I use
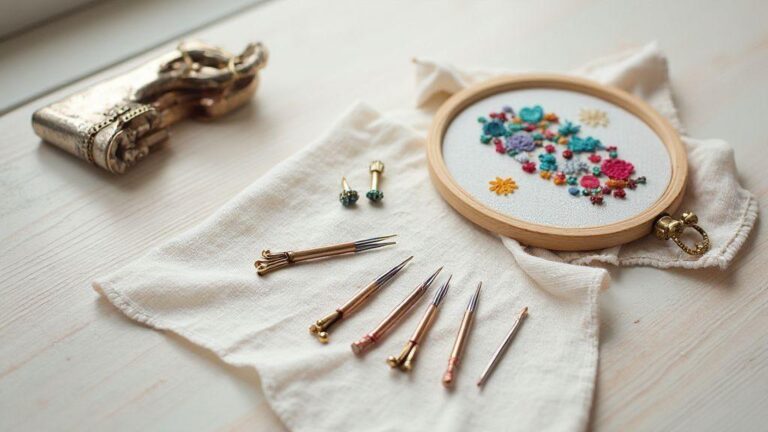
I keep a compact set: sharp embroidery needles and a chenille needle for thicker threads, a lighted magnifier for tiny stitches, and a basic 6-inch hoop to hold fabric taut. For thread, a small palette of colors that match my planned design plus a couple neutrals works well. A small pair of scissors, a needle threader, and a magnetic pin pouch complete the kit. I like a portable setup so I can stitch anywhere. For guidance on needle types, see Embroidery Needles Explained: Which Type Should You Use.
I also keep a fabric scrap box for practice and a tiny notebook to jot stitch ideas, color changes, and what I learned. This helps avoid repeating mistakes and plan color palettes for next time. For color choices, see How to Choose the Right Colors for Shaded Embroidery.
Fabric, hoops, needles, and thread basics
I start with forgiving cotton muslin or cotton linen. A 6-inch hoop fits most guides and keeps fabric taut without fighting tension. For needles, labeled embroidery needles with sharp points glide through fabric, while a chenille needle helps with thicker threads. Use six to eight thread colors max to avoid crowding. DMC cotton floss is my go-to for its smoothness and colorfastness. Have a few neutrals on hand for outlines or blending.
Thread your floss on bobbins or cards to prevent tangling. Label shades and keep colors organized in a small tray. Keep scissors sharp and a spray bottle handy to press or set stitches without scorching the fabric. For fabric guidance, see The Best Fabrics for Hand Embroidery and Which Ones to Avoid and for hoop selection, How to Choose the Right Embroidery Hoop for Your Project.
How I organize my starter supplies
Store your starter kit in a labeled tote with sections for fabric, needles, thread, and tools. Plastic dividers help you see items at a glance, and color-coded thread labels speed color selection. A shallow bin for fabric scraps and a dedicated practice tray keeps your workspace tidy. Plan your project by layout: hoop size, fabric type, needle size, and color count. Keep a spare needle and backup thread handy to avoid derailments. A compact, visible setup makes the process smoother and more inviting. For a visual starter project, see Your First Embroidery Hoop: A Complete Beginner Project with Photos.
Simple Embroidery Patterns for Beginners I Love
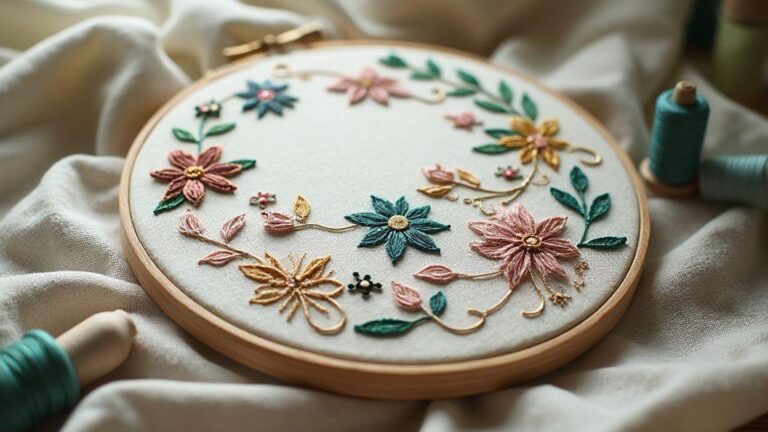
Simple patterns unlock big creativity. I start with designs that are easy to see and stitch—basic flowers or hearts work well because their shapes are forgiving. A pattern you can finish in one sitting helps you practice steady stitches without frustration, and you can build momentum with each small project.
Choose patterns with clean lines, tiny leaves, and dotted details to train your eye and hands. Single-color or two-color designs are perfect for beginners, letting you focus on stitch technique. If a pattern feels busy, you’ll rush and the stitches show it. Simple designs, done well, are incredibly satisfying and teach discipline in the quiet rhythm of stitching.
Simple embroidery patterns for beginners to practice
Keep a short list of go-to practice patterns: a simple flower with a few petals, a small strawberry or heart for satin and backstitch practice, and a tiny boat or moon shape for symmetry. Print a large, crisp outline and pin it to fabric, choosing a fabric color that contrasts with your thread so stitches show clearly. Practice one stitch at a time, stay patient, and fix mistakes as you go. Small stories like a bee on a flower or a balloon can help you manage space on the fabric. After finishing, compare to the original and note improvements for next time. For starter patterns, check 10 Free Floral Embroidery Patterns for Absolute Beginners and Free Botanical Line Art Patterns Perfect for Hoop Art.
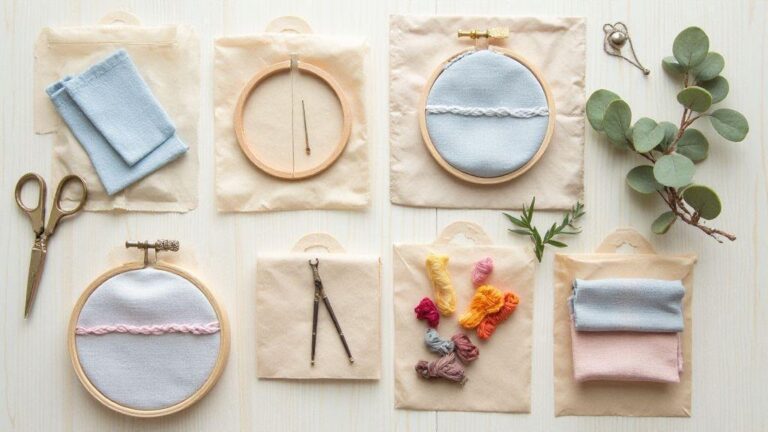
Beginner friendly embroidery kits with supplies and motifs
Beginner kits are a lifeline: they come with fabric, hoop, threads, needles, and a clear pattern. Motifs like blossoms, animals, and seasonal icons align with early practice goals. Look for kits that include simple tutorials or step-by-step photos to show how each stitch should look. A kit should let you measure progress by finishing the whole design, not just a single stitch. Tension and fabric guidance explained in beginner-friendly terms matter for the Best Embroidery Kits for Absolute Beginners. Also consider expansion potential: a kit that offers extra skeins or motif options that match the original style helps you keep color families consistent as you grow. The right kit should feel like a doorway to many small, satisfying pieces. For ideas on beginner patterns, explore Free Alphabet Embroidery Pattern (Monogram Your Everything), Free Mushroom Cottagecore Embroidery Patterns, or Cute Animal Embroidery Patterns Free Printables for Beginners.
One-pattern practice plan
Practice one pattern at a time: tape a printed design to fabric and outline key shapes with a pencil. Use a single stitch type at first—backstitch for outlines, satin for fills—and aim to finish the entire pattern in short, focused sessions. Review your work, adjust thread tension, and note two things to improve next time. This simple loop keeps you moving forward with steady progress. For pattern ideas, see How to Turn Any Photo into an Embroidery Pattern and How to Create a Repeat Pattern for Borders and Edges.
How to Start Bordado Easily for Beginners
Bordado rewards steady practice with small, repeatable steps. Start with simple designs, a fabric you like, and a well-lit space. Keep threads short to avoid tangles and secure your work with a neat knot at the back. Break tasks into tiny wins: threading the needle, a single backstitch, then a few satin stitches, and you’ll have a tiny picture before you know it.
Choose simple outlines rather than heavy shading to see progress quickly. Pick a comfortable needle size and a fabric with a loose, even weave. A tidy starter kit—scissors, a thimble if needed, a few needles in different sizes, and a couple of floss colors that pair well—helps you stay motivated. Practice on scrap fabric if you’re unsure, so your final piece stays neat. Kits labeled for beginners typically include a printed pattern, pre-cut fabric or printed fabric, and color-coded floss with simple directions. A calm pace helps avoid mistakes. If you stumble, re-thread and return to the last easy step mastered. Consistency—tiny daily progress—beats long, sporadic sessions. For backstitch technique, see Backstitch: Perfect Every Time. For satin-style fills, you might also explore Long-Short Stitch Tutorial: The Foundation of Realistic Shading.
First stitches I teach myself: backstitch and satin
Backstitch creates solid, neat lines. Bring the needle up at the end of the line, go down a stitch-length away, and come up ahead of where you went down. Keep the thread taut but not strained and adjust tension if a stitch looks loose. Satin stitch provides a smooth, filled area: lay long, even stitches side-by-side, close together to avoid fabric show-through. If a stitch ends short, place a neighboring stitch to maintain a neat fill. Satin takes patience, but the glossy finish is worth it. For a broader look at shading techniques, see How to Create Realistic Leaves with Long Short Stitch.
Using embroidery kits with step-by-step instructions for beginners
Choose kits that spell out each move in clear steps and show a photo of the finished result. The first page should display the full image; the back should indicate color placement, and the reverse should keep a tidy color chart. Match floss to the color key, thread calmly, and follow steps in order. If something seems tricky, pause and re-check the diagram. These kits act as a road map, turning a potentially tangled task into doable steps.
As you work, observe how tasks are grouped into milestones: outline with backstitch, then fill with satin or French knots. Keep thread lengths short to minimize tangling, and switch colors only when necessary to avoid confusion. A well-designed kit guides you with prompts to pause, check, and re-knit a section. Step-by-step guidance helps you build confidence and keep projects consistent. For transfer and color-placement tips, see How to Use Transfer Paper for Embroidery Step-by-Step and The 6 Best Methods to Transfer Embroidery Patterns onto Fabric.
My 30-minute daily practice routine
I approach a half-hour session with a plan. The first five minutes are setup, threading, and pattern review. I warm up with a small backstitch outline, then spend the next 15 minutes on a designated section with even stitches. The last ten minutes are for tying off, storing tools, and a quick tension check to plan what to tackle next. This routine keeps progress steady and motivating. For a structured routine, see The Running Stitch: The First Stitch Every Embroiderer Should Master and How to Do a Perfect Backstitch Every Single Time.
Where to Buy Best Embroidery Kits for Absolute Beginners on a Budget
You don’t need fancy gear to begin. The best embroidery kits for Absolute Beginners on a budget provide everything in one box and keep costs reasonable. Look for a simple hoop, floss, a needle, and color-coded patterns. The easiest kits teach the basics without extra gear you won’t use yet. Favor reputable brands or stores offering bundled starter kits, beginner-friendly stitches, and forgiving fabrics. If two options are close in price, choose the one with better notes and a small practice swatch.
Seek kits with beginner tutorials, whether on paper or online. A quick video or printable guide can help when learning a new stitch. For budget buys, quality matters most where it counts: sturdy hoops, smooth floss, and clear color guides. These details add up to a smoother start and fewer trips back to the store. For options, see budget-friendly embroidery kits.
Comparing complete starter embroidery kits for beginners online
When comparing online options, assess contents, usability, and value. Check for hoops, a full set of floss, needles, fabric, and clearly printed patterns. Be wary of kits with lots of extras but skimpy basics. Read how the instructions are presented—picture-led steps are ideal. Calculate value by price per item and how often you’ll use each piece. Consider user reviews and difficulty ratings; look for notes about finish timelines and weekend projects. Shipping times and return policies matter too.
Seek kits that balance cost with curation: a reasonable price with a color guide and a simple practice piece beats an expensive box with missing parts. Clear explanations of each stitch and practice method matter. A kit that feels like a gentle invitation, not a scavenger hunt, increases your chances of sticking with it. For shopping guidance, see The Complete Beginner’s Shopping List for Hand Embroidery.
Local stores and bordado para principiantes kits completos
Local embroidery sections let you touch hoops, inspect fabric quality, and see floss color variety up close. In-store demos or staff tips can ease the learning curve. Bilingual or Spanish-language starter kits help many learners, and beginner projects on display can be highly motivating. Local bundles sometimes include extras like fabric samplers or practice sheets, adding real value.
Look for shops with return policies and in-store workshops. Quick, affordable workshops can save hours of trial-and-error at home and let you meet other beginners. If you’re shopping for a beginner kit, you may pay a touch more for a guided project in hand rather than a bare bag of supplies. For hoop and pattern guidance, see How to Choose the Right Embroidery Hoop for Your Project.
Bottom line: the Best Embroidery Kits for Absolute Beginners should be complete, well-made, and ready to spark your long-term love of embroidery. For a comprehensive shopping guide, see The Complete Beginner’s Shopping List for Hand Embroidery.

I’m Sophie Caldwell, the author behind granaboom.com, and I believe hand embroidery is one of the simplest, most relaxing ways to create something beautiful with your own hands. I started this blog to help beginners learn hand embroidery without feeling overwhelmed by complicated instructions or “perfect” results.
Here you’ll find beginner-friendly guides to decorative embroidery stitches, along with clear step-by-step practice ideas and patterns you can use to build confidence. My focus is on making the learning process easy: simple explanations, helpful stitch combinations, and small projects that look polished even when you’re just starting out.
Welcome to granaboom.com—grab your hoop, choose a few colors, and let’s stitch one line at a time.