Stem Stitch vs Backstitch — What’s the Difference and When to Use Each
How you choose between stem stitch vs backstitch
You want the stitch that makes your embroidery look crisp and durable. Stem stitch and backstitch each have their own voice, so your choice shapes the project’s feel. Consider the line you’re drawing, the fabric, and how much time you want to invest. If you’re after a smooth, flowing outline, stem stitch gives a gentle curve. If you need a solid, defined edge that endures wear, backstitch is the safer bet. Lighter fabrics can show stem stitch softly; denser fabrics often show backstitch with clean, sharp lines. You’re the artist, and the stitch is your tool. If you’re new to embroidery, you might start with a gentle primer like the Hello World guide.
Your goal is balance. Stem stitch yields a supple line that moves with the fabric, while backstitch creates a stronger, uninterrupted edge. For a delicate floral path or leaf, stem stitch keeps the line organic. For bold lettering, a sturdy border, or a wordy phrase, backstitch helps the letters stay solid. Thread thickness also matters: thinner threads pair nicely with stem stitch for subtlety; thicker threads make backstitch pop. You’re choosing how bold or soft the final effect will be.
In practice, test both stitches on a scrap before committing. A quick tryout shows how the fabric behaves and how the line feels in your hand. If the outline should bend with the fabric, stem stitch is often kinder. If you want precise, machine-like precision, backstitch delivers. Your decision comes down to the vibe you want—the gentle flow of stem stitch or the crisp, defined edge of backstitch. Keep a small sample on hand to remind yourself of your preference.
The difference between stem stitch and backstitch you should know
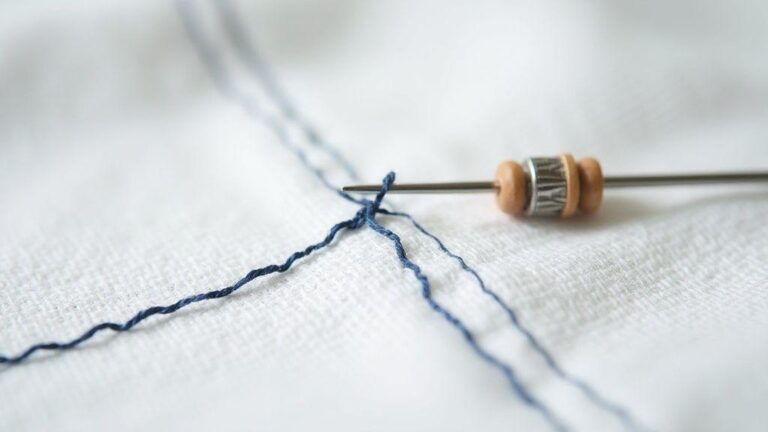
Stem stitch runs in a curved line with a soft, connected edge that can bend with curves. It sits on the surface and is forgiving, allowing you to adjust as you go without losing the line’s flow. This makes stem stitch ideal for vines, stems, and subtle outlines with a natural feel. Keep the stitch length consistent so the line reads as a single, smooth path.
Backstitch is a series of overlapping straight stitches that create a clean, continuous line. Each stitch ends where the previous one began, yielding a solid, uninterrupted edge. This is your go-to for text, sharp borders, and geometric shapes. It’s the opposite of soft and wavy—precision and clarity. If you’re concerned about gaps or loose threads, backstitch provides a stability anchor. The line looks more defined and less sketch-like than stem stitch. For beginners, the Hello World guide offers a gentle introduction.
They also feel different under the needle. Stem stitch follows your tension with a slightly stretchy look along the line. Backstitch requires steadier tension to keep the line taut and even. With practice, you’ll feel the difference: stem stitch wants a relaxed hand; backstitch rewards deliberate, measured pulls. That awareness shifts your finish from sketch to polished.
When to use stem stitch or when to use backstitch for your project
Use stem stitch when the outline needs softness and movement. It’s perfect for curved petals, bending leaves, or lines that look hand-drawn rather than machine-perfect. If your fabric has a looser weave or you’re stitching by hand with a light thread, stem stitch breathes and glides instead of pulling tight. It also suits decorative lines rather than rigid boundaries.
Choose backstitch for clear, strong outlines and text. If you’re stitching a label, bold letters, or a border that must stay sharp, backstitch is your steady partner. On sturdy fabrics or with thicker thread, backstitch holds up better to wear and washing than a looser stem stitch line. It’s your friend when you want a defined, purposeful edge.
If you’re combining stitches, mix them strategically. A stem stitch border around a central backstitched word can create contrast—the soft edge against the precise type. Just keep tension even across both stitches so transitions don’t read as mistakes. Your project will feel cohesive, not patchy.
Quick decision guide best stitch for outlines
- For a soft, flowing outline: stem stitch.
- For a crisp, bold outline: backstitch.
Stem Stitch technique and backstitch technique
You’re learning two core stitches that form the backbone of many hand embroidery projects. Stem Stitch gives curves a gentle, flowing look, while Backstitch provides clean, precise lines. Treat these stitches like two tools in a small toolbox: both essential, but you choose the one that fits your task. Practice helps you feel how each stitch interacts with the fabric, making you a stronger embroiderer.
With Stem Stitch, the thread glides and sits in a soft slope, great for outlines and petals that bend. Backstitch locks in straight lines with crisp edges, giving structure for letters or borders. Relax your grip and let your stitches travel with the fabric’s grain. Switching smoothly between these methods builds confidence instead of fighting the fabric with stiff knots.
Remember, the goal is control and consistency, not speed. Keep stitches evenly spaced and tension steady. If a curve looks jagged, adjust by tightening or loosening a touch to smooth it out. This mindful approach keeps your work clean and pleasing, helping you stay motivated as you improve.
Step by step stem stitch technique you can follow for curves
- Begin with a clean, small starting thread near the pattern edge. Bring the needle up at the start point, make a short stitch to the right, then go down a short distance and back up slightly toward the left to form the next stitch, letting the thread loop sit along the curve. Keep stitches longer than the knot so the line flows. Overlap stitches slightly for a continuous line. Slip the needle under the previous thread to hide the ending knot as you finish.
- For a smoother arc, space stitches evenly along the curve’s outer edge. Let the path ride inside the curve line rather than digging a trench. If the line pushes outward, shorten upcoming stitches a touch and let the thread settle. Practice on a teardrop or circle first, then increase curve complexity as you gain confidence. The line will read as a soft, continuous line—the Stem Stitch winning look.
- Keep the fabric taut but not stretched. If tension pulls, loosen the frame a bit and resume. Move with a steady rhythm rather than a jagged stop-start. When you finish, secure the end under the last few stitches and pull to hide the tail. Your curve should read as a soft, continuous line—the Stem Stitch winning look.
Step by step backstitch technique you can use for straight lines
- Start at your starting point, bring the needle up, and go back down just ahead to form the first backstitch. Bring the needle up at the end of that stitch and insert it back down at the start point of the next stitch. Repeat to create a continuous line with crisp edges.
- If your line wobbles, adjust your starting point slightly and keep the needle perpendicular. Maintain consistent tension so the line doesn’t pull away from the surface. For long lines, work in small chunks, securing the thread behind the line periodically to avoid slips. Finish by anchoring the end under the last stitches and snipping close.
- Practice straight lines along a grid or ruler guide. You’ll see your hands become steadier and more precise. The more you sew, the more Backstitch feels like a reliable tool for confident lines.
Best stitch for outlines and curves
Stem Stitch gives control for outlines with a soft, continuous line that stays graceful and easy to adjust. It lies close to the fabric, reducing fraying at tight corners and reading as a clean, balanced edge. For small or detail-heavy projects, Stem Stitch maintains a steady thickness along curves, helping your design read clearly.
For outlines with a neat, soft edge, Stem Stitch is your go-to. It blends well with other stitches, staying forgiving and not drawing attention to the stitches themselves. This makes it ideal for beginners who want to guide the eye without heavy stitching.
Why you will use stem stitch for curves and stems
Stem Stitch shines on curves because its diagonal, twisted look follows the fabric grain without bunching. It stays consistent along bends, perfect for stems and flowing lines in florals. The stitch’s slight slant mirrors movement, producing a smooth arc rather than a jagged edge. You can vary stitch length to match how sharp or soft you want each bend, and it’s forgiving if you misjudge a turn.
On fabric with give, Stem Stitch tolerates minor shifting better than many stitches, helping you keep tension steady. For small or narrow stems, this stability ensures curves remain legible and polished.
Why you will use backstitch for lettering and sharp edges
Backstitch is ideal for lettering because it creates a solid, continuous line with uniform thickness and a crisp edge. It makes words easy to read at a glance. It’s also excellent for outlines in bold borders where you want a defined stop-and-start. For sharp corners and precise edges, Backstitch holds its line well—the stitches butt up against one another for a smooth boundary. It’s the precise frame that keeps filled areas neat inside the lines.
If you’re new to embroidery, start with a straight line and a small letter to feel the control of Backstitch. With practice, even tension and steady hands make Backstitch shine for lettering and sharp edges.
Embroidery stitch comparison checklist
- Consistency of line: Stem Stitch for curves; Backstitch for solid edges and letters
- Edge quality: Stem Stitch yields a soft edge; Backstitch yields a defined edge
- Curves: Stem Stitch handles bends well; Backstitch excels on straight lines and corners
- Fabric tolerance: Stem Stitch suits lighter fabrics; Backstitch maintains tension on firmer fabrics
- Speed and control: Stem Stitch is forgiving for beginners; Backstitch rewards precision
Durability and speed what to expect
When you start hand embroidery, speed and durability are key. Speed comes with practice and choosing the right stitch for the job. A simple, sturdy stitch for large areas finishes quicker without losing strength. Durability depends on how tightly you pull, how clean your stitches are, and how well you finish ends. With practice, fabrics will wear and wash better without threads loosening.
Different fabrics and threads behave differently. A cotton pillowcase accepts stitches easily, while a delicate silk scarf needs lighter hands and shorter stitches to avoid puckering. Finishing ends cleanly helps the stitches survive daily use longer. Stay steady and deliberate, and your work will hold up longer than rushed stitching.
Durability isn’t just about the stitch; it’s about securing the thread, tying off ends, and finishing the fabric. A neat Backstitch can stay strong with a clean knot and trim. Your speed will improve as you learn to align stitches with the fabric’s grain and pull evenly. The goal is steady progress, strong stitches, and a lasting finish.
Which stitch is faster for you: stem stitch vs backstitch
For speed, stem stitch often feels quicker on large, flat areas because longer stitches glide along the fabric. It’s a real time-saver for wide fills. Backstitch can be faster for outlining shapes and thin lines because it makes clean, straight progress with small, consistent stitches. Your hands will tell you what feels natural: a rhythm from short, careful moves to longer, confident pulls.
If you’re just learning, start with stem stitch for blocks of color and switch to backstitch for details. Outline with backstitch for crisp edges, then fill with stem stitch to speed things up. Practice both on a swatch to see which becomes your go-to for different parts of a project. For a gentle introduction, the Hello World guide offers a friendly overview.
Which stitch lasts longer under wear and wash
Backstitch generally holds up well because its single-line structure resists pulling when the fabric moves. It creates neat, continuous lines that stay secure during washing. Stem stitch can be durable too if stitches stay evenly spaced and ends are finished well. The key is how you secure the threads and finish the piece so the thread doesn’t loosen with friction.
Hand-wash with gentle soap or use a gentle machine cycle in a fabric bag. Check for loose ends and re-secure as needed. With careful finishing, either stitch can endure daily wear and washes for a long time.
Tips you can use to increase stitch strength
- Use sturdy fabric and even tension. Too tight and the fabric puckers; too loose and the stitch loosens.
- Finish ends with a clean knot and trim close to the knot.
- Keep stitches short and even; short, consistent stitches beat long, uneven ones.
- Don’t pull the thread when starting or stopping; guide the fabric instead.
- Weave tails back under several stitches before cutting.
- Choose thread weight appropriate for the fabric; thicker thread on thick fabric lasts longer.
Tools and materials that help each stitch
Choosing the right tools for each stitch sets you up for success. For Stem Stitch, use a smooth, sharp needle and a thread that slides without snagging. A suitable thread weight helps cleaner lines and less fraying. For Backstitch, pick a needle with a longer eye and a thread that resists tangling over long distances. Keep a steady hand and a comfortable grip. Have snips, a thimble, and a magnifier if needed. The goal is fewer stops, steadier stitching, and tidy finishes that don’t distract from your design.
Stay organized with a fabric scrap for color testing, and map lines with a fabric pen before sewing. A comfortable hoop or frame keeps the fabric flat. A good stash matches your projects: smooth, even thread for Stem Stitch; sturdy thread that resists fraying for Backstitch. Keep extra needles of different sizes to switch as needed. The right combination helps you finish with clean edges and consistent density.
Best needle and thread for your stem stitch projects
Stem stitch sings with a needle that glides and a thread that sits flat. Use a sharp needle with a round tip (size 7 or 8) for even weave fabrics, paired with smooth, mid-weight cotton or cotton-wrapped polyester thread. The thread should have a gentle sheen and hold its shape. If fabric is slippery, try a slightly waxed thread.
Aim for a soft tubular line that follows your sketch. A finer thread in a lighter shade helps stitches sit flush. Pull steadily and keep the work taut but not stretched. If fraying occurs, switch to a thicker thread or adjust needle size to balance ease of passage and visibility. Stem Stitch vs Backstitch — stem stitch pairing is smooth needle, friendly thread, and a comfortable pace.
Best needle and thread for your backstitch projects
Backstitch benefits from a needle that moves along a straight line with minimal snagging. Use a sharp needle with a longer eye (size 7 or 8) and a snug, smooth cotton floss or sturdy embroidery thread. Avoid dull thread that can catch fibers. For long lines, a slightly thicker thread helps visibility and reduces gaps. A tidy Backstitch line comes from even tension and a steady hand. Use a fabric with bite, like even weave or Aida, to keep stitches even. If the fabric is small or delicate, opt for a finer thread to prevent crowding. Slow, deliberate stitching improves the crispness of Backstitch lines.
Hoop and tension tips for clean lines
Keep the hoop at a comfortable height to avoid tension in your shoulders. The fabric should be taut but not stretched beyond its natural pull. If you see waviness, adjust tension so stitches lie flat. A steady grip guides the needle at a uniform angle, keeping lines straight. If you notice puckering, recheck fabric count and adjust the hoop. Clean lines come from patience and controlled, small movements rather than rushed passes.
Practice plan to master stem stitch vs backstitch
Plan focused practice with clear goals: shape curves using Stem Stitch and achieve clean straight lines with Backstitch. Repetition builds hand steadiness. Treat each drill as a mini-workout for your embroidery hand, resting between sets to keep fingers precise. As you practice, keep tension even and stitches uniform—consistency is what separates a beginner from a skilled hobbyist. Remember: Stem Stitch vs Backstitch — What’s the Difference and When to Use Each is your daily practice guide. For a gentle introduction, the Hello World guide offers a friendly overview.
A good plan varies tasks without overwhelming you. Start with a simple Stem Stitch curve, then switch to Backstitch for a straight line. After finishing, note what felt easy and what felt off, then adjust your grip or tension accordingly. If a curve looks stiff, loosen your grip and let the thread glide more smoothly. If a Backstitch line wobbles, slow down and place stitches deliberately. Small tweaks add up over a week of practice.
End each session with a quick self-check: are stitches evenly spaced, is the thread flat, and does the line match your pattern? Track progress by counting stitches and measuring line straightness under magnification. This habit helps you target improvements and steadily close the gap from OK to great.
Simple exercises for stem stitch for curves you can try
- Start with a gentle arc, keeping stitches short enough to bend with the fabric but long enough to feel steady. Press lightly to prevent puckering, and tuck the thread edge neatly against the fabric for a smooth curve.
- Move to a gentle S-curve and watch for bunching. If stitches pull, pause, loosen tension a touch, and resume with a lighter touch. Use a contrasting thread to see where each stitch lands, then return to your regular color. Vary curves to build control and stay relaxed.
- Finish with a small spiral tightening toward the center. If the spiral looks jagged, redraw lightly and align stitches to a new rhythm. With practice, Stem Stitch curves become fluid and confident.
Drills to improve backstitch technique you should repeat
- Start with a straight-line drill. Place backstitches carefully for equal spacing and a clean line. If a stitch dips, reset your hand position; a small grip shift makes a big difference. Visualize the line as a ruler you’re following and don’t rush—the steadier you are, the straighter it becomes.
- Practice a dashed-line effect by adding short, evenly spaced backstitches with tiny gaps. If gaps appear, slow down and measure as you go; consistency will follow. When comfortable, reduce gaps until you sew solid lines again.
- Do a turning-point drill. Create a short corner by moving from straight into a small angle, then back to straight. Keep thread tension steady through the turn. If the corner looks puckered, adjust fabric tension and recenter stitches at the turn. Repeating builds confidence for letters and decorative borders.
How you track progress and fix common mistakes
Track progress by logging stitch count, noting wobble or puckering, and comparing today’s work with yesterday’s. Write down what felt easy and what felt frustrating, then tackle one fix at a time. When you spot a recurring issue, focus on one adjustment—precision beats speed.
Common mistakes are easy to fix. If stitches pull, loosen your grip slightly and rework slowly. If gaps appear, ensure you catch the fabric with each stitch and keep hands relaxed. For curves that look sharp, shorten stitch length and guide the needle with smaller, controlled movements. Repeating these fixes yields cleaner lines and more natural curves.
Practice plan reminder
Stem Stitch vs Backstitch — What’s the Difference and When to Use Each is a practical guide to daily practice. By combining deliberate practice with the right tools and thoughtful tension, you’ll master both stitches and bring your embroidery to the next level. For a gentle introduction, the Hello World guide offers a friendly overview.

I’m Sophie Caldwell, the author behind granaboom.com, and I believe hand embroidery is one of the simplest, most relaxing ways to create something beautiful with your own hands. I started this blog to help beginners learn hand embroidery without feeling overwhelmed by complicated instructions or “perfect” results.
Here you’ll find beginner-friendly guides to decorative embroidery stitches, along with clear step-by-step practice ideas and patterns you can use to build confidence. My focus is on making the learning process easy: simple explanations, helpful stitch combinations, and small projects that look polished even when you’re just starting out.
Welcome to granaboom.com—grab your hoop, choose a few colors, and let’s stitch one line at a time.