Sashiko Hoop vs No Hoop — Which Is Better for This Technique?
How you control tension: sashiko hoop vs no hoop
You’re about to learn how tension changes your sashiko work. Whether you use a hoop or not, you can shape every line into clean, even stitches. A hoop keeps fabric flat and offers a steady guide, but it isn’t the only path. Adapt your grip, fabric, and hand movements to maintain control with either method. The goal is stitches that lie evenly and don’t pull the fabric out of square. As you switch methods, you’ll feel the tension shift in your fingers and wrist and learn to ride that shift rather than fight it.
Tension can make or break a sashiko pattern. If stitches pull too tight, lines distort and the fabric puckers. If they’re too loose, you lose the crisp look sashiko is known for. The hoop helps by giving a stable border, but you can train your hands to hold the fabric taut without one. With practice, you’ll slow down, adjust your grip, and read the fabric’s give. Your aim is steady, controlled tension that stays even from stitch to stitch.
Think of your hands as the main tool here. Whether using a hoop or not, keep movement minimal beyond the needle and thread. Small adjustments matter: a finger press here, a slight bite of fabric there, a gentle tug to equalize tension after a row. With practice, your stitches look more uniform as you maintain calm, deliberate movements. The more you practice, the easier it becomes to weave a smooth line, even without the hoop.
Why tension matters for sashiko stitching accuracy
The right tension anchors stitches in place. Too tight, and you pull fabric away from the needle; too loose, and thread sags, creating waviness. Consistent tension makes your sashiko pattern read clean, like a trustworthy sewing chart. Practice helps you recognize the feel of even tension—notice when the thread glides smoothly and when it strains. Relaxed shoulders and a steady grip help you avoid tugging the fabric or twisting the thread, keeping lines straight and patterns precise.
Use sashiko tension methods to keep even stitches
Combine small, deliberate actions to control tension. Start with fabric secured softly, whether in a hoop or held by your hands. If you’re using a hoop, keep it snug but not crushing. If you’re hoopless, find a comfortable grip with your non-dominant hand guiding the fabric. After each stitch, ease the thread’s pull so the next stitch sits evenly. With practice, micro-adjustments become automatic, lining your stitches up in a neat rhythm.
As you build muscle memory, your eyes learn to read the fabric’s tension. Notice edge buckling or stitches sitting high or low. Train your fingers to compensate with tiny pulls or releases, keeping thread taut but not taunt. When done well, sashiko lines appear uniform, no matter how many repeats your pattern demands. The key is consistency and calm control.
Simple sashiko tension methods to try
- If you use a hoop: hold the fabric taut in the hoop with even pressure. After every few stitches, re-check the stretch and adjust gently.
- If you skip the hoop: cradle the fabric with your non-dominant hand, keeping it flat and steady. Let your dominant hand move with smooth, small motions to prevent pulling.
- For both methods: pause briefly after a stitch to let the fabric settle, then continue with steady rhythm.
- Slow down when a row ends; reset your grip and resume with even tension to maintain straight lines.
Remember the goal: even stitches that create clean, square patterns. Your hands are your tuning system. With practice, you’ll feel when to tighten or loosen a fraction, and your work will look like you planned it that way.
Which fabrics suit hoop or hoopless sashiko
Sashiko looks simple, but fabric choice shapes how easy the stitches sit and how clean your pattern stays. For hoop users, choose a fabric that stays flat and doesn’t fray or stretch much. Cotton is sturdy and forgiving; linen has a crisp weave that can handle tighter stitches but can be slippery until you adjust. Beginners often start with medium-weight cotton for clean, even lines. Linen yields a bright, slightly stiff feel that makes each stitch pop but requires tension tweaks. Pick a fabric that isn’t too loose or stretchy for crisp results.
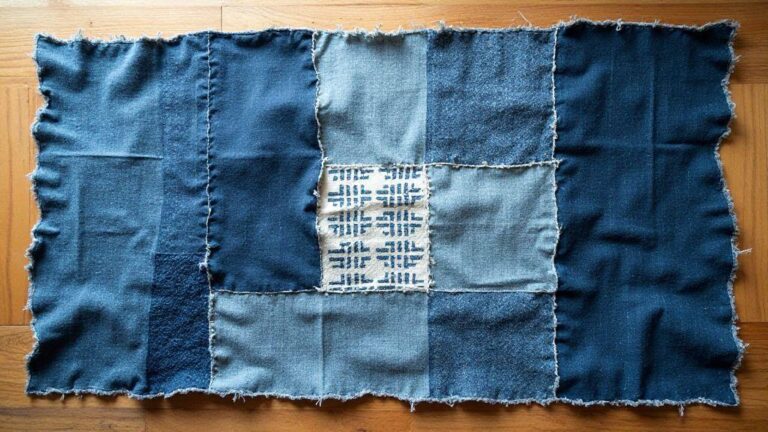
Hoopless sashiko requires a fabric that stays steady on its own. Thick cottons or denim can work well since they don’t shift as you stitch. A denser weave helps stitches sit evenly, especially for mending or dense patterns. You might consider a double layer of fabric to prevent puckering. The right fabric balances grip and guidance as your hands move the needle.
When choosing fabrics for sashiko in any setup, consider pattern density, thread weight, and how crisp you want your line. Cotton offers easy handling and forgiving results for beginners. Linen provides structure and a sharper look with more control. Prep matters for both: wash and press to minimize shrinkage, then iron so the weave lies flat. A flat surface helps your stitches read clearly.
Cotton and linen for easy sashiko fabric handling
Cotton is ideal for easy handling and steady stitches. It grips the needle well and stays straight with medium-weight fabrics, forgiving if tension isn’t perfect. Linen brings a crisp look and strong weave; it can be slippery and fray more if you’re not careful. For high-contrast, crisp finishes, linen is great—just pace yourself and tune tension as you go.
Prep matters for both fabrics. Wash and dry cotton before starting to minimize shrinkage; do the same with linen and press it smooth. A flat working surface helps your needle glide and your pattern read clearly.
Thick layers and mending with sashiko without hoop
With thick layers, hoopless sashiko becomes practical. Stack fabrics and use your non-dominant hand to steady the top layer while you stitch. Practice stitches help you sense how the needle bites and how the fabric moves. Consistent stitch length keeps layers aligned and prevents bulk from warping lines. Denser fabrics like heavy cotton or denim benefit from slower moves and shorter stitches to avoid bulk.
Sashiko shines for mending, allowing stitches to reweave fabric strength. For hoopless work on thick layers, keep your grip steady and use your other hand to flatten folds, minimizing bunching. Pin or baste lightly to keep layers aligned, then remove pins as you stitch. Prep helps—pin the layers, use light starch sparingly, and test a few stitches on scrap first to gauge tension.
How you prep fabric for each method
Prep is your secret to clean sashiko, whether you’re using a hoop or not. For hooped work, press your fabric smooth, secure it in the hoop, and lightly baste around the area you’ll stitch so the pattern doesn’t slip. If you’re using a hoop, choose a size that fits comfortably in your lap or on your work surface so you’re not fighting tension. Pre-cut your fabric to leave enough space around the design to move as you stitch.
For hoopless sashiko, prep by ensuring your fabric is clean and flat, then grip steadily with your non-dominant hand guiding the area you’re stitching. Iron to remove folds that would pull on your stitches. If layering, pin or baste lightly to keep layers aligned, then remove pins as you stitch so nothing stabs you or gets in the way. Always test a few stitches on a scrap first to understand how the fabric behaves and adjust tension before committing.
Sashiko Hoop vs No Hoop — Which Is Better for This Technique?
This question comes up often. The truth is: it depends on your comfort, fabric, and pattern density. If you crave speed and a perfectly flat surface, a hoop helps. If you prefer a natural feel and have a simple pattern, hoopless works beautifully. Try both to see what fits your style and project.
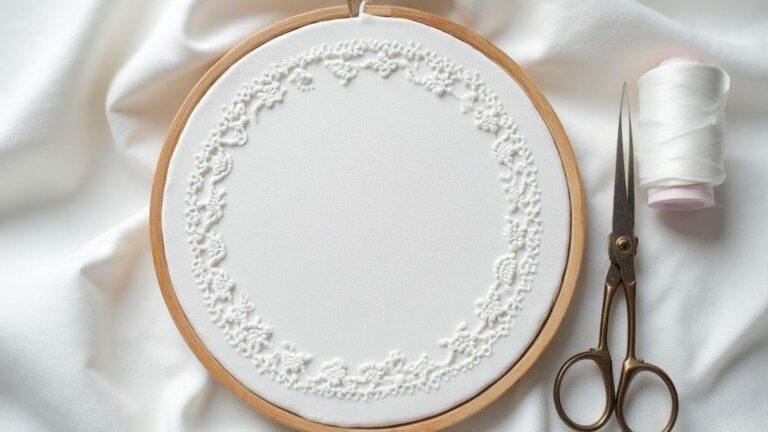
Pick the right tools: best hoop for sashiko and accessories
You’ll want the right setup before you start stitching. A hoop keeps fabric flat and threads neat, helping patterns stay crisp and reducing fatigue. It makes packing your kit easier for classes or trips. The hoop is like a sturdy frame for a painting: if it’s loose or sloppy, your design suffers. With the right tools, you’ll finish faster and feel more confident with each stitch.
When comparing options, you’re choosing comfort, control, and accuracy. A solid hoop reduces slipping, keeps tension steady, and allows natural hand movement. You’ll notice smoother lines and fewer pulled fabrics. With the right combination of hoop and accessories, you can focus on the pattern rather than fiddling with the fabric.
Finally, your toolkit should feel natural in your hands. Wooden hoops offer a classic look with a sturdy bite, but they can be heavy and warp if wet. Plastic hoops are light, affordable, and moisture-resistant, though they may slip if tension isn’t tight enough. Q‑snap frames provide rigid, square grip for precise stitches, with a steeper learning curve but excellent stability for tiny marks or large projects.
Compare wooden, plastic, and Q‑snap options
Wooden hoops give a traditional feel and a sturdy grip but can be heavier and prone to warp if wet or over-tightened. Plastic hoops are lightweight, portable, and forgiving for beginners but can slip if not tight enough. Q‑snap frames offer a rigid, stable frame for precise, consistent lines, though they require a bit more setup and adjustment.
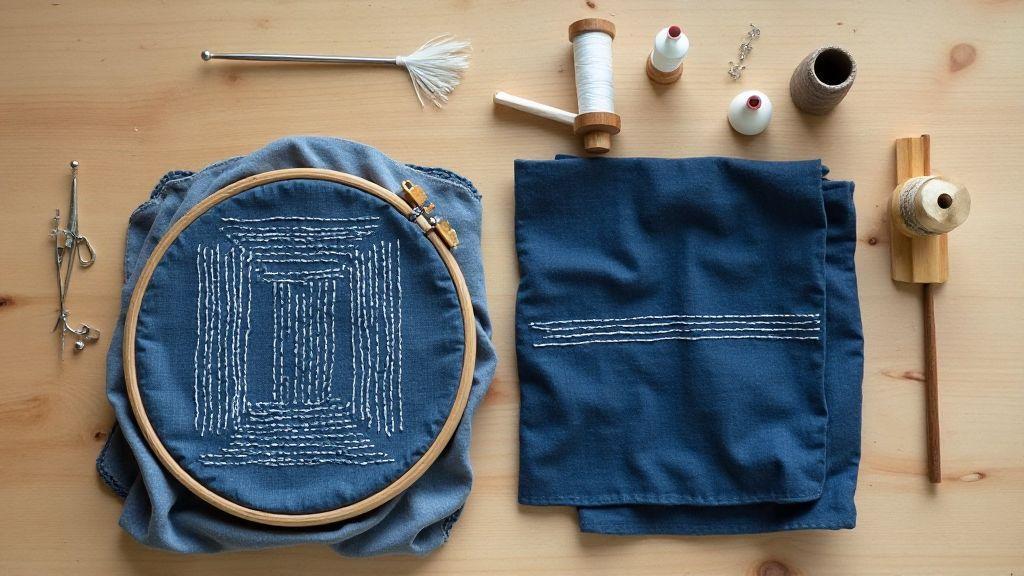
Essential sashiko tools and accessories to own
Beyond the hoop, you’ll want a few key items. A sashiko needle glides through cotton with minimal snagging, helping stitches stay uniform. Choose a comfortable length and tip. A roll of sashiko thread (cotton) provides the classic look with a soft sheen. A steady, high-quality fabric panel is essential—tinely woven cotton or linen offers a smooth surface. A fabric frame, pinning board, sharp scissors, a chalk pencil or fabric marker, and a mild fabric cleanser complete the kit.
How you choose a hoop size for accuracy
Hoop size should fit your project and stitching style. A larger hoop offers room for bold, sweeping patterns; a smaller hoop keeps you close to the fabric for tiny lines. Consider your space and the scale of your design, and start with a medium size if you’re unsure.
Traditional sashiko methods and the hoop debate
Sashiko is a quiet, careful stitch that tells a story. Purists emphasize simple thread, cotton fabric, and a steady rhythm. The hoop debate exists, but it isn’t a rule. The heart of sashiko is rhythm, not a device. Some makers prefer hoopless work for a closer hand feel, accepting slight tension variation as part of the handmade texture. Others use a hoop to hold the fabric taut, especially on larger pieces, for crisper lines. In rural Japan, sashiko is often done without a hoop, stitching by feel and focus on even stitches and straight lines. The choice depends on the finished piece you want in your hands and in your view.
How rural Japan often used sashiko without hoop
In villages, sashiko is a textile map of daily life. The fabric is held by hand or tucked under the knee, not in a hoop, keeping the fabric flexible and allowing long seams to be stitched quickly. Tension comes from grip and wrist rather than a frame, producing crisp but slightly softer edges that suit boro-inspired pieces. Try a small patch without a hoop to feel the difference.
Rural sashiko emphasizes practical stitching with sturdy threads and stitches that stay secure with everyday wear. No hoop means fewer tools and a focus on control—pausing to check lines and adjusting as you go. It’s slow but powerful.
How modern makers blend traditional and hoop methods
Many crafters mix the old and new. Start with traditional, fringe-free lines, then switch to a hoop for larger sections or borders. The blend gives the tactile feel of no-hoop work with the precision a hoop offers for longer projects. Hoop usage doesn’t erase history; it adds a modern tool to honor the old style while enabling new techniques. Try a section with a hoop and another without, compare line quality and ease, and find your personal rhythm.
Work comfort and speed: hoop vs hoopless sashiko
Hoop work keeps fabric flat, reducing rework and supporting a steady rhythm, which can speed you up with practice. But it can tire your hands if the hoop is large or tight. Hoopless sashiko allows freer movement, saving wrist energy over long sessions. It can be easier in crowded spaces or on travel, though you may miss the extra stability. The best approach may be to use both: hoop for tight blocks, hoopless for flowing lines. The right choice depends on your comfort, project size, and how you like to move.
Ergonomic benefits of sashiko with hoop
A hoop reduces the need to grip fabric tightly, lowering tendon strain and allowing a fixed angle to minimize wrist twists. A properly sized hoop fits your forearm and keeps stitches in view. If too small, you over-tighten; if too large, you reach for the edge and tire your shoulder. A smooth inner edge reduces grip fatigue and helps beginners learn even tension.
Hoopless sashiko removes frame constraints, enabling a looser grip and more dynamic movement. Your shoulder and neck stay looser, and you can slide the fabric and adjust posture as you stitch. This can feel more natural day to day, especially for longer sessions.
Portability of the hoopless sashiko technique for travel
Hoopless sashiko shines in travel. Pack light: a needle, thread, and fabric fit in a small bag. You can sew on trains, planes, or a park bench without lugging a box. You’ll learn to hold the fabric with your non-dominant hand and guide stitches with your dominant hand, keeping your setup compact. In windy or crowded spots, hooplessness protects your fabric from frame pressure.
Prep is quicker on the go: no setup height or clamp required. For travelers who stitch by the hour, hoopless sashiko keeps momentum high, letting you resume where you left off without reassembling a frame.
Tips to reduce hand strain in long sessions
- Alternate grips every 20–30 minutes to prevent fatigue. Switch from a relaxed grip to a looser pinching hold, then back again.
- Use a light needle and smooth thread to minimize resistance. Heavier threads require more force; lighter threads glide, easing motion.
- Keep wrists neutral. Don’t bend them for long periods; let your hands float and use your forearms for small movements.
- Take micro-breaks: stretch fingers, roll shoulders, and shake out your hands. A minute or two resets tension.
- Warm up with easy stitches before long sessions to prime your muscles.
- Position your fabric at a comfortable height and angle; a light tilt can reduce neck and shoulder strain.
Which projects are best for you with or without a hoop
When choosing a project, consider your comfort and desired control. A hoop helps beginners keep stitches even and fabric flat. If you prefer texture and a freer feel, skip the hoop and let the fabric move with your motion. Either way, stay relaxed and patient to finish with a clean look.
Some designs shine with a hoop, especially small, tight areas. Others benefit from long, flowing stitches with less constraint. Start with a simple piece to test both methods, then pick the one that gives you the look you want without fighting the fabric.
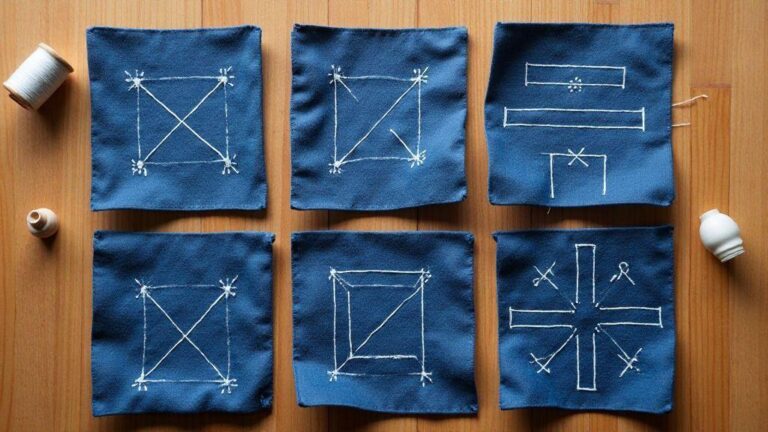
Beginner-friendly sashiko with hoop options
Starting with a hoop yields clean, even lines as the fabric stays taut. Pick a simple geometric pattern on lightweight fabric to see results quickly. Set the hoop to a comfortable tension and stitch slowly to build muscle memory. As you gain steadiness, you can experiment—still using the hoop for control, but exploring small variations inside the hoop to feel the needle flow when the fabric has a bit more freedom.
Advanced mending and sashiko without hoop for texture
Mending with sashiko without a hoop invites texture into the fabric. Stitches become dynamic as the fabric shifts under your hand, producing a visible repair that looks handmade. Work slowly, letting stitches sit naturally and keeping tension consistent by feeling the thread’s pull rather than watching the line. Practice on scraps before tackling cherished pieces.
Choose method by project size and skill
Project size and skill level guide whether to hoop or not. Small projects or tight spaces benefit from a hoop for neatness and accuracy. Large surfaces or flowing designs can benefit from hoopless freedom. If you’re new, start with a hoop to learn stitch length and spacing, then try hoopless to explore texture and movement.

I’m Sophie Caldwell, the author behind granaboom.com, and I believe hand embroidery is one of the simplest, most relaxing ways to create something beautiful with your own hands. I started this blog to help beginners learn hand embroidery without feeling overwhelmed by complicated instructions or “perfect” results.
Here you’ll find beginner-friendly guides to decorative embroidery stitches, along with clear step-by-step practice ideas and patterns you can use to build confidence. My focus is on making the learning process easy: simple explanations, helpful stitch combinations, and small projects that look polished even when you’re just starting out.
Welcome to granaboom.com—grab your hoop, choose a few colors, and let’s stitch one line at a time.