Embroidering Wildflowers: A Freestyle Guide for Beginners
Gather Your Basic Tools for Wildflower Embroidery
Embroidery succeeds when your tools are within reach, letting you focus on stitches. Building a reliable kit lays the foundation for Embroidering Wildflowers: A Freestyle Guide for Beginners, so you won’t fight your supplies mid-stitch. You’ll learn which tools truly matter and which you can skip for now.
Set up a small, dedicated workspace with a flat surface, good lighting, and a hoop or stand that feels comfortable in your hands. This setup reduces hand fatigue and keeps stitches neat, letting your wildflower designs bloom with brighter detail. The goal is to make every stitch feel like a natural next move.
As you assemble, some tools become trusted partners. You’ll reach for certain needles, threads, and scissors again and again because they glide through fabric and stay sharp for clean edges. Your kit should feel like an extension of your hand rather than a jumble of pieces. When your tools click, your stitching does too, and your flowers come alive with tiny, precise petals.
Choose needles and scissors for your kit
You’ll want needles that glide through fabric without snagging, especially on delicate linens or cottons. A lightweight, sharp embroidery needle is a great start because it pierces cleanly and keeps stitches neat. If your fabric is looser, opt for a finer needle for tidier work. For scissors, choose a small, sharp pair—nail-nose or spring-action scissors offer control without crushing fabric. A micro pair for thread snips helps you switch colors without fighting your main scissors mid-design.
Test a few needle sizes on scraps before committing to a project, and keep a magnet or pin cushion handy so pins don’t go missing. The goal is speed with accuracy, not strain. The right needles and scissors translate your wildflower ideas into tidy, vibrant stitches.
Pick basic embroidery threads and fabric
Start with a set of solid colors covering common wildflower tones—pinks, purples, yellows, greens, and neutrals. Include a range of light, medium, and dark options for shading petals and leaves. A good mix of cotton embroidery floss or thread provides smooth color transitions and a soft finish. As you gain confidence, you can add variegated threads for texture, but keep the starter palette simple so you can judge how each stitch sits on the fabric.
Choose fabrics that are easy to stitch on and forgiving for beginners. Evenweave or linen gives structure for clean stitches, while cotton is light and easy to handle. For smaller hoops, pick fabric that won’t fray quickly and press flat to avoid puckering. Your fabric choice affects how your stitches read, so pick something that helps your petals and stems stay crisp and lively.
Pre-wash your fabric to minimize shrinkage and stretch it gently in your hoop to avoid tension battles. A cotton or evenweave fabric is forgiving for beginners. Prepped fabric helps your colors pop and keeps lines straight, which is essential for capturing the whimsy of wildflowers. Your goal is smooth stitches that read clearly from a short distance.
A quick setup note: keep a small spray bottle handy for a light mist if the fabric holds creases; a little moisture can reset tension without soaking the cloth.
Basic tools checklist
Keep a sturdy hoop, a sharp needle, a small pair of scissors, a few color families of threads, fabric, and a needle threader or wax for smoother threading. Having these essentials within reach helps you move from color to color without pausing, maintaining momentum and flow in your Embroidering Wildflowers: A Freestyle Guide for Beginners journey.
Set Up Your Hoop and Fabric Correctly
You’ll start right when you set up your hoop and fabric. Before you stitch, choose a clean, tight workspace and secure the hoop so the fabric doesn’t shift. Smooth out wrinkles with your hands, and if the hoop bends, swap it for a fresh one so the fabric sits flat from the first stitch. A flat, stable surface makes complex stitches feel easier. Keep a small spray bottle handy for a light mist if needed to reset tension.
For beginners, cotton or evenweave fabric is forgiving and easy to control. If your fabric is too loose or stretchy, you’ll fight every move. Place the fabric over the inner hoop, then outer hoop with even pressure. Tighten screws just enough to keep the fabric taut, not warped. If you notice slack, loosen slightly, adjust, and re-tighten. You want a smooth surface so your designs don’t ripple as you stitch. This setup sets the stage for clean, confident embroidery, especially when you’re working on Embroidering Wildflowers: A Freestyle Guide for Beginners or any new pattern.
When you’re done, do a quick tension test: tap the fabric like a drum and listen for a tight, even sound. If it thumps unevenly, readjust before you start. You should be able to pull the thread lightly without the fabric lifting away.
Follow an embroidery hoop setup for beginners
Place the fabric over the inner hoop, then fit the outer hoop with even pressure. Center the fabric and check for creases under where you’ll stitch. Tighten the screws just enough to keep the fabric taut, then loosen slightly if pucker appears. A clear setup helps you focus on stitches rather than fabric wrangling. Practice with a simple test swatch to feel how the fabric responds to your needle, and keep a small notebook to note which tension and fabric combinations work best for your favorite patterns.
Stretch fabric for even tension and smooth stitching
Tension is your secret weapon for clean stitches. If the fabric is too loose, your designs look sloppy; if too tight, you risk tearing or puckering. Lightly tug the fabric across the hoop in several spots, then tighten a touch and recheck. You want firm, even hold all around. Use your thumb and forefinger to feel for balance; address any slack before stitching.
For delicate threads or woven designs, consider fray check or a stabilizer to prevent fraying at the edges. Evenly stretched fabric helps decorative stitches sit flat, especially when creating bold floral shapes for Embroidering Wildflowers: A Freestyle Guide for Beginners. The payoff is smoother lines and crisper curves in every petal and leaf.
Hoop tension tips
Keep the hoop clean and dry to prevent slipping. Tighten the outer ring gradually in small turns, checking tension as you go. If the fabric shifts, loosen slightly, adjust, and re-tighten. After finishing, loosen the screws before removing the fabric to prevent long-term deformation. Calm hands and patience are part of good tension discipline.
Learn Simple Wildflower Embroidery Stitches
Embroidery lets you bring tiny gardens to fabric, and your confidence blooms with every stitch. Start with simple stitches to form petals and centers with minimal fuss. This section builds the basics, then shows how to layer stitches for graceful flower shapes. The right stitch makes your design feel peaceful and playful, not rushed. Each stitch supports the overall look, helping your piece read as cohesive and lively.
Your starter focus is steady hands and consistent threads. Backstitch, stem stitch, and running stitch each offer a different texture to help flowers stand out. Plan where petals sit and where centers go to keep your wildflowers balanced and appealing. Aim for a natural look rather than perfect symmetry, so your embroidery feels organic.
Practice backstitch, stem stitch, and running stitch
Backstitch defines outlines and crisp edges. Keep stitches even and the needle pointing forward along the line. Master the rhythm to achieve precise outlines without stiffness. This serves as a clean base for softer stitches later.
Stem stitch gives a gentle, rounded line ideal for stems and delicate edges. Vary the thread’s twist to keep the line smooth and softly shaded. Let each stitch barely overlap the previous for a continuous, breeze-like effect.
Running stitch is quick and great for filler. Keep points evenly spaced and tension light. Use it to add momentum to your design without sacrificing charm.
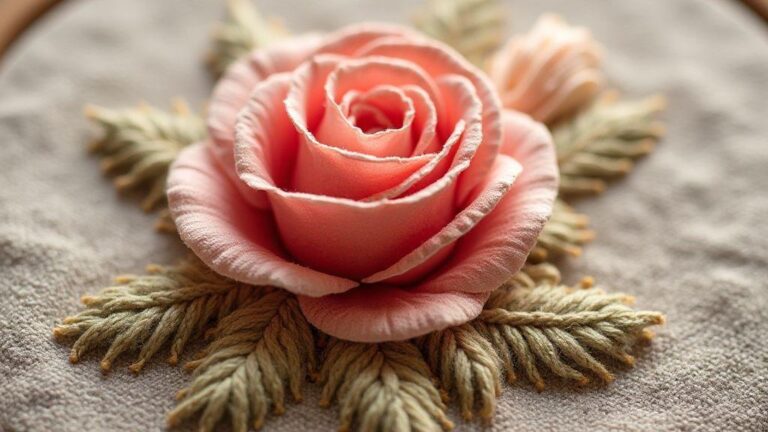
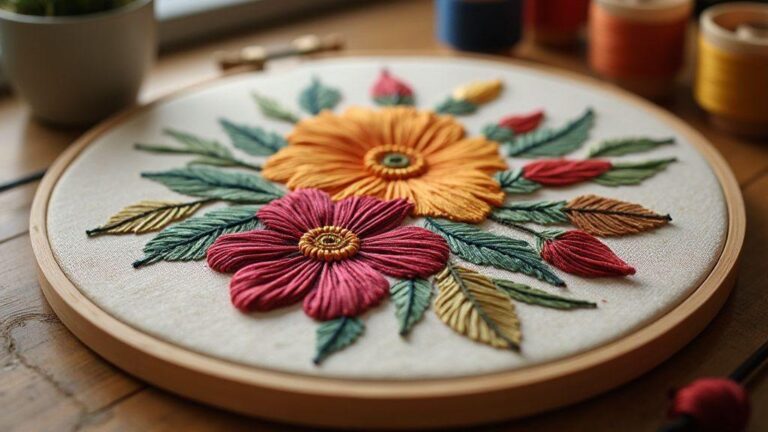
Master French knots and lazy daisy for petals and centers
French knots create tiny rounded dots that can become centers or dew-like highlights. Wrap the thread around the needle a few times, then pull through near the fabric to form a compact knot. Maintain steady tension so the knot sits neatly on the surface.
Lazy daisy stitches are perfect for delicate petals. Loop the thread once and anchor with a small stitch to form petals around a center, varying loop size to imply different petal lengths. This builds a soft, blooming look.
As you combine French knots and lazy daisies, you’ll add layers and texture. Place knots at the heart of a blossom and surround them with lazy daisies for a full, sunny bloom. Colors can stay light for breezy looks or be brighter for graphic styles—the result should feel natural and satisfying.
Stitch practice exercises
Grab your fabric, hoop, and threads. Start with simple lines: a curved stem in backstitch, then add tiny French knots as centers along the stem. Add a few lazy daisy petals around those knots, varying spacing. Finish with a light run of running stitches to hint at tiny leaves or stems tying the bouquet together. Revisit stitches and adjust tension for smooth, even lines.
For a quick warm-up, practice one full flower: a small circle of lazy daisies for petals around a French knot center, with a stem in backstitch. This exercise helps you see how textures work together and builds motivation. Repeat the shape in different colors to build a mini garden on fabric.
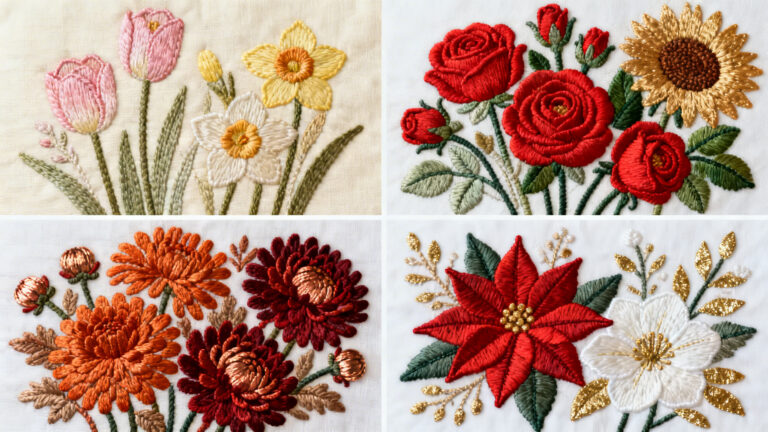
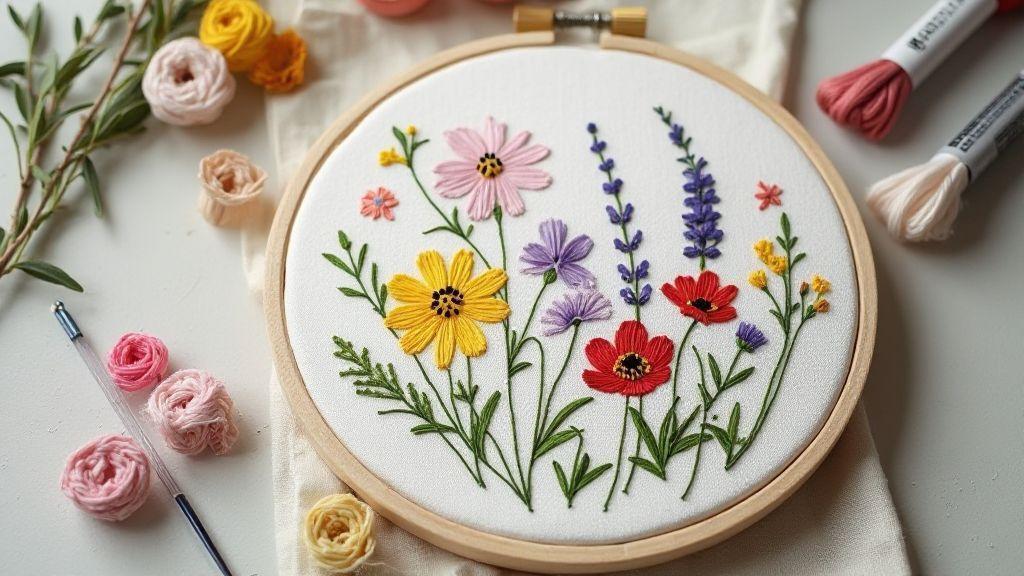
Choose Thread Colors for Realistic Wildflowers
When aiming for lifelike wildflowers, your thread colors are everything. Start with a palette that mirrors nature: soft petal cores, subtle shading shifts, and tiny highlights for depth. Keep threads organized by flower to avoid mixing tones. If unsure, test on a scrap first to save frustration later. Your goal is to capture the mood of the field, not just a flat bloom on fabric.
Use color variations within a single flower to create realism. Blend a pale base with slightly darker tips or edge colors to suggest petal curvature. Add tiny accents—like a whisper of yellow at the center or a blue highlight along the edge—to mimic light catching on petals. Layer colors to achieve three-dimensional blooms.
Think in layers: base petals, mid-tones, and shadows. Use a light outer highlight and a deeper shade for inner folds. For mullein, pair a warm cream base with a burnt-orange center and sage green leaves. Thoughtful layering brings a bloom to life under your needle.
Use shading and mixed strands to add depth
Shading creates depth without heavy outlines. Layer lighter strands with darker ones for natural shadows. Mix half-strand colors to soften transitions for a silky, blended look. Pair glossy satin with matte cotton for varied petal textures and subtle light reflection. Keep stitches small to read as soft gradients rather than blocks.
Use shading around the center to push the flower forward or backward. A darker core with lighter edges simulates curved petals catching light. For a white daisy, add a tiny gray or pale blue shadow near the center to convey depth without overpowering brightness.
Compare cotton, silk, and rayon thread choices
Cotton threads are sturdy and easy to control, great for beginners and matte petals; they’re forgiving if tension slips. Silk threads give natural sheen and glow, suitable for delicate wildflowers but require steady hands. Rayon threads sit between, offering smooth, vibrant color with manageable handling.
Decide based on the bloom and effect you want. For realistic shading, mix a cotton base with a silk highlight. For bold color pops, rayon carries bright hues while remaining workable. Your choice shapes how your wildflowers read up close and from a distance.
Color pairing guide
Pair cool greens with warm petal colors for believable foliage. Mint leaves with soft pink petals read as fresh. For yellow or orange petals, cool greens balance the look. Don’t shy away from unexpected hues; a touch of lavender in a yellow bloom can mimic subtle shadows. Two-tone petals work well—try a light base with darker edging to imply curvature. Test pairings on scrap fabric first.
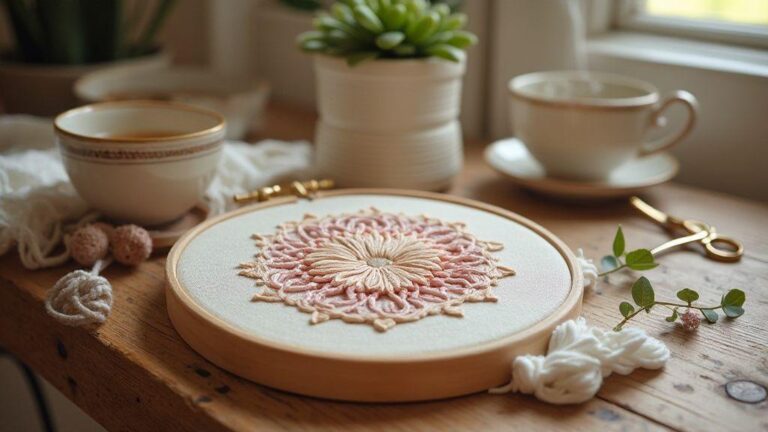
Create Freestyle Embroidery Patterns and Layouts
You’ll discover how to freestyle with stitches that feel free and organic. This section guides you to build patterns that look intentional even when drawn by eye. Trust your instincts, start with simple shapes, and grow into full layouts that balance color, space, and texture. Think of it as drawing with threads, not pencil lines. Your finished piece should feel alive, not stiff.
Start simple. Pick uncomplicated shapes: a few petals, a tiny centered center, and a couple of stems. Use a single color at first, then add a second shade for depth. Simple forms teach balance between positive and negative space. Start with a daisy or small poppy—they read well freestyle and don’t demand exact outlines. Focus on the rhythm of your thread: steady hands, even tension, relaxed posture. If a line feels off, pause, adjust, and continue; the process matters more than perfection. Keep stitches loose enough to move with the fabric and avoid puckering. By the end, you’ll have a tiny bouquet that looks lively, not stiff.
As you grow comfortable, add a second color for petals or green for stems. Embrace natural variation; one petal can be larger or a bud can appear at a bend. Your beginner piece should feel approachable and read as a cohesive wildflower cluster. The Embroidering Wildflowers: A Freestyle Guide for Beginners approach shines as you experiment with simple shapes and relaxed stitching.
Arrange stems, leaves, and blooms for balanced designs
Balance across the fabric is key. Place a central bloom first, then arrange stems and leaves outward like gentle spokes. Keep density even—no crowding in one area and sparseness in another. Use light, curved lines for stems to avoid rigid angles. Leaves can tuck along stems with varied sizes to create growth and rhythm. If a stem ends in a bloom, let the flower’s weight pull slightly toward that direction to guide the eye.
Freestyle design thrives on natural alignment. Step back every few stitches to check composition. Lightly mark spots with erasable pencil or wash-away chalk, then stitch over if you’re happy with the arrangement. Try clusters on one side with a longer stem on the other to achieve asymmetrical, harmonious balance. Rearrange elements as you go to unlock a nicer flow. Your goal is spontaneous yet deliberate design.
Layout tips for freestyle designs
Think in layers. Start with the largest shapes, then fill with smaller details. Vary stitches in length and direction to add texture without clutter. Use negative space on purpose; a blank corner can help the piece breathe. If spacing is uncertain, map the pattern on scrap fabric first. Let curves guide the eye around the fabric—avoid rigid grids. A central flower with curling stems and sprinkled buds can provide a recognizable starter. Design with flow, test with samples, and trust your balance.
Add Decorative Stitches and Advanced Texture Techniques
Texture makes your embroidery come alive. Blend bold stitches with subtle micro-details to add depth you can feel. Start by selecting stitches that suit your fabric and thread weight, building layers one by one. Use thick stitches for bold texture and fine stitches for delicate highlights. The aim is lively, tactile interest, not perfect symmetry.
Texture also comes from finishing. Combine satin, seed, and ribbon stitches to craft a field of texture that reads like a story. Vary lengths and directions to mimic natural surfaces—petals catching light or wood grain casting shadows. Leave some areas airy; negative space makes textured stitches pop. Listen to your fabric; adjust tension as needed. The result is a piece that feels alive, with texture you could almost touch.
If you’re working from a plan, keep a simple note near your hoop: stitches used, colors, and the order of application. This helps reproduce the look on future projects. With practice, you’ll discover favorites for certain fabrics and motifs. Your confidence grows with each finished piece, and you’ll see how texture choices alter the mood of Embroidering Wildflowers: A Freestyle Guide for Beginners.
Try bullion knots, detached chain, and woven bars for texture
Bullion knots create long, elegant twists that resemble tiny ribbons. Start with a tight wrap and even tension for neat knots. They catch the light and add a museum-like sheen on certain fabrics. If the fabric is slippery, secure the work more firmly and keep wraps even to avoid wobble.
Detached chain stitches yield airy, floating lines that resemble vines or whiskers. Use them to outline stems or add delicate highlights along petal edges. Work with small, consistent gaps and relaxed tension so the chain sits slightly above the fabric. Space them thoughtfully to create lacy textures that feel light and modern.
Woven bars provide grid-like texture and subtle shading. Begin with a short backbone stitch, then weave over and under in a tidy rhythm. They read as structured and balanced against organic motifs, ideal for shadows or implied fabric weave.
Combine floral embroidery stitch guide moves for richer petals
Mix moves to create multi-dimensional petals. Start with a light base fill, then layer thicker stitches along the outer edges for contour. Combine long and short stitches with a few satin stitches to round the shape. Vary color slightly near the bottom edge for depth and keep a lighter color on top to lift. Whipped stitches along inner petal lines add ribbing that mimics how real petals catch light. A few well-placed lines beat heavy coverage. For drama, add a tiny bullion knot at the petal tip as a stamen highlight. Balance is key—enough variety to feel rich without overpowering the flower’s form.
Pair seed stitches with French knots near the center to create pollen-like texture that contrasts with smoother petals. Practice on a swatch to understand how each stitch sits and how color shifts affect glow.
Finishing and care steps
When you finish, press gently with a warm iron through a pressing cloth to set stitches without crushing them. Trim threads from the back, leaving a small tail to weave into nearby stitches. If any ends are loose, secure with a touch of fabric glue or a knot, then hide the knot under adjacent stitches. The final surface should be crisp and tidy to show off all texture.
Caring for embroidered work is part of the craft. Hand wash gently in cool water with a mild detergent, reshape while damp, and lay flat to dry. If you iron again, use a low heat setting and a pressing cloth. Proper care preserves texture and colors, keeping your Embroidering Wildflowers: A Freestyle Guide for Beginners stitches vibrant for years.
Why Embroidering Wildflowers: A Freestyle Guide for Beginners Works For You
This freestyle approach rewards experimentation and personal expression. Start with simple shapes, learn to balance layout, and gradually add texture and color. With patience and practice, your wildflowers will bloom with confidence on fabric—each piece a unique garden you’ve stitched by hand, guided by Embroidering Wildflowers: A Freestyle Guide for Beginners.

I’m Sophie Caldwell, the author behind granaboom.com, and I believe hand embroidery is one of the simplest, most relaxing ways to create something beautiful with your own hands. I started this blog to help beginners learn hand embroidery without feeling overwhelmed by complicated instructions or “perfect” results.
Here you’ll find beginner-friendly guides to decorative embroidery stitches, along with clear step-by-step practice ideas and patterns you can use to build confidence. My focus is on making the learning process easy: simple explanations, helpful stitch combinations, and small projects that look polished even when you’re just starting out.
Welcome to granaboom.com—grab your hoop, choose a few colors, and let’s stitch one line at a time.