French Knot Mastery: The Complete Step-by-Step Guide
Quick French Knot Overview
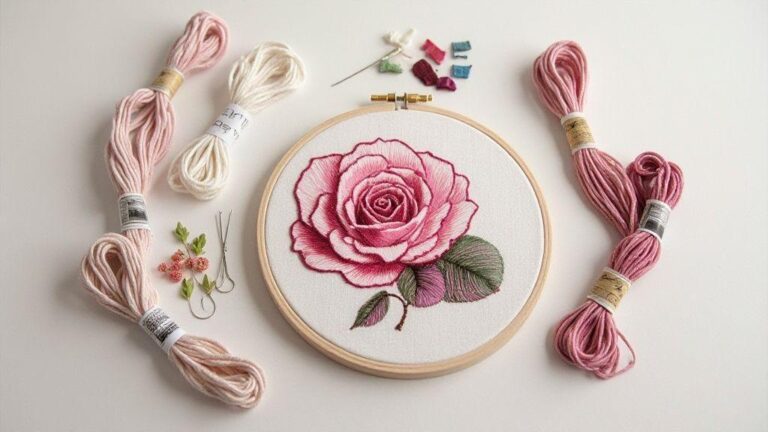
French knots are small, tight stitches that add personality to your embroidery. They create dots, shading, and texture that pop against flat fills, turning a plain design into something lively and dimensional. Mastering this simple stitch unlocks decorative possibilities for your projects.
The basic idea is looping thread around your needle and pulling it through the fabric to form a compact knot. You control the size by how much thread you leave between the needle and fabric. The result is a crisp, raised dot that adds charm without overwhelming your work.
Your toolkit matters: a fine thread, a sharp needle, and a steady hand will make this stitch sing. Start with a generous count of stitches around your chosen spot to keep the knot centered. With practice, you’ll place French knots in rows, seas of dots, or tiny spirals—the payoff is texture without bulk and a polished look.
What you need to know about French Knots
French knots look simple, but small method changes change the outcome. Knot size varies with how much thread you wrap around the needle. Keep your tension even so knots sit nicely on the surface. If knots look loose, check thread length and wraps; if they’re too tight, your needle may be pulling the fabric.
Fabric type matters. Cotton or linen holds knots well; delicate or stretchy fabrics need gentler tension and shorter thread lengths. Practice on scrap fabric to dial in tension and knot size. Consistency is your friend: aim for knots that are the same size and height. You can guide the knot with a gentle touch on the back of the fabric as you pull through to keep surrounding stitches from distorting. The goal is uniform little dots that add texture, not irregular spots.
Benefits you’ll get from a French Knot Mastery Guide
A dedicated guide helps you craft precise, repeatable knots that elevate your entire project. Mastery leads to cleaner outlines, more dimensional shading, and a cohesive look across designs. It also speeds up your stitching as steps become second nature.
With a reliable guide, patterns emerge: single knots for subtle shading, grouped knots for bold texture, and directional play to suggest depth. You’ll reproduce professional results even on beginner fabrics and have a reference to keep you moving through tricky sections or unfamiliar fabrics.
Your toolkit becomes smarter too. You’ll learn which thread lengths suit your hands and how to adjust needle size for different knot effects. A good guide helps you avoid knots that drift or stitches that pucker, turning uncertain starts into crisp, confident knots.
Quick fact: knot basics for beginners
Size comes from wraps and tension. Maintain a steady hand, practice on scraps, and measure thread length before each knot. Consistency goes a long way toward neat, balanced work. Practice beats guesswork every time.
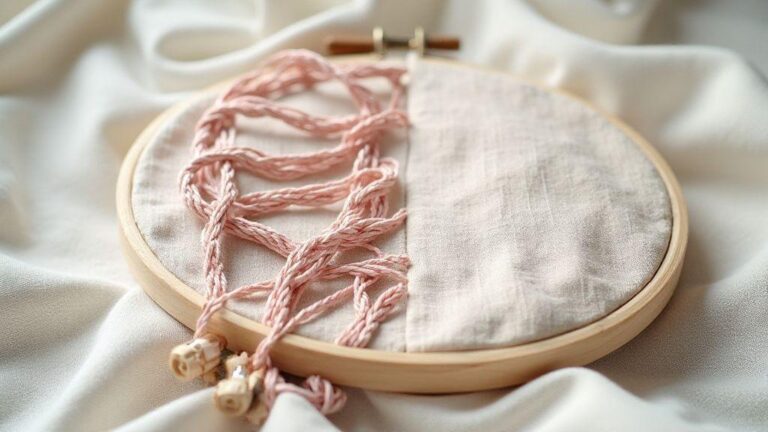
Choose the Best Thread and Needle for Your French Knots
Start with the right tools to keep knots neat and secure. The thread should have a bit of stiffness without shedding, and the needle should have a sharp point that slides easily through fabric. Delicate linen benefits from finer thread and a smaller needle; bulky wool on thick canvas calls for a touch heavier. The goal is smooth movement and even stitches, not tugging or fraying—think of it as choosing a good pen for a fine drawing.
Thread choice matters: smooth, evenly spun threads yield consistent knots; fuzzy threads can fray and read unevenly. Cotton embroidery floss, perle cotton, and mercerized cotton are common options. If you want a bit of shine, mercerized thread is nice—test a small sample first. Pair the needle with the thread’s thickness; too big leaves holes, too small can snag. Try a few scrap samples before committing.
Fabric type influences needle choice too. Fluffy or loosely woven fabric benefits from a slightly larger needle to anchor knots; tight weaves need a finer needle to keep holes neat. Tension matters: a good thread-needle match helps knots stay put even after washing. This simple pairing is the start of your French Knot Mastery journey and saves time later.
Needles that Work Best for You
Different needles behave differently with French knots. A sharp embroidery needle glides through fabric for clean holes and heal nicely after pulling through. Dense or tightly woven fabrics benefit from a sharper point; delicate fibers are kinder with a rounded or ballpoint needle. Test on scrap to feel the interaction.
Knot size also guides needle choice. For tiny knots, use a fine needle; for bolder knots, a slightly larger needle offers control. On felt, a blunt or crewel needle can work, but choose a size that avoids oversized holes. Have a few options ready and test to determine your favorite—this makes knots look instantly more even.
Try threading a needle and testing on scrap fabric: note how the fabric behaves and whether the needle skips or slides, and whether you feel tugging as the knot forms. Your comfort with the needle matters as much as the thread you choose.
Thread Types and Sizes to Pick for Your Projects
Cotton embroidery floss gives color depth and a soft finish but can split. Separate strands to match thread thickness to needle and fabric. For most French knots, 2–3 strands of floss or a single strand of perle cotton works well. Lighter weights keep knots subtle; heavier weights create bold pops. Consistency is key—don’t mix too many thread types in one piece, or the knots will read differently.
Mercerized cotton looks smooth and takes color beautifully, helping knots stand out. It has a touch of stiffness that keeps knots round and neat and can help on fraying fabrics. For texture lovers, hand-dyed threads add variation. Pair thread size with fabric and needle carefully; a heavy thread on a thin needle leaves large holes, a light thread on a thick needle may skip stitches. Keep notes on what works for you so each project starts faster and ends cleaner.
Tool Checklist Before You Start
Gather these basics before stitching: a suitable needle, the right thread, sharp scissors, and scrap fabric for test runs. A thimble or finger guard can help with thick fabric. A small storage tin keeps threads tangle-free, with extra needles in your project bag. A fabric marker or water-soluble pen helps place knots precisely without leaving marks.
Check thread length—too long tangles, too short means re-threading often. Test a knot on scrap to test tension and flatness. If a knot puffs, loosen slightly; if it sinks, tighten a bit. This prep saves frustration mid-design. Keep your workspace tidy and your mind focused for smoother stitching.
How to Make French Knots Step by Step
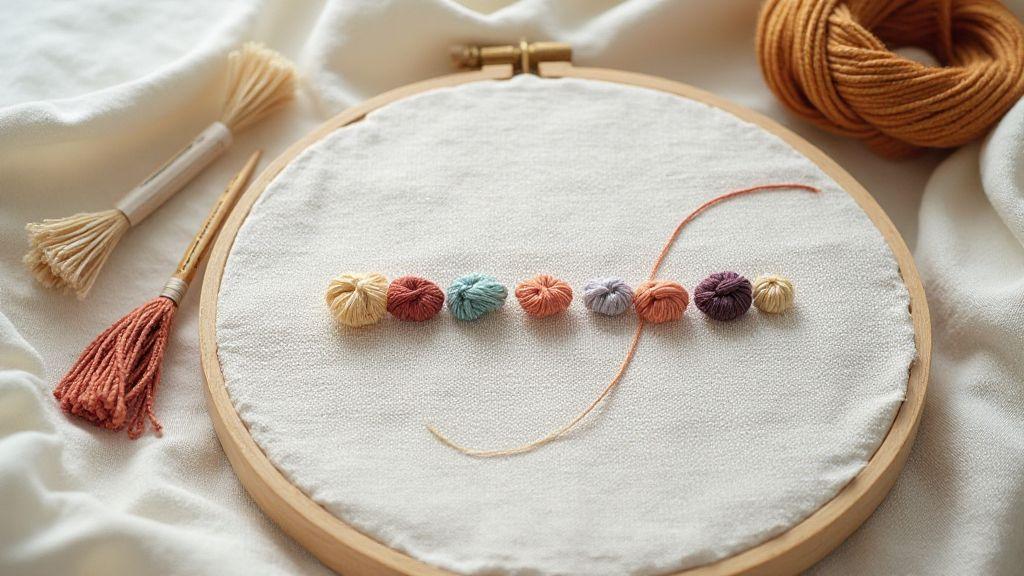
You’re about to master a tiny stitch with big impact. Thread your needle and tie a small knot at the end to prevent slipping. Bring the needle up where you want the knot, wrap the thread around the needle 2–3 times (adjust for chunkier knots), and hold the wraps in place with your finger as you push the needle back down close to the entry. Pull gently until the knot sits snug against the fabric. If you pull too hard, it collapses; too soft, it wobbles. Practice to keep tension even.
Control knot size with the number of wraps. Fewer wraps equal smaller knots; more wraps yield bigger bumps. Keep wraps neatly aligned and avoid thread slipping as you insert the needle. Pull slowly and smoothly to keep the knot round. If the knot skews, nudge the base with your finger and reposition as you pull through.
Finish with a neat tail and secure the knot by weaving the tail under nearby stitches. On delicate fabrics, use finer thread to avoid overpowering the design. Practice makes perfect, and your French Knot Mastery: The Complete Step-by-Step Guide will continue to improve your wraps, tension, and placement.
Embroidery French Knot Step by Step for You
Choose a smooth weave, thread your needle, and tie a small knot. Bring the needle up at the starting point, wrap 2–3 times, hold the wraps, and insert the needle back down near the entry. Pull slowly, keeping the base flat and the knot centered. If lopsided, nudge the base and rewrap as needed.
With experience, vary knot size for texture. Fewer wraps for tiny dots; more wraps for bold knots. Keep knot spacing even for cohesion. Finish by securing the tail under nearby stitches. The result is crisp, dimensional texture that elevates any project. Your confidence grows as knots become more uniform and controlled.
Remember: aim for clean rounds and even tension. If a knot sinks or pills, adjust your pull and rewrap. Practice makes the transitions between knots feel seamless, a core element of French Knot Mastery: The Complete Step-by-Step Guide.
A Simple French Knot Tutorial for Beginners You Can Follow
Start with basic setup: scrap fabric, sharp needle, and floss or embroidery thread. Thread the needle, tie a knot, bring the needle up, and wrap the thread around the needle 1–2 times. Keep wraps tight but not fraying. Insert near the entry and pull through slowly, stopping when the knot sits snug. If the knot slides, slow down.
Begin with a single wrap for each knot on a small test area to learn tension and placement. Space knots evenly; once comfortable, try two wraps to see knot growth while keeping bases flat. Finish by weaving the tail under a few stitches to secure it. You’ll notice steadier, more precise stitches as you gain confidence in the technique.
One-minute practice drill: pick a small scrap, thread, and tie a knot. Make a single knot in one corner, then move five stitches over and repeat. Keep knots round and bases flat, adjusting as needed. Practice daily to build consistency.
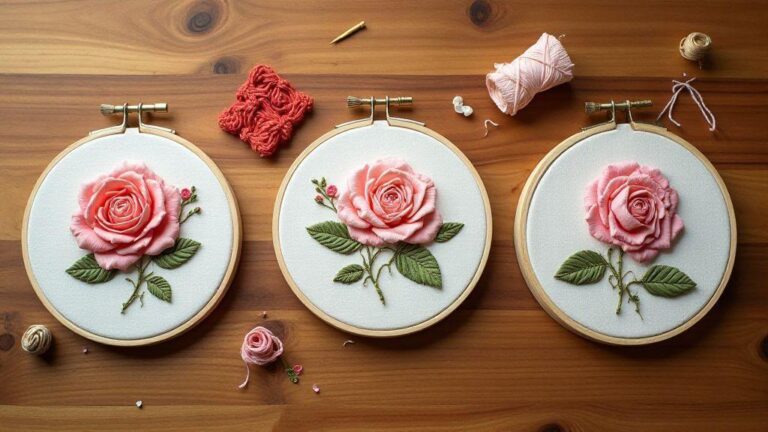
French Knot Stitch Patterns and Variations
French knots offer versatility beyond a simple circle. Think of each knot as a color dot anchoring your design. Knots can become petals, berries, or tiny stars, and spacing and size shift the overall look. Stack knots to create overlapping textures or to simulate fabric depth. Repeatable knot size across a motif keeps the piece cohesive, and on linen or evenweave the knots stay neat. On loosely woven fabrics, a light underlayer may help keep knots crisp.
How You Place Knots to Build Stitch Patterns
Treat each knot as a building block. Mark landing points and maintain consistent height. For curves, cluster knots tightly along the curve and space ends to form a smooth arc. A rhythm emerges from placing knots—one, two, three in a cluster—making the pattern easier to read.
Vary knot size by how long you hold the needle in the fabric. Short holds create tiny knots; longer holds yield larger ones. Use color shifts within clusters to add depth, and keep stitches consistent to avoid a jagged line. If one knot sits high or low, adjust the next ones to sit evenly, creating a deliberate, polished pattern.
French Knot Variations and Tips You Should Try
Experiment with twists to elevate knots. A long-armed knot loops the thread twice for a thicker dot. A shorter tail reduces bulk for a softer look, and combining tiny knots with open fabric creates a delicate, seeded appearance.
Try color-shift knots by threading two colors through the needle in a single pass while keeping tension even. Pair knots with backstitch outlines to give your piece a clear structure.
Tips to try: keep a small notebook of knot sizes and fabrics used; note how tension shifts with different fabrics. If a knot looks fuzzy, switch to smoother thread or shorten the tail. Practice on waste fabric to build confidence.
Small Pattern to Try Tonight
Create a tiny cluster of five knots in a loose flower shape with a center knot in a contrasting color. Make outer knots slightly larger by holding the needle a touch longer as you pull through. This quick pattern helps you feel the rhythm of placement and builds confidence for bigger designs.
Advanced French Knot Techniques to Master
Mastering knots means controlling tension, angle, and wrap count so every knot sits perfectly. Start with a steady wrap count—two, three, or four wraps—depending on thread and fabric. Adjust needle angle to keep the knot snug without puckering. If a knot wanders, re-seat and rewrap. Layering knots becomes a deliberate rhythm, not guesswork.
Small adjustments matter: a slight wrist turn or a breath before pulling tight can save rows of knots. Keep notes of what works—fabric, thread thickness, wrap count. Your notes turn mistakes into a plan and help you tackle complex layouts with confidence and flair.
Layering and Multi-Wrap Knots You Can Learn
Layering knots nests one knot beside another to create depth. Use different thread weights to push some knots forward and pull others back. Multi-wrap knots—three or four wraps—give a dense, plush center. Keep fabric taut and the needle perpendicular to maintain round knots. If a knot flattens, rethread and reinsert at a slight angle to restore volume. Work in small clusters to adjust tension early and avoid a chain reaction of loose knots.
Mixing Beads and Stitches to Raise Your Work
Beads add sparkle and weight to knots. Thread beads onto the needle before a sequence, anchoring the bead with a French knot. Beads center the design while the knot frames it. Use larger beads for bold focal points and tiny seed beads for a delicate halo. Balance is key—too many beads can stiffen fabric.
Place beads at focal points and gently cradle them with surrounding stitches for a three-dimensional push. Practice on scraps to nail the rhythm. When beads are involved, mind the thread path so the bead doesn’t shift the knot angle.
Advanced Practice Focus
Practice with a small sampler: sections for single knots, layered knots, and bead-enhanced knots. Use different thread weights to feel how tension shifts. Set a timer for 15-minute practice blocks to build muscle memory, then review what felt smooth and what didn’t. Your success comes from repeatable steps you can rely on during real projects.
Troubleshooting French Knot Issues and Perfecting Tension
French knots can be tricky at first. Learn to manage tension, prevent snagging, and achieve neat, consistent knots. Small checks and fixes go a long way toward turning frustration into confidence. Your goal is smooth, even knots that stay put with less effort.
Your grip, thread length, and fabric texture all affect knot quality. With practice, you’ll see fewer skipped knots and fewer frayed ends. Think of tuning an instrument: tiny changes in tension or anchor can harmonize the whole piece. Stay patient, test one change at a time, and you’ll progress toward French Knot Mastery: The Complete Step-by-Step Guide.
Keep a habit of checking each knot as you sew to prevent small issues from becoming big problems. Consistent stitches lead to a neat, polished final piece and renewed confidence with delicate fabrics.
Fix Common Knot Problems You Will Meet
Knots can be too tight, too loose, or uneven. Quick fixes: adjust thread length and tension before the next knot. If a knot slips, wrap the thread more times around the needle for extra grip. Bulky knots can be tamed by pulling through less thread and keeping stitches small and controlled. These small tweaks save you from unraveling an entire row.
Thread fraying at the needle eye happens—switch to fresh, smooth thread and avoid forceful pulling that twists the thread. If the fabric weave is very tight, knots may sink; use a contrasting thread to spot and correct knots quickly. These fixes keep your work neat and readable and prevent repeating mistakes.
Perfecting French Knot Tension with Simple Checks
Maintain even tension by keeping a consistent grip as you move thread through your fingers. If a knot looks flat, you’re wrapping too loosely; tighten a touch. If it puffs up, loosen a bit and re-test on scrap. A simple check is to gently pull the finished knot to test its security. If it slips, adjust wrap count or tension. Compare two knots side by side for height and roundness. With these checks, your knots stay consistent and your fabric stays tidy.
Quick Fix for Loose or Tight Knots
If a knot is too loose, rewrap once and pull with steady pressure for more grip. If a knot is too tight, release a little thread before pulling through and adjust your grip to be lighter. Keep your wrist relaxed and let your fingers guide the stitch for better results next time.
Putting French Knot Mastery: The Complete Step-by-Step Guide into practice will transform how you approach embroidery, helping you build texture, depth, and confident technique across projects.

I’m Sophie Caldwell, the author behind granaboom.com, and I believe hand embroidery is one of the simplest, most relaxing ways to create something beautiful with your own hands. I started this blog to help beginners learn hand embroidery without feeling overwhelmed by complicated instructions or “perfect” results.
Here you’ll find beginner-friendly guides to decorative embroidery stitches, along with clear step-by-step practice ideas and patterns you can use to build confidence. My focus is on making the learning process easy: simple explanations, helpful stitch combinations, and small projects that look polished even when you’re just starting out.
Welcome to granaboom.com—grab your hoop, choose a few colors, and let’s stitch one line at a time.