Mexican Otomi Embroidery: History, Symbols, and How to Get Started
Mexican Otomi Embroidery: History, Symbols, and How to Get Started
Explore Otomi embroidery history
Otomi embroidery is a living art, felt in every stitch. You’ll find vivid colors, bold shapes, and stories woven into fabric. This tradition isn’t just decorative—it keeps culture alive in your home, closet, or craft space. Look closely and you’re seeing heritage handed down through generations, stitched with care and pride. The history invites you to trace threads back to village life, family tables, and seasonal work, where motifs carried meaning and memory.
Fabrics are bright and eye-catching, yet the technique stays approachable for at-home projects. Design and function meet in these works: birds, animals, and plants are not mere decor; they reflect food, weather, and daily tasks. Your embroidery can borrow this spirit—focus on clear shapes, steady stitches, and color choices that tell your story. The history teaches that embroidery is communication across time.
If you’re curious about where to begin, start with motifs. Notice a balance of nature and daily life. Use sturdy fabric, bright threads, and a light touch. You’ll soon feel like you’re conversing with generations of embroiderers who used the same simple tools and patient hands.
Tenango embroidery origins in Hidalgo
Tenango embroidery began as a way for Hidalgo communities to mark days and duties. Early pieces link to market days, harvests, and family rituals. The work was practical—survival and identity—before it became art that traveled beyond village borders. The shift from utilitarian cloth to showpiece textiles happened as demand grew and skills spread. Your project can follow that arc: simple beginnings growing into expressive pieces.
Origins thrive on collaboration. Women, men, and children often worked together, sharing patterns and techniques. This teamwork created a living library of designs—animals, landscapes, and crops that map a region’s life. Motifs evolve with trade and contact, yet stay rooted in place. Stitching Tenango-inspired designs means joining a tradition of communal craft and shared meaning.
If you want a quick starting point, pick a basic animal or landscape motif and practice it with bright colors reflecting Hidalgo’s light and terrain. Let the lines be bold, fills even, and stitches steady. You’ll feel the Hidalgo spirit in your work—humble tools, big heart, clear message.
Otomi embroidery history and key dates
Otomi embroidery has a timeline you can almost hear in the needle’s rhythm. Early village patterns circulated among neighboring communities, followed by a rise in regional schools of design. A turning point comes when artisans began selling pieces beyond their towns, helping sustain the craft during hard times. Momentum grows from sharing skill and stories, not just selling products.
Key moments include colonial and modern influences that broadened palettes and motifs. A shift toward more symbolic, nature-based patterns—birds, plants, and celestial symbols—helps preserve the fabric’s language. The revival era later brought museums, fairs, and cooperatives, aiding fair wages and broader recognition. This history shows value grows when communities support traditional methods.
Quick facts on Otomi origins
- The art blends practical use with symbolic meaning; bold figures carry stories.
- Local communities keep motifs alive by passing them down in families and workshops.
- Tenango and other Otomi styles rely on simple stitches—start with basic loops and satin fills to capture the look.
- Color schemes reflect the landscape: bright blues, greens, pinks, and yellows echo the region’s light and flora.
- If you’re exploring Mexican Otomi Embroidery: History, Symbols, and How to Get Started, you’ll find motifs and practical steps to begin today.
Understand Otomi textile symbolism
Otomi patterns form a readable language. Colors and shapes tell stories from daily life, nature, and community values. Choosing an Otomi-inspired design honors a long tradition linking people, land, and memory. Your piece gains depth because you know why each motif matters and how it connects to a broader culture. Think of it like recipe notes for a dish—every ingredient has purpose, and together they sing.
Otomi art blends animals and plants with geometric forms to reflect beliefs about life, growth, and protection. Learning the symbolism helps you create a design that feels authentic and respectful. When you mirror these symbols, you’re not copying; you’re communicating with a living tradition. Your finished piece becomes a bridge between your hands and generations of makers.
Let your hands guide you as you study how symbols flow from one element to another. Repeating patterns and balanced layouts create a calm, intentional rhythm. Sewing will reveal stories your hands are telling—stories that belong to a community, not just a single artist. Your work can carry that shared memory into your home or toward a thoughtful gift.
Otomi symbols meaning for animals and plants
Animals are more than creatures in Otomi designs; they embody admired qualities. A bird can symbolize freedom and alertness; a jaguar may stand for strength and protection. Deer and rabbits suggest careful movement and gentleness. Plants act like living letters: corn for sustenance, pine for resilience, sunflowers for vitality. Including these symbols weaves in values your audience can sense at a glance, making your embroidery a quick, meaningful story.
Meanings aren’t fixed to one village or family; they shift with local life and memory. This makes symbol choices personal and resonant. If you grew up near cornfields or forests, you might reflect your own landscape. If you’ve traveled, you might fold in new plant forms you connected with. Either way, your design communicates respect for nature and community through recognizable symbols.
How Mexican Otomi motifs tell stories
Otomi motifs work like a language you read with your eyes first. Repetition, paired shapes, and the arrangement of animals and plants tell a sequence—daily routines, myths, or family history. Two facing birds can imply partnership or balance; a row of leaves might show growth through seasons. Your choices guide the story your piece shares with viewers.
These motifs honor predecessors. Using familiar symbols connects your fiber of memory to theirs. Your work becomes a dialog across generations, a way to say, I see you; I respect your craft. You’ll feel that connection most as you sew, watching the story unfold under your needle—like a quiet tale told through color and line.
Simple symbol guide for your designs
- Use easy, recognizable shapes so your embroidery tells its story clearly.
- A circle can mean the sun or life; a square, earth or home.
- A simple bird silhouette signals freedom; a leaf suggests growth.
- Mix small dots with curved lines to imply movement. Expression matters more than perfection.
- Color choices shape mood and meaning. Warm tones convey energy; blues and greens feel calm and hopeful. Pair colors to fit your space and story.
Recognize Mexican Otomi motifs and patterns
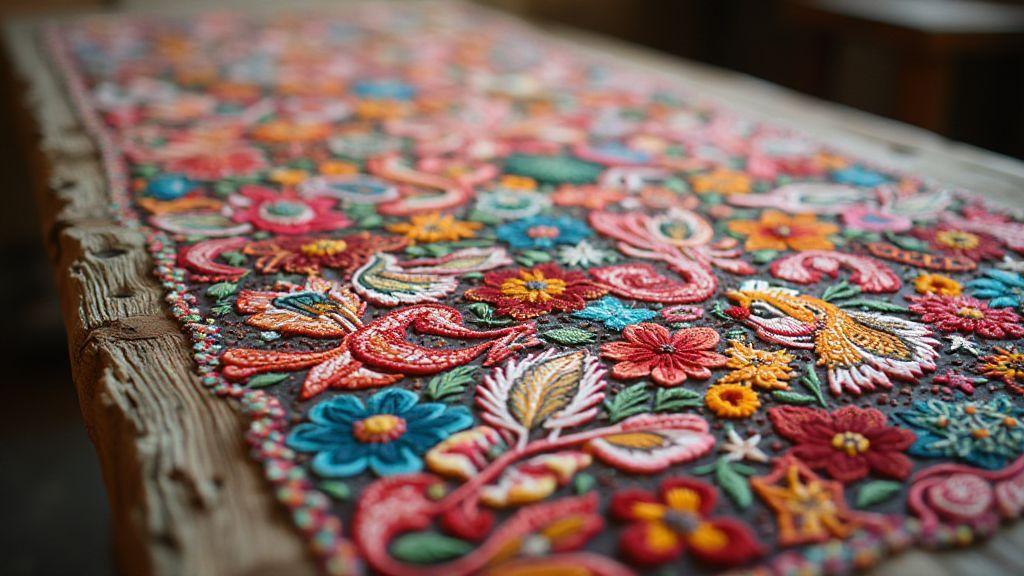
You’ll notice bold shapes and bright colors in Otomi embroidery. Motifs aren’t random; they mirror village life and daily routines. Repeating birds, deer, flowers, and other nature-inspired symbols arrange in balanced layouts. From afar, the overall composition reads as traditional and alive.
The strength of Otomi patterns lies in simplicity with bold contrasts: solid color fills, clean outlines, and symmetrical arrangements. Colors reflect regional tastes and the natural dyes artisans use. By focusing on composition, you’ll recognize the Otomi feel even if you don’t read every symbol—like recognizing a friend by handwriting.
In practice, Otomi embroidery appears on blouses, table runners, and wall hangings. Motifs repeat with varied scale and color to stay fresh. Pieces with tightly packed flowers or birds among vines signal traditional Otomi influence. Seeing motifs across villages grows familiarity and color variation.
Common motifs: birds, deer, flowers
Birds are stylized with clear outlines, often perched or in flight. Deer convey calm and natural balance, with simplified antlers or heads. Flowers range from tulip-like blooms to full blossoms, all rendered with solid color fields and crisp edges. These motifs map to stories: birds as messengers, deer for gentleness, flowers for growth and renewal.
Mix pieces with similar motif sets to keep a cohesive look. A blouse with birds and flowers pairs well with a table runner featuring deer and blossoms if you keep the color story consistent. The result is bold yet balanced—a wearable museum display.
Color choices and regional styles
Color in Otomi embroidery blends tradition with practicality. Expect bright reds, deep greens, sunny yellows, and sky blues sourced from natural dyes or local threads. Regional styles push the palette in different directions: some areas favor warm, fiery tones, others cooler, tropical hues. This creates a lively family of colors that still feels connected.
Match colors across pieces to keep harmony. A blouse with bold red and orange accents pairs with textiles reflecting those tones. Wall hangings or table pieces can favor one dominant color with smaller accents in the rest of the palette. Balance is key, so motifs pop without competing.
Regional styles also show up in motif density and spacing. Some regions pack patterns tightly for a vibrant surface; others space them for an airy, modern vibe. Understanding this helps you pick items that feel authentic or achieve your desired mood. You’ll sense what feels Otomi at a glance by how colors interact with space.
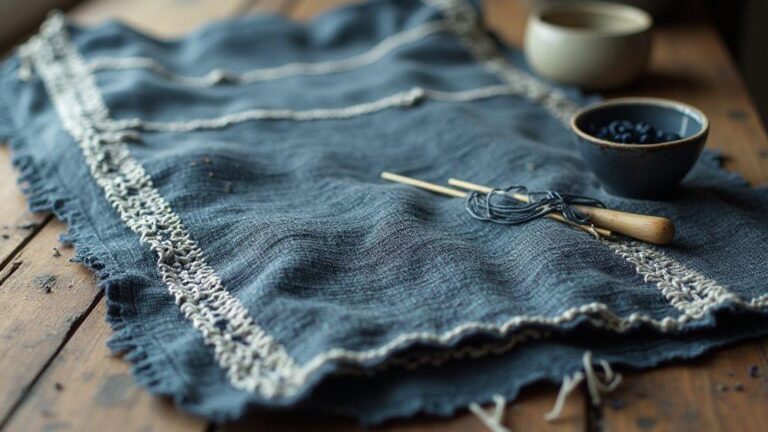
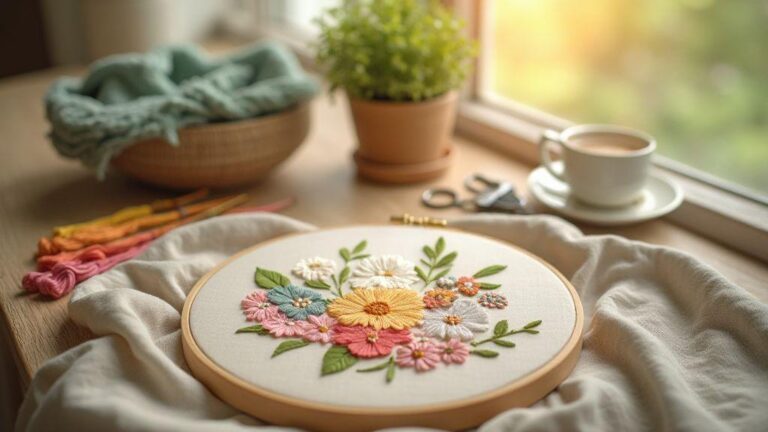
How you can start Otomi embroidery
Otomi embroidery invites you into a colorful world of patterns, bright threads, and patient stitching. Start by understanding what makes Otomi unique, then build a tiny toolkit that fits your budget and space. This is a journey, not a sprint: learn a little at a time, and every stitch adds to a story woven for generations. The goal is to enjoy the process while creating something you’re proud to wear or display. With practice, you’ll recognize signature shapes—animals, flowers, and abstract symbols—that define Otomi’s lively identity. Begin with simple designs and grow into more complex compositions as confidence strengthens.
Set up a comfortable workspace with good lighting and a quiet corner. Start small: a panel, a pouch, or a decorative napkin. Notice how thread colors flow together and how the fabric’s weave guides your stitches. Your hands will build muscle memory, and your eye will learn balanced shapes. Use materials you enjoy, then let curiosity and steady practice reveal progress in weeks, not months. This is how Mexican Otomi Embroidery: History, Symbols, and How to Get Started can feel personal to you. Keep projects small at first, celebrate tiny wins, and share your work with friends or family who appreciate the craft.
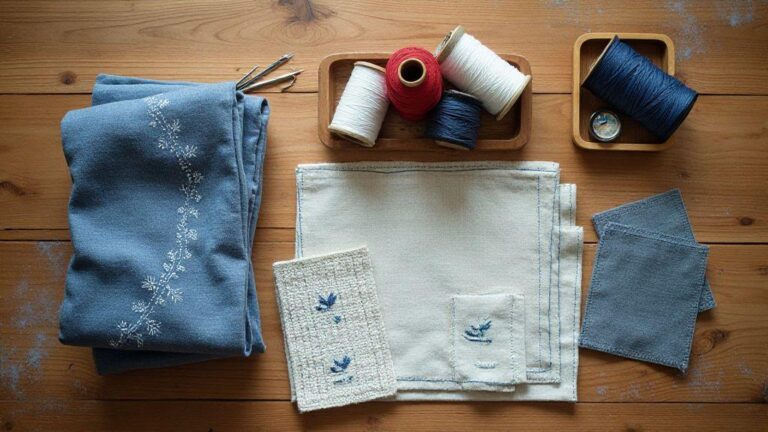
Beginner Otomi embroidery supplies checklist
- A small embroidery hoop
- A sharp hand sewing needle
- Embroidery floss in a chosen color palette
- A fabric marker or chalk for placing shapes
- Scissors for clean thread snips
- Natural fabric like cotton or linen with a medium weave
- A clean, flat workspace and a storage container for threads
- Optional: a lighted magnifier for finer details
Choose three to five main colors with a couple of accents. Start minimal, then expand as you gain confidence.
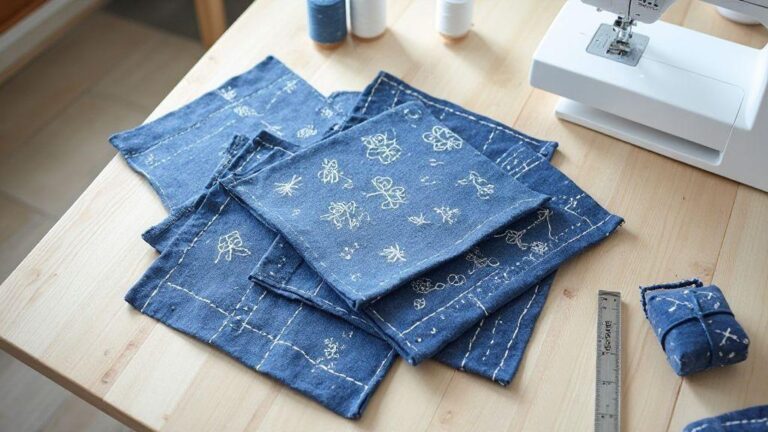
How to start Otomi embroidery with easy projects
Starting with easy projects keeps motivation high and stitches clean. Practice basic stitches on small shapes first—consider a simple border, a single animal motif, or a flower cluster. Repetition helps you learn spacing and proportion quickly. Trace a simple motif onto fabric, outline with a light stitch, then fill with even stitches. Small motifs should stay within a few inches in size: a tote panel, a napkin border, or a bookmark with Otomi elements are perfect.
Finish small pieces to experience pride and momentum. As your skills grow, your colors will balance more naturally and stitches stay even. Then you’ll be ready to tackle more ambitious motifs while preserving the joy.
First steps and materials to buy
Gather a small hoop, a sharp needle, a few skeins of embroidery floss in a chosen palette, and a light fabric with a moderate weave. Lightly mark your design, then begin with clean, even stitches. Sit comfortably, take breaks, and let your voice emerge through color and shape.
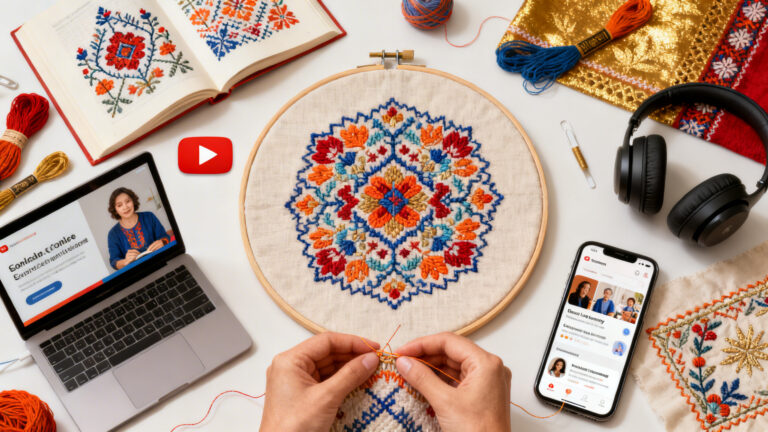
Master Otomi stitch tutorials and traditional techniques
This section guides you through core stitches, methods, and handwork that keep Otomi traditions alive. Expect practical tips, clear demonstrations, and results you can share.
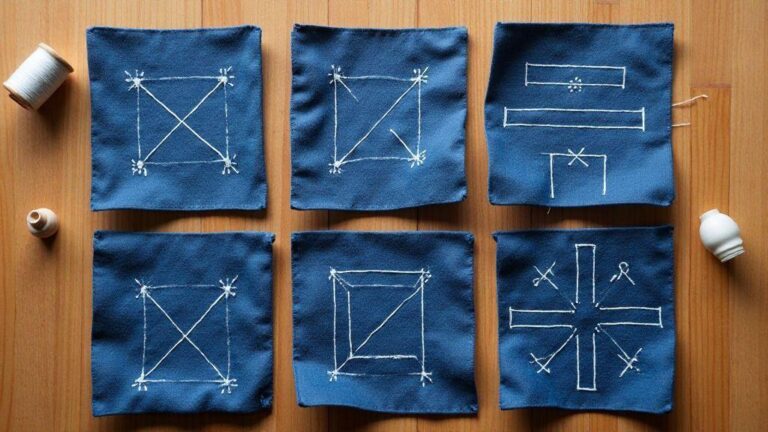
Otomi stitch tutorials: satin and outline
Learn two backbone techniques:
- Satin stitch for smooth, filled shapes that pop with color. Control thread tension and allow the fabric to breathe for crisp edges.
- Outline stitch to define stems and curves, balancing thickness and spacing to support interior fills. Start with small motifs, then scale up.
Traditional Otomi techniques and handwork
Traditional Otomi handwork blends bold color with precise control. Color placement guides the eye; directional stitching adds movement; careful knotting anchors layers. Begin with small samples to build confidence, then branch into more complex patterns reflecting your personal style.
Practice drills to build your skill
Do short drills to build muscle memory and consistency: straight lines, curves, small filled shapes. Use repeated loops to train coordination. Compare results to references, adjust tension, and continue. When you can perform these drills without thinking, you’re ready for full Otomi motifs.
Support Otomi cultural significance and ethical buying
Choosing ethically made pieces respects Otomi culture and supports communities. Buying directly from artisans or fair-trade shops helps families, education, and local economies. Sustainability and cultural integrity go hand in hand, empowering that connection.
Look for items made with traditional techniques, natural dyes, and clear producer information. Proximity to provenance enhances value: you’ll notice handmade stitches, purposeful color, and evident care. Prioritize transparency and fair pricing to help sustain Otomi embroidery for the next generation.
If you’re curious about the broader impact, ask who made the piece, where the workshop is, and how the price is distributed. Responsible buying isn’t hard—it’s about choosing transparency and connection. Your purchases can support scholarships, community projects, and shared knowledge that keep Otomi embroidery vibrant.
How to support Otomi artisans directly
- Reach out to artisan cooperatives or markets that publish maker profiles for direct access to the stitchers.
- Buy in person at local markets to see textures, dyes, and compare pieces side by side.
- Look for items labeled with the maker’s name or cooperative badge; seek transparent online listings with maker stories and workshop locations.
- Request a certificate of origin or a short design story to learn about materials and process.
Spot authentic Tenango work and avoid imitations
Authentic Tenango work shows a clear lineage of technique and meaning. Look for hand-stitched borders, tight backwork, and the Otomi palette—bright, symbolic colors reflecting village life. Beware machine stitching or generic colors. True Tenango tells a story in every line.
Check construction for consistency: dense stitching, rhythmic design, and motifs tied to village life or nature. If a listing glosses over the maker or dye details, it’s a red flag. Compare with reputable Otomi cooperatives or museum collections to verify authenticity. Always seek provenance: who made it, where, how, and whether the design is traditional or adapted for new markets.
Questions to ask sellers before you buy
- Who made this piece, and where is the workshop located?
- Is the embroidery hand-stitched or machine-assisted?
- What materials and dyes were used, natural or synthetic?
- How is the sale price distributed between maker and seller?
- Can you share the maker’s story or a certificate of origin?
These questions help you judge whether your purchase honors the artist’s skill and culture. A thoughtful seller will share the maker’s name, workshop, and a brief design history, ensuring your money supports someone who carried the craft through hours of careful stitching.

I’m Sophie Caldwell, the author behind granaboom.com, and I believe hand embroidery is one of the simplest, most relaxing ways to create something beautiful with your own hands. I started this blog to help beginners learn hand embroidery without feeling overwhelmed by complicated instructions or “perfect” results.
Here you’ll find beginner-friendly guides to decorative embroidery stitches, along with clear step-by-step practice ideas and patterns you can use to build confidence. My focus is on making the learning process easy: simple explanations, helpful stitch combinations, and small projects that look polished even when you’re just starting out.
Welcome to granaboom.com—grab your hoop, choose a few colors, and let’s stitch one line at a time.