What Is Hardanger Embroidery? A Complete Introduction
History of Norwegian Hardanger Embroidery
Hardanger embroidery blends practicality with beauty, born from need and needle, now a national treasure you can wear or display. Its crisp lines and delicate cutwork echo centuries of hands keeping the tradition alive through time and fashion. This craft tells a story beyond stitches—it’s a history written in thread.
Its journey begins with a simple question: how did a region’s needlework become a symbol of a country? The answer lies in people who stitched for warmth, modest dress, and then art. Hardanger stands out with its distinctive geometry and holes that form patterns—a language spoken with thread and tiny openings.
History isn’t just dates; it’s the hands that carried the technique, adapting as they went. Color choices, fabric types, and the social functions of embroidered cloth reveal how history lives in daily life, ready for you to discover in your own stitching.
Origins in the Hardanger region
In Norway’s Hardanger region, the craft found its name and its soul. Local life—farming rhythms, long winters, close-knit communities—shape how the technique developed. The stitches started from need and grew into a mark of identity, echoing rivers, peaks, and steady hands across generations. This isn’t merely technique; it’s a portrait of the place that cradled it.
Early pieces were simple yet sturdy: mending, then ornament, and finally storytelling on linen or damask. The climate made fabrics precious, and embroidery stretched resources while adding beauty. Today’s style retains that practical backbone: clean lines, precise cutwork, and respect for the fabric’s grain. The workshop’s quiet rhythm—measure, cut, stitch—still speaks.
Trade routes and cultural exchanges fed Hardanger’s growth. It learned from neighboring traditions but kept its own voice: geometric patterns, filled stitches, and signature cutwork holes. The blend of influence and identity provides a living link to the past you can recreate in your projects.
History of hardanger embroidery in folk dress
Hardanger embroidery dressed history as it wore itself: on shirts, aprons, and wedding gowns, framing the wearer and unfolding family stories with every movement. Folk dress carried social meaning—ties, regional pride, and the craft’s resourceful use of scarce textiles. It’s a quiet luxury in everyday wear, passed through generations and teaching math, symmetry, and patience.
Wedding attire and formal garments show a more elaborate side, with sharper contrasts and cutwork for rites and celebrations. Embroidered pieces become family plot points—who stitched what, whose hands touched the fabric, and how it traveled across generations. The memory is intimate in every edge and hole.
Why you’ll value its past
Hardanger embroidery teaches stitching with intention: the quiet precision of each cut and the balance between open work and filled areas. The past helps you appreciate material choices—linen fibers and sturdy threads that endure—keeping your projects grounded and practical. Embracing history deepens your stitching experience, honoring those who stitched before you and inspiring tomorrow’s makers.
Materials for Hardanger Embroidery
You have many choices, but the right materials set the tone for clean lines and neat satin stitches. Aim for fabrics that stay sturdy and threads that hold their shine without fraying. Your goal is a crisp, even look, not a budget scramble.
Fabric and thread choices for counted-thread work
Even-weave fabrics are ideal for Hardanger, giving square holes and straight guides for counted stitches. Cotton linens or linen blends are popular for their durability and steady tension. The fabric’s texture should be predictable so the negative space reads clearly when you cut.
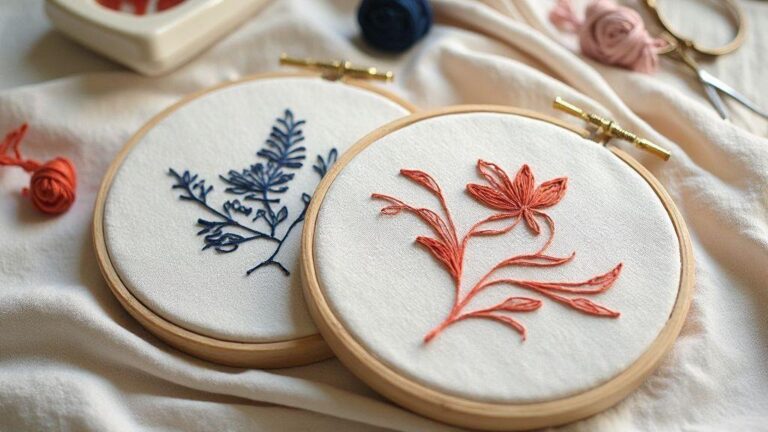
Threads should move with the fabric: a high-quality cotton or linen thread that stays firm yet flexible. Use white or ecru for a classic look, with subtle color blends for depth. Keep a few spool sizes on hand to maintain consistent tension.
Essential tools and what you should buy
- Sharp embroidery scissors or small shears for clean cuts
- Precision needle for counted work
- Lighted magnifier or loupe for accuracy
- Removable fabric marker or chalk
- Small cutting mat, seam roller, and tweezers
- A steady workspace with good lighting
What you should buy
- High-quality even-weave linen or linen/cotton blend fabric in a light color
- Smooth cotton embroidery thread, plus a subtle second color
- Sharp embroidery scissors or dedicated small shears, and a precision needle
- Lighted magnifier, marking pencil or removable fabric marker, and a soft brush
Core Hardanger Embroidery Techniques
You’re about to explore the techniques that define Hardanger, built on planning, counting, and patient work. When you ask, What Is Hardanger Embroidery? A Complete Introduction, these techniques show you the answer in practice.
Kloster blocks, cutting, and needleweaving
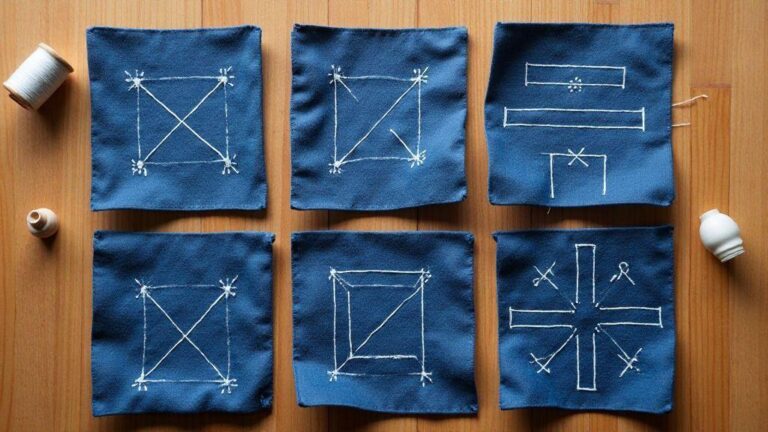
Kloster blocks form the framework for lace-like panels. Measure carefully to keep blocks evenly sized, then cut away fabric inside the blocks to reveal open spaces. Needleweaving fills the gaps with tiny stitches, creating a delicate lattice. Precision matters at every cut—the result is light, airy elegance.
How counted-thread embroidery controls design
Counted-thread embroidery uses the fabric as a grid, delivering symmetry, balance, and crisp geometry. Accurate counts ensure motifs sit exactly where planned, with controlled tension that keeps negative spaces even and calm.
How you practice techniques
Start with simple patterns focusing on Kloster blocks and basic counted stitches. Build muscle memory with small goals each session, stay steady, and re-count if you stumble. Gradually add needleweaving and refined counting to deepen your pieces.
Hardanger Stitches and Patterns
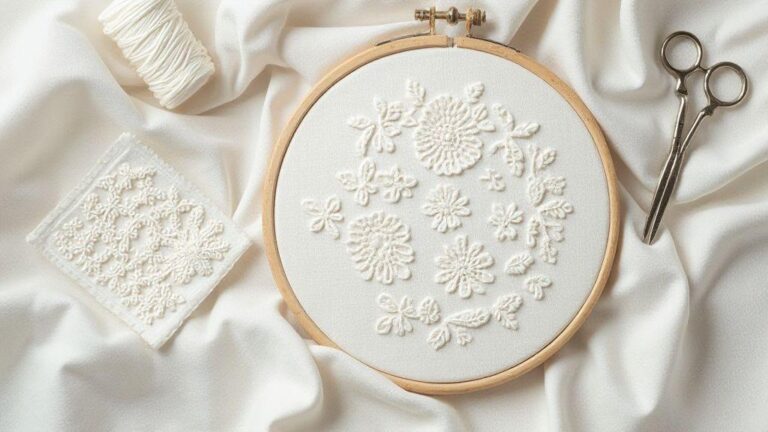
Hardanger stitches open a world of delicate beauty by pairing clean lines with exact cutwork. This approach creates lace-like panels that feel timeless yet modern.
Common hardanger stitches and patterns
Begin with running stitch and buttonhole stitch to secure threads and shape edges. Add decorative stitches like Kloster blocks and woven bars to achieve the distinctive Hardanger look. Choose grids, leaves, or flowers to guide placement of stitches and cuts.
Reading grid patterns and motif repeats
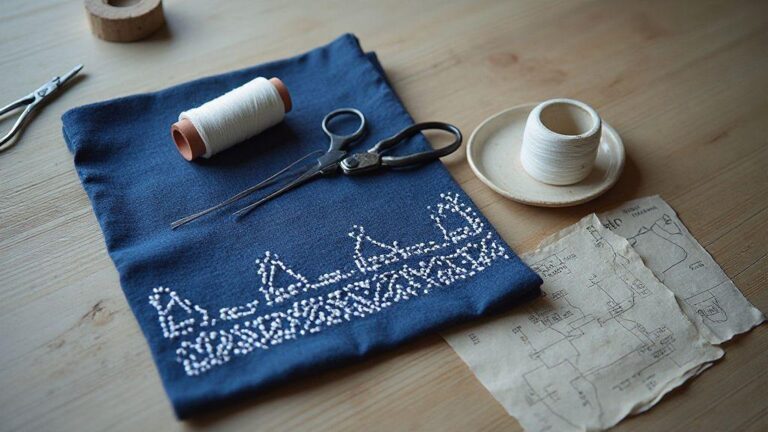
Grid patterns are your embroidery blueprints. Mark starting points, count squares, and map motif beginnings. Repeats create rhythm—count each repeat as you go and mark progress to maintain alignment. Work in sections to keep lines crisp and spacing even.
Which stitches to learn first
Master the running stitch to secure threads and set the grid, then add the buttonhole stitch or woven bar to shape edges. These form the backbone of most patterns; practice on a small sampler to gain even, steady lines.
Reading grid patterns and motif repeats (revisited)
Translate the grid into a stitch plan, mark starting points, and keep the fabric taut. Proper counting and alignment ensure crisp lines and balanced negative space.
Hardanger Embroidery for Beginners
Hardanger embroidery opens a world of delicate, geometric beauty you can wear or display with pride. Start with basic counted patterns, then gradually tackle more intricate designs. Think of it as drawing with thread: once you understand the grid, everything falls into place.
What Is Hardanger Embroidery? A Complete Introduction is a great starter, but you’ll feel the magic as soon as you stitch your first motif. With patient hands, you’ll see tiny squares become openwork that catches the light.
Simple beginner projects
- Tiny sampler: a mix of satin stitches and withdrawal stitches to build confidence
- Small coaster with openwork border to practice balancing solid stitches and negative space
- Simple napkin with a single motif to learn alignment and back-work finishing
Common beginner mistakes and fixes
- Uneven tension: practice with a scrap first, keep a steady pull
- Miscounting stitches: mark the grid lightly and recheck counts
- Sloppy corners: slow down at joins and keep layers flat
- Over-cutting holes: recheck before withdrawing threads
- Wrong fabric choice: use an even-weave fabric with a regular thread count
Start with This Checklist
- Gather bright light, sharp scissors, and the right fabric
- Choose a stable, even-weave cloth and the correct needle size
- Pick a simple, counted pattern and lightly mark your grid
- Use steady, gentle tension; test on scrap fabric first
- Practice withdrawal stitches on a small patch
- Keep the back neat—trim threads and secure ends as you go
- Work in good lighting to see every stitch clearly
- Review counts after every few stitches to avoid errors
- Finish with a clean edge and a light press to set the stitches
Care, Finishing, and Global Context
Care for your embroidery so it stays bright and true, no matter where it’s displayed. Finishing isn’t an afterthought—frame under UV glass or mount on a breathable panel to let the piece breathe. A thoughtful finish helps your work endure and travel across cultures. Global context shows how different regions honor textiles: some emphasize tight lines, others looser forms. Your care plan remains steady, while finishing can nod to global influences.
Cleaning, blocking, and preserving your piece
- Clean gently with cool water and mild detergent; air dry flat
- Block the piece on a clean board to keep stitches even; dry completely
- Store in a breathable bag away from sunlight and heat; dust lightly
- Check colors and threads yearly; re-stretch or re-frame as needed
How hardanger counted-thread embroidery fits world traditions
Counted-thread embroidery threads through many traditions, blending precision with open spaces. Pieces from Norway, Iceland, and the Baltic regions share patience and clear structure. Your work can honor these roots while adding your personal touch. What Is Hardanger Embroidery? A Complete Introduction fits into this global tapestry, linking technique to a broader craft heritage.
How to preserve your work
Display frames with UV protection, acid-free backing, and proper mats to prevent yellowing. If you mount on fabric panels, keep away from damp areas. Regular dusting and occasional frame maintenance help your piece endure.
What Is Hardanger Embroidery? A Complete Introduction
Hardanger Embroidery is a counted-thread technique that combines precise geometry, negative space, and delicate cutwork to create lace-like panels on fabric. Rooted in the Hardanger region of Norway, it reflects a history of practicality turned into art. Mastery comes from counting, careful cutting, and patient needleweaving, producing pieces that are both timeless and personal. This introduction is a gateway to understanding how technique, materials, and tradition come together in every stitch.

I’m Sophie Caldwell, the author behind granaboom.com, and I believe hand embroidery is one of the simplest, most relaxing ways to create something beautiful with your own hands. I started this blog to help beginners learn hand embroidery without feeling overwhelmed by complicated instructions or “perfect” results.
Here you’ll find beginner-friendly guides to decorative embroidery stitches, along with clear step-by-step practice ideas and patterns you can use to build confidence. My focus is on making the learning process easy: simple explanations, helpful stitch combinations, and small projects that look polished even when you’re just starting out.
Welcome to granaboom.com—grab your hoop, choose a few colors, and let’s stitch one line at a time.