Embroidered Wall Art: Framing Your Hoop Like a Pro
Tools for Embroidered Wall Art Framing
Framing your hoop brings the design to life. With the right tools and setup, your fabric stays smooth and your stitches neat, avoiding warps, snags, or loose threads. The goal is a clean, gallery-worthy finish that highlights the embroidery.
Remember: the frame should support, not overpower. Choose tools that help you tighten the fabric evenly, align the hoop with the wall, and protect the stitches. A calm workspace helps you focus on each knot and color change, and with practice your accuracy improves.
As you gather tools, compare brands and styles. You don’t need every gadget—just what helps you work smoothly. Keep a compact kit: a few hooks, a soft cloth, a ruler, and a reliable glue for quick securing. The best tools feel made for your hands. Your Embroidered Wall Art: Framing Your Hoop Like a Pro starts with confident, simple choices.
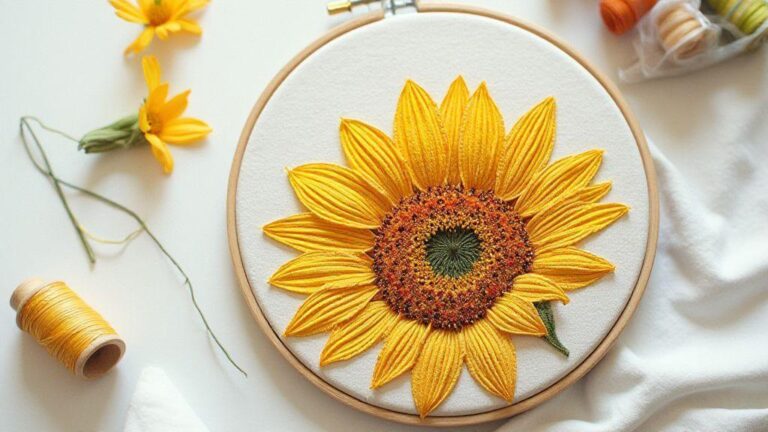
Choose the right hoop and needles
The hoop sets the stage for your piece. A tight, even grip prevents wrinkles and keeps stitches neat. Look for a hoop that fits your fabric snugly without pinching. If fabric is thick, you may need a larger inner hoop to avoid pressure points. The right hoop helps you pull threads evenly and see stitches clearly, making framing easier.
Needles matter as much as the hoop. A sharp, fine needle moves through fabric smoothly and reduces snagging. For delicate material, choose a finer needle to protect threads and keep stitches clean. For thicker fabrics, a 3/9 or 80/12 needle handles the bulk without bending. Test a stitch or two on scrap fabric to feel how the needle glides before committing.
Your choice of hoop and needle affects tension and alignment. With these basics mastered, you’ll frame with steadier hands and fewer surprises on finish day.
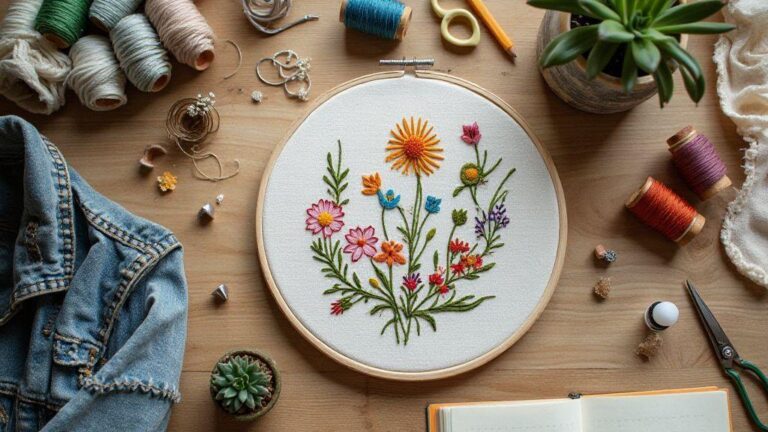
Pick threads, stabilizer, and glue
Thread choice colors your piece and how it reads on the wall. Pick threads that contrast or harmonize with your design and fabric. If unsure, test a few colors on a small swatch to see how they read in different light.
Stabilizer is your best friend for a clean frame. It prevents fabric from stretching as you work, especially on dense patterns or lighter fabrics. Choose a stabilizer that matches your fabric weight and the look you want. Edges stay crisp and the hoop retains its shape.
Glue quietly keeps things in place while you frame. A light touch of fabric glue can secure loose edges or hide frays behind the backing. Use sparingly and let it dry fully before framing. A small dab at corners or along the back edge can smooth slips without creating stiffness.
Quick materials checklist
- Hoop in the right size with snug grip
- Sharp needles suited to your fabric
- Colorful thread options for your design
- Stabilizer that matches fabric weight
- Soft cloth for cleaning and smoothing
- Fabric glue for securing loose edges
- Backing material or mat board for neat presentation
- Measuring tools to keep alignment straight
Backing techniques for embroidery hoops
A strong backing keeps the piece neat and durable. Felt or fabric backers soften edges, reduce fraying, and help the hoop sit flat without sagging. If the fabric is lightweight, a sturdy felt backer can make the design polished and ready for the wall. A thin layer of felt on the back also helps with tension and prevents snagging on the hoop’s rim. Lining the back with a contrasting fabric adds a subtle detail when the hoop is hung. For a display-ready look, use a sturdy backer that matches your décor—dense fabric or lightweight stabilizer behind the embroidery helps colors pop and keeps threads from showing through.
Use felt or fabric backers for support
Felt backers lock in stability and resist fraying, keeping the back neat and the edges tidy. Fabric backers add style and can be trimmed to fit, acting like a quiet frame and helping the embroidery stand tall without drawing attention to the hardware.
Apply paper or card backing for display
For a museum-ready finish, slip a sturdy paper or card behind the hoop before concealing threads. A clean backing makes the hoop look seamless from the front and hides knot ends. Choose textured or subtly colored cardstock that echoes thread tones, cut to fit the hoop, and secured with light adhesive or small stitches. The backing becomes part of the display, giving the piece a finished, professional vibe.
Secure mounting steps
Center the backing in the hoop, keeping the fabric taut but not overstretched. Retighten the hoop so the backing sits firmly against the frame and stitches stay crisp. If using paper or card backing, you may add a thin adhesive layer to prevent shifting. Smooth air pockets and recheck tension. Finish with a gentle press around the rim to ensure the backing stays in place and the display remains flawless.
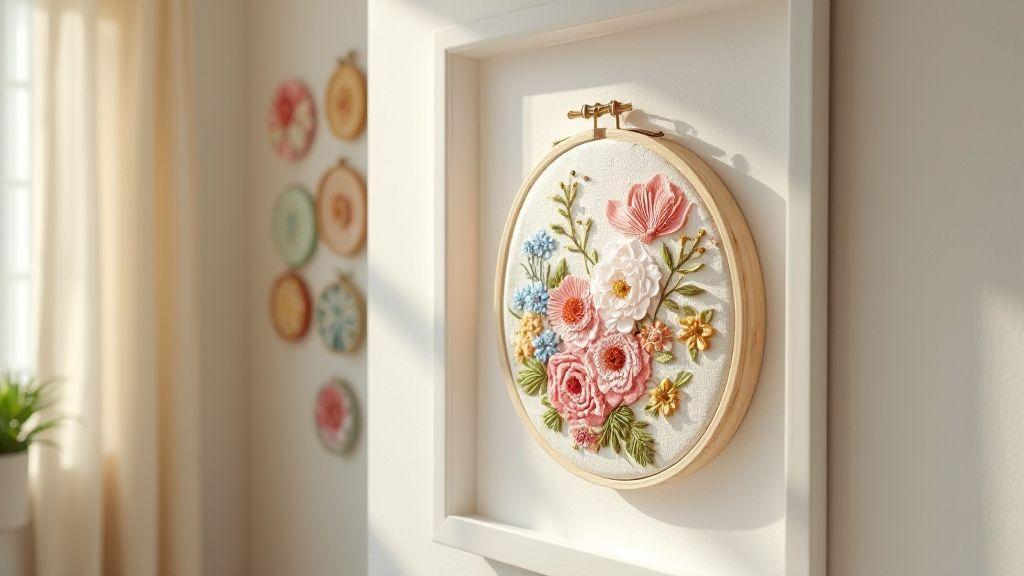
Embroidered Wall Art: Framing Your Hoop Like a Pro
You’ve finished your embroidery and are ready to show it off. Framing your hoop is part of the art, not just a finish. When you frame it like a pro, the piece sits flat, looks neat, and shines on the wall. This guide helps you achieve a polished look with simple steps you can trust.
Begin with the right hoop setup: choose a frame that fits the hoop snugly without squeezing the fabric. Inspect fabric edges and the back of the hoop; trim fraying threads and pull taut to keep the surface smooth. A steady, even surface makes the stitches read as a single piece of art from a few steps away, and a calm frame helps the embroidery shine.
Think about display angles and lighting to bring out texture and color. Clean lines in the frame and a simple mat—or none at all—keep the focus on your work. A plain wooden frame in a neutral shade is a safe starting point that lets colors pop without competing with your design.
Trim and tension fabric cleanly
Trim fabric edges so the back stays tidy and easy to mount. Pull the fabric taut before placing it in the hoop and recheck the front to ensure stitches lie flat. A clean border prevents stray threads or puckers from catching the eye when framed. Maintain even tension throughout; if a thread loosens, re-tighten before mounting. If you notice loose spots after framing, re-tack from the back for a seamless wall presentation.
Conceal inner hoop for a neat edge
Hide the inner hoop by pulling the fabric tight and stretching it over the inner ring so the seam stays unseen. The outer edge of the hoop should be visible, not the screws or bands. If the hoop has a lip, position the fabric behind it. A thin layer of foam or felt between the fabric and the frame’s inner edge quiets wiggle and protects against shifting.
Pro finishing tip
Secure the fabric with a tiny dab of glue along the back edge where needed. A cotton swab and small amount of glue prevent lifting corners without creating stiffness. Let glue dry fully before hanging for a sturdy, moisture- and sun-resistant finish. Keep the display simple so the eye stays on the stitches, not the frame. A neat edge, clean back, and quiet frame keep Embroidered Wall Art: Framing Your Hoop Like a Pro looking fresh for years.
Frameless embroidery wall art ideas
Frameless embroidery wall art offers a modern twist that shows texture and color without borders. The clean look is easy to swap as your style changes, letting threads shine in a simple setting. Choose fabrics with a subtle underlay to keep stitches crisp and consider a lightweight backing to prevent bending or sagging. Lighting can highlight satin stitches or linen texture; photograph your wall monthly to track how light changes your pieces and adjust layouts as needed.
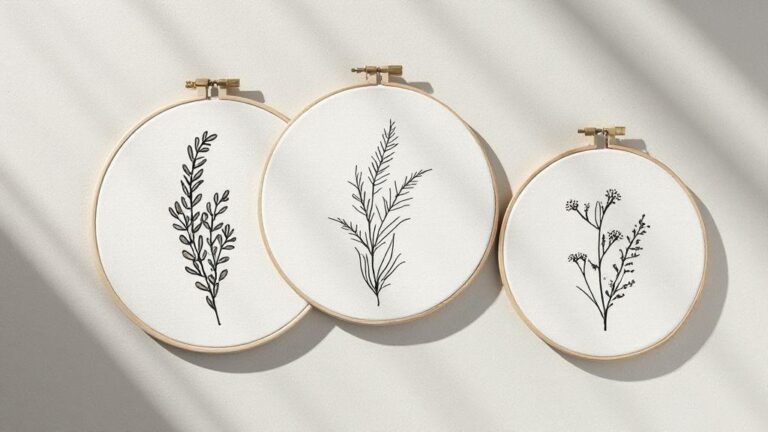
Create floating hoop displays
Use hoops of varying diameters mounted against the wall with no visible hardware for a floating effect. Matte finishes (black, white, natural wood) keep thread colors as the star. Layer sizes to create depth and rhythm. Mount on lightweight boards or directly into wall studs using clear hooks or adhesive mounts to minimize obstruction. Mark a light guide line to maintain even spacing and ensure a cohesive look.
Mix sizes for a gallery wall
Mix sizes for a museum-like energy without a strict grid. Start with a central piece and add smaller hoops around it. Highlight repeated textures and colors to create a connected group. Plan with photos or sketches, then mark positions on the wall with painter’s tape. Vary spacing and avoid crowding to maintain negative space and balance.
Hanging layout guide
Aim for a central anchor at eye level (about 60 inches from the floor) and build outward in a loose oval or rectangle. Check level often and adjust spacing as needed. A cohesive layout keeps the eye moving naturally across the display.
DIY embroidered hoop framing projects
Turn simple hoops into polished wall pieces with templates and patterns. Trusted templates save time and improve results, helping you build a growing library of ready-to-frame hoops. Use beginner-friendly projects to learn control, tension, and finishing touches, then mount hoops flat on the wall for a clean look. Practice with templates you trust to achieve consistent results that look stylish and achievable.
Use templates and patterns you trust
Choose templates that fit your hoop size and patterns with bold shapes and fewer tiny details. Clear outlines, color guidance, and stitch counts help you stay on track. Keep a small stack of reliable patterns for quick rotation. Simple color blocks and easy stitches (like backstitch and running stitch) are forgiving for beginners and quick to complete. Finishing tips—such as trimming threads close to the fabric and securing without warping—help your hoop look balanced and polished.
Beginner project: simple stitched hoop
A simple stitched hoop builds foundational skills: placement, stitching, and finishing. Tighten the fabric in the hoop for a smooth surface, outline the pattern, and fill with a basic stitch. As you work, your tension will improve and stitches become steadier. This quick win motivates you to tackle more complex embroidery and maintain clean framing.
- Step-by-step project plan 1) Gather a small hoop, fabric, a simple pattern, needle, and thread colors you love. 2) Mark the pattern on the fabric, secure in the hoop, and tighten until taut. 3) Start with a straightforward stitch, like backstitch or running stitch, following the outline. 4) Trim loose threads, tie off neatly, and remove from the hoop. Lightly press if desired. 5) Mount the hoop in a frame or hang as-is; add a mat for color pop if framing. 6) Display a few hoops together for a cohesive wall.
Remember, this simple project builds confidence and prepares you for bigger, bolder works. Embroidered Wall Art: Framing Your Hoop Like a Pro starts here—with steady hands and smart templates.
Hanging embroidered hoop tutorial and care
Hang with confidence and care for lasting beauty. Choose a wall anchor and method that suits the hoop’s weight and wall type. For light hoops, a small picture hook works; for heavier pieces, use appropriate wall anchors. Pair hardware with a wire or hanging screw set back from the hoop to keep sightlines clean. Rotate pieces to avoid uniform lighting and protect colors from direct sun. If you notice a snag or crease, handle gently with a soft brush. With a thoughtful hanging plan, Embroidered Wall Art: Framing Your Hoop Like a Pro feels casual, yet intentional in your space.
Choose anchors and hooks for your wall
Choose anchors that fit your wall type and the hoop’s weight. Start with a small picture hook for light hoops, upgrading to toggles or screws for heavier pieces. Test one hook in a hidden spot before committing. Aim for a slim gap between hoop and wall to reduce wobble. Painted drywall hides hardware better than brick, but brick can add character with proper anchors. A hanging method (wire or single screw) should allow minor tilt adjustment while keeping the piece centered at eye level.
Clean and store your embroidered pieces
Dust hoops gently with a soft brush or microfiber cloth, then store in breathable containers. Avoid plastic bags that trap moisture; use cotton storage sacks or airy boxes. If stacking hoops, place soft tissue between them to prevent color transfer. Store away from direct sunlight and high heat. When reusing, inspect stitches and tension, fix as needed, and rehang for a fresh wall moment.
Hanging checklist
- Confirm wall type and select appropriate anchors
- Measure and mark the hang height for your hoop
- Install the hook or screw securely and level
- Attach hanging hardware to the hoop and test weight
- Hang and adjust until perfectly level; review symmetry

I’m Sophie Caldwell, the author behind granaboom.com, and I believe hand embroidery is one of the simplest, most relaxing ways to create something beautiful with your own hands. I started this blog to help beginners learn hand embroidery without feeling overwhelmed by complicated instructions or “perfect” results.
Here you’ll find beginner-friendly guides to decorative embroidery stitches, along with clear step-by-step practice ideas and patterns you can use to build confidence. My focus is on making the learning process easy: simple explanations, helpful stitch combinations, and small projects that look polished even when you’re just starting out.
Welcome to granaboom.com—grab your hoop, choose a few colors, and let’s stitch one line at a time.