Cute Animal Embroidery Patterns: Free Printables for Beginners
Find Cute Animal Embroidery Patterns: Free Printables for Beginners
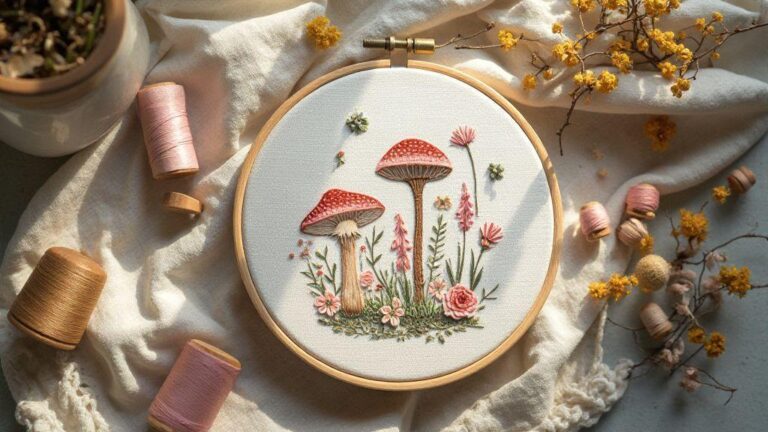
Embarking on embroidery is easier when you start with fun, friendly designs. Cute Animal Embroidery Patterns: Free Printables for Beginners are perfect for learning stitches without feeling overwhelmed. These patterns use simple outlines and cheerful characters, so you can practice backstitch, satin stitch, and running stitch while your project brings a smile. Start small with a tiny puppy or a sleepy cat, then level up as your confidence grows. The goal is steady practice, not perfection on day one.
As you explore, you’ll find many free printables come with helpful guides, like thread color suggestions and step-by-step instructions. Print them, tape them to your workspace, and keep a notebook for the stitches you try. When a pattern feels friendly and not flashy, you’ll stay motivated to finish and repeat. You’re building muscle memory with simple shapes first, then you’ll tackle slightly more complex animals.
Think about the end product too. A tiny bunny on a fabric coaster makes a sweet daily reminder of progress, while a chubby panda on a tote bag becomes a visible achievement. Keep several options on hand so you can swap when one project gets frustrating. With beginner-friendly patterns, you’ll see steady growth and enjoy every stitch along the way.
Where you can download embroidery patterns free
Free embroidery patterns live all over the web, and you can grab many in seconds. Look for sites offering single-page printables you can save as PDFs and print at home. Collections labeled for beginners are ideal for starting out. Bookmark trusted sources so you don’t have to hunt each time. If a site asks for sign-ups or shows too many ads, skip it and choose a cleaner option. Easy access helps you stitch more.
Many craft blogs share free templates paired with simple tutorials. They’re gold for beginners because they often include tips on thread weight, needle size, and fabric type. When you download, ensure the lines are bold enough to follow in a hoop. You want a pattern you can trace or print directly without extra steps. If color suggestions are included, great—you can try the palette or use your own.
Don’t overlook community sites or social media groups. Fellow beginners share free printables and progress photos, which can be reassuring and inspiring. If you’re worried about copyright, choose patterns clearly labeled for personal use so you can stitch at home freely.
How to pick kawaii animal embroidery patterns you’ll love
First, check the level. Look for beginner labels or patterns with large, simple shapes. If lines look wobbly in the preview, it isn’t for you yet. Choose patterns with one or two animals and minimal backgrounds. A clean design helps you learn stitches faster and feel proud of the finish. Your future self will thank you for matching patterns to your current skill.
Next, consider your project. Are you aiming for a small wall hanging, a patch, or a tote bag? The project guides the size and complexity. Favor patterns that fit your fabric and hoop size to avoid stretching. Think about color too—simple palettes are kinder to beginners and help you see how stitches behave with different threads. If a design offers options, start with the simplest version and add more color later.
Finally, trust your eyes and mood. If a cute animal makes you smile and you can picture it on your fabric, that’s a win. The right pattern should feel inviting, not demanding. If you dread a pattern, set it aside and pick one that sparks joy instead.
Quick tips to verify free printable embroidery patterns
- Check the source’s license: ensure the pattern is for personal use and free to download.
- Look for clear, bold lines in the preview for easy tracing.
- Confirm basic instructions or a link to a simple tutorial are included.
- Ensure the file is a printable PDF or an image you can print without distortion.
- See user feedback or comments that confirm others had a good experience.
Pick Easy Animal Embroidery Designs for Beginners
You’re starting your embroidery journey, so choose designs friendly to both your thread and nerves. Easy animal designs give quick wins and real confidence. Look for simple outlines, large color blocks, and lots of straight or gently curved lines. Think chubby cats, smiling dogs, or a curled squirrel. Favor designs with few colors and minimal shading to learn fabric handling, hooping, and stitching without overwhelm. The more you practice, the more your stitches become even and neat. Your goal is steady progress, not perfection on day one.
Focus on animals that show clear silhouettes and big, friendly eyes. A rounded head, simple body, and short legs are your best friends. Skip tiny details like whiskers for now. Your first projects should teach you how to anchor threads, manage tension, and keep stitches even. When you find a pattern you love, print it out and pin it to your fabric to study how the lines flow. You’ll be surprised how quickly you recognize easy curves and corners to stitch. Remember: you’re building muscle memory, not a masterpiece right away.
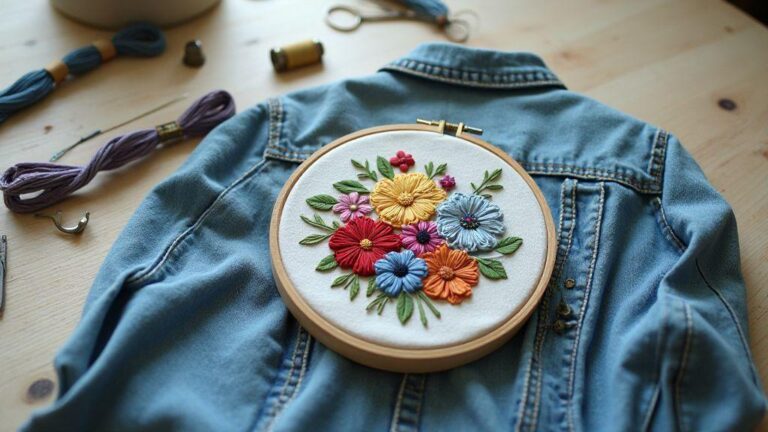
Consider how designs will look on items you actually use. A small animal on a pillow corner or a tote is a perfect test run. You’ll learn how fabric, hoop size, and thread choices affect the final look. Start with a single color or two—then add a second color once you’re comfortable. Each project will make your hand steadier and your stitches more uniform, boosting your confidence when you finish something you can show off.
How you spot simple shapes and few stitches
You’ll notice simple shapes in designs with big, bold areas rather than tiny details. Look for round heads, oval bodies, and straightforward legs. If the outline is a single continuous line or just a few segments, that’s your cue. Fewer stitches mean less tangling and more focus on even tension and clean finishes. Prefer designs with long, smooth curves over jagged edges to reduce the number of tiny stitches you chase later.
When scanning a pattern, check where color changes happen. Large color blocks teach you how to manage long runs of backstitch or fill stitches without pulling. If you see tiny, intricate details, skip them for now and mark the pattern to remind yourself to keep it simple. The goal is to understand the flow of the line first, then gradually add detail as your technique improves.
Start with printable animal embroidery templates for practice
Printable templates give you a clear guide before you pick up your needle. Print a few, choose your favorite animal shapes, and cut out the sections you’ll trace. Practice tracing lightly, then transfer the design to your fabric using your preferred method. Templates help you visualize stitch paths, so you’re not guessing while you work. As you gain comfort, switch to one-stitch blocks and follow the lines with a single pass for clean results.
Each practice run teaches you something new. If a line feels awkward, adjust your grip and slow down. Templates also let you compare different animals side by side, helping you pick easier shapes next. Save your favorite templates for repeat practice—the confidence grows quickly when you can pull out a familiar design and finish it with ease.
One-stitch projects to build your confidence
Start with a simple one-stitch project, like a single-color silhouette of a small animal. A straightforward backstitch or split stitch along a bold outline is enough to feel a meaningful accomplishment. Keeping the stitch count low helps maintain even tension and a flat fabric. When you finish, you’ll see how a clean line carries the whole design and gives you a quick win to fuel the next try.
After you nail the one-stitch project, move to a two-color version of the same animal. Use a single fill stitch for a solid area and a contrasting outline. It’s a gentle step up that stays within your comfort zone. Each completed piece proves your practice matters and that your hands can translate a pattern into a lovely fabric piece.
Gather Tools and Materials for Simple Embroidery
Embroidery starts with the right setup, and you’ll feel the difference as soon as your hands touch the fabric. Keep it simple, clean, and enjoyable, so gather a few basics first. Your toolkit should be easy to access at your workspace, a cozy setup that supports quick, happy stitching.
Choose reliability over fancy gadgets. A small, light hoop that fits your fabric, a sharp needle you’re comfortable with, and threads that glide without snagging are your best friends. Start simple and add bells and whistles later if you want. Your goal is steady practice, not perfection on day one. Joy comes from making and finishing something you’re proud of.
Organize your kit in a dedicated box or bag so you always know where everything is. This saves time and keeps your mood up, especially on days you just want a quick, cute project.
Needles, hoops, and beginner thread choices you need
You’ll want a few basic needles with smooth eyes and comfortable grips. Start with a small pack of assorted embroidery needles for different fabrics and stitches. A lightweight hoop is essential; it keeps fabric taut and stitches neat without pulling the material. Don’t over-tighten—just enough to remove slack and let your thread glide.
For thread, pick a beginner-friendly set. Choose cotton floss in a few favorite colors and a couple of metallics if you like a bit of shine. A simple 6-strand cotton floss, separated into six strands, works well for most beginner projects. You’ll find that split cotton gives you more control and avoids bulk in tight areas. Always pull threads gently to prevent frays.
Fabrics you should use with cute animal embroidery patterns
Natural fabrics like cotton or linen are ideal for beginners. They’re easy to pierce, hold stitches well, and wash up nicely. If you’re practicing, choose fabric that isn’t too slippery so stitches stay where you intend. A light-colored fabric helps threads pop and patterns stay visible.
Avoid highly stretchy fabrics at first; they can distort stitches. If you do use knits, add a stabilizer underneath. For tiny designs, a bit of backing or interfacing helps prevent puckering. As you gain confidence, you can experiment with different fabrics, but start simple and steady.
Must-have starter kit items for beginners
Keep your starter kit tight and focused. Include a small embroidery hoop, a few needles, a family of cotton floss colors, scissors, and a fabric marker for pattern transfer. Add a soft thimble if you need extra finger protection. A tiny pin cushion and a thread organizer help manage loose ends after each stitch.
Have a few ready-made goals—like a mini patch or bookmark—to stitch when you sit down. A simple storage bag labeled with its contents keeps you organized and eager for the next project.
Hands-On Projects Using Free Printable Patterns
Using free printable patterns makes crafting feel doable right away. You’ll work faster because patterns are ready to trace, cut, and stitch. This section explores hands-on projects that fit a busy weekend or a quick evening session. Choose something you can finish with supplies you already have at home to keep motivation high and results satisfying from the start.
Your projects become personal when you choose designs that speak to you. Printable templates allow you to scale, flip, or mirror patterns to fit different fabrics or surfaces. This isn’t about perfection; it’s about practicing a skill and watching your confidence grow with every stitch. You can mix patterns with small scraps to make something truly yours.
Keep your workspace simple and organized. A clean surface, a pencil, scissors, and a few colored threads or paints are enough to start. Printables save you from guessing, and you’ll see progress in real time as you complete each project.
You can make a small hoop art with printable animal templates
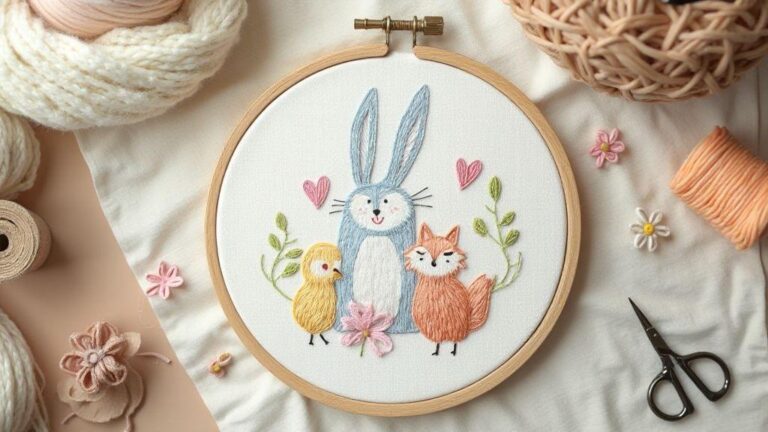
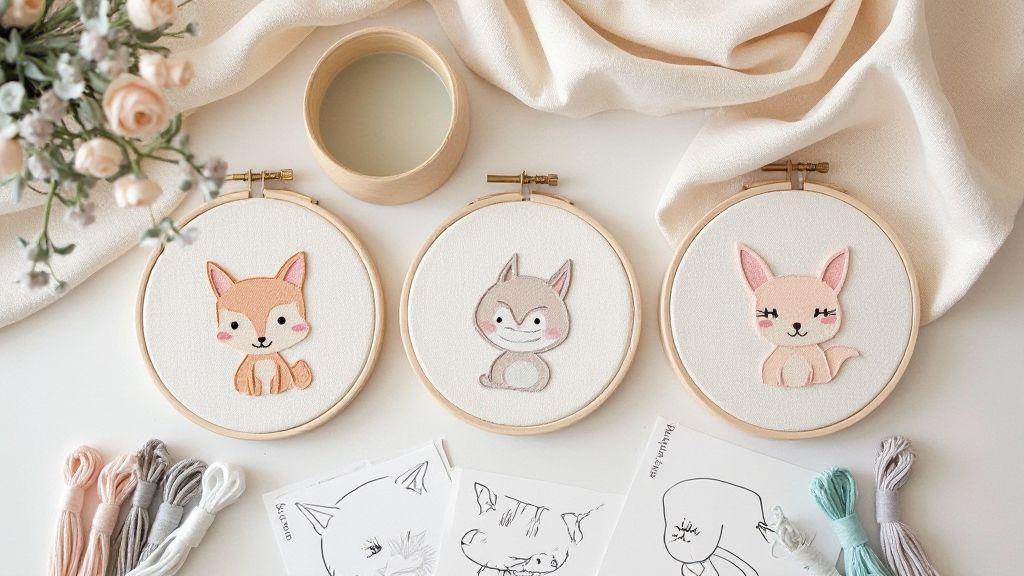
Begin with a tiny hoop art project using printable animal templates. Print a few designs on regular paper, then transfer outlines to fabric or felt by tracing. Clip the fabric in a small hoop and stitch simple shapes like circles and lines to form the animal. The goal is clean lines and confident stitches, not perfection. If teaching kids, let them pick a favorite animal and practice basic stitches like running stitch or backstitch to fill shapes. You’ll end up with a cheerful wall piece easy to gift or display.
Choose patterns with bold, chunky shapes for easier tracing and stitching. If a pattern is too detailed, resize it larger before printing. Use a contrasting thread color so stitches pop. Finish with a simple felt backing and a ribbon loop for a polished display.
Simple embroidery patterns for kids you can teach
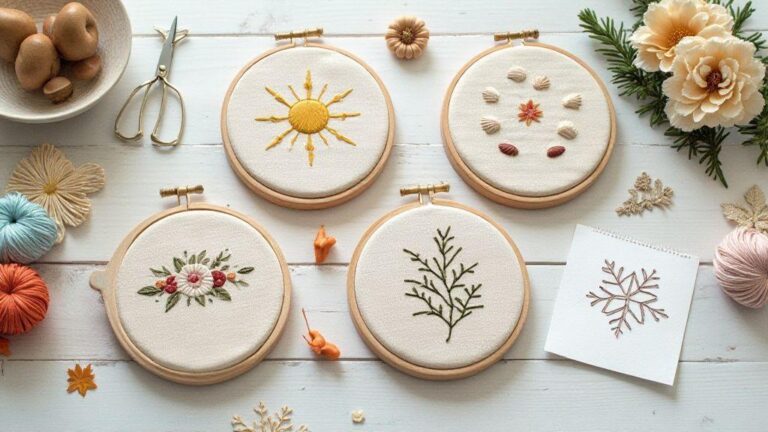
These patterns are great for teaching kids and beginners. Start with big, friendly shapes like hearts, stars, or a sun, then add simple stitches such as backstitch for outlines and satin stitch for fills. Guide kids on safe needle handling and keeping stitches even. Printing a few templates lets you switch activities if one feels tricky. Kids love seeing their art come to life on fabric, and you’ll hear proud I did it! when they finish.
Encourage kids to choose colors they love. Bright threads make the project feel magical and keep motivation high. If frustration grows, switch to a simpler pattern or take a short break, then return with a fresh mindset. The goal isn’t speed; it’s confidence. Each completed shape reinforces measuring, tracing, and careful stitching basics that carry to bigger projects.
Step-by-step mini project you can finish in an hour
- Print a simple animal silhouette and two companion shapes on your material.
- Trace the shapes onto fabric, then cut them out with a small margin.
- Pin the shapes inside a small embroidery hoop and start with a bold backstitch around the edges.
- Fill the shapes with a basic satin stitch or running stitch, keeping stitches even and relaxed.
- When you’re happy, tie off the thread, trim excess, and add a back fabric piece or small hanger.
This mini project can be completed in about an hour, giving you a quick win that boosts confidence. It’s a perfect starter for Cute Animal Embroidery Patterns: Free Printables for Beginners and a gentle introduction to layering textures. You’ll feel ready to tackle bigger patterns next, while staying organized and enjoying the process.
Transfer and Print Templates Safely and Easily
Printable templates should feel straightforward. Keep fabrics clean, lines sharp, and the project moving smoothly from screen to stitches. In this section, you’ll learn how to print and resize patterns so they fit your project exactly, without guesswork or blurred edges. With the right steps, you’ll turn a digital design into neat stitched reality you’re proud of, every time.
Protect your fabric and wall art with practical tricks. Printing at the correct scale prevents surprises like a tiny squirreler or a bear overflowing a quilt block. Stay consistent with paper size, print settings, and grid references. By the end, you’ll feel confident choosing the right template for any project and keeping prints crisp from page to fabric.
Practice makes perfect. Start small to nail transfer, then scale up to bigger pieces. You’ll see clean lines, accurate shapes, and minimal distortion. Cute Animal Embroidery Patterns: Free Printables for Beginners can be your map, turning those pages into beautiful stitch work quickly.
How you print and resize printable animal embroidery templates
Select a template that fits your fabric size and hoop. Ensure the design is at the right resolution so lines print boldly. Print at 100% scale and compare with your hoop. If you need to resize, do it before printing to avoid blurry edges. Print a test page on regular paper to gauge how the pattern sits on your fabric and adjust as needed.
Set your printer to the correct paper size and orientation. Use standard letter or A4 sheets to keep things simple. If the design uses a grid, print with a light grid overlay to help place stitches precisely. When you’re happy with the size, print the final copy on smooth paper for easier tracing. If printing color blocks, grayscale can save ink while preserving linework. Cut around the design with small borders to align precisely on fabric. Keep a spare copy in case you need to re-trace or re-transfer.
Transfer methods you can use: tracing, iron-on, wash-away pens
Tracing is the simplest and most beginner-friendly method. Place the template under the fabric or on a light box, and trace the lines with a pencil or erasable pen. It’s forgiving and quick, ideal when you’re learning stitch placement.
Iron-on transfers give a neat, fixed guide. Print or cut the template, place it face-down on fabric, and press with a hot, dry iron. Some inks transfer well, others require a special pen or sheet—follow product instructions. Once transferred, you can stitch over the lines or remove the backing if needed. This method works well for bold, solid-line patterns.
Wash-away pens offer precise, temporary marks. Draw the design on fabric, stitch over the lines, then wash away the marks. This keeps fabric clean and stitches crisp, especially for intricate or multi-color projects.
Best printing tips for clear free printable embroidery patterns
Aim for clear lines and accurate placement. Use high-contrast paper for easy tracing, print at actual size, and test with a small print to verify scale. If lines blur, switch to a sharper print mode or use thicker paper for the template. A steady hand when tracing helps keep lines continuous and ready for stitches, especially on tight curves. Bold, consistent lines are your friend here.
Finish, Care, and Share Your Cute Animal Embroidery
Finish strong by sealing edges, backing, and choosing a display method that fits your project. Your goal is clarity and charm—so keep things simple and sturdy. When you finish, share your progress with friends or a small online group. Care now means longer joy later, and your Cute Animal Embroidery Patterns: Free Printables for Beginners deserve a bright life.
Your printable patterns are beginner-friendly, yet developing a routine helps. After you complete a piece, trim loose threads and gently wash the fabric to remove oils. Let it dry flat, then press with a light iron using a clean pressing cloth. This keeps colors crisp and stitches smooth. Choose a display that matches your style—framing, a hoop, or a tablet sleeve—so your work shines and invites compliments.
Share your work with honesty and warmth. Post a photo with a note about the technique, what you learned, and which pattern clicked for you. Your story helps others dive into Cute Animal Embroidery Patterns: Free Printables for Beginners, and your tips can save them time. Celebrate every tiny milestone, because your progress might inspire someone else to start stitching too.
How you wash and press hand embroidery animal patterns
Washing protects stitches and colors. Uselukewarm water and mild detergent, avoid harsh chemicals. Soak briefly if dusty, then rinse gently. Treat your work like a keepsake, not a t-shirt. Lay flat to dry for best shape retention.
Pressing helps keep lines clean. Turn the piece face down, place a clean cloth over it, and press with a warm, not hot, iron. For stubborn creases, a short cool press in small sections works best. No heavy steam—the goal is smooth stitches and neat edges. If using printable fabric with light ink, set the print with gentle heat fix first, following the printable’s instructions, and test a small corner.
Your aim is to retain the same soft texture you started with and avoid puckering or color bleed.
How you frame or gift your beginner-friendly embroidery printables
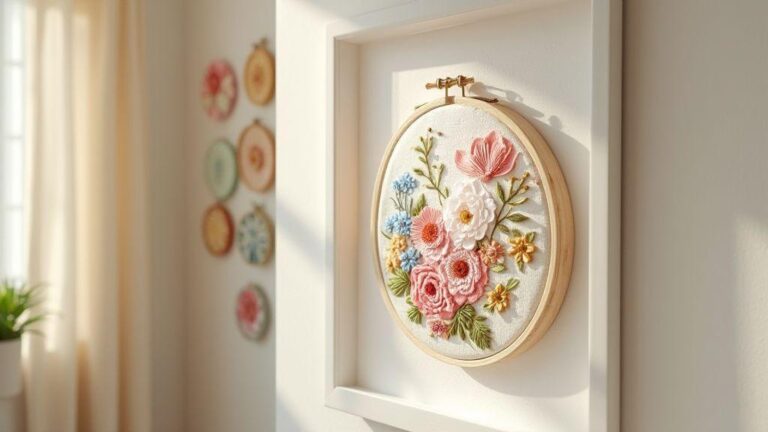
Framing makes a big impact with little effort. Choose a frame that suits the piece and a matte that doesn’t crowd the image. A simple black, white, or wood frame can highlight your work without stealing focus. If you prefer a casual look, use a small embroidery hoop with the print stretched into a frame for a ready-to-hang vibe. Your goal is to present Cute Animal Embroidery Patterns: Free Printables for Beginners in a way that honors the stitch work and keeps the animal character front and center.
Gifting isn’t just about the piece—it’s the story you include. Add a short note about the pattern, the stitches you used, and how you felt during the process. A friendly tip or two can spark future projects for your recipient. If you’re giving as a card insert, mount the fabric on a stiff backing and frame simply. Your thoughtful presentation makes the gift personal and special.
Simple steps to protect and display your work
Protect your work by keeping it away from direct sunlight and moisture. Hang or store it in a cool, dry place, and consider a UV-protective frame to keep colors from fading. A lightweight display like a finished hoop preserves texture while looking neat. When not on display, store your piece in a breathable fabric bag to prevent dust buildup.
Display with intention. Group a few pieces in a cozy corner, or rotate your work seasonally to keep your space fresh. For a quick win, place your embroidery on a small easel or shelf where curiosity meets admiration. Your display should invite you to pause, smile, and think, I made this with my own hands.

I’m Sophie Caldwell, the author behind granaboom.com, and I believe hand embroidery is one of the simplest, most relaxing ways to create something beautiful with your own hands. I started this blog to help beginners learn hand embroidery without feeling overwhelmed by complicated instructions or “perfect” results.
Here you’ll find beginner-friendly guides to decorative embroidery stitches, along with clear step-by-step practice ideas and patterns you can use to build confidence. My focus is on making the learning process easy: simple explanations, helpful stitch combinations, and small projects that look polished even when you’re just starting out.
Welcome to granaboom.com—grab your hoop, choose a few colors, and let’s stitch one line at a time.