Needle Painting Flowers: A Beginner’s First Project
Materials for Needle Painting Flowers
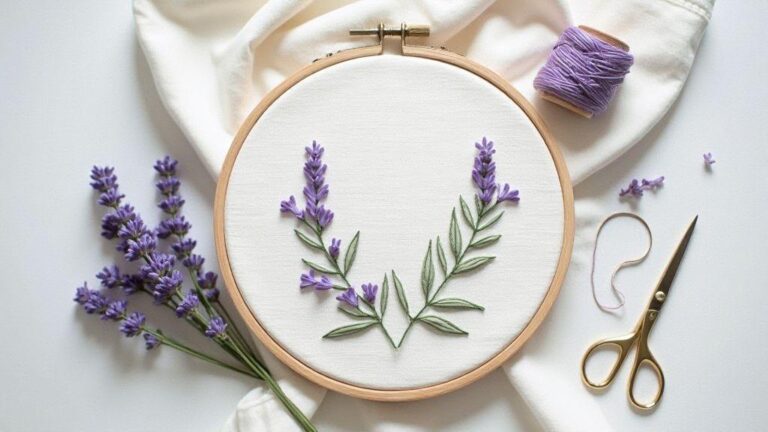
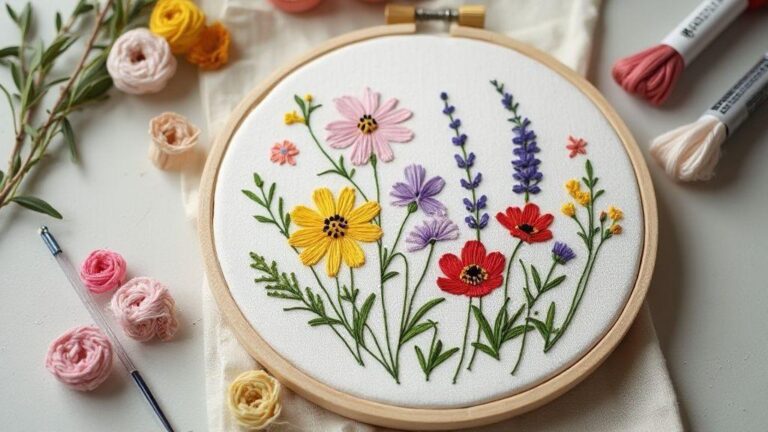
When you start Needle Painting Flowers: A Beginner’s First Project, the right materials make all the difference. Choose supplies that are easy to handle, reliable, and forgiving as you learn: smooth threads that glide through fabric, a hoop that holds steady, and colors that blend like real petals. The goal is control and comfort, not a battle with tangled floss.
Fabric choice matters as much as threads. Opt for a smooth, even-weave fabric like linen or high-count cotton that lets each stitch sit neatly. The weave should be tight enough to prevent color bleed but not so tight that the needle struggles. Threads should be colorfast and soft, and keep a color wheel in mind for subtle shade shifts that create light and depth. The right fibers can help petals glow or make the piece look flat.
You’ll want a small, sharp needle that fits comfortably in your hand and slides through fabric with ease. A range of thread weights builds dimension—finer threads for the center, bolder ones for outer petals. Include embroidery scissors, a water-soluble pen, and a needle threader for prep. A soft thimble saves fingertips during long sessions, and a bright but gentle light helps you see stitch direction and color transitions clearly.
Materials for Needle Painting Flowers
Before you begin, gather your primary supplies so you’re not hunting for tools mid-stitch. Use a reliable embroidery hoop that fits your fabric, a smooth needle plate, and a neutral workspace. Your color palette should cover pinks, peaches, greens, and a few earth tones for stems and leaves. Start with a core set that blends well and add a few highlights for depth. Keeping colors organized in labeled containers helps you grab the shade you need quickly, especially for subtle petal shading.
Threads should be mercerized or cotton with a soft sheen so light catches the stitches nicely. Use short, tidy lengths to prevent fraying. Metallic or satin threads can add dewdrop glints or edge highlights, but reserve them for accents so the main stitches stay smooth. A clean, lint-free surface keeps fabric free of fuzz that dulls the sheen. If a color doesn’t blend smoothly, swap it for a warmer or cooler shade until the gradient feels natural. The aim is gentle layering, not loud color.
You’ll also need basic setup tools: a fabric pen or chalk for guidelines, a small ruler or needle gauge for even stitches, and a water-soluble marker for temporary guides you can erase later. For cleanup, have a lint roller or soft brush to remove stray fibers without disturbing work. The right toolkit reduces frustration and helps you shape each petal with confidence.
Set Up Your Hoop and Workspace
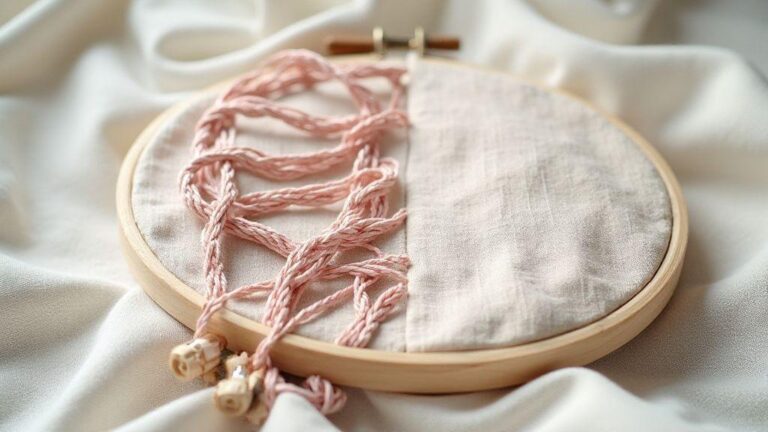
Your hoop should feel like an extension of your hand—secure but not tight. Place fabric between the inner and outer rings and tighten gradually, checking that the weave lies flat. If you notice puckering, loosen and recenter. A clean, flat workspace is essential; clear clutter so you can move freely without snagging threads. Position your dominant hand closer to the needle path to minimize wrist strain.
Lighting matters. Use a bright lamp at eye level to reduce shadows and reveal subtle color differences. If near a window, balance daylight to keep thread colors true. A small tray helps organize color changes, and a cover keeps stray threads from drifting onto the project. Practice a few inch-long stitches on scrap fabric to test tension and flow before you start the real piece.
Basic Stitches to Paint Petals
You’re about to turn threads into petals you can feel. Start with a clean hoop, smooth fabric, and a fresh needle. Stitch as if you’re coloring with thread, imagining light and depth in every pass. Focus on smooth, even stitches and how the thread rests on the surface. With practice, your petals will acquire life and subtle shading.
Combine reach and control by using short, curved lines to outline a petal and then fill with gentle, overlapping stitches. Thread density affects brightness and shadow, so keep tension steady to avoid puckering while ensuring the color stays in place. The goal is petals that glow softly, like morning light on a garden.
As you gain confidence, experiment with color layering. Start with a pale base and add darker edges for depth. Rest your hand and take breaks—fresh eyes make edges crisper and more defined. Your own style will emerge as you transform simple stitches into a bouquet you can wear.
Needle Painting Stitches for Flowers
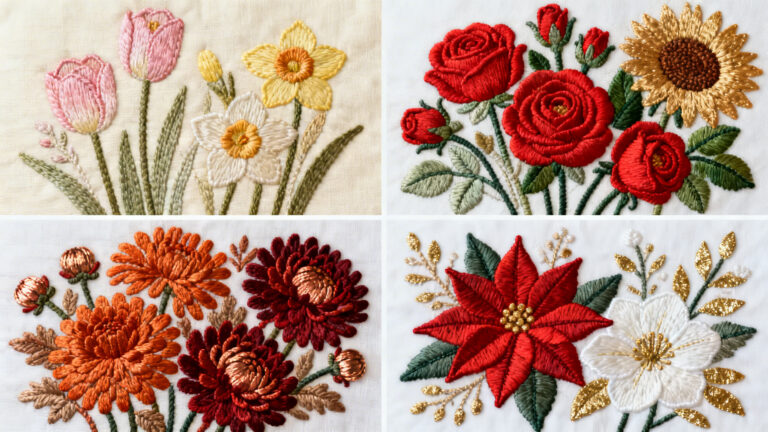
Needle painting stitches add depth through careful shading. Begin with a light base, layer mid-tones, and finish with the darkest edges for contrast. Transitions should be smooth; you want colors to fade softly, not jump. Place strokes to make petals look rounded and alive.
Think in tiny sections: long, flowing stitches for surfaces, short stitches for tiny highlights. If a boundary line looks harsh, soften it with a few extra stitches of the surrounding shade. Practice on scrap fabric, mixing tones until you’re satisfied. Layering tones and keeping the grain direction and petal curves in mind will give your flowers dimension, almost as if you could lift a petal from the fabric.
How to Form Long and Short Stitches
Long and short stitches create texture and depth. Start with a plan for where light hits and how shadows fall; long stitches form soft gradients, short stitches fill in details or create veining. Keep needle moves deliberate and tension steady to avoid loose spots. Alternate lengths to mimic natural petal ripples. If a line is too abrupt, blend with neighboring stitches by extending the edge with longer passes. Vary stitch length within a single petal for a more organic look.
Practice Stitch Exercises
Try these Practice Stitch Exercises on a small leaf or single petal, then repeat with slight color changes. Focus on smooth transitions and even tension. Set a timer for short sessions and rotate through long stitches, short stitches, and mixtures. Each round builds muscle memory, helping you stitch faster and more cleanly.
Flower Needle Painting Patterns for Beginners
You’re embarking on a gentle, rewarding path with Flower Needle Painting Patterns for Beginners. Look for patterns that are friendly to new stitches but still yield lush results. Start with patterns that use a limited color palette and clear outlines—large, uncomplicated shapes are best to begin. Layer color slowly and keep notes on what’s tricky and what helps. With practice, your stitches will be steadier, your color choices more confident, and your finished pieces polished enough to gift or frame.
Simple Needle Painting Flower Designs
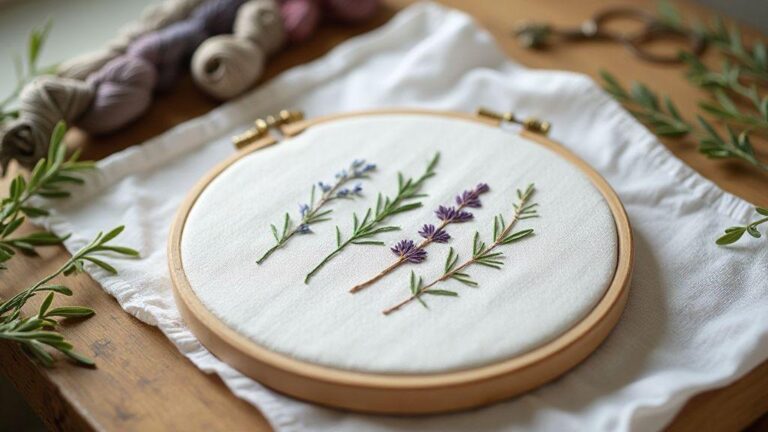
Choose designs that emphasize soft color transitions and clear shapes. Start with a daisy or tulip outline, using a pale base color and a slightly darker shade to build the first layer. Add tiny, tight stitches along the shape to suggest curvature, then some longer stitches inside for depth. Don’t rush—let each stitch settle. As you gain comfort, layer another color for subtle shading to make petals look rounded.
Try a simple sunflower or carnation next. Use short, parallel stitches for petals and a few longer accents near the tips to catch light. A touch of black or brown in the center anchors the flower, while a dab of white or cream on petal tips creates a natural highlight. The aim is a readable, balanced design that remains approachable for beginners.
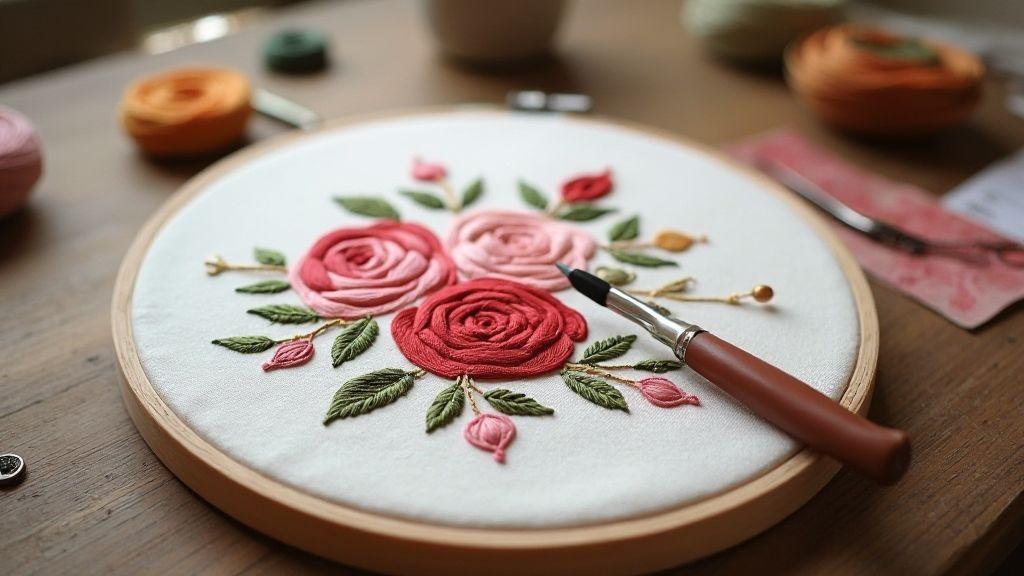
How to Needle Paint Roses for Beginners
Roses can seem daunting, but break them into simple moves: a rounded core, several soft outer petals, and a gentle gradient from shadow to light. Start with a circular center in a deep tone, then lay short, curved stitches radiating outward, following the petal curves. Vary stitch length and direction to mimic natural growth; longer outer edges give a curling effect. Use lighter highlights along the top edges to show light.
Don’t worry if petals aren’t identical—roses are imperfect in a beautiful way. Focus on the overall shape and the soft color transitions. Blend two or three hues per petal: start with a mid-tone, then add light and dark at the edges. If a petal feels stiff, loosen your grip and rework the edge to curve more naturally. With patience, beginner roses will read as lush blooms.
Pattern Sizing Tips
When sizing your pattern, consider how visible you want the final piece to be. Start small to build accuracy, then scale up as control improves. Adjust stitch density: more stitches yield richer color; fewer stitches keep things light. You can crop or trim later if placement changes.
Weigh the fabric weave and thread thickness: tight weaves with finer threads show more detail and require sharper, shorter stitches. Looser weaves permit longer stitches to fill space quickly. Test colors on a scrap first to see how they blend and how stitches look after washing and pressing. For beginners, try printing or tracing at 50% or 75% of the original size; as you gain confidence, move toward 100% or adjust proportions to fit your project.
Step by Step Needle Painting Flowers
Transfer a Pattern and Plan Colors
Transfer the pattern to fabric with a light map of color choices. Pin the pattern, outline main shapes with an erasable fabric pen, and keep lines thin. Plan a small palette of light, mid, and dark values for each flower part. Test color blends on scrap fabric so you’re not guessing later. Map highlights and shadows to help your needle work feel alive.
Layer Threads to Build Depth
Think in layers: a light underlayer for shape, mid-tones, and a thin darker edge to define form. You’ll often mix two or three shades in a petal for smooth gradation. Don’t rush transitions; tiny, careful stitches produce realistic petals. Layering can create a watercolor-like blend; add a few metallic threads for subtle highlights, but keep them restrained to avoid shouting.
Timing and Pacing
Pace matters as much as technique. Stop every few stitches to assess edges and softness. Maintain a steady rhythm and even tension. If you rush, petals may look stiff; slowing down helps you re-thread or rework tricky sections. Think of it as watercolor painting in thread—build slowly, layer by layer, to achieve a natural flow that aligns with Needle Painting Flowers: A Beginner’s First Project.
Tips for Your Beginner Needle Painting Project
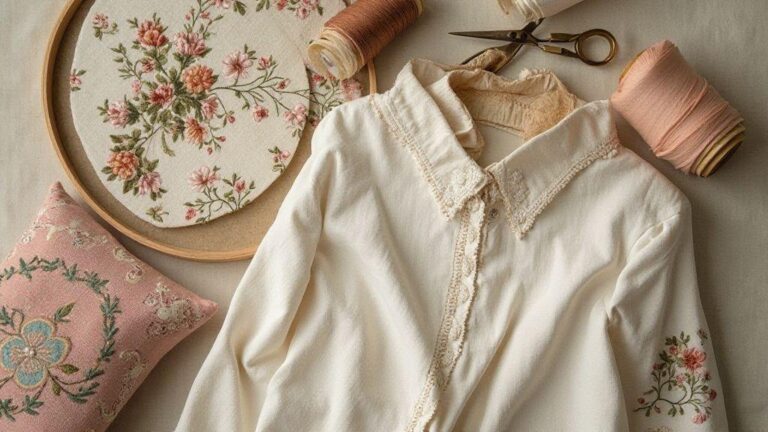
Your first project should feel rewarding, not overwhelming. Start with simple shapes and soft blends, letting satin and long stitches guide you. Keep fabric taut, eyes relaxed, and focus on each stitch’s direction. Choose a calm design and a comfortable hoop so your hand doesn’t tire before you finish.
Materials matter as much as technique. Use a high-quality cotton or linen that doesn’t fray easily, and a smooth, medium-weight thread. Start with a small color set that blends well—light, mid, and dark shades for each area. Keep stitches even by aligning the needle with the fabric grid, and avoid rushing. Test colors on scrap first, then plan their use on the project to see how they blend in real light. A calm plan and steady hands make your Needle Painting Flowers: A Beginner’s First Project more approachable.
As you progress, you’ll notice how tension shapes each petal and leaf. Accept a few imperfect stitches at first; the goal is even, smooth coverage. Take short breaks if your eyes feel strained, and pause to clean your needle and hoop before moving to a new color. Growth comes from practice, not perfection—celebrate small wins, like neat outlines or clean blends on a single petal. With patience and steady hands, you’ll turn a simple canvas into a living bouquet you can treasure.
Needle Painting Tips for Beginners
Start with a few basic stitches: long and short for shading, satin for petals, and a fine stem stitch for lines. Practice on scrap cloth until the thread flow is smooth. Map color placement in advance with a quick sketch or reference photo to guide light, mid, and dark areas. Aiming for soft transitions rather than abrupt changes helps colors read naturally.
Keep tension even without over-pulling, which can cause puckering. If a stitch sits uneven, lift, reposition, and resew. Use a single direction for each area to maintain cohesion. Practice color blending on a separate sample, layering colors in translucent increments to mimic natural shading. Protect your work with a clean cloth when not stitching.
Fix Common Stitch and Tension Issues
If stitches are uneven, check grip and posture. Sit straight, relax shoulders, and hold the hoop steady with your non-dominant hand while guiding the needle with your dominant one. Rework gaps by lifting thread ends and resewing with a smaller bite. If the fabric pucks, loosen your grip; if stitches are too tight, ease off and let the thread settle. A simple test is to press gently with a finger under the work—if it springs back evenly, you’re on track.
Finish and Display Your Floral Work
A finished piece deserves a show–worthy presentation. Give the back a light press to set stitches, then trim stray threads close to the fabric. A thin batting behind the work adds body without bulk, helping it hang flat. Mount or frame with a simple mat that complements thread tones to make the stitches pop.
Choose a hanging method suited to fabric and weight. Lightweight pieces can rest in a shallow frame or on silk backing for a floating effect; heavier pieces benefit from a rail or tab frame. Lighting changes the display—angle to catch the sheen and texture of the stitches. If you plan to gift or sell, add a small label with the project name and date. When handling for photos, keep hands clean and work on a smooth surface.
Thread Painting Floral Tutorial for Final Steps
Wrap up with crisp finishing steps. Check each petal edge and tighten any loose stitches, blending flat spots by lifting and blending threads. A light spray of fabric-safe wrinkle remover can help, but test on scrap first. Back the piece with stable fabric or light interfacing to prevent sagging, trim backing neatly, and mount on a lightweight board. If framing, consider a simple border to keep focus on the floral details. When you’re ready, your Needle Painting Flowers: A Beginner’s First Project is ready to be admired.
Needle Painting Flowers Tutorial for Framing
Framing brings your work into the spotlight. Choose a frame that complements your palette; darker woods can make reds pop, while lighter frames suit pale pinks and greens. Use a soft neutral mat to prevent color clashes with the stitches. Secure the piece to mounting board with acid-free adhesive and center it. A thin edge border helps draw the eye to the floral details.
Hang with a sturdy hook or wire that supports weight without warping. If you want flexibility, mount on foam board to swap finishings or rotate pieces. A well-chosen frame elevates your work, turning a simple floral study into a centerpiece that sparks conversation about your craft.
Needle Painting Flowers: A Beginner’s First Project is your gateway to a patient, rewarding stitching journey.

I’m Sophie Caldwell, the author behind granaboom.com, and I believe hand embroidery is one of the simplest, most relaxing ways to create something beautiful with your own hands. I started this blog to help beginners learn hand embroidery without feeling overwhelmed by complicated instructions or “perfect” results.
Here you’ll find beginner-friendly guides to decorative embroidery stitches, along with clear step-by-step practice ideas and patterns you can use to build confidence. My focus is on making the learning process easy: simple explanations, helpful stitch combinations, and small projects that look polished even when you’re just starting out.
Welcome to granaboom.com—grab your hoop, choose a few colors, and let’s stitch one line at a time.