Water-Soluble Pens: Which Brand Is Best for Embroidery Transfers?
Water-Soluble Pens: Which Brand Is Best for Embroidery Transfers?
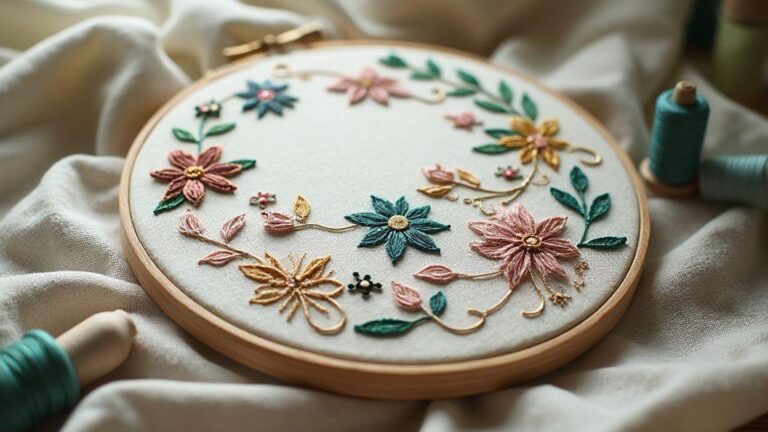
You want clean guides for embroidery transfers, and the right water-soluble pen makes that easier. Brands vary in how they write on fabric, how quickly they fade, and how they wash out. This guide helps you spot reliable options, what to look for, and how to choose the best pen for your project. By the end, you’ll feel confident selecting a pen that delivers crisp lines without leaving marks after washing.
Top Water-Soluble Pen Brands for Embroidery
When you start, you’ll test a few brands to see which lines transfer best onto your fabric. Look for smooth writing, water washout, and minimal ghosting. Some brands shine on light fabrics; others work well on dark or patterned textiles. Consider your project—simple monograms or complex designs—and pick a brand that matches your needs. Look for pens that dry quickly and don’t smear as you trace. Many top brands offer multiple tip sizes, with fine tips for delicate details and broader tips for larger designs. Some pens come with replaceable ink refills or fabric-safe solvents for stubborn spots after transfer. For thin fabrics, choose fast-drying pens to avoid smudges. Beginners should start with a well-reviewed brand that has clear instructions and forgiving washout.
What You Need to Check in a Brand
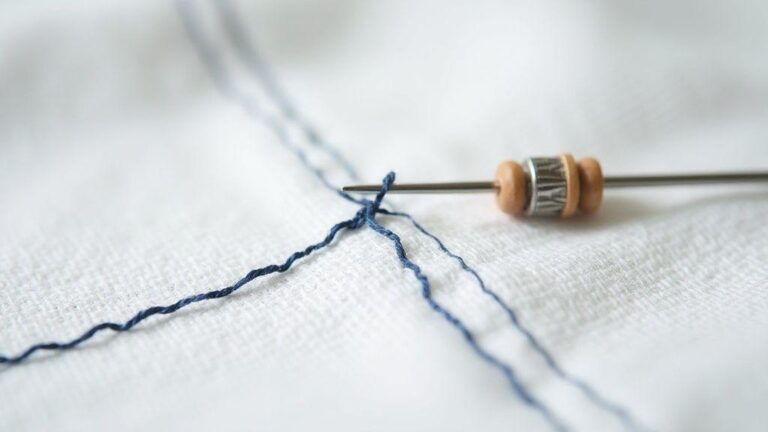
Examine how easy it is to see the ink on fabric, how quickly it dries, and how well it washes out. Check the label for wash-out guidance and whether the ink works on your fabric color, since some inks show up best on light backgrounds. Look for ink that washes out with water without harsh solvents or extra steps, and consider compatibility with your embroidery hoop or stabilizer to avoid smudges along hoop edges or transfer lines. A key factor is how vibrant the lines stay before washing; you want clear guides without being permanent until you wash them out. Check for non-toxic, fabric-safe ink and easy-to-clean tips, and read reviews about real washout results.
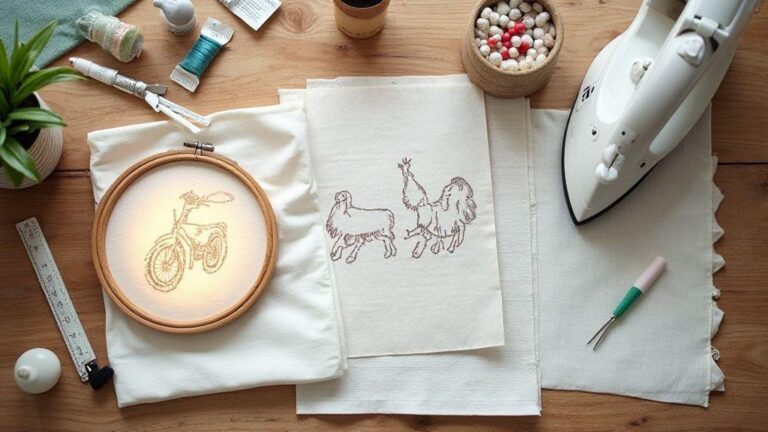
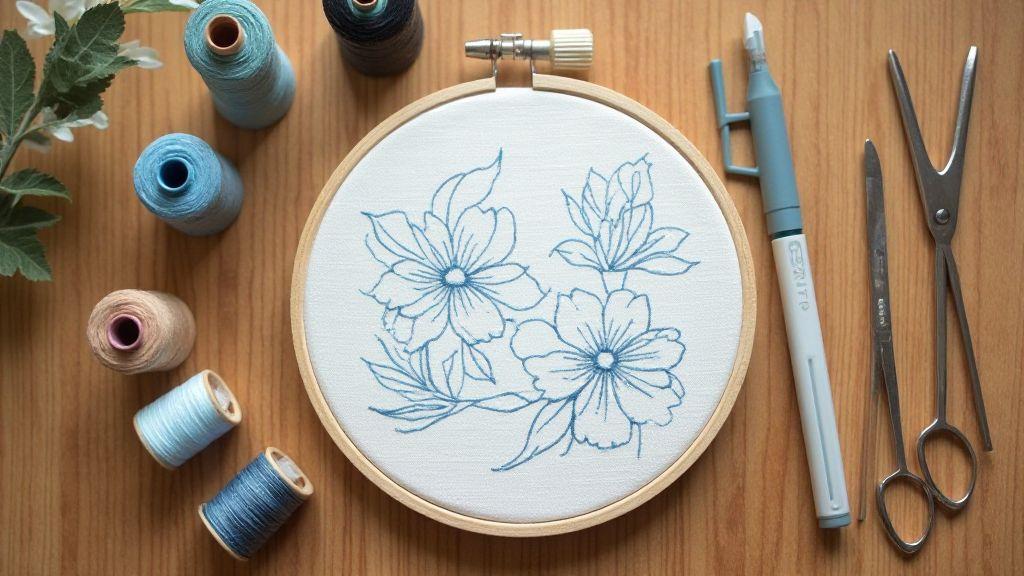
How to Transfer Embroidery Designs with Water-Soluble Pen
You’re ready to bring a design from paper to fabric. The right pen lines glide smoothly, giving you a clean guide for stitches. Match the pen to your fabric type and embroidery method so the guide stays visible without bleeding or smearing. Start simple to test ink behavior on your fabric, then move to a more detailed design. Keep the lines light and precise; you want them visible while stitching but easy to wash away later. If you’re marking tiny details, use a fine tip or a washable stabilizer to prevent ink from wicking through. Practice on a scrap first to confirm visibility and washout before tackling the real project.
Step-by-Step Tracing for Beginners
- Print or trace your design onto thin paper that matches your project size. Place it on fabric over a stable surface and keep the fabric taut.
- Trace slowly with a steady hand to create even lines you can follow with your needle. If you slip, retrace the section.
- Choose a pen with the right tip size: a bolder outline for you, or a micro-tip for fine details. Draw major lines first, then inner details. Don’t press too hard; you want a visible guide that washes away later.
- Lift the paper carefully to avoid smudges and check lines from different angles to ensure you didn’t miss curves.
Tips to Keep Lines Clear for Your Transfer
- Keep the fabric clean and flat; use a hoop or frame to tension the fabric.
- Control pen pressure to avoid thick lines or faint marks. If a line looks faint, retrace with a steady hand.
- Test marking on a corner first to learn how your material responds. If you see blotching, switch pens or adjust technique.
Removing Marks Safely
Dampen a clean cloth with cool water and gently dab the fabric. If marks linger, use a mild detergent or a small amount of embroidery-safe stain remover, then rinse. Avoid rubbing too hard. Air dry away from direct heat. If faint lines remain after washing, re-dampen and wipe again. A clean fabric provides a solid foundation for neat embroidery.
Pick the Best Water-Soluble Pens for Embroidery by Fabric
When you start embroidery, the right transfer pens make your design easy to stitch. You want pens that glide on fabric, wash out cleanly, and don’t leave stubborn marks. Your choice should fit your fabric type, the look you want, and how easily you can erase or remove lines later. Think of these pens as the map for your stitches—clear, precise, and easy to follow.
You’ll find pens that work across fabrics, but being specific helps. For cotton, linen, and delicate blends, water-soluble options that disappear with water or a gentle rinse are ideal. For dark or patterned fabrics, you might prefer pens that leave faint lines or use contrasting colors that you can see yet still wash away. The aim is embroidery that shines, not the marks.
Choosing the right pen also means considering your project timeline and laundering. If you wash often, pick a pen that fully disappears after a light wash. For very light fabrics or tight stitching, you’ll want stronger visibility during stitching with clean removal afterward.
Best Pens for Embroidery Transfers on Cotton
Cotton is forgiving, but you still need a pen that shows up well and washes out. Look for water-soluble pens that write smoothly and produce crisp lines without overpowering stitches. A fine tip helps with delicate details, while a slightly lighter line keeps your eyes at ease as you sew. Test on a scrap first; if lines fade too quickly or last too long, adjust. Many embroiderers prefer a light blue line that disappears with a quick rinse; on white cotton, a light gray can keep stitches visible.
Washable Fabric Markers for Embroidery Tracing on Delicate Fabrics
Delicate fabrics like chiffon or silk blends require markers that won’t soak in or leave ghost marks. Choose markers labeled for delicate fabrics with quick-drying ink to prevent smudging during stitching. Look for markers that mark clearly under light and wash away with cool water or a mild wash. Fine tips help preserve small details, and quick-drying ink reduces smear risk.
Test on Scraps Before You Trace
Always test on scraps that match your fabric. Draw a line, stitch over it, then wash or rub to see how it behaves. If the mark resists washing, you’ll need a different pen. If it vanishes too quickly, switch to a stronger option or adjust your stitching tempo. Keep a small test piece handy for each new fabric or project to avoid costly mistakes.
Sewline Water-Erasable Pen Review
You’re looking for a tool that helps plan stitches without leaving lasting marks, and the Sewline water-erasable pen is a popular choice. Its fine tip lets you draw precise lines, and the ink vanishes with water. The pen is lightweight and comfortable for longer sessions, making it a practical option for beginners.
Sewline offers color options, with white and blue providing strong contrast on light fabrics. Marks fade quickly when dampened, and the pen travels well in a small kit for classes or workshops. If you’re comparing pens, consider how easy it is to erase versus how long lines stay visible. For simple projects, it delivers clear guides, easy erase, and a comfortable grip. It’s not flawless—some fabrics hold marks longer, and stubborn lines may require a gentle rinse.
How Sewline Erases from Fabric
Sewline erases best with a light touch. A quick rinse under cool water usually lifts the marks, while a gentle blot helps prevent smudging. On tightly woven or darker fabrics, you might need a mild soap and a second rinse. Test a small corner first to learn how your fabric responds.
Erasing is relatively quick, but you may need a second rinse or gentle wipe on some fabrics. Heat or direct sun can make marks linger, so keep the project out of bright light while working. On delicate or light fabrics, the ink often disappears without a trace.
Pros and Cons You Should Know
Pros: precise lines with a fine tip, quick erasing via water, minimal residue on many fabrics, comfortable grip, visible lines on light fabrics. Cons: some fabrics show marks longer; you may need extra steps for delicate or dark fabrics. The erase process isn’t always instant, and on heavy-duty fabric marks can be stubborn.
When Sewline Works Best
For simple projects on light fabrics, the fine tip supports clear, small lines and makes re-marking easy. It’s great for lots of tiny details and for re-marking as you go. If you’re attending a class or workshop, Sewline’s marks erase easily, letting you reuse fabric. For dark or busy fabrics, consider a lighter or brighter ink color to keep lines visible before stitching.
Clover Water-Erasable Marker Embroidery and Dritz Washout Fabric Marker Review
You’ll compare Clover water-erasable markers and Dritz washout fabric markers to see which better suits your embroidery transfers. Both leave a temporary guide you stitch over before removing. Clover tends to erase with water quickly, leaving minimal residue on natural fabrics. Dritz washout markers can be slightly bolder in line and hold up well during stitching, leaving no stubborn residue after a wash on most fabrics.
Clover Water-Erasable Marker Embroidery Features
Clover markers are designed to vanish with water, offering steady ink flow and a precision tip for fine guides. They’re generally gentle on natural fabrics, with lines that disappear quickly when rinsed. On lighter fabrics, visibility is strong; on darker fabrics, you may need a test swipe or a contrasting guide. Clover markers are beginner-friendly, stay visible long enough for planning, and don’t tend to bleed beyond lines. Storage is easy, and they’re reliable for practice sessions.
Dritz Washout Fabric Marker Review Highlights
Dritz markers also wash out with water but can feel a touch different in the hand. The tips may produce a slightly bolder line, helpful for beginners who want a visible guide that won’t vanish before you finish stitching. They tend to hold up well during stitching and erase cleanly on many fabrics. They work across cottons and blends, with durability in the marker body and helpful replacements or refills.
Choose the Right Marker for Your Project
When choosing, consider fabric color, stitching density, and how quickly you want to remove marks. For light fabrics, Clover is a solid default; for darker fabrics needing a more visible initial guide that fades later, Dritz can be a better fit. Test both on scraps to see which line you prefer during stitching and which erases easiest for you. For intricate designs, pick a fine tip; for larger areas, a bolder tip can help. Always perform a quick wash test on scrap before committing to your project.
Water-Erasable vs Heat-Erasable Pens Embroidery
Choosing between water-erasable and heat-erasable pens can be tricky. Water-erasable pens leave marks that fade with water, making them ideal for delicate fabrics or projects you’ll launder, and they’re generally easier to control for beginners because lines stay visible long enough to guide stitching. Heat-erasable pens melt away with heat, which can be convenient when you want to remove marks after finishing without washing. Temperature must be controlled, or ink may vanish too early or smudge. For beginners, heat-erasable pens can feel forgiving since you can erase marks right after finishing a section.
Mixing types can provide flexibility—use water-erasable for layout on delicate fabrics, then switch to heat-erasable for tight, detailed areas you’ll stitch before laundering. Always test on a scrap to understand how the ink behaves with your fabric and thread.
Why You Might Choose Water-Erasable
Water-erasable pens are forgiving on snag-prone fabrics and gentle on threads, with lines that stay visible long enough for stitching and disappear with a rinse. They’re particularly useful if you’re worried about future washing. Quick tests on scraps show how many rinses erase the lines.
When Disappearing Ink Pens Are Useful
Disappearing ink pens (often heat- or water-activated) suit larger, bolder designs where you need quick layout marks. They’re great for samplers or big motifs, but you must monitor timing since marks disappear at different speeds with heat exposure and washing.
Care and Safety Tips for Erasable Pens
Always test on a scrap before using erasable pens on your main fabric. Check how long the ink lasts and how it reacts to your stitching and washing routine. Follow fabric-safe settings and don’t press too hard with the iron over the marks unless you’re sure the ink will disappear cleanly. Store upright and cap when not in use. If staining or residue appears after erasing, rinse or wash gently and follow the manufacturer’s instructions for best results.
FAQs
- What are water-soluble pens for embroidery transfers? They are markers whose ink washes away with water, leaving embroidery guides that are easy to follow during stitching and then disappear as you wash.
- Which brand is best for embroidery transfers? The best brand depends on your fabric, design complexity, and laundering plan. Popular options include Sewline, Clover, and Dritz, each with their own strengths in tip sizes, visibility, and washout behavior. Always test on scraps to confirm the erase and washout performance for Water-Soluble Pens: Which Brand Is Best for Embroidery Transfers?
- How do I choose by fabric? For cotton and linen, water-soluble pens with crisp, light guides work well. For delicate fabrics, choose quick-drying markers that erase cleanly. For dark fabrics, a visible contrast that still washes out is ideal. The Water-Soluble Pens: Which Brand Is Best for Embroidery Transfers? guide helps you compare visibility and washout across fabrics.
- How should I test before starting a project? Always test on a fabric scrap that matches your piece. Trace, stitch over, and wash to see how the ink behaves. Adjust pen choice, tip size, and pressure based on the test results to ensure your final piece remains clean and precise.
If you’re planning embroidery transfers, remember that Water-Soluble Pens: Which Brand Is Best for Embroidery Transfers? can guide you to the right tool for crisp guides, easy erase, and clean washout. For a quick primer on getting started with embroidery transfers, see Granaboom’s hello-world page.

I’m Sophie Caldwell, the author behind granaboom.com, and I believe hand embroidery is one of the simplest, most relaxing ways to create something beautiful with your own hands. I started this blog to help beginners learn hand embroidery without feeling overwhelmed by complicated instructions or “perfect” results.
Here you’ll find beginner-friendly guides to decorative embroidery stitches, along with clear step-by-step practice ideas and patterns you can use to build confidence. My focus is on making the learning process easy: simple explanations, helpful stitch combinations, and small projects that look polished even when you’re just starting out.
Welcome to granaboom.com—grab your hoop, choose a few colors, and let’s stitch one line at a time.