Transferring Patterns onto Dark Fabric: Tips and Tricks That Work
Transferring Patterns onto Dark Fabric: Tips and Tricks That Work
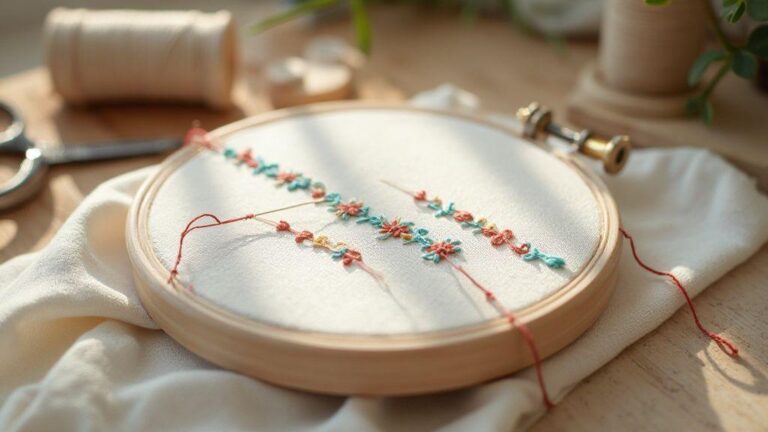
When you’re learning hand embroidery, transferring your pattern onto dark fabric can feel tricky. You want a system that shows up clearly and stays put as you stitch. The right tools make the process smoother and build your confidence, like laying a map onto a dark surface—the lines should glow with clarity, not blur into the background. Some methods are friendlier for beginners, and once you pick one, you’ll likely stick with it. For a quick, beginner-friendly overview of getting started with hand embroidery basics, see our introductory guide.
These tools help you get a stable, visible guide on dark fabric. For dense or textured cloth, choose options that cut through color without smearing. The aim is a clean line you can see and feel as you sew. The right mix of chalk, paper, and transfer methods keeps you precise and saves you from redoing stitches later. With these tools, you’ll feel more in control and less anxious about getting the design right on dark cloth. It can help to review a concise starter resource, such as the introductory guide.
As you practice, the pattern’s lines become a treasure map for your thread. Favor methods that are easy to remove if you make a mistake, yet durable enough to stay in place while you stitch. It’s about balance: visibility now, clean removal later, and a method that fits your fabric texture. With the tools in this section, you’ll build a solid routine that makes transferring patterns onto dark fabric feel natural. If you’re new, you may also benefit from our introductory guide.
What you need before you start
Before you pick a transfer method, you need a few basics. Have a clean workspace, a reliable light source, and a small kit of marking options. Press your fabric flat so the pattern sits evenly. Decide if you want a temporary guide or a more lasting mark. Your choice shapes how you approach the project, so set yourself up for success. These setup considerations are echoed in our introductory guide.
Keep supplies organized in a compact kit. A tidy setup helps you keep lines straight and your mind calm, saving time hunting for markers or transfer paper. The goal is a crisp guide on dark fabric you can follow stitch by stitch. For a quick reference, consult the introductory guide.
Choosing white tailor’s chalk and chalk markers
White tailor’s chalk and chalk markers are classic choices for dark fabric. They show up clearly against black or navy cloth and can be erased or washed away after finishing. Chalk sticks, pencils, and water-erase markers each have their feel. If you’re new, start with a white chalk pencil for a fine line you can easily adjust. For bolder lines, a white chalk marker is handy, but test how well it washes out on your fabric.
Test marks on a scrap piece of the same fabric to ensure removal with washing or ironing and to verify visibility long enough for sewing. For detailed work, faint lines may be preferable. Keep a small brush or damp cloth nearby to tidy stray marks so your final piece looks clean and professional. For a quick overview of setup and safety tips, see our introductory guide.
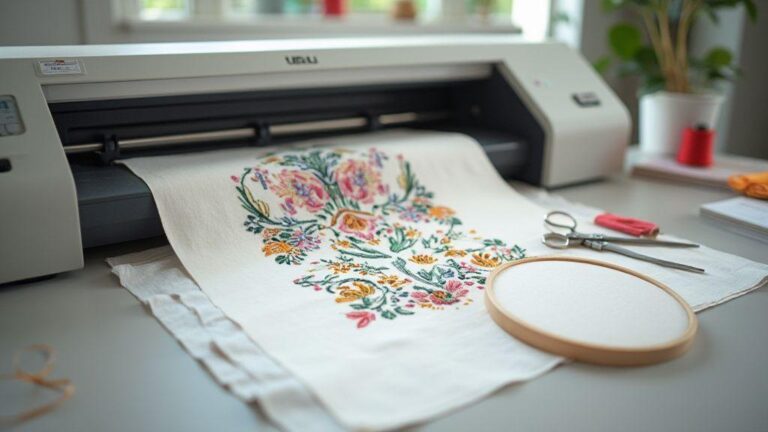
Printable iron on transfer paper for dark fabric
Printable iron-on transfer paper for dark fabric is a popular modern option. Print your pattern, place it face down on the fabric, and press with a hot iron. The lines stay put as you stitch, so you don’t redraw by hand. This method works well for intricate designs or when you want a steady guide without chalk. Follow the paper’s instructions precisely, including heat setting and ironing duration, to ensure durability.
Always test on a scrap piece first. Some papers perform better than others, and you want to avoid surprises on your main project. If your fabric has a nap or texture, you may need extra pressure or a particular iron angle for good contact. Once satisfied, you can stitch confidently, knowing your pattern lines won’t shift. For a quick primer on choosing and using transfer papers, refer to the introductory guide.
Compare the best transfer methods for dark fabric
When working with dark fabric, you need transfer methods that stay visible and don’t fade while you stitch. Some require less prep; others give crisper lines. Choose options that suit your fabric, thread, and stitching style. Consider speed versus precision and ease of cleanup. Here are three solid paths to compare, each with real-world use.
The goal is a method you can trust on your next project. Some require specific stabilizers or heat settings, while others rely on clever paper tricks. By testing on scrap fabric, you’ll learn how each behaves with your hoop and needle.
Imagine your next design on a dark tote or linen. Your transfer should yield a clean outline that won’t wash away or smear. You want a method you can rely on from the first stitch to the last knot. This overview pairs well with the guidance found in our introductory guide.
Freezer paper method for dark fabric explained
This method uses a sheet of freezer paper to create a printable or traceable template that sticks to fabric when pressed with heat. Cut your design on the paper, place the shiny side down on the fabric, and press with a hot iron. The waxy coating helps the paper cling just enough to stitch through the lines. It’s simple, inexpensive, and effective on dark fabrics because you can see the design through the paper, then peel it away after stitching.
A quick setup for small projects: no special tools beyond an iron and scissors. Trace designs with a pencil or fabric pen before ironing to keep lines accurate. The paper sits on the surface and doesn’t bleed into fibers, so you can see your lines clearly. When you’re done tracing, peel away the paper to reveal a crisp imprint. If the paper lifts, re-iron briefly. The method is forgiving and helps you stay on track.
To keep lines crisp, work in a clean, well-lit area and use a fine pencil or erasable pen. If you’re unsure about pressure, test on scrap fabric first. The freezer paper method is a stepping stone that buys you time, keeps the fabric flat, and gives you confidence to proceed to stitching with clear lines. For beginners, the introductory guide can provide quick setup tips.
Preparing and ironing freezer paper to fabric
Cut freezer paper slightly larger than your pattern. Place the shiny plastic side down on the fabric and press with a hot, dry iron, moving slowly to fuse. The dull side faces up, contacting the cloth. The bond should be stable without shiny blotches. Iron with small, even strokes; the paper should stay flat when lifted. If it peels or wrinkles, re-iron briefly. Once bonded, place your pattern on the dull side and begin tracing. If fabric shifts, re-iron to reseal.
Keep nails short and workspace tidy to avoid snagging. After tracing, you can leave the paper on briefly to recheck alignment, then peel away to expose a crisp imprint. If faint marks remain, erase gently or cover with a fabric-safe chalk. This step builds confidence: you want a clean surface where your stitches will go. The quick-start concepts are summarized in our introductory guide.
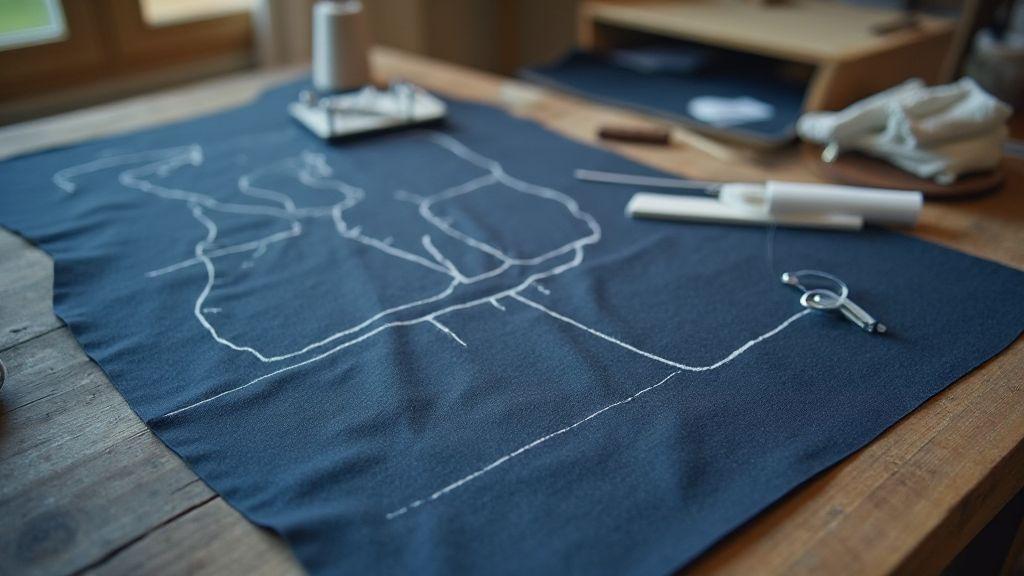
Tracing patterns on black fabric tips for clear lines
Tracing on black fabric can be tricky, but high-contrast tools help. Use a white or light pencil, chalk, or fine white fabric marker. Test on a scrap first to ensure visibility and no smearing while you sew. A bright light under the fabric or a light box helps you see the pattern through the dark cloth. Tape the pattern to a window for daylight tracing, and maintain steady pressure for smooth lines. For deeper lines, retrace or touch up with a white pen or chalk.
The freezer paper base keeps the fabric flat, aiding clean stitches. With practice, tracing on black fabric becomes quicker and the final embroidery neat and bold. If you’re just starting, the introductory guide can help.
Use chalk and markers safely on dark fabric
Mapping design on dark fabric is simple, but safety matters. Always test a small corner first to see if the chalk or marker lifts color or remains after washing. Use a light touch for faint lines you can follow, not deep impressions. If using a marker, choose fabric-safe, non-toxic options, and keep your workspace tidy to avoid smudges.
Use tools designed for dark fabrics—white tailor’s chalk and chalk markers provide clear contrast. Hold the tool at a steady angle and draw with smooth strokes. If a line is too bold, brush it away gently with a clean fingertip or soft cloth, then redraw a lighter line. Pin the fabric to prevent shifting, and consider masking tape to catch chalk dust as you erase later. Always test how easily chalk lifts after washing.
Using white tailor’s chalk on dark fabric without damage
White tailor’s chalk leaves distinct, removable marks. Sharpen a fresh piece for clean edges and sketch with short, confident strokes. If a line is too strong, erase gently and redraw lighter. Pin the fabric to prevent shifting. Use masking tape to catch chalk dust, and test a hidden corner to see how easily chalk lifts after washing. After drawing, the lines should be visible but not overpowering. If adjustments are needed, erase gently or lift excess chalk with a soft brush. For a quick safety check, the introductory guide offers tips.
Chalk markers for tracing patterns on dark fabric that show up
Chalk markers give bright lines that pop on dark fabric. Test on a scrap first and use a light hand to avoid hard-to-erase marks. Trace slowly along curves and corners, letting the line guide stitches. If you misline, wipe away with a damp cloth before it dries. Keep the pattern aligned with a light touch and check from different angles. If the color bleeds or you dislike the marker, switch to tailor’s chalk or another marker.
How to remove chalk and marker lines
Gently wipe chalk dust away with a soft brush or cloth. For lingering marks, use a tiny amount of mild soap and water on a clean cloth and blot—do not rub. Rinse with a clean damp cloth. A fabric-safe eraser can lift stubborn chalk traces. Always test removal methods on a hidden corner first. For chalk markers, follow product instructions; some lift with a damp cloth, others may require a solvent or washing. A quick wash after finishing helps remove last traces. For additional safety tips, consult the introductory guide.
Heat transfer options that work on dark fabric
Stitching on dark cloth requires transfers that stay visible. Options include heat transfer pencils for quick, clean lines drawn directly onto fabric, or printable iron-on transfer paper designed for dark fabric. If you’re worried about precision, test on scrap fabric first. Pair transfers with a simple stabilizer under the fabric to prevent puckering.
For crisp edges, ensure high contrast and proper heat. If pencil lines look faint, go over them again after placing under the needle. With iron-on transfers, confirm the paper’s weight suits your fabric and mirror-image printing if needed. For tiny details, increase print contrast or choose higher-opacity transfer paper. Align the transferred design with the weave to ensure stitches follow the intended path.
Tips to avoid surprises: test a small corner first; press evenly with steady pressure, and avoid moving the iron too much. If the transfer peels or fades after washing, re-check heat settings and time. A gentle detergent wash helps extend the design’s life. With a balanced mix of pencil, paper, and patience, your dark fabric designs stay bold and lasting. You can explore more on transfer methods in our introductory guide.
Heat transfer pencil for dark fabric and when to use it
Heat transfer pencils are ideal for quick, clean lines on dark fabric. Use them for delicate lines or lettering that must stay exact. Sketch with a light touch and keep your hand steady. If you need thicker lines, go over the area again once the first pass dries, then stabilize with a simple under-layer of stabilizer.
Choose the pencil for tight corners or fine details that are hard to align with paper transfers. It’s less messy than ink or paint and won’t add bulk under the needle. For larger color blocks, consider printable iron-on paper, then finish with pencil accents for sharp edges. Always test on a scrap piece to confirm line weight against your fabric’s darkness and texture. The introductory guide has quick notes on choosing tools.
Printable iron-on transfer paper for dark fabric: printing tips
Printable iron-on transfer paper for dark fabric produces bold white or light-colored ink that pops on black or navy cloth. Use high-contrast designs and print in reverse (mirror image) so the design reads correctly after transfer. Do a quick print test to check alignment, density, and edge sharpness. Ensure printer settings match the transfer paper requirements.
After printing, cut along the design and place face down on the fabric. Press with steady heat and follow timing guidelines. Some papers require a warm peel, others a cool one. Take care with alignment and print quality to keep final embroidery crisp on dark fabric. For a compact checklist on printing and transfer, see the introductory guide.
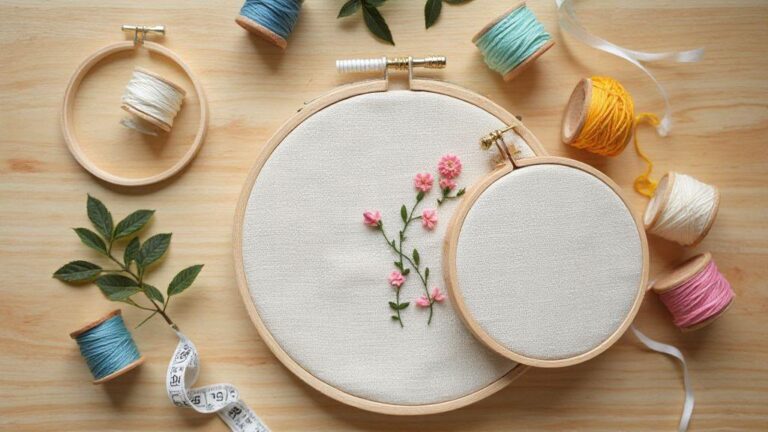
Stabilizers and hooping to keep your design steady
Stabilizers and hooping are the backbone of clean hand embroidery. Choose a hoop size and stabilizer that match your project—lighter fabrics vs. thick canvas, or napkins with pile. Stabilizers determine how your design sits after finishing, preventing shifting, puckering, and loose threads. Hoop the fabric with appropriate tension without over-tightening to avoid warping. If the fabric has a nap, keep it smooth to prevent snagging.
Set up in a clean, well-lit space with handy tools. If stitching on stretchy fabrics, you may need a looser hoop or a stabilizer with some give. Your goal is steady fabric and accurate stitching from start to finish. For an overview of beginner-friendly hooping tips, consult the introductory guide.
Choose tear-away vs water soluble stabilizer for your project
Tear-away stabilizers are ideal when you need a firm hold that removes cleanly after stitching, especially on woven fabrics. They leave less residue and are quicker to remove in small pieces. Water soluble stabilizers dissolve in water, leaving no trace, and are perfect for delicate fabrics or embroidery close to the garment surface. They require water and time for dissolving, so plan accordingly. The basics are covered in our introductory guide.
Hooping and backing tips to prevent puckering while you stitch
Backings and stabilizers level tension and reduce puckering. Use compatible backing with your stabilizer and stretch fabric gently in the hoop. For thick materials, consider a larger hoop or a frame for even pressure. Avoid creases that grab threads, and keep the surface smooth. After stitching, remove the hoop carefully and trim stabilizers close to the edge to avoid distorting stitches. If you’re new to this, the introductory guide offers a quick-start reference.
This guide, Transferring Patterns onto Dark Fabric: Tips and Tricks That Work, combines practical transfer methods with safety and setup tips to help you achieve crisp, lasting embroidery on dark fabrics. By trying different approaches and testing on scraps, you’ll discover the best balance of visibility, ease, and cleanup for your projects. For a compact overview of the essentials, see the introductory guide.

I’m Sophie Caldwell, the author behind granaboom.com, and I believe hand embroidery is one of the simplest, most relaxing ways to create something beautiful with your own hands. I started this blog to help beginners learn hand embroidery without feeling overwhelmed by complicated instructions or “perfect” results.
Here you’ll find beginner-friendly guides to decorative embroidery stitches, along with clear step-by-step practice ideas and patterns you can use to build confidence. My focus is on making the learning process easy: simple explanations, helpful stitch combinations, and small projects that look polished even when you’re just starting out.
Welcome to granaboom.com—grab your hoop, choose a few colors, and let’s stitch one line at a time.