Sashiko on Denim: How to Mend and Beautify Your Jeans
Why sashiko on denim works for your jeans
Sashiko on denim works because your jeans already have sturdy fabric and a classic style that sashiko boosts. You get a practical repair that also adds artistic touch, so worn spots become a feature, not a flaw. The stitches grip the fabric, slow fraying, and extend life. If you wear jeans often, this method saves money and preserves an authentic look.
This approach lets you express yourself while you mend. You can choose patterns that match your personality or the jeans’ vibe, from simple dots to geometric lines. The result is durable and decorative, so your jeans feel unique, not patched. You’ll wear repairs that look intentional, not like a stopgap.
For sustainability, sashiko on denim reduces waste: you repair instead of replace, reuse old threads in bold contrasts. Your jeans tell a story of where you’ve been and how you’ve cared for them, adding character you can’t buy off the rack. Sashiko on Denim: How to Mend and Beautify Your Jeans makes this storytelling visible.
Traditional history and purpose for your repair
Sashiko began as a practical craft in Japan, born from need and resourcefulness. You’ll find this technique used on workwear to reinforce heavy fabric and extend life. The stitches are chosen for strength, patterns simple enough to learn but strong enough to last. The original aim was to keep workers warm and clothes durable, which fits denim today.
The purpose is not just to fix; it’s to preempt wear. By stitching through the fabric, you create a barrier against ripping. You’re adding a safeguard that stays visible, helping you monitor wear and repair it again when needed. The look is traditional, but the method is timeless.
Over time, sashiko evolved from a utilitarian fix to a decorative feature. Your repair can honor that history while making your jeans look thoughtful and intentional. When you carry on the tradition, you’re part of a craft with roots you can wear.
How sashiko adds strength and style to your denim
Sashiko stitches weave through the fabric, creating a grid that holds fibers together. This reinforcement makes worn areas less likely to tear, especially at pockets, knees, and hems. You’ll feel the difference in how the fabric behaves after a mend; it won’t snag as easily, and it will hold shape longer.
Style comes from choice. You can keep it subtle with small, neat patterns or go bold with large, geometric lines that echo the jeans’ seams. The contrast threads you pick turn a repair into a design feature. You’ll wear the jeans with pride, knowing a repair can look like a deliberate embellishment.
Choosing the right stitch density matters. Too sparse and you don’t gain strength; too dense and you risk stiffening the fabric. You’ll find a balance that suits your fabric weight and comfort level. With sashiko, your jeans look intentional—and tougher.
Sashiko thread basics
You’ll want strong thread that resists fraying and holds color. Use thicker embroidery thread or sashiko-specific thread, which bears the load of repeated pulls. Color helps; a white thread on dark denim pops, while a tonal thread blends for a quiet look.
Keep your thread winding clean and tension consistent. Uneven tension makes stitches pucker or come loose over time. Practice on a scrap patch first to get the feel for how tight you should pull.
How to sashiko mend your jeans
Sashiko on Denim: How to Mend and Beautify Your Jeans is a practical way to extend the life of your favorite pair, blending repair with quiet artistry. You’ll learn to stitch and reinforce fabric while adding a small piece of art to your jeans. You can save money and feel proud every time you look at the careful work you did with your own hands. When you mend with sashiko, you create tiny, durable stitches that lay flat and look intentional. Your jeans become uniquely yours, with a touch of traditional craft you can wear.
Sashiko isn’t just about fixing tears; it’s about turning a flaw into beauty. Your jeans already tell a story, so let your thread add a new chapter. You’ll notice the fabric breathes again as the stitches hold the weave together without bulk. The result is not just a fix, but a fresh patch that blends with your style. It’s practical, personal, and surprisingly satisfying.
Begin with a calm workspace, clean surfaces, and sharp needles. You’ll move faster once you get a rhythm, and your hands will know what to do even when the patch is stubborn. As you sew, you’ll feel a tiny sense of mastery growing, like learning a favorite song on a new instrument. Your jeans deserve that care, and you deserve the calm focus of a simple, repeatable method.
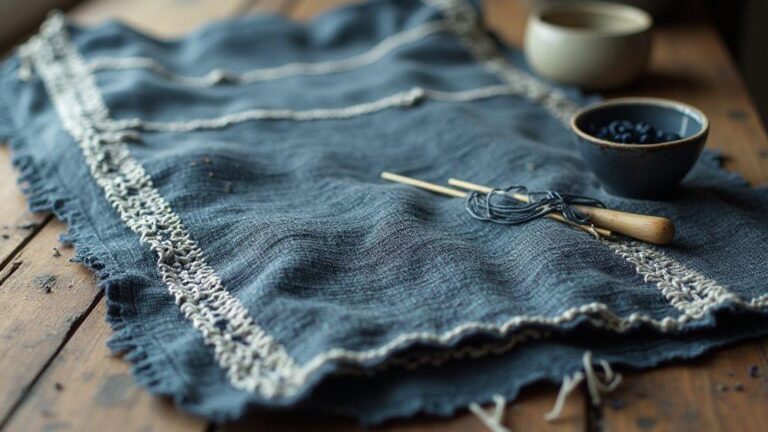
Tools and materials you need
You’ll need a few simple things to start. Gather sharp needle, square patch of denim, darning thread or sashiko thread, marking pen or chalk, and scissors. A little thimble can help, and a light fabric scrap nearby is handy for testing tension. Your aim is clean, even stitches that won’t pull through the fabric. Keep your threads clean and dry so your needle can glide through easily.
Choose a thread color that contrasts just enough to show the stitches, but not so bold it covers the patch. If your denim is blue, a white or light gray thread often looks crisp, while a dark denim might pair nicely with a lighter shade. Test a few stitches on a scrap first to see how the thread sits. You want a tight, even line that you can repeat across the tear without bunching.
Simple step-by-step mending you can follow
First, cut a patch a bit larger than the tear and place it inside the jeans. You want it to sit flat so the stitches don’t push it to the wrong side. Thread your needle with a strong, single strand and knot the end. Begin a few millimeters away from the edge of the tear and stitch a baseline line to anchor the patch. Then you’ll work in small, even stitches that move in a straight path. The key is consistency; a steady pace keeps the pattern neat.
As you sew, create a simple running stitch along the edge and small white dots that mimic a traditional sashiko pattern. Don’t pull tight—let the stitches sit naturally so the patch stays level. When you reach the other side, secure the thread with a knot and trim away the excess. Finally, press gently with a warm iron to set the stitches and flatten any bumps. Your jeans are ready to wear and show off your careful work.
Visible mending denim sashiko for your style
Visible mending with sashiko turns worn jeans into a statement. This method blends traditional Japanese stitching with modern casual wear, so your jeans feel unique and personal. Choosing sashiko for your denim adds durability while keeping a clean, crisp look that fits everyday outfits. Patterns can echo your mood—bold or subtle—and you’ll notice the threads catching light, giving denim a fresh feel. Your jeans become not just clothes, but a small, wearable project you’re proud of.
Visible mending isn’t about hiding flaws but embracing them. Your jeans tell a story when you stitch over a tear or faded patch with careful, deliberate stitches. The small knots and lines act like tiny illustrations on fabric you wear, so your style feels personal rather than generic. With practice, you’ll find a rhythm: gentle pulls, steady spacing, and a calm pace that turns repairs into a mindful moment. Your everyday look gains a confident, handmade edge you can show off.
As you experiment, you’ll see how different stitches and densities change the vibe. A tighter line adds a graphic feel, while looser stitches read as casually handcrafted. The key is balance: you want denim that moves with you, not stiff fabric crisscrossed with obvious repairs. With planning, you can finish patches that look intentional and stylish, so your jeans stay in rotation and feel like your own signature piece.
How to pick visible patterns for your jeans
Pattern choice comes down to mood and purpose. If you want a bold, modern look, choose geometric shapes or a repeating grid that repeats across a patch. If you prefer a softer, timeless vibe, try floral motifs or meandering lines that follow the tear’s shape. Start with simple patterns on a small area to learn tension and spacing before you branch out. You’ll get quicker and neater as you go, and confidence will grow with each completed stitch.
Contrast matters almost as much as the pattern itself. A strong color like bright white or sky-blue threads on dark denim pops and makes the repair the focal point. If you want your repair to blend, pick threads that closely match the jean color or use a slightly lighter shade for a subtle highlight. You’ll still see the stitching, but it won’t shout at your outfit. Consider patch size too: larger repairs benefit from wider, repeating patterns, while tiny repairs shine with delicate, intricate designs.
Think about your wardrobe. Are your jeans mostly casual or do you dress up for work meetings? Choose patterns that fit that spectrum. If you wear denim with other textures, like leather or corduroy, a simpler pattern can keep your look cohesive. If your style leans boho or artsy, a more elaborate motif can echo that vibe. Your jeans should feel like you, not like a costume.
Choosing color and contrast you will love
Color sets the mood. Bright threads give energy and a playful feel, while muted threads give a classic, refined look. For daily wear, neutral tones work with most outfits. If you treat your jeans as a centerpiece, bold colors will announce your style louder. Balance thread color with the fabric shade and the amount of visible stitching. A good rule is to choose one dominant color and one accent color to keep things harmonious.
Contrast guides focus. High contrast makes the stitches pop, turning the patch into art on your jeans. Low contrast softens the line between fabric and stitch, letting the repair feel like part of the garment. If you’re new to sashiko, start with a high-contrast combo on a small patch to see how it reads from a distance. If you enjoy subtle detail, test a tone-on-tone approach on a larger area for a quiet finish.
Practical tip: test color on a scrap denim before you commit. Sometimes a shade you love on a spool reads too bright against your particular denim. Check in daylight and under indoor lighting. Your final choice should feel intentional every time you glance at your jeans.
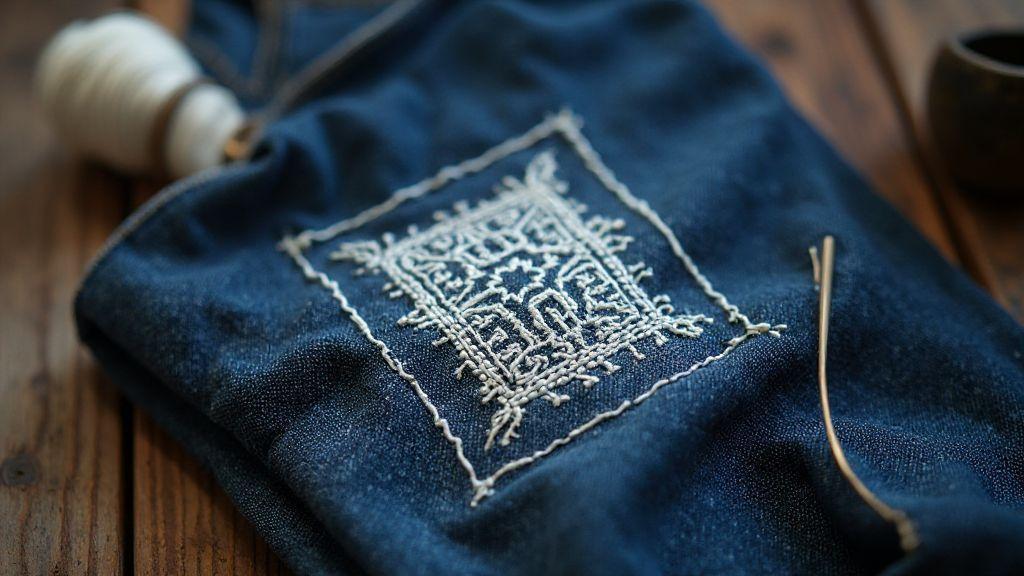
Decorative sashiko embroidery on denim
Decorative sashiko on denim can turn everyday jeans into wearable art. Start with a simple border or a short panel along a seam, then gradually add small motifs that echo your wardrobe pieces. You’ll feel a sense of accomplishment each time you tie off a thread and wipe away a little oil from your needle, knowing you created something durable and beautiful.
When you go decorative, think about symmetry and flow. Place motifs so they align with existing seams or faded areas to create a natural rhythm. You can add tiny stitches to mimic stitching on pockets or along belt loops for a cohesive look. Remember, you’re designing with fabric and thread, not just repairing. Your jeans become a canvas, and every stitch is part of your personal story.
Sashiko stitching patterns for your jeans
You’ll love how sashiko can save and style your jeans. Start with simple patterns you can see clearly on your fabric. The stitches reinforce wear spots and add a cool, old-school look. You’ll notice your denim feel tougher after a few careful passes. Use a clean, contrasting thread to make the pattern pop, or choose a thread that blends for a subtle touch. Your jeans become a canvas you can wear with pride, not a project you abandon.
As you practice, you’ll feel the rhythm of the stitches in your hands. Grid patterns give you a steady, graphic look that works on pockets and hems alike. Running stitches bring a lighter touch, perfect for along seams or patch edges. You’ll find small repeats are friendlier to beginners, while larger grids look bold and modern. Keep your tension even so the lines stay crisp and neat.
Think about where to place your stitches. A row along a torn edge can become a deliberate feature, not a flaw. If you want a vintage vibe, soften the edges with slightly longer stitches. For a cleaner finish, trim loose threads and press gently. Your jeans will tell a story—each stitch a paragraph of care and character. And if you ever want to switch up the look, you can resew over the same area with different patterns.
Grid and running-stitch patterns you can use
Grid patterns give you a steady, eye-catching look on jeans. Start with small squares along a knee or pocket edge to create a structured design. Use a bright thread for a bold display, or a matching tone for a subtle detail. Running stitches work well for borders around patches or along seams. They are forgiving and easy to adjust as you work.
Grid lines guide your hand. Keep each square consistent in size and run your thread with smooth, even tension. If a square looks off, lift and rejoin to keep the line straight. For a casual vibe, let the grid breathe with a few intentionally wider gaps. Your jeans stay practical, but now they show your personal touch.
Running-stitch borders along a torn edge can frame the repair and make it look deliberate. You might stitch a short line along a pocket seam to echo the original stitching, then add one or two tiny motifs inside the grid. The key is balance: don’t overcrowd the area, or you’ll lose the pattern’s clean feel. Your denim becomes a wearable gallery of small, thoughtful details.
Traditional motifs like kikko you can try
Kikko, a traditional hexagonal pattern, is a graceful choice for jeans. It adds a quiet, orderly texture that contrasts nicely with rugged denim. Start with a simple hexagon and work your way outward, keeping your stitch length steady. The repetition gives you a meditative moment while you mend or decorate.
As you try kikko, your eyes learn the rhythm of the pattern. If you’re careful, you’ll create a honeycomb effect that looks refined yet sturdy. You can place it along a patched knee or near a torn cuff to anchor the repair with beauty. The motif translates well to small areas, so you don’t need a lot of space to make a strong impression.
If you want something even more personal, mix kikko with a few irregular hexes to echo wear. That blend looks intentional, not accidental, and it feels modern. Your jeans carry both tradition and your own style—something you can wear with confidence.
Sashiko repair techniques
Start with a simple running stitch to secure the patch and backing. This stitches the layers together without bulk, creating a clean foundation for your sashiko pattern. Once the base is set, you can move into traditional sashiko motifs—straight lines, small squares, or a dotted field—that spread strength evenly. The key is to keep lines parallel and evenly spaced, so the fabric has predictable support.
If you want a visible statement, switch to a bold sashiko pattern on the outside. This can be both decorative and functional, turning a repair into a design feature. Use a contrasting thread color to highlight the pattern, then seal the edges with a light touch of fabric glue or a discreet seam preventer to keep everything neat. You’ll end up with jeans that look repaired and ready to go, not worn out.
To finish, trim any excess patch edges close to the stitching and secure loose threads. A small knot under the patch or a clean, hidden backstitch will keep threads from unraveling. You’ll feel the improvement as you move—your knees won’t protest with new rips, and your denim will tell a story of care.
Choose sashiko thread and tools for your project
You’ll start by gathering the right supplies so your stitches sit neat and strong. Pick thread that adds texture without snagging your fabric, and choose tools that feel comfortable in your hand. Remember, your setup sets the tone for every stitch you take, so take a moment to test a few combinations before you dive in. Your project will thank you with cleaner lines and fewer skipped stitches.
First, consider thread weight and material. Choose a sturdy yet smooth thread that slides through fabric easily. For beginners, a cotton sashiko thread or ready-made sashiko embroidery floss works well because it isn’t bulky but still shows a crisp line. If you’re mending denim or heavier fabrics, you might opt for a slightly thicker option to keep the design visible. Your goal is a thread that holds its shape but doesn’t create pull on the fabric. Next, pick needles that fit your fabric and thread. A slightly longer needle with a sharp point helps you pierce multiple layers without tearing, especially on thicker denim. Keep a few needles on hand in case one gets dull or bent; your patience will thank you when your lines stay even and consistent.
As you assemble, think about the tools you’ll actually use. A small hoop keeps fabric flat so stitches sit evenly, and a hoop that’s comfortable in your grip makes long sessions easier. A thimble protects your finger from pushes that would otherwise slow you down, especially when you’re working through reinforced areas. Marking aids are easier with a light chalk or erasable pen; you’ll want something that marks clearly but wipes away cleanly after the stitch to avoid ghost lines on your finished piece. Your setup should feel calm and predictable, not like you’re wrestling with a mystery box.
When you’re shopping, don’t overthink your first project. Start with standard sashiko thread, a sharp needle, and a small hoop. You’ll learn how the thread behaves on your fabric, and you can tweak things on your next project. This approach to denim mending will still read clearly in your notes and reference later, so keep that in mind as you experiment with tension and stitch size.
Best thread types and needles for you
For most beginners, a smooth, mid-weight sashiko thread gives you clean lines without tangling. You want something durable but not stiff, so your fabric moves with you as you stitch. Cotton threads are classic for a reason: they hold color well and age nicely. If you’re working on darker denim, a slightly brighter thread can help your stitches pop for a bold, graphic look.
When choosing needles, a sharp, long needle is your friend. It slips through fabric easily and reduces drag, so your stitches stay even. A compact pack of needles lets you switch sizes if you switch fabrics or thread thickness. If your project involves multiple fabric layers, you’ll appreciate a needle with a sturdy shaft to avoid bending. And don’t forget a thimble; it saves your finger from fatigue on dense areas and ties your whole process together. Your goals are clean lines, even tension, and comfortable hands after a long session.
If you want to add texture, consider a slightly thicker thread for visual interest, or mix two thread types for a subtle variegated effect. Always test stitches on scrap fabric first to see how your chosen thread behaves with your needle. The right combo makes your mending feel like a mini craft workout, not a chore.
How to use a thimble, hoop, and marking tools
Your thimble should feel like a quiet teammate, guiding your push without getting in the way. Place it on your dominant hand’s finger and test how it distributes pressure when you push through several fabric layers. A good thimble prevents blistering and helps you keep a steady rhythm. The hoop keeps your fabric taut so stitches sit evenly. Tighten it just enough to prevent puckering, but not so tight that it strains the fabric. A loose hoop invites wobbly stitches; a tight hoop can make you work harder. Marking tools save you from guessing where to stitch. Use light, erasable marks to plan your lines, then remove them easily after you finish. Your goal is smooth guidance, not guesswork.
Start with a simple pattern and light, even passes. Let the needle glide through fabric rather than forcing it. The hoop should feel like training wheels, not a cage—steady, not restrictive. When you’re done, remove marks with a damp cloth or an eraser-safe tool so your finished piece looks crisp and clean. If you’re unsure, practice a line on scrap fabric before you tackle your real project. Your confidence grows with every stitch.
Sashiko for mending jeans
Mending jeans with sashiko is about both repair and decoration. You’re reinforcing worn spots while adding a decorative stitch that makes your jeans look intentional, not patched. Start at the edge of the worn area, then stitch across the tear or thinning fabric in a straight or geometric line. Your goal is to weave the fabric back together so it remains functional and looks beautiful. Use a sturdy thread that won’t pull easily and a longer stitch length for denim strength. If you’re repairing cuffs or pockets, plan your pattern to wrap around the edge so the mend feels integrated, not patchy.
As you work, consider how the thread choice changes the look of your jeans. A dense line of stitches gives a clean, crisp effect, while a looser pattern adds texture and movement. You can frame the repair with small, simple motifs to echo traditional sashiko designs. The result is jeans that wear better and tell your story, not just a fix. Remember, Sashiko on Denim: How to Mend and Beautify Your Jeans is about turning a flaw into a feature you’ll proudly wear.

I’m Sophie Caldwell, the author behind granaboom.com, and I believe hand embroidery is one of the simplest, most relaxing ways to create something beautiful with your own hands. I started this blog to help beginners learn hand embroidery without feeling overwhelmed by complicated instructions or “perfect” results.
Here you’ll find beginner-friendly guides to decorative embroidery stitches, along with clear step-by-step practice ideas and patterns you can use to build confidence. My focus is on making the learning process easy: simple explanations, helpful stitch combinations, and small projects that look polished even when you’re just starting out.
Welcome to granaboom.com—grab your hoop, choose a few colors, and let’s stitch one line at a time.