Mountmellick Embroidery: The Irish Whitework Tradition Explained
Historical Mountmellick embroidery origins
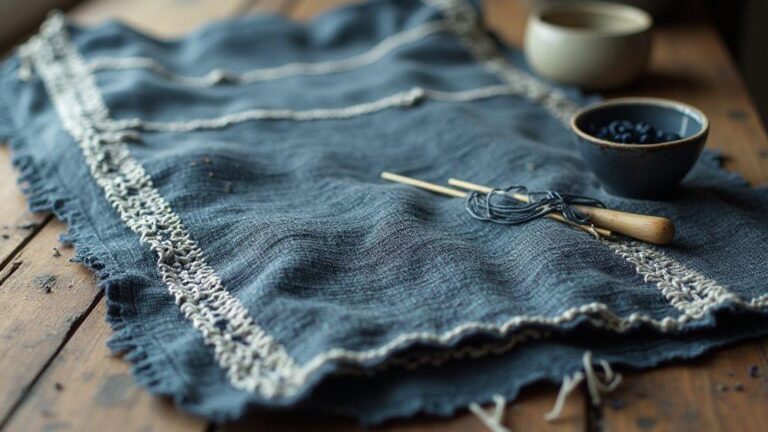
Mountmellick Embroidery: The Irish Whitework Tradition Explained began in a small Irish town, and its quiet charm shows in every stitch. The whitework style uses thick raised stitches on a soft, tactile surface that invites touch. Its origins lie in practical needs—lace and fine needlework for households—but it quickly grew into a distinctive art. Workers used simple, sturdy fabrics and bold stitches to create durable pieces that still look delicate. This blend of practicality and beauty makes Mountmellick Embroidery feel special as you explore Irish craft. The story you read today blends local skill with a cozy sense of place, a reminder that great crafts often start in a kitchen or parish room.
As you move through history, you’ll see how communities shared techniques and passed them on. Whitework became more than decoration; it was a way to tell stories on towels, table runners, and christening gowns. The style stayed practical—easy to repair, easy to wash—so it could travel with families for generations. The thread work sits on sturdy linen, giving the designs a clean, bright look that stays readable after years of use. This resilience keeps Mountmellick embroidery alive in museums and in local kitchens alike, a bridge between old and new.
You’ll feel how the craft nurtured town pride. Women and artisans formed networks, trading patterns and tips, supporting each other’s work. The embroidery wasn’t just art; it helped households manage costs too, with durable pieces that lasted. That practical bond between craft and community is the heartbeat of Mountmellick, the reason this art still matters today.
19th century Irish whitework development
In the 19th century, Irish whitework grew from needed home textiles to a recognized embroidery style you can still admire. Simple motifs evolved into more intricate patterns, with raised stitches that add texture and depth. The development was about experimentation—trying different stitch combinations to make pieces that stood out at church fairs and family gatherings. The technique respects the natural color of the linen while letting the stitches create rhythm and contrast. This period marks Mountmellick Embroidery as not just functional but expressive, a way to show care and skill.
Teaching circles and parish groups helped spread the technique. Women shared frames, needles, and ideas, turning a quiet craft into a lively exchange. Pieces were designed for specific uses—community spaces, weddings, or everyday linens—each with its own rules and possibilities. The 19th-century spirit remains alive in the stitches you’ll see in modern pieces, reminding you that today’s embroidery often stands on the shoulders of yesterday’s experimentation.
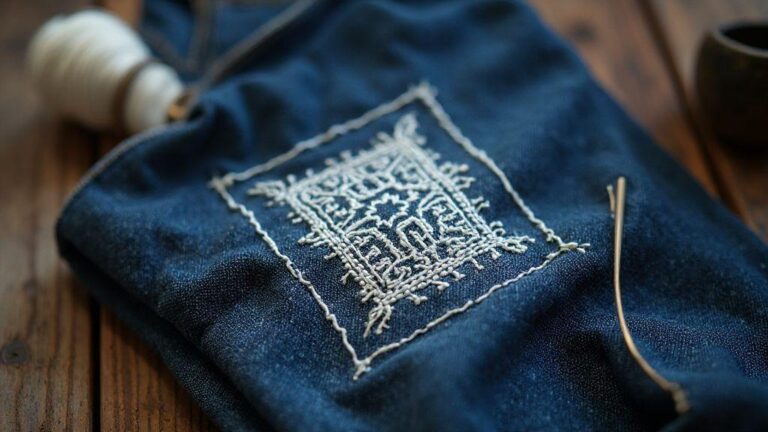
The rise in popularity brought a sense of identity. A Mountmellick piece appearing in a display was a testament to a time when Irish craft could compete with larger European traditions. Even as fashion shifted, the core idea remained: strong, practical whitework that looks timeless. The same boldness from the 19th century informs contemporary recreations, linking history to current work.
Role in local crafts and economy
Mountmellick Embroidery helped households by creating valued goods that could be sold or traded. Women transformed linen scraps into beautiful pieces, turning small costs into meaningful craftsmanship. This wasn’t just art; it was work you could rely on, especially in tight times. The craft provided a shared source of income and pride, with pieces suitable for homes, churches, and schools. The practical side of history here shows where beauty meets utility and commerce.
The embroidery also strengthened social ties in the community. Workshops, markets, and fairs were places where patterns were swapped and skills honed. This network kept techniques alive, even when fashions changed or economic pressures rose. The local economy benefited—from fabric suppliers to frame makers—because a Mountmellick piece needed every small part to shine. The craft’s value extended beyond the needle; it supported the town’s spirit and daily life.
You’ll see modern references to these roots in current studios and museums. The tradition remains a source of local pride, shaping how people in Mountmellick and beyond talk about Irish whitework today. It’s not just history; it’s a living thread in your own craft journey, reminding you that you can learn from the past and still create something meaningful now.
Visit museum examples
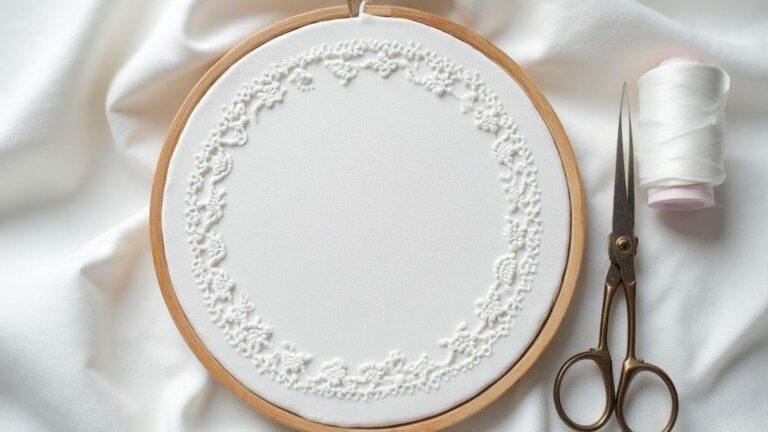
If you visit, you’ll find Mountmellick pieces displayed with clear labels and close-up photos of stitches. You’ll study the raised work and see how each stitch adds volume to the design. Look for towels and church linen that show the characteristic brightness and durability of Mountmellick Embroidery: The Irish Whitework Tradition Explained. Notice the crisp white threads against linen, which makes the patterns pop in a gentle, timeless way.
Mountmellick stitches you can master
You’ll love how Mountmellick stitches feel once you get the rhythm. This style brings a soft, airy look to whitework that’s both simple and elegant. The basic stitches grow into textures that look intricate, even when kept neat and even. Practice helps your hands learn when to slow down and when to speed up, and your pieces begin to tell their own stories with every line you stitch. The key is keeping tension even and stitches consistent so the fabric doesn’t pucker or gape.
This tradition leans on light, steady stitches that build a gentle surface. When you stitch, you’re shaping light and shadow on the fabric. Your goal is calm, balanced patterns that read clearly from a short distance, so your work stays legible and graceful. If you’re short on time, focus on one area and let the rest breathe; Mountmellick looks best when it can breathe.
As you explore these stitches, you’ll notice how the style blends ease with elegance. Your practice becomes a small ritual: pick a thread, set your hoop, and let your hands do the talking. With time, you’ll add textures that surprise you, and you’ll proudly say you’ve earned your place in this Irish whitework tradition.
Padded satin, stem stitch and couching
Padded satin gives a soft lift to edges, like a tiny cushion under each line. Use a short, clean satin stitch and add light padding behind it to create gentle volume. Keep the padding even for smooth raised areas.
Stem stitch is your trusty workhorse here. It lays down a continuous, flexible line for outlines and long curves. Keep stitches slim and consistently spaced for the design to sing. Couching ties threads down with tiny anchors. Place a main thread and lay a second over it, securing every few millimeters. The cottage-white look comes alive when these stitches sit with even spacing.
When you combine padded satin, stem stitch, and couching, you create quiet dimensionality. The surface gains depth without shouting, and the pattern stays readable from across the room. Practice these three in small motifs to see how the light catches the raised areas. With time, you’ll stitch quicker and steadier, and your Mountmellick pieces will feel truly balanced.
French knots and raised texture methods
French knots add tiny dots of texture that look like pearls on the fabric. Work them with neat, tight loops, letting the knot sit flush to the surface. Space them evenly and avoid crowding.
Raised texture methods push your work into tactile relief. Build up areas with extra thread or padding so certain shapes pop out. Keep your foundation smooth, then add layers slowly. Raised sections should feel deliberate, not rushed. Step back and those bumps balance the flat spaces, making your embroidery come alive.
Together, French knots and raised textures bring personality to Mountmellick pieces. The knots add restrained sparkle, while raised areas give you visible depth.
Practice core Mountmellick stitches
Grab a small sampler and work through core stitches in a simple sequence. Start with clean padded satin and even stem stitches along a straight line, then introduce light couching to anchor the thread. Add a row of French knots at intervals to test spacing. Finish with a couple of small raised patches to feel the texture under your fingertips. If a knot feels loose, redo it gently to keep the surface uniform.
Keep practice consistent: use the same needle, fabric, and thread type within each session. When you switch stitches, reset your tension. You’ll see your control improve as you move from one stitch to another, and your embroidery will look steadier and more confident.
Mountmellick motifs and pattern basics
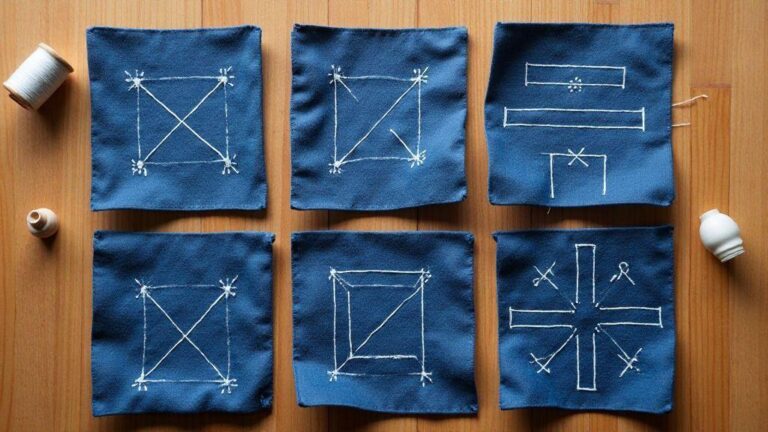
You’ll start by understanding that Mountmellick embroidery is built on simple shapes that bloom into rich patterns. The backbone is a mix of floral motifs, leaves, and geometric fills worked in white on white or with subtle shading. Clean lines and careful spacing do the heavy lifting; you don’t need fancy stitches to achieve a powerful look.
Patterns repeat in predictable ways, making Mountmellick friendly to beginners. Motifs often nestle inside a square or rectangle frame, giving your work a calm structure to follow. Map your path before stitching—lightly mark guide lines so your final piece feels balanced rather than busy. The motifs’ rhythm and open spaces provide a quiet, readable design.
Tradition matters because the motifs tell stories of the land and its people. By learning the basics, you connect with generations of makers who used the same shapes to express care and patience. Your practice becomes a bridge from old hands to your own. When you finish a motif, you’ll feel a quiet pride, knowing you carried a piece of Irish whitework forward.
Floral and leaf designs in Irish whitework
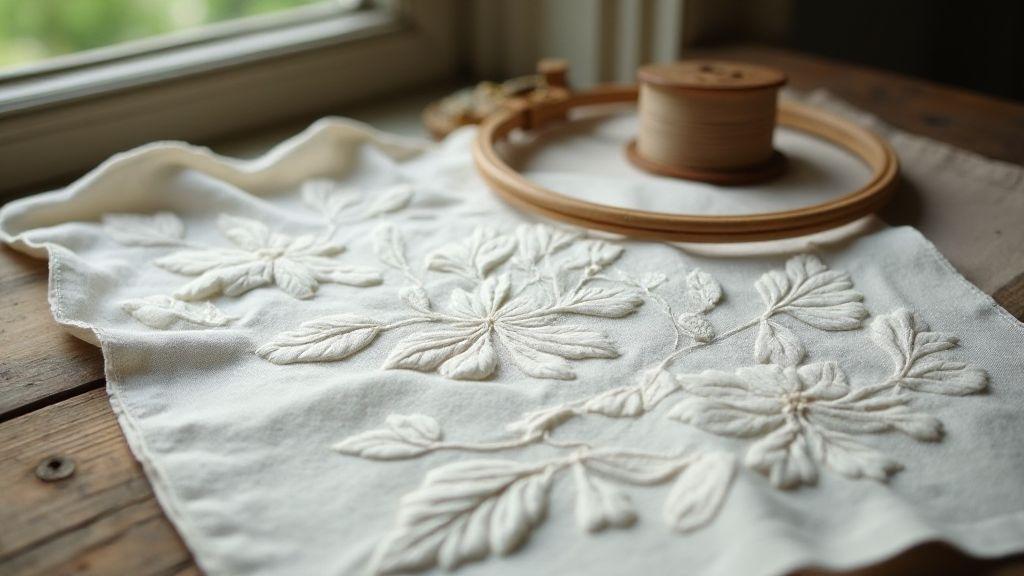
The heart of Irish whitework lies in botanical shapes. Flowers bloom with simple petals and tight centers, while leaves curve with a natural arc. Satin stitches fill petals and long lines create leaf veins, keeping texture light and airy. The contrast between solid petals and delicate stems creates a look that feels fresh and timeless. Your aim is harmony: bold enough to be seen, subtle enough to remain elegant.
Scale matters: a single large rose anchors a corner, while a row of tiny blossoms forms a border. Leaves often echo flower shapes for cohesion. Vary density—more stitches inside petals for a crisp surface, fewer on outlines for breathing room. This balance keeps your work readable from any distance.
Reading traditional Mountmellick embroidery patterns
Treat traditional patterns like a map. Start at the central motif and trace outward along stems and petals. Lines aren’t random; they guide your stitching path and help avoid crowding. Symmetry is common, with gentle asymmetries giving character. Reading the pattern means choosing the rhythm and deciding where your eye rests.
Color might be minimal, but the structure is rich. Margins and spaces frame each motif, like stage directions. Use light pencil lines or erasable markers to plan, then wash them away as you stitch. Reading the pattern first helps prevent mistakes and keeps embroidery clean and balanced. Each completed motif builds confidence as you interpret a tradition with your own hands.
Pick a simple Mountmellick motif
Choose a straightforward motif—like a small flower cluster with a pair of leaves. Outline the main shapes with a fine running stitch, then fill petals with satin stitches for a smooth surface, and add light stems to connect everything. Keep the scale modest so the motif sits nicely within a block or border. The clean lines create a quiet, refined Mountmellick effect.
Mountmellick embroidery supplies you need
You’re about to dive into soft whites and delicate stitches. Start with a solid set of supplies that keeps your work steady and your eyes happy. Begin with a clean workspace, good lighting, and a small tub to hold tools so you’re not digging around mid-stitch. Your goal is to feel confident enough to start and keep going, not to hunt for every item while thread tangles.
Essentials should be simple and reliable. Choose sturdy white cotton fabric that behaves well under Mountmellick stitches. Pick threads that fit your project—often a soft white or pale cream so the pattern stands out without shouting. A lightweight hoop helps keep the fabric flat, and a comfortable pair of scissors saves fingers during longer sessions. A few note cards or a small notebook helps map stitches and remember color combinations.
As you gather, think about how you work best. A firmer cloth for tight weaves or a plainer weave for looser work. Include a few spare needles in different sizes and a couple of portable kits for on-the-go stitching. It’s about assembling what makes your stitching smooth and enjoyable.
Cloth, yarn and thread choices for whitework
For Mountmellick embroidery, your cloth choice matters. A smooth, evenly woven cotton lets stitches sit evenly and keeps texture clean. Choose a fabric that doesn’t pill or stretch too quickly so whitework stays crisp over time. The color is usually white or near-white, so the fabric’s surface brightness helps patterns pop.
Thread choices are typically high-quality cotton or linen. They give a gentle luster without overpowering the design. If you’re starting, pick a single color family and stay with it until you’re confident in your stitches. A finer thread yields delicate patterns; a thicker thread adds bold texture. Test threads on a scrap before stitching to learn how they behave under tension.
You might explore subtle sheens or matte finishes. A soft sheen catches the light for a gentle glow; a matte thread reads softly for large whitework blocks. The goal is harmony between fabric and thread so stitches read clearly and evenly.
Needles, hoops and where to buy kits
Needle choice affects stitch control more than you might expect. A sharp needle with a fine shaft works well for Mountmellick embroidery, letting you pass through the fabric cleanly. A slightly longer needle helps with longer stitches. Stock a couple of sizes so you can switch easily if a stitch feels too tight or too loose.
A hoop keeps work taut and even. Look for a lightweight hoop that’s comfortable to grip and won’t slip. A smaller hoop helps with detail; a larger hoop supports bigger panels. Ensure the clamp is smooth and won’t leave marks. If you travel, a flexible hoop that fits a project bag is advantageous.
When you’re ready to buy, Mountmellick embroidery kits can be handy. They include pre-cut fabric, instruction sheets, and basic threads. Kits are great for beginners because they provide a clear path to practice stitches and see how everything fits together. Look for kits that specify difficulty and include a stitch guide so you can learn as you go.
Gather your Mountmellick materials
Before you begin, lay out every item you’ll use: fabric, threads, needles, hoop, scissors, and a small notebook for stitches. Having it all in front of you saves rhythm disruptions. Place the hoop on a stable surface and secure the fabric so you can glide the needle. Keep threads organized in a small box or bag—group them by color and brand so you can grab what you need quickly.
Check thread length and twist. Use threads that don’t fray easily and don’t shed fibers onto the fabric. If you’re trying a new brand, test with a scrap swatch. Jot quick notes in your notebook about what worked best for your first practice piece so you don’t forget.
Easy Mountmellick embroidery tutorial steps for you
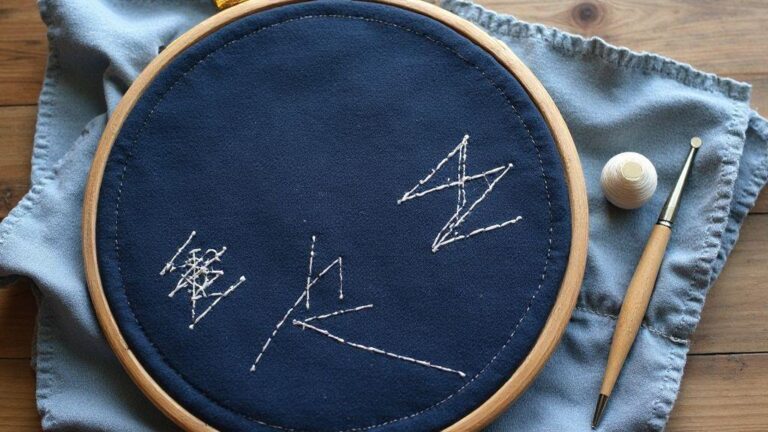
Mountmellick embroidery is a gentle, white-on-white style that feels calm and precise. Your hands will settle into the rhythm as you work. In this section, you’ll learn the basics in three clear steps that keep you moving forward. The stitches are simple but elegant, and you’ll see how each step builds your confidence. With practice, your piece will speak with quiet, refined detail. You’ll be ready to tackle a small project on your own, with your own personal touch on every leaf and petal. Mountmellick Embroidery: The Irish Whitework Tradition Explained.
This is your entry point into the world of Mountmellick. Start with a smooth linen or cotton fabric and a small, sharp needle. A crisp, even weave makes the stitches sit neatly. Pin your fabric to a hoop to keep it flat. You’ll be surprised how much easier it is when your work area is calm and tidy. You’ll learn how the raised and filled stitches create depth without color, which is the heart of this tradition.
Prepare your threads by keeping them clean and evenly split. Use one strand for light work and two for a bolder look, depending on your fabric and pattern. Your goal is clean, even stitching with no pulling. If a loop or knot happens, gently pull it back and rework it. With soft, patient steps, you’ll feel your embroidery becoming more confident and precise.
A beginner project to build skill fast
Starting small helps you grow quickly. Practice basic shapes like a simple leaf or flower using just two stitches: a clean outline and a soft fill. Trace a simple square or circle on your fabric. Outline the edge with a running stitch, then fill the inside with a basic mount stitch. Keep stitches uniform and avoid crowding. When you finish, press gently from the back with a clean cloth.
This project teaches thread length management. Cut fresh lengths as you go and roll them between your fingers to keep them smooth. If you snag or a thread loosens, slow down, fix it, and resume. You’ll start to see how your stitches sit on the fabric and how careful care yields a tidy finish.
Step-by-step stitch order to follow
Begin with the outline stitch to establish the shape. Then switch to the mount stitch for gentle filling. Work in small, even gaps so texture stays calm and even. If you’re filling a leaf area, alternate light and darker sections by using slightly different thread tension to create subtle depth.
Next, move to the raised stitch or vein stitch for texture at the edges. Keep stitches short and wrap the thread snugly around the base to lift it slightly above the surface. As you near the end, double-check that all stitches align and the fabric lies flat. A neat finish shows in the last few stitches and makes the whole piece feel polished.
Finally, complete with a small satin or long stitch to fill any remaining area. Use even pressure and keep your hands relaxed to prevent puckering. Tie off securely on the back and trim excess thread close to the fabric. You’ll feel a sense of calm when you see the clean, white-on-white design come together. Mountmellick Embroidery: The Irish Whitework Tradition Explained.
Care and modern uses of traditional Irish needlework
You can keep Mountmellick Embroidery looking bright and alive with a simple care routine: gentle handling, mild cleaners, and a safe home for display. When washing, use cool water and a light soap; avoid harsh detergents that fade threads. Air dry flat and out of direct sun to prevent yellowing. Store pieces in a clean, breathable bag or box away from damp spaces. With these steps, Mountmellick pieces stay crisp and charming for years, ready to be shown or worn.
Today’s uses keep the craft in everyday life. Frame a small piece as wall art, add a panel to a cushion cover, or sew a decorative band onto a tote or jacket. The look is timeless, but the feel is modern. If you’re short on time, rotate pieces between frames or cushions to keep your craft fresh without extra work. Mountmellick work becomes a conversation starter and a nod to Irish tradition in your home.
For beginners and seasoned stitchers alike, remember that care is part of the beauty. Treat stains gently, test a small area first, and avoid aggressive rubbing. Your embroidery thrives when you respect the fabric and threads. By keeping a simple routine and choosing modern, practical uses, you honor the craft while fitting it into your life.
Washing, drying and storing Mountmellick pieces
- Gentle washing: Use cool water and a mild, pH-balanced soap; hand wash if possible. Don’t twist or wring; press water out softly and lay flat to dry. For tall pieces, roll in a clean towel to absorb moisture before laying flat. Keep air flowing away from direct sun to avoid fading. Trim any loose threads with clean scissors instead of pulling.
- Drying and storage: Lay pieces flat on a clean surface or drying rack, reshaping gently while damp. When fully dry, store in a breathable container—cotton or linen sleeves or bags work well. Avoid plastic, which traps moisture. If stacking, place acid-free tissue between layers. Regularly check for moisture or moths and keep the storage area cool and dry. With thoughtful care, Mountmellick works stay pristine long after you finish them.
Using Mountmellick embroidery in home and fashion
- In home décor, Mountmellick Embroidery adds quiet elegance. Add a simple border to a linen napkin, craft a delicate cushion cover, or frame a small panel as wall art. The whitework threads catch soft light, giving your room a refined glow. For a quick update, stitch a removable centerpiece on a plain table runner or craft a simple lampshade trim.
- In fashion, the look remains refined and adaptable. Mountmellick embroidery can decorate a light blouse, cuffs, or a collar, adding texture without weight. It works beautifully on linen or cotton, keeping garments airy. If you’re new to fashion applications, start small—a pocket flap or a single panel on a tee. The result is timeless, wearable, and a nod to traditional craft.
Protect and display your Mountmellick work
Display with care to protect your investment and celebrate your skill. Use UV-protective glass for frames and keep framed pieces away from direct sunlight. Use acid-free mats and backing to prevent yellowing and aging of the fabric. If you hang pieces, ensure they’re not under heavy tension; a light, secure mount will keep stitches even and the fabric undistorted. Periodically re-check the frame and backing to prevent moisture buildup that could harm the embroidery.

I’m Sophie Caldwell, the author behind granaboom.com, and I believe hand embroidery is one of the simplest, most relaxing ways to create something beautiful with your own hands. I started this blog to help beginners learn hand embroidery without feeling overwhelmed by complicated instructions or “perfect” results.
Here you’ll find beginner-friendly guides to decorative embroidery stitches, along with clear step-by-step practice ideas and patterns you can use to build confidence. My focus is on making the learning process easy: simple explanations, helpful stitch combinations, and small projects that look polished even when you’re just starting out.
Welcome to granaboom.com—grab your hoop, choose a few colors, and let’s stitch one line at a time.