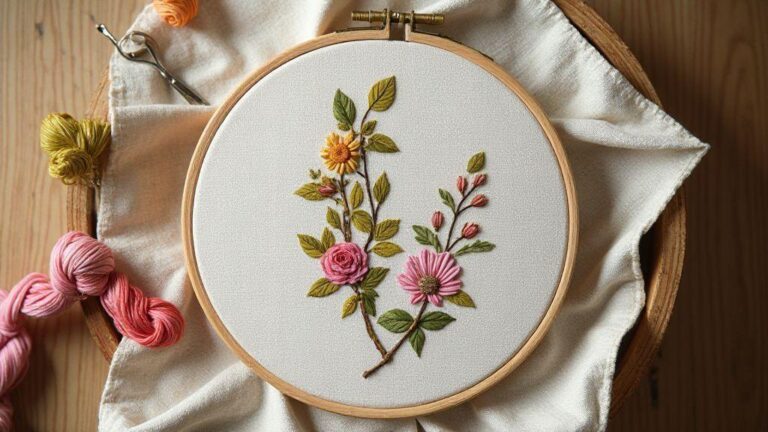
How to Use Transfer Paper for Embroidery Step by Step
How to Use Transfer Paper for Embroidery Step by Step can seem tricky, but this guide streamlines it: choose the right paper, test on scraps, and transfer cleanly for crisp stitches. For a quick primer on starting embroidery basics, Hello World guide.
Choose the right transfer paper for your project
When you start a hand embroidery project, the transfer paper you choose sets up your design for success. Look for a method that prints cleanly, removes neatly, and won’t shadow or stain your fabric. Think of it as a blueprint for your stitches—wrong paper can mean extra rubbing, erasing, and re-stitching. Start by knowing your fabric and design size, since that guides which paper to pick. For light or delicate fabrics, choose an option that erases easily and won’t leave ghost images. For bold, dense designs, you can tolerate a firmer transfer, as long as the paper peels away cleanly later. Your goal is a crisp line that disappears when you’re done, not a stubborn mark you can’t remove.
There are two main families: light-transfer papers that leave little residue, and tracing papers that require a pencil or pen to copy your design. Light-transfer papers are beginner-friendly because you can see lines through the fabric and lift away evenly. Tracing papers offer control over line thickness and are handy for detailed patterns. Test on a scrap first. If your fabric is dark or busy, you’ll need a transfer method with high contrast that won’t fade as you stitch. You want a method that stays put during stitching and vanishes without a trace when you finish.
Consider your finished look. Some papers leave a visible guide on light fabrics, while others wash out completely after laundering. If you plan to wash your project, choose a paper designed to wash out or be heat-removable. Keep a small stash of a couple of papers so you can switch based on fabric color, texture, and pattern detail. This keeps your design accurate without sacrificing fabric safety or time.
Pick between iron-on and tracing papers
Iron-on transfer paper can be a lifesaver on tricky fabrics or large designs. Place the paper on the fabric, apply heat, and the image sticks where you want. It gives you a solid start so your threads stay in line. But heat can affect delicate fabrics, so test on a scrap first and use a low setting. If the fabric has a nap or pile, iron-on can shift, leading to misalignment. Quick test and mirrored pressing moves help keep the pattern centered.
Tracing papers rely on transferring the design with a pencil or pen. This is gentler on heat-sensitive fabrics and perfect for details. You’ll get precise, thin lines that guide stitches without scorching. The downside is you must apply enough pressure to transfer, which can smudge on some fibers. If you’re a careful drawer or want to tailor every line, tracing papers win. To choose, ask: Is heat safe for this fabric? Do you need ultra-fine lines for detail? If yes, tracing might be best.
If you’re unsure, mix and match. Use iron-on for a rough guide on sturdy fabrics, then trace over to clean up fine lines with a pencil. This combines speed with precision and keeps your project moving.
Match paper to your fabric and thread
Choosing the right paper starts with fabric color and weave. Light fabrics like cotton or linen benefit from minimal residue; dark or busy fabrics hide marks but still need a crisp transfer. For smooth, tight weaves, a light tracing paper or carbon transfer works well since lines don’t smudge easily. For rough textures, avoid papers that snag fibers or leave lint, as lines will blur while you sew.
Thread type matters too. Thick cotton floss may require a bolder transfer line so you can see each stitch. Fine embroidery threads pair with delicate lines that don’t overwhelm the fabric. Always test on scrap fabric with the same transfer method you plan to use. Your goal is visibility during stitching and invisibility after washing or pressing.
Color contrast helps. A high-contrast transfer on light fabric is easy to follow, while a low-contrast line on dark fabric can be hard to see. If unsure, choose a paper that lets you invert the design with a pencil or lightbox. By matching fabric, thread, and paper thoughtfully, you’ll stitch with confidence every time.
Best transfer paper for embroidery projects
For beginners, a versatile option is a light pressure-heat transfer paper with clean removal. It’s forgiving on most fabrics, easy to erase, and won’t leave stubborn marks after washing. Pair this with a soft graphite pencil or pen to trace, and your lines stay crisp during stitching but fade away afterward. This setup works for a wide range of projects—from simple motifs to intricate lettering.
On darker fabrics, a high-contrast carbon transfer sheet can help lines pop. Be ready for a careful erase or wash-out step to remove the guide after you finish. For heat-sensitive fabrics, choose iron-on transfer paper with a low-temperature setting. The key is to practice on scraps so you know how your chosen paper behaves with your fabric and thread.
How to Use Transfer Paper for Embroidery Step by Step
How to Use Transfer Paper for Embroidery Step by Step starts with selecting the right paper, testing on scraps, and tracing or transferring the design with care. Keep the paper flat to avoid smudges. If lines look faint, repeat the transfer with consistent pressure. Begin stitching with light lines that guide your work, then remove or wash away the guide as you finish.
Prep your fabric and tools before you transfer
Set yourself up for success with clean, ready-to-use materials. Choose a smooth fabric like cotton or linen and pull threads taut so the surface stays flat. Keep your embroidery hoop, scissors, needles, and a light source within arm’s reach for smooth workflow. Plan where the design goes on the garment or project, and mark light guidelines with a washable pencil or chalk so you can transfer later without guessing. If you’re using multiple colors, keep a tray of threads by color family to avoid tangled skeins. A tidy setup helps you move efficiently.
Decide your final layout and ensure your workspace is distraction-free. A bright lamp and a clean table make a huge difference when doing fine stitching. If you’re new to embroidery, practice a few tiny stitches on scrap to feel the fabric’s weave and how the thread behaves, so you’re not surprised by skipped stitches later.
Wash, iron, and hoop your fabric
Before transferring, wash the fabric to remove sizing and oils that can cause resistance. Dry completely, then iron on a clean, low setting with steam if safe for your fabric. A crisp, flat surface is essential because wrinkles can throw off alignment. If you don’t iron well, misaligned stitches and a less professional look can result.
Place your fabric in the hoop. Choose a hoop size that fits your design and is comfortable to work with. Tighten evenly so the fabric is taut but not stretched. If you notice puckering, readjust the tension to keep the weave smooth. A taut fabric helps stitches land where you expect.
Recheck your marks after hooping. Lightly puff the fabric to test for edge movement. If marks smear, redraw them with a gentle pencil or erasable pen. Your goal is clean, precise guidelines that won’t vanish as you stitch.
Test the paper on a scrap you own
Test transfer paper on a scrap to understand how it behaves with your fabric, thread, and needle. Note imprint darkness and adjust pressure or layering as needed. This prevents mistakes on your real project and keeps confidence high.
Check how easy erasing is on the scrap. If you see smudging or ghosting, adjust your method. This step helps you learn whether you need darker lines or a lighter touch for the transfer. It’s a safety net for clean lines and a crisp design.
When you’re happy with the test, apply the same pressure and technique to your real piece for consistent results.
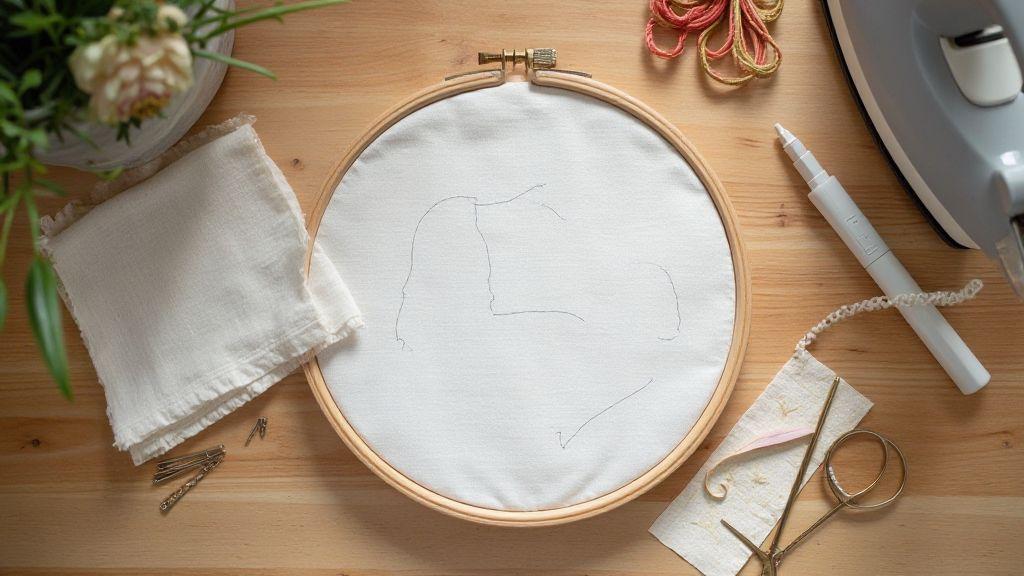
Prepping fabric for transfer paper embroidery
Ensure your surface is clean, lint-free, and ready. Lightly brush or roll a lint roller over the area to prevent fibers from sticking to your transfer lines. Place the transfer paper on the fabric with the design facing down on a flat, hard surface. Hold steady and apply even pressure as you trace. Aim for a bold, accurate impression rather than a faint ghost of a line. If the line looks faint, increase pressure or try another pass.
After tracing, lift the paper and inspect your lines. They should be visible and accurate. If any part is faint, retrace carefully. A solid transfer minimizes stitching errors and makes for a smoother project.
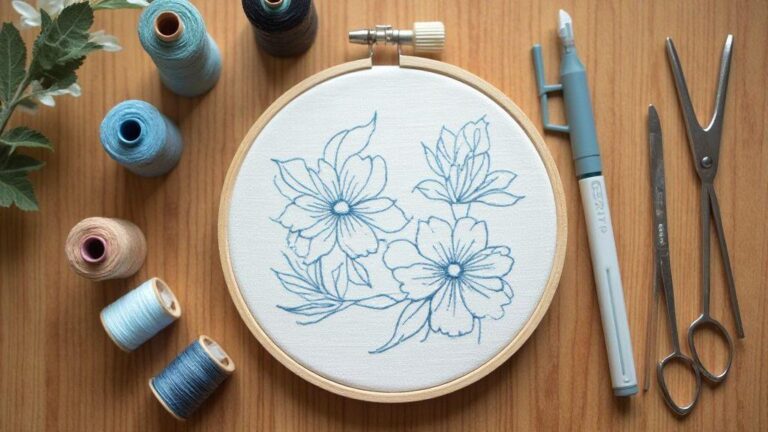
Trace designs clearly and reverse when needed
You’ll trace your embroidery design so every stitch aligns. Start with a clear pattern and use a light-colored backing if your fabric is busy to see lines better. Trace with a fine pencil or non-permanent marker so marks can be removed later. Trace slowly for small details, using short, confident strokes. Clear tracing provides a clean guide that makes stitching feel natural. If your pattern is reversed on the fabric, reverse the tracing so the final piece reads correctly.
If you’re practicing, start with a simple motif. Lines should feel easy to follow, not jagged. If your hand wobbles, switch to a stencil for crisper lines. Check line directions—some curves look different when you rotate the fabric. A good trace saves you from tugging threads to fix misalignments later. When finished, compare the traced lines with your stitching to confirm a strong, readable guide.
Keep tracing tidy. Erase stray marks gently and re-trace faded areas. If you’re using a lightbox, revisit the pattern midway to ensure nothing shifted. A neat trace acts like a cheat sheet for your stitches.
Use a lightbox or window to trace your pattern
A lightbox is ideal for precise tracing. Place the fabric over the pattern, turn on the light, and follow lines clearly without pressing hard. If you don’t have a lightbox, a sunny window or bright lamp behind the pattern works too. Steady light helps you follow each line without pressing hard on the fabric.
Keep your hand steady and move in smooth, short strokes. If a line disappears, slow down and retrace. A good trace on a well-lit surface makes the next steps feel effortless. If sharing space, cover the pattern with a thin fabric to avoid accidental marks and tape edges to prevent shifting. Store the pattern flat to keep lines crisp.
Reverse images for iron-on transfer papers
Iron-on transfer papers require you to reverse the image before printing or tracing. If you don’t, the design will appear backward on fabric. Flip the image in your photo app or printer settings so text or directional details read correctly. Print or trace a reversed image onto the transfer paper, then cut close to the design to minimize extra transfer. Place the paper on fabric with the marked side facing down, apply heat as instructed, and peel away to reveal the transferred design.
If you make a mistake, reprint or re-trace after adjusting orientation. Keep a small stash of transfer papers for quick fixes. Correct mirroring is essential for embroidery to look right.
Tracing designs with transfer paper for embroidery
Tracing with transfer paper moves designs onto fabric cleanly. Place the transfer paper between the pattern and fabric, graphite side toward the fabric. Lightly trace to leave a visible, fine outline. If lines don’t show up well, adjust pressure and try again. For dark fabrics, use lighter graphite or chalk-based options to keep lines visible but not overpowering. After stitching, erase marks with a soft eraser or use washes designed for embroidery fabrics.
For complex designs, work in sections to prevent smudging. Place scrap fabric on top to protect work as you move from line to line. This method keeps the final embroidery neat and reduces ghost marks.
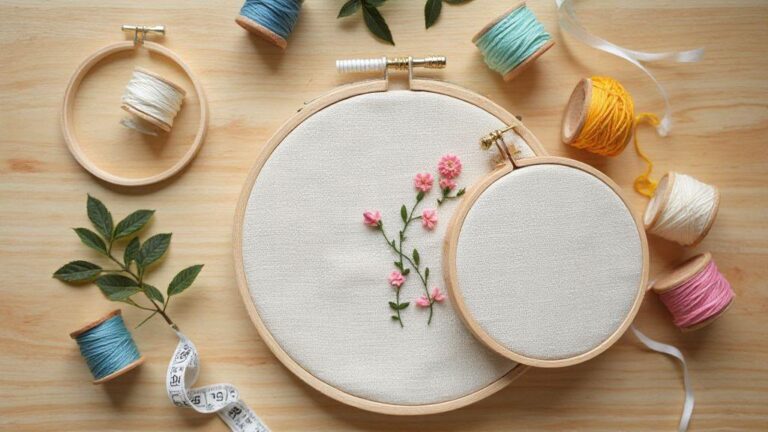
Align and secure the paper in your hoop
Place the paper in the hoop so the design stays centered during stitching. Center the paper in the hoop and apply gentle pressure to set it. If your hoop has two rings, tighten the outer ring first, then the inner ring until the paper lies flat. A taut surface helps stitches land where you expect.
Check that the paper sits flat with no edges curling upward. If you see lift, press it down or reseat it. Keep the hoop steady on the table and avoid twisting it while stitching. A calm setup saves you from redoing sections later.
Take a moment to confirm the design is centered in the hoop, leaving space around for easy stitching. If using multiple sheets, ensure alignment before you begin to avoid confusion mid-project. For a beginner-friendly walkthrough of setting up your first embroidery project, Hello World guide.
Mark centers and tape the paper to keep it still
Mark the paper’s center with a removable marker. Align this center with the hoop’s center so the pattern stays centered during embroidery. Use painter’s tape or light washi tape along the edges to secure the paper without covering the transfer lines you’ll stitch. Press firmly to prevent air pockets. If the paper shifts, re-tape a corner. Precise centers yield a cleaner finished piece.
Before you start stitching, recheck alignment. If centers aren’t perfectly aligned, adjust now. Also ensure tape doesn’t obscure key lines you’ll follow with your needle for best visibility.
Smooth away wrinkles before you stitch
Wrinkles under the paper can distort transfer lines. Gently press the paper to smooth folds, using a clean, dry iron on a low setting if the paper tolerates heat. If heat isn’t an option, smooth with your hand. A flat surface gives your needle a predictable path.
Recheck alignment after smoothing. A wrinkle near a center mark can pull the design off-center. Re-tape edges if needed and test tension by lifting the paper slightly. Confirm all transfer lines are clearly visible. Dark lines may show through stitches, so keep them crisp but not bold.
Aligning and securing transfer paper for embroidery
To align transfer paper, place it between your fabric and design or above the fabric if your method requires direct tracing. Match the design’s center with your paper’s marker, then tape or cling the paper in place. Ensure the lines you’ll stitch are visible but avoid over-wetting if using water-soluble pencils.
Keep the transfer level and free of air bubbles. Press along the edges to secure it, then double-check for crookedness. If misalignment is noticed, pause and re-seat the paper before you begin. During stitching, maintain light, steady tension to prevent smudging. If you need to remove transfer tape after finishing, do so gently to avoid tearing the paper or fabric. For future projects, you can refer back to this How to Use Transfer Paper for Embroidery Step by Step approach to refresh your technique anytime.
Transfer and stitch intricate designs with care
Take it slow to ensure clean stitches and neat details. Start with a clear, bold outline and keep the fabric taut. If lines blur, your stitches will look heavy; use a light touch and steady hands. Let the design guide you, not fight you, and choose a transfer method that fits your project and eyes.
Establish a stitching rhythm. Maintain even thread tension and avoid over-tightening the fabric. Use a magnifier or strong light to see thin lines clearly, then lock your starting point with a small, inconspicuous knot. Check your progress against the pattern every few stitches to catch misalignments early.
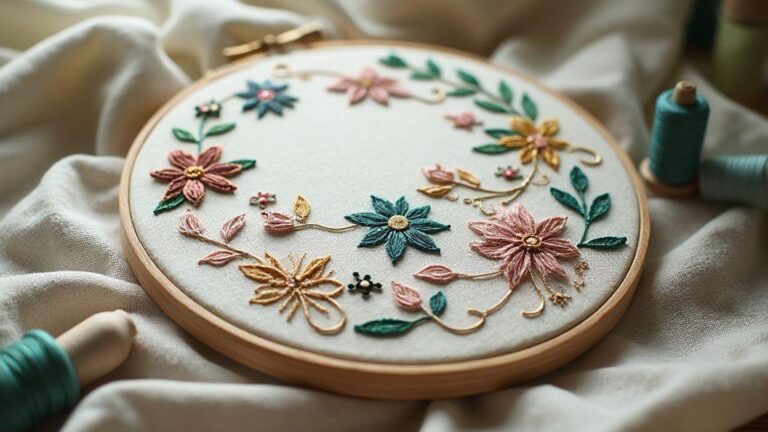
Protect your finished work. After stitching, wash or press away any visible transfer marks and give the piece a final stretch in the hoop before framing. With care, intricate designs become a wearable treasure.
Break complex designs into small sections you can handle
Divide large designs into manageable sections. Start with easier areas to build confidence, then tackle trickier parts. Map a rough order to maintain flow. Treat each section as a mini-project: decide stitches and colors, test on scrap, and ensure cohesion across the piece. If you stumble, pause, re-check the pattern, and adjust your plan. Focus on centered areas first, then fill in the edges for quicker progress.
Use fine pens or transfer tools for thin lines
Thin lines demand precise guides. Use fine-tipped pens or fabric transfer tools to lay down exact lines without bleeding. Test on a scrap swatch to ensure ink or graphite won’t smudge during stitching. Keep lines light at first; if you can barely see them, you won’t distort the fabric. For delicate details, consider water-soluble pens or carbon transfer, then recheck after area completion to confirm accuracy. If you must erase, do it gently with a soft eraser or damp brush after you’ve stitched over the marks.
Transferring intricate designs for hand embroidery
Transferring is the bridge between idea and stitch. Choose a method based on fabric type and precision needed: light tracing with transfer paper, carbon paper, or transferring from a printed pattern. Your goal is exact replication without bulky marks showing through stitches. Secure the pattern, apply your transfer medium, and maintain a steady hand. If concerned about marks, test on a scrap first and adjust pressure so lines disappear as you stitch or wash away afterward. Better transfers boost your confidence with every needle push.
Follow a step-by-step guide and avoid mistakes
Embroidery beginners save time and avoid ruined fabric by following a clean plan. Start with a simple project and the right tools, then proceed step by step. Rushing can stretch fabric or smudge designs. Keep lines clean and threads neat so your hands stay steady and your eye patient. When prepared, you’ll feel confident about every stitch and your first project will look neat rather than floppy.
Your accuracy improves with a tidy workspace. Lay out pattern, scissors, hoops, and needles within reach to avoid last-minute scrambles. Test a tiny area on scrap first; if it’s not quite right, adjust tension, transfer method, or thread choice before committing to the whole piece. A calm start means fewer re-dos and more enjoyment.
Respect your fabric’s grain and stabilizer needs. Some fabrics curl, fray, or require a light stabilizer to stay flat. If you skip this, your stitches won’t sit where you want. Do a quick practice run on scrap to confirm everything feels right. Your accuracy grows as you become accustomed to the rhythm of your needle and hoop.
How to Use Transfer Paper for Embroidery Step by Step
Using transfer paper correctly is a game changer for precise designs. Draw your pattern, place the transfer paper between the fabric and pattern, and press with care. Keep the paper flat to avoid smudges. If lines appear faint, repeat the transfer with consistent pressure. Keep the transfer lines light at first; then you’ll see clear guidelines on your fabric to follow the plan precisely. You’ll feel confident knowing your embroidery will sit exactly where you want it.
Try tips for using transfer paper in embroidery and test first
Experiment with different transfer papers to find the cleanest mark for your fabric. Some fabrics hold marks better than others, so test a tiny corner first to avoid big mistakes. Always test on a scrap before committing to the final piece. This helps you adjust pressing time or pressure as needed. If ghosting occurs after washing, switch papers or use a fabric-safe erasing method. The goal is clear marks that disappear when you’re done, not permanent lines.
Step by step embroidery transfer paper guide
1) Pick pattern and paper. 2) Place paper between pattern and fabric. 3) Trace with pencil or stylus. 4) Lift pattern to check lines. 5) Apply light heat or pressure as recommended. 6) Remove pattern and test on scrap. 7) Begin stitching using your new guide.

I’m Sophie Caldwell, the author behind granaboom.com, and I believe hand embroidery is one of the simplest, most relaxing ways to create something beautiful with your own hands. I started this blog to help beginners learn hand embroidery without feeling overwhelmed by complicated instructions or “perfect” results.
Here you’ll find beginner-friendly guides to decorative embroidery stitches, along with clear step-by-step practice ideas and patterns you can use to build confidence. My focus is on making the learning process easy: simple explanations, helpful stitch combinations, and small projects that look polished even when you’re just starting out.
Welcome to granaboom.com—grab your hoop, choose a few colors, and let’s stitch one line at a time.