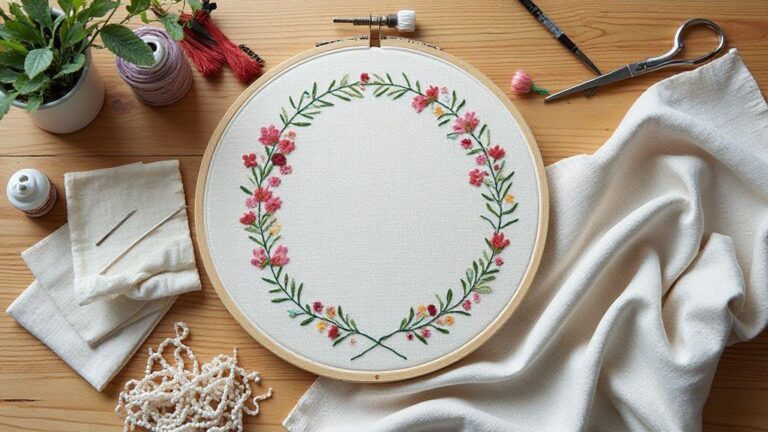
How to Organize Your Embroidery Supplies Like a Pro
Embroidery floss organization that saves time
You’re ready to sew, not hunt for a color. Gather all floss in one place and group by color family so you pick threads in seconds. A tidy setup prevents tangles and frays, keeping your focus on stitches. With a simple habit, your workspace becomes a calm, predictable routine. Consider how you use floss: separate light, medium, and dark tones to reduce color chaos. Put your most-used colors in front and reserve rare shades in labeled boxes. The goal is to reduce clutter so you can enjoy every stitch. Think of this as your path to How to Organize Your Embroidery Supplies Like a Pro.
Bobbins and thread storage solutions
Bobbins are essential for quick color changes. Use a dedicated bobbin holder or pegboard to keep them flat and visible. Winding floss onto bobbins consistently prevents knots. If you don’t wind every skein, label loose threads with color and shade so you can grab what you need.
Labeling helps more than you might think: color codes on each bobbin or a tiny tag with the DMC number or shade. For kits, keep bobbins in order of the design so you can flip through colors like pages in a book. A breathable storage system—shallow drawers or clear trays—lets you lay out bobbins in neat rows. You’ll save time, avoid mistakes, and stitch faster.
Label and sort embroidery threads
Sort by color families and label each group. Start with broad categories (reds, blues, greens, neutrals) and subdivide by shade. Labeling helps prevent mixing tones that look similar but read differently on fabric. Keep a quick reference card or small notebook with color codes to recreate shades later. If you’re using multiple brands, note the brand alongside color numbers to avoid mismatches. Clear, labeled organizers let you see at a glance what you have and what you need.
Use transparent organizers with labeled sections to spot missing colors at a glance. This simple upgrade makes every project feel doable.
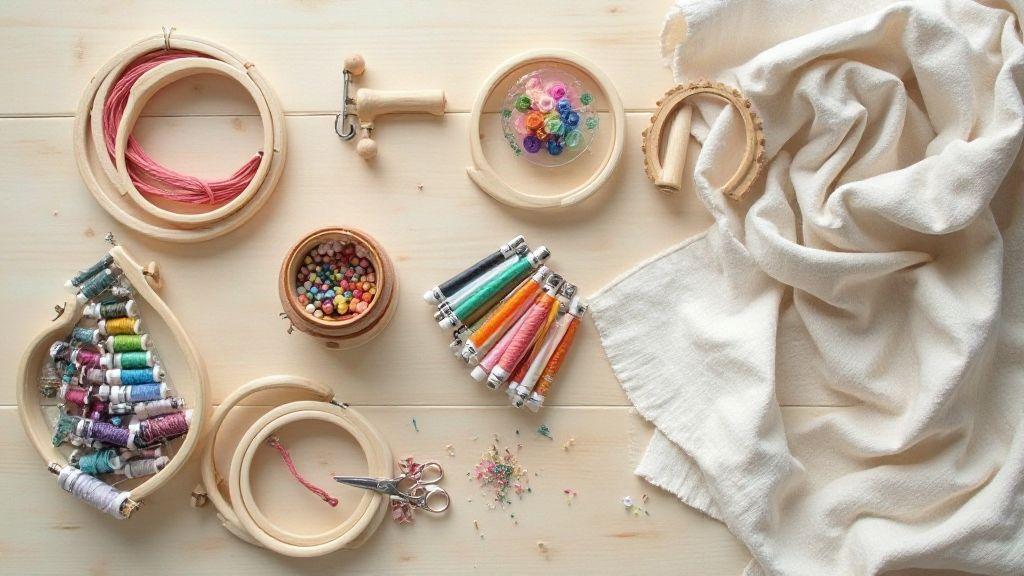
Clear boxes and stackable trays
Clear boxes and stackable trays let you see floss at a glance and grab it fast. Choose modular trays that fit your desk or tote, and place the most-used colors on top. A mix of open shelves and closed boxes reduces dust while preserving color accuracy.
Storage ideas for embroidery hoops
Smart storage protects hoop wood, keeps hoops clean, and makes the right size easy to grab. Label hoops by size and group active projects together, storing inactive hoops elsewhere to reduce clutter. Use simple organizers that fit your space; clear containers show what you have, while fabric sleeves protect hoops from snagging threads. Wipe hoops with a dry cloth regularly to keep the wood from drying out.
Long-term planning saves headaches. By keeping hoops clean, labeled, and sorted by size or project, you’ll be ready to start a new piece in minutes and notice fewer lost or damaged hoops. This turns chaos into a calm, productive craft space that motivates you to stitch more.
Wall racks and pegboards for hoops
Wall racks and pegboards give you prime real estate for hoops and a neat, visual order. Mount a rack at eye level for easy grabs, and use labeled baskets or hooks on a pegboard to keep hoops off your work surface. If space is tight, vertical wall storage frees desk area for stitching.
Choose a design that matches your room and projects. Metal hooks offer sturdiness for heavy hoops, while wooden racks suit a cozy craft room. Position hoops by size or project so you can grab the right one quickly. Leave air circulation to prevent moisture buildup. Wipe hoops occasionally and rotate displays to avoid sun fade. A tidy wall storage system speeds your workflow, especially when juggling multiple projects.
Soft sleeves and hoop bags
Soft sleeves protect hoops from dust, sunlight, and nicks during transport. Look for sleeves with a snug fit so hoops stay put, plus light padding for protection in transit. Label sleeves by size or project to keep your system tight. A small pocket for scissors or a thimble turns a bag into a mini kit. Storing sleeves in a dedicated bin saves time and keeps your workspace calm.
Soft sleeves help hoops stay cleaner and less worn. This small step delivers big returns in ease and readiness for your next project.
Stackable hoop racks
Stackable hoop racks are a compact, scalable solution for growing collections. Start with a single stack for your most-used sizes, then add more as needed. Keep sizes grouped within each stack and use color coding or labels to speed selection. Ensure the base is stable so hoops don’t tip while you’re grabbing one mid-stitch.
Build a portable embroidery supply case
A portable case is essential for quick access. Choose a sturdy, lightweight shell with a padded interior and clear compartments so you can see what you need without digging. The layout should open flat like a mini worktable, with zippered pockets for needles and small scissors, elastic loops for skeins, and a mesh pouch for pins. Prefer transparent or labeled compartments for at-a-glance access. A water-resistant cover helps if you stitch near windows or outdoors. Organize so you can grab what you need in one swift motion.
If you can, pick compartments that are transparent or labeled to see inside at a glance. Organization saves time and mood, especially when you’re on a deadline.
Choose a compact case for your kit
Start with a size that fits your bag or backpack. A compact case should feel pocket-friendly but still hold your essentials. Look for dimensions that let you stash scissors, needles, and a few skeins without crowding. A slim profile means you’ll actually take your kit to classes or cafes. Durability matters: zippers, reinforced corners, and a resistant exterior keep tools safe. Interior padding protects delicate items. A lay-flat design helps you see everything at once. Accessibility matters: elastic loops hold needles firmly, and clear pockets help you spot thread packs quickly.
Pack embroidery kit organization tips
Begin with a simple color order: arrange threads by color family, then shade from light to dark. Use small labeled bags or color wheels to keep tones together. Establish setup and teardown routines: put items back in the same place after a session, and use a tiny checklist to refill thread or replace worn scissors. Add a small thread wallet to corral loose threads. A slim wallet with fabric pockets lets you organize skeins by color or length, and keep a few extra bobbins nearby for quick rethreading.
Add a small thread wallet
A small thread wallet keeps loose threads in check. Choose one with clear pockets so you can see colors at a glance. Place full skeins in one section and cut floss into short, labeled lengths in another. This prevents tangles and makes color changes smooth.
Easy embroidery supply organizers and DIY ideas
Easy organizers save time and money while making your threads, needles, and tools easier to reach. A clean, organized space reduces downtime and helps you practice with confidence. With the right DIY ideas, your speed and accuracy will grow, and you’ll feel the difference when you can grab the right color or tool in one motion. This is your foundation for consistently smooth embroidery sessions.
Repurpose jars, pill boxes, ice trays
Repurposed jars work as thread snips holders and small parts containers. Use transparent lids to see contents quickly. Pill boxes can store colors by family or project; label the top for quick access. Ice trays with individual compartments keep skeins separated and labeled to avoid mix-ups. Decorate jars and boxes to make organization enjoyable. The goal is distinct, quick cues so you can grab what you need in seconds.
Make simple floss cards and boards
Floss cards are a quick upgrade: punch holes in sturdy cardboard and loop floss ends through, labeling with color names or numbers. Laminate or cover with clear tape for durability. For a larger display, mount several cards on a corkboard to view all colors at a glance. Arrange by color family—warms, cools, neutrals—to speed decisions and reduce waste.
Label DIY bins for quick finds
Label bins with bold, clear text and high contrast so you can read them from your chair. Place labels where your eyes land first, and consider a color-coded dot system for quick scanning. Keep one in-use bin for the current project to maintain a smooth workflow. This simple system helps you finish projects faster.
How to Organize Your Embroidery Supplies Like a Pro
Organizing your embroidery things isn’t just tidy—it makes you faster and less frustrated. When you can find your needle, floss, and hoops in seconds, you can start stitching right away. A simple setup helps you see what you have and what you’re missing, so your projects flow from start to finish.
Create zones to organize embroidery supplies
Put supplies into zones that mirror your workflow. A needle-and-thread station, labeled floss bins, and a separate hoop/fabric zone minimize cross-movement. Label everything in bold and consider color-coding zones to reinforce habits. The more intuitive the zones feel, the more likely you are to stick with them.
Keep a project basket and tool caddy
A project basket holds your current project and essentials: needles, floss, a small scissors set, and a fabric scrap. A portable tool caddy keeps frequently used items within reach without clutter. Use a transparent lid and compartments to keep everything visible and organized, whether you’re at a desk or on the go.
Weekly tidy and restock list
Set aside 10–15 minutes weekly to tidy and restock. Return items to their zones, discard scraps, and note what you used up. Keep a restock list on your phone or in a notebook: colors you’re running low on, preferred needle sizes, and any new tools to try. A regular rhythm keeps your space clean and your mind clear.
Craft room organization embroidery tips
A space that helps you sew more and stress less starts with clear bins and open shelves. Label bins boldly so you know exactly where to grab what you need. Keep your most-used tools within arm’s reach, and let the rest live on sturdy shelves. A logical, predictable layout reduces clutter and makes it easier to choose projects you can finish. Open shelves also help you swap in fresh pieces for new projects, keeping creativity flowing.
Use clear bins and open shelves
Clear bins let you read contents at a glance, saving minutes or hours over a week. Pair them with open shelves to arrange by color family or project type. Bold labels reduce interruptions, and a dedicated tray or caddy keeps frequently used tools handy. Clear bins plus open shelves are the backbone of a fast, focused craft routine.
Plan a workflow from kit to storage
Start with your kit: lay everything out and verify all parts. Sort items into a temporary tray—colors, fabric, needle, pattern—to see what you’re working with and keep things moving. Move to stitching on a dedicated work surface, keeping tools within reach. As you finish, place completed components into labeled storage. Return everything to its home after finishing, with colors by family, fabrics by size, and tools by function. A repeatable workflow reduces mistakes and speeds up your process.
Label shelves by project type
Label shelves by project type to switch gears quickly. For example, a Floral Embroidery shelf or Intricate Patterns shelf keeps everything you need in one place. Large, bold labels and color coding help you remember where things live, supporting you whether you’re finishing a project or picking up a WIP.
This version preserves the original guide’s structure while tightening repetition and enhancing clarity. It reinforces the central keyword and provides actionable, SEO-friendly sections to help readers efficiently organize embroidery supplies like a pro.

I’m Sophie Caldwell, the author behind granaboom.com, and I believe hand embroidery is one of the simplest, most relaxing ways to create something beautiful with your own hands. I started this blog to help beginners learn hand embroidery without feeling overwhelmed by complicated instructions or “perfect” results.
Here you’ll find beginner-friendly guides to decorative embroidery stitches, along with clear step-by-step practice ideas and patterns you can use to build confidence. My focus is on making the learning process easy: simple explanations, helpful stitch combinations, and small projects that look polished even when you’re just starting out.
Welcome to granaboom.com—grab your hoop, choose a few colors, and let’s stitch one line at a time.