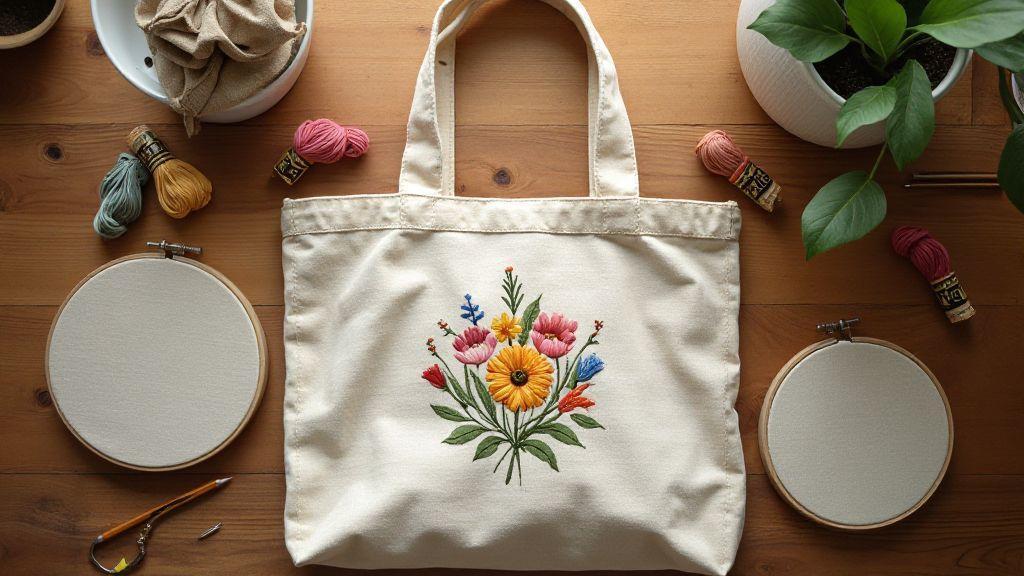
How to Embroider a Linen Tote Bag from Start to Finish
Materials and tools for your tote embroidery
Embarking on a linen tote embroidery project means lining up sturdy, reliable tools that won’t fight you as you stitch. Think of your tools as the foundation of your creativity: sharp needles, clean holes, and a comfortable hoop keep your focus on the design. In this section, you’ll learn how to pick the right threads, needles, hoops, templates, and scissors so your linen tote turns out neat, durable, and unique.
Linen behaves differently from other fabrics: sturdy but prone to fraying if rushed. The right thread and needle choice helps you weave clean lines and crisp shapes. A taut hoop or frame keeps the fabric steady, making even stitches easier. Templates give you crisp guides, and sharp scissors save you from snagging threads. With these basics, you’re ready to move from concept to a finished tote you’ll be proud to show off.
If you’re new to linen, start with a simple layout and a light touch. As you gain confidence, try denser stitches or a more intricate pattern. The goal is steady progress, not perfection on the first try. Your tote will reflect your patience and practice—and that makes it special.
Choosing embroidery thread for linen
Choosing the right thread for linen is a game changer. You want threads that glide smoothly through the fabric without pucker or snagging. For linen, polyester embroidery floss or cotton embroidery floss with a tight twist works well. It holds up to washing and keeps its color. If you prefer a matte, traditional look, use perle cotton in a two-ply or six-strand variation for clean, crisp lines.
Consider color thoughtfully. Start with two or three shades that complement your tote, then add a pop of contrast for emphasis. When threading your needle, pull a secure tail to avoid fraying and test a small stitch on a linen scrap to verify behavior. If the thread shreds or slips, swap to a finer needle or a longer stitch. The goal is smooth, even lines that lie flat against the fabric.
Needles, hoops, templates and scissors
Your needles should match both your thread and linen’s weave. For tote work, use a sharp needle (size 7–9) that cleanly penetrates the fiber without creating large holes. Keep a few needles in different sizes handy for quick thread or stitch changes.
A hoop or frame keeps linen taut so stitches stay even. Choose a lightweight hoop with a smooth inner rim to prevent snagging. For warpier fabric, a scroll frame or magnetic frame can help maintain tension along the whole design. Templates are your friends for precise patterns. Use a light water-soluble pen or chalk to transfer your design, and keep a clean eraser handy. Sharp scissors that balance well in your hand will make trimming threads effortless and save you time.
Quick materials checklist
- Linen tote fabric (pre-washed)
- Embroidery thread (polyester or cotton floss; 2–3 colors to start)
- Needles (sharp needles, size 7–9)
- Hoop or frame (lightweight and smooth inner rim)
- Templates or pattern transfer tools (water-soluble pen, chalk)
- Scissors (sharp, small for detail cuts)
- Marking tools (pins, needle, eraser)
Preparing layout and hooping your linen bag
You’re about to stitch a cleaner, crisper design, so start with a calm, precise setup. Lay your bag flat on a clean, bright surface and smooth out wrinkles. Keep the bag’s opening away from the hoop to avoid snagging. If you’re unsure about alignment, preview your design on paper first and note key reference points. Mark where embroidery will sit with a light fabric pen or chalk, then tape the edges to prevent shifting during hooping. A steady start saves you time and frustration.
Choose a hoop that fits your linen tote. A larger hoop can feel bulky but helps keep fabric taut and prevents puckers. If the bag is very soft, consider a lining or stabilizer to hold the fabric in place. Secure the fabric with gentle pressure—over-tightening can stretch linen, under-tightening invites shifting. When hooped, double-check that marks align with your design’s center. This calm check makes embroidery feel effortless.
Review your thread and needle setup. Use a weight that matches your linen texture and pattern complexity. Pre-wind a few bobbins and ensure thread colors contrast enough to read the design while harmonizing with the linen. If you’re new, test a small sample on scrap linen to confirm tension and stitch length. Once it looks right, you’re ready to start and you’ll feel the difference in clean lines on the tote.
Layout and placement for bag embroidery
Begin by centering the design on the tote’s front panel. Use a ruler to find the exact middle and check vertical balance. If the tote has seams or side panels, align the design so it won’t be interrupted by a pocket or seam. Slightly offset the design from curved edges to ensure crisp lines. Mark a centerline and use temporary guidelines to keep placement steady.
Consider design size: it should fit inside the printable hoop area without touching the clamp. For a single motif, larger sizes create impact; for words or multiple small motifs, keep them compact and readable. Leave space around the edges to avoid trapping threads against the hoop. When placement feels right, pin the fabric lightly or use a removable stabilizer.
Think about line quality: plan color changes to avoid crossing threads or skipping stitches. Slow down for small details to maintain legibility. A well-planned layout reduces undo work and helps your tote look crisp from the first stitch.
Hooping techniques for tote bags
Start with a clean hoop surface and appropriate stabilizer. If the tote is soft, sandwich the fabric between stabilizers to prevent wobbly stitches. Tighten the hoop just enough to remove slack without distorting the linen. Test with a single thread on a small corner before the full design. If puckering appears, loosen the hoop and re-tighten with even pressure. Your goal is a taut, smooth surface.
Tote bags aren’t flat, so hoop the area facing you and consider a larger hoop or roll method to reduce edge distortion. For larger designs, hoop twice or use a backer cloth to maintain shape. If the fabric slips, add gentle pins or clips. A secure hoop keeps stitches even and work stress-free.
Manage needle entry points with a stabilizing needle plate or rolled stabilizer under the hoop. Keep the fabric edge about a half-inch inside the hoop to leave room to pivot. For dense patterns, slow your machine and use a shorter stitch length to preserve tension. Hoop technique becomes a simple, repeatable step that keeps your tote embroidery polished.
Tension and positioning tips
- Check tension by stitching a quick sample on similar fabric. If stitches pull, ease the upper thread or reduce stitch length.
- Aim for even, smooth stitches that don’t pucker the linen.
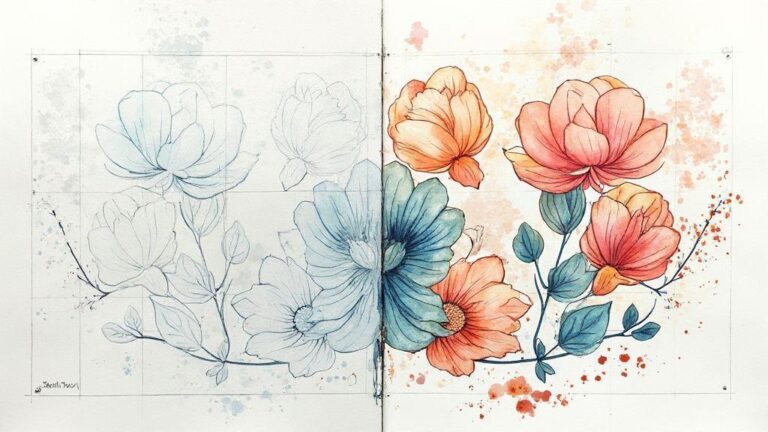
Transferring designs to linen fabric
Transferring your design to linen brings the pattern to life. Start with a light, smooth linen for easy tracing and flat stitches. Use a clean surface and good lighting to avoid missing details. If the fabric wrinkles, press lightly—avoid heavy creases that distort patterns. Lay your pattern on the linen, secure it, and verify corners match reference points. A confident start saves rework later.
Several transfer methods work for different projects. Chalk pencils leave temporary lines that wipe away easily. Water-soluble pens create bold lines that rinse out later (test first). Light tracing with a stencil or carbon paper can work if you protect the back of the fabric with a thin cloth to prevent ghost marks. Practice methods on scraps to dial in your technique before working on the tote.
For complex designs, try a light mirror method: trace onto tracing paper, pin to linen, and trace through with a fine pencil. Beginners should start with simple shapes and larger gaps between lines. Practice on scraps before tackling the tote.
How to Embroider a Linen Tote Bag from Start to Finish
Begin with a clean, pressed tote and visible transfer marks. Thread your needle with a sturdy thread that contrasts against the linen to easily see stitches. Work in small, even stitches with consistent tension; slips show up as puckers. If the design has many small details, outline first, then fill in to preserve shape. Do not rush. Finish by tying off securely, trimming excess thread, and giving the bag a gentle press to set the stitches.
You’ll love the moment you complete the tote: the linen texture, clean lines, and how the design pops. If you make a mistake, a small cutaway repair or stitch tweak can salvage the piece. Keep a thread sample and a scrap handy to practice fixes without risking the whole bag. Your end result should feel sturdy and stylish—something you’re proud to carry.
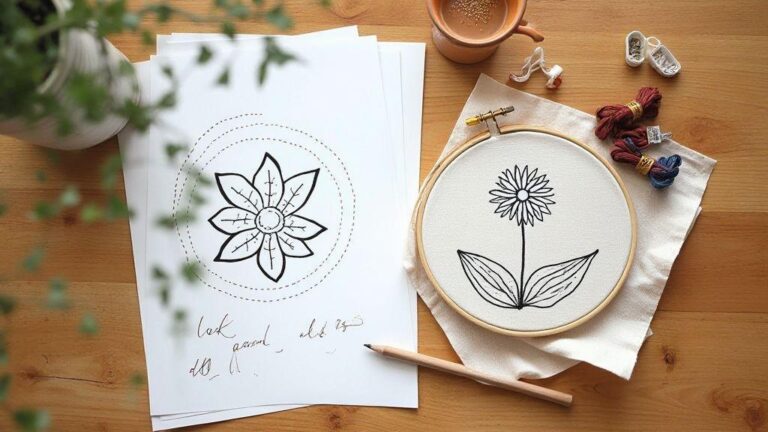
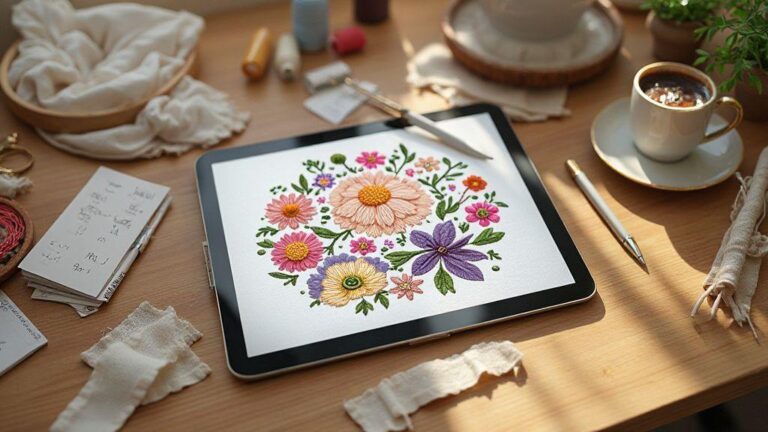
Using patterns, templates and tracing methods
Patterns give a clear roadmap for linen. Start with a clean, printed pattern and a sturdy template. Secure the template with gentle pins or low-tack tape to prevent shifting. Break large patterns into sections to reduce errors and stay focused on one area at a time. The goal is accurate alignment for a balanced, professional final piece.
Templates and tracing tools help with repeating motifs or making multiple copies. When tracing, keep your hand relaxed and steady to avoid distorting lines. If using carbon paper, place a thin cloth between linen and paper to prevent shine marks. Practice on scrap linen first to dial in technique, then apply to your tote.
Beginner embroidery stitches for tote bag
Embroidery on a tote bag is a fun way to start stitching. Practice on scrap cloth before moving to the linen tote. Start with simple stitches that look great on natural fabric. Your goal is steady stitches, not perfection on the first try, so relax your grip and take breaks as needed. Basic stitches can create big impact: single-color work for clean lines, or multiple colors for a playful vibe. If your first attempt feels uneven, consistency grows with practice. The linen’s texture helps guide the thread, and your tote will tell its own little story with each stitch.
When choosing a simple pattern, geometric shapes or a small flower keep things manageable. Keep the fabric taut but not stretched; too-tight fabric makes needles harder to push, too-loose fabric makes stitches wobble. You’re building skill with every stitch, and the tote will reward your effort.
Linen tote bag embroidery tutorial for basic stitches
Pin or baste your pattern onto the linen tote, then stitch with three easy basics: backstitch for clean outlines, satin stitch for filled shapes, and French knot for small dots. Keep the thread snug but not tight; smooth lines glide over the fabric. If you miss a spot, you can revisit it later—the linen will forgive you.
Control tension by feeling the thread in your fingers. Too tight causes puckering; too loose makes stitches look sloppy. After each stitch, feel the fabric to ensure no loose loops. Personalize the tutorial by changing thread colors or adding a border to frame the design.
Step-by-step practice: backstitch, satin, French knot
- Backstitch: draw the outline with a continuous line; don’t rush.
- Satin stitch: fill shapes in small, even rows with tight gaps.
- French knot: wrap the thread around the needle several times, then insert near the starting point and pull through to create a tiny dot.
Stitch tension hacks
Rest hands and let the fabric breathe to keep stitches even. If lines wobble, slow down and check your grip. Loosen tension if the fabric puckers, and practice on scrap linen to train your fingers for the right feel.
Stabilizers and backing choices for linen embroidery
Stabilizers help linen stay steady without showing through. For linen, a light to mid-weight stabilizer works best. Tear-away stabilizers are great for woven linen with typical stitch density; cut-away stabilizers stay put and support the fabric, especially on items washed often. Test a small scrap to see how the stabilizer behaves with your needle and tension.
Fusible stabilizers can simplify setup, bonding to the back of linen and reducing shifting. If your project curves, consider a water-soluble topping to prevent stitches from sinking into the weave. The goal is a stable, smooth surface so embroidery sits on top of the linen rather than sinking in.
Choosing stabilizers depends on fabric weight and stitch type. For light linen, tear-away disappears after use. For medium to heavy linen, cut-away provides lasting support. If washing, pick stabilizers that hold up to heat and laundering. The right choice makes linen look plump with stitches, not stiff.
Securing stabilizer around seams and straps
Apply stabilizer to the back of the linen, then secure around edges with a light baste stitch or wash-away glue. Leave a bit of stability along seam lines and trim excess after stitching. For straps, wrap stabilizer around the area you’ll sew and pin to prevent shifting. Fusible stabilizers should be applied with light pressure to avoid scorching. If stitching near a seam, remove some stabilizer beyond the stitching area to prevent interference with seam allowances. A neat strap helps prevent embroidery ripple at the edges.
How to remove stabilizer cleanly
Gently remove tear-away stabilizer after finishing. Peel from a corner and work slowly to avoid lifting stitches. Trim stubborn areas with small scissors. For cut-away, trim closely along the edges. If using a fusible stabilizer, remove any residue after finishing. A light mist of water can help soften fibers, but avoid over-wetting. Use a vacuum or lint roller to clean up any leftover bits. Test a small corner first if you’re worried about snagging stitches. Finally, inspect for loose threads and press from the back to finish.
Finishing touches, care and floral patterns
Finish with small touches that make your tote look polished and durable. Check for loose threads and trim them close to the fabric. A gentle low iron on the back keeps stitches smooth without flattening them. Consider outlining floral shapes with a fine backstitch to sharpen edges. A simple label or woven tag adds charm without overpowering the design. You can add a touch of fabric spray or a tiny bead for texture, but keep it minimal. The finished tote should feel cohesive and ready to use or gift.
Finishing and caring for embroidered tote
Care for your embroidered tote to keep colors bright. Turn inside out before washing; use a gentle cycle with cold water and mild detergent. Avoid bleach. Lay flat to air dry or hang in the shade. If needed, light ironing from the back helps smooth fabric while preserving stitches. Store the tote in a cool, dry place away from direct sunlight.
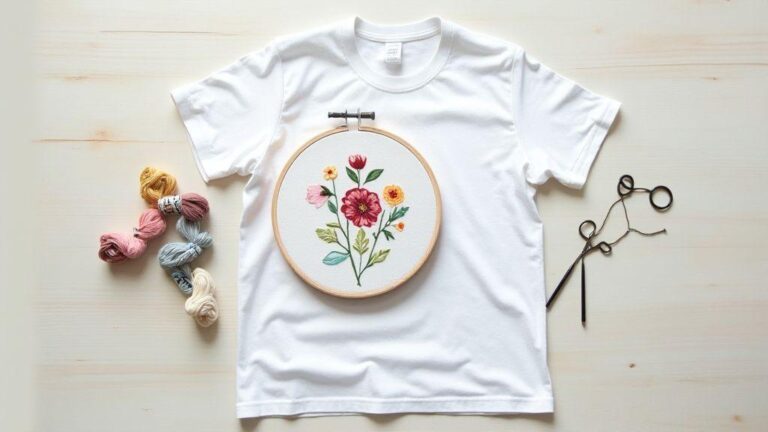
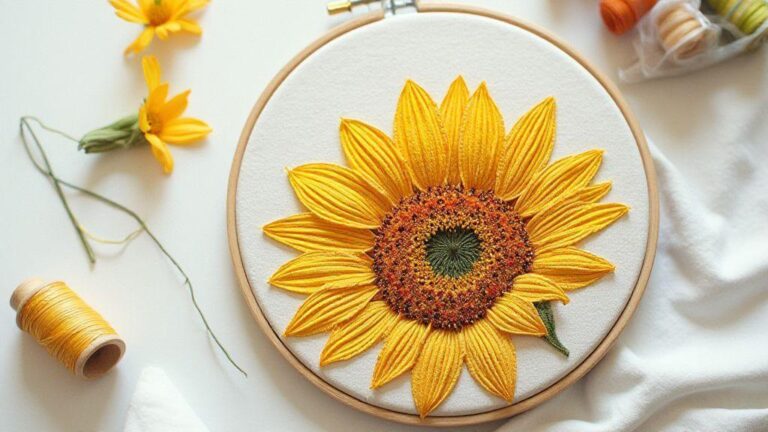
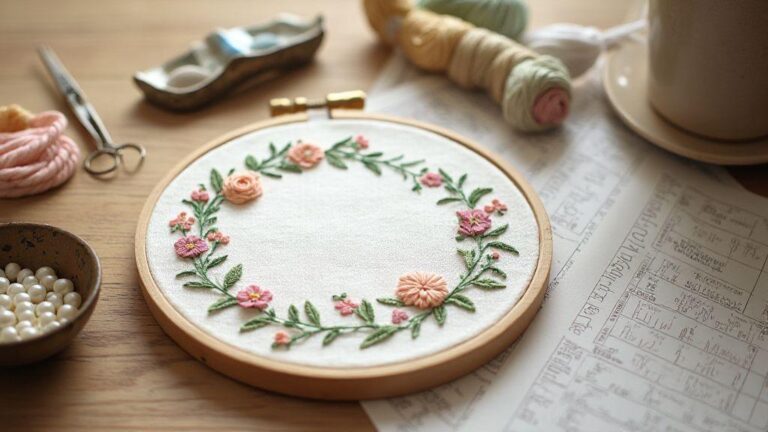
Floral embroidery patterns for linen tote
Floral patterns on a linen tote bring a timeless vibe. Use stitches that suit linen’s texture—satin, back, and stem stitches work beautifully. Start with a light sketch or transfer, then build color in layers. Linen weave adds depth and a rustic charm. A few well-placed blooms often look more elegant than a crowded design. Choose a color palette you love and stick to it for cohesion. Tiny French knots in centers or along stems add texture without overwhelming the piece.
Washing and storage tips
Wash in cold water with a mild detergent. Turn inside out, air dry away from direct sun. Iron on a low setting from the back if needed. Store folded in a breathable bag or box in a cool, dry place. Your tote will stay vibrant and ready for everyday use.

I’m Sophie Caldwell, the author behind granaboom.com, and I believe hand embroidery is one of the simplest, most relaxing ways to create something beautiful with your own hands. I started this blog to help beginners learn hand embroidery without feeling overwhelmed by complicated instructions or “perfect” results.
Here you’ll find beginner-friendly guides to decorative embroidery stitches, along with clear step-by-step practice ideas and patterns you can use to build confidence. My focus is on making the learning process easy: simple explanations, helpful stitch combinations, and small projects that look polished even when you’re just starting out.
Welcome to granaboom.com—grab your hoop, choose a few colors, and let’s stitch one line at a time.