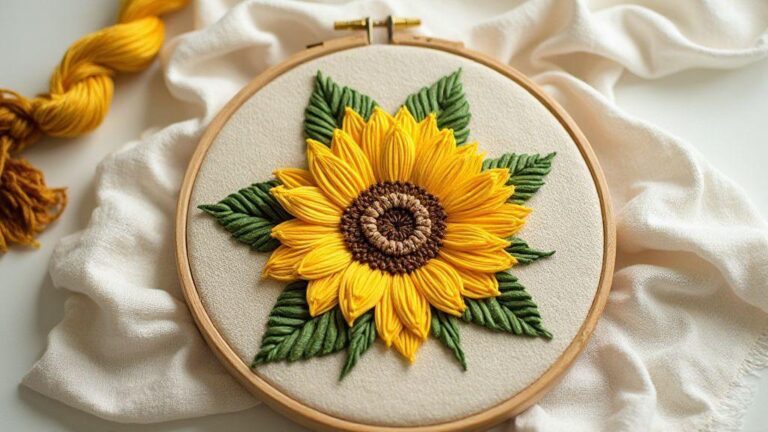
How to Create Realistic Leaves with Long & Short Stitch
Choose your threads and fabric
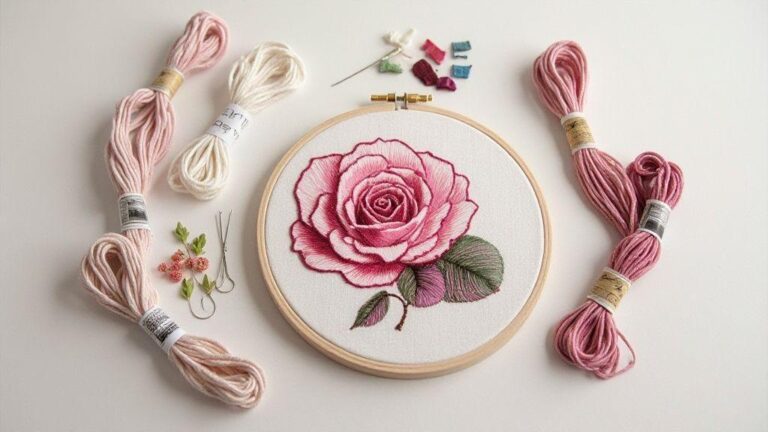
You’ll get the best results when you pick threads and fabric that work together. Start with a tight-weave fabric like cotton or linen so stitches sit evenly and don’t snag. Opt for sturdy but smooth threads—embroidery floss or high-quality stranded cotton work well. For a soft, natural look, choose slightly variegated tones to mimic real leaves. Blending two greens with a touch of brown adds depth for shadows. Always test a small sample to see how the thread weight behaves on your fabric under your needle speed.
When deciding on thread types, consider durability and shine. Silk threads offer a delicate luster; cottons stay matte and bold. For a leaf embroidery piece, aim for a mid-weight thread that layers well without puckering the fabric. If you’re new, start with a single color and build depth with two or three lighter or darker shades. The goal is a natural transition between tones, not a flat green block. The right combination makes your stitches pop and your leaf look alive.
If your project leans toward realism, keep the palette cohesive with related greens and a touch of yellow for highlights. Don’t overwhelm with contrasting colors, or the leaf will look painted, not stitched. A tiny bit of metallic for veins can be used sparingly. Focus on texture and shading to make your leaf feel real in color and form.
Thread and fabric choices for leaf embroidery
Your thread choice should support the long and short stitches that shape the leaf’s texture. Use a smooth, sturdy cotton for clean edges, or a slightly glossy silk for a soft sheen. Fine threads yield a delicate leaf, while thicker threads create bold veins. For realism, layer small amounts of color with a light hand, letting threads mingle in the fabric rather than sit on top. A well-chosen thread set gives a natural finish with subtle shading that mimics real foliage.
Fabric matters as much as thread. A tight weave helps place tiny stitches with confidence, reducing gaps and frays. Cotton or linen in light to medium weight works well, especially when practicing long and short stitches to create soft leaf gradations. If the fabric is too loose, puckering and uneven stitches occur. If it’s too stiff, the leaf can look stiff too. Test on a scrap first, then commit to your project.
When you combine threads and fabric properly, your needlework sings. Control texture by layering stitches and letting shades fade into one another. If your leaf needs transparency, choose lighter threads and fewer wraps. For a more solid leaf, use denser stitching and slightly darker tones for veins. The result is a leaf that feels dimensional, not flat or cartoonish.
Needles, hoop size, and fabric prep for your work
Choose a sharp needle for clean, precise stitches, and a larger eye if using thicker floss. A size 7–9 embroidery needle works well for midweight threads on cotton or linen. If you’re using finer threads, go a size smaller to keep stitches tight and neat. The right needle keeps edges crisp and threads moving smoothly.
Hoop size matters because it controls tension. A hoop too small can pull the fabric and distort your leaves; a hoop too large may let the fabric shift. Pick a hoop that keeps work taut but comfortable to maneuver. You’ll achieve straighter lines and cleaner edges, especially with long and short stitches requiring consistent spacing. Create a comfortable working area where your hand can glide.
Before you start stitching, prep your fabric. Wash and press to remove sizing that could resist the thread. Apply light starch or interfacing if you want extra stiffness to keep edges neat, then center your leaf design in the hoop. Tape or pin the fabric lightly to prevent shifting. Your surface should be flat and well-lit so you can see subtle color changes. Prep smooths the path to clean, even stitches.
Quick materials checklist
- Fabric: Tight-weave cotton or linen, light to medium weight
- Threads: Cotton embroidery floss or stranded cotton, plus a small amount of coordinating silk for sheen if desired
- Needles: Size 7–9 embroidery needle (adjust if using finer threads)
- Hoop: Medium to large hoop with good tension
- Prep: Fabric conditioner (or mild wash), iron, light starch or interfacing
Plan your colors and blend with intent
You’ll achieve the most realistic leaves when you plan colors before you stitch. Choose a palette of 3 to 5 greens plus a touch of brown or yellow for stems and highlights. Consider where the leaf sits in your project: sunlit edges appear brighter, shaded areas cooler and deeper. Write down the color names and the order you’ll apply them to keep leaves cohesive with the whole design.
Map your blend ideas on paper or in a photo app. Decide which stitches carry which tones. You might mix a light celadon with a mid-green for the main area, then add a touch of olive at the edges for depth. Blending creates life in the leaf, not a flat shape. Your needle becomes part of a color conversation, guiding the eye along the vein and curve. Keep blend ratios simple so you can reproduce them if you restitch.
Test your blend on a scrap fabric. Lay colors side by side and stitch a small leaf corner. See how tones shift as you pull threads. If a shade looks muddy, swap it for something brighter or purer. This quick test prevents ruining a whole leaf later and helps you achieve the glow you want.
Color blending for realistic leaf embroidery
When you blend colors, you tell a story of light and shade. Start with a light base matching the leaf’s primary tone, then layer mid-tones to carve the shape. A soft, pale mid-green creates airiness, while a deeper olive adds weight where the leaf curves away from the light. Let each color peek through in small areas to create a natural gradient.
Don’t hesitate to incorporate a tiny touch of yellow or brown along the midrib or edges. A hint of yellow catches the sun, while a brown edge can anchor the leaf in the scene. Use small amounts to prevent color competition. Keep transitions smooth with short, controlled stitches so colors mingle on the fabric.
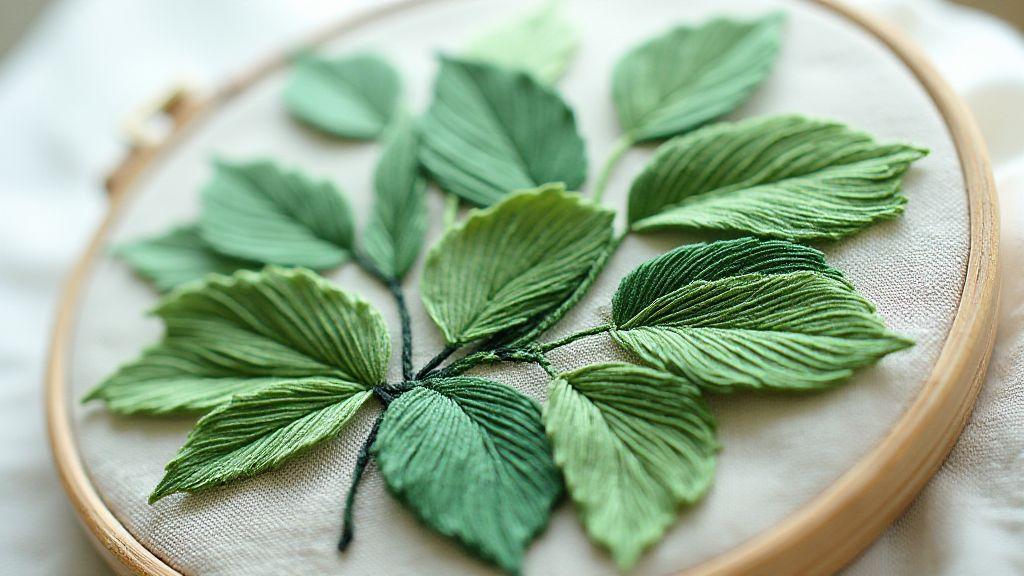
Silk shading long and short stitch leaves for soft gradients
Long and short stitches are ideal for soft gradients. Start with longer stitches along the leaf’s main body in a mid-tone, then fill with shorter stitches toward edges and highlights. This layering mimics light wrapping around a curved surface for a velvety look. Use shorter stitches where the leaf folds or to keep color crisper.
Vary stitch length slightly to avoid a stiff, uniform look. A few longer stitches here and a cluster of shorter ones there create a gentle, realistic blend. Let threads cross subtly; allow colors to mingle without obvious seams. This breathes life into the leaf and makes the embroidery feel alive with light.
Simple shading steps
1) Start with a light base color across the leaf.
2) Add a mid-tone along the center and veins to create depth.
3) Introduce a darker shade at edges and folds for contrast.
4) Finish with a highlight near the top where light would hit.
Keep transitions smooth and view from a few feet away to check balance.
Use stitch direction to shape your leaf
You’ll see the leaf take form when you follow the grain of its veins. Start with a light guideline along the midrib, then choose a stitch direction that mirrors the leaf’s natural flow. Align stitches with the curve to avoid stiff, boxy shapes and let the fabric breathe. Let your stitch direction run smoothly from base to tip, with edges curving slightly toward the tip.
Your technique should feel intentional. Think of the leaf as a tiny landscape; stitch direction is the road that guides the eye. Change direction at the right moments—along lobes or serrations—to create natural shading. Practice on scrap fabric first, then translate control to your project. The goal is stitches that align with the leaf’s flow, reading as real at a glance.
Stitch direction for realistic leaf shapes
Edges should curve rather than cut straight. Start at the base and angle stitches outward along the contour. Use short stitches near the base to form a solid core, then longer stitches toward the tip for a natural taper. Mirror bends to keep the leaf’s shape cohesive. Repeat directional rhythm along veins for a consistent, intentional look.
Long and short stitch placement to form curves
Long and short stitches work together like a team. Place short stitches along the inner curve where shading is tighter, and let long stitches sweep along the outer curve for a gentle fade. Adjust lengths mid-stroke to follow natural bends. Keep thread near the surface to avoid bulk, and shorten stitches on textured fabrics to maintain a smooth silhouette. Let long stitches lead the eye; short stitches anchor the shadows.
Flow map for stitch angles
Create a flow map to guide stitch angles from base to tip. Start with a central spine and plot how each vein angles outward, widening gently away from the base. Use the map to maintain consistent angles across sections and leaves, especially when stitching multiple pieces.
How to Create Realistic Leaves with Long & Short Stitch
You’ll see leaves come alive when you blend long and short stitches with intention. Start with a base of short stitches along the inner edge to build depth, then overlay longer stitches along the outer curve to soften the silhouette. This combination mimics how light falls on real leaves, with deeper tones tucked toward the center and lighter tones along the edges. Keep stitches parallel to the leaf’s natural veins, following your flow map to achieve dramatic realism.
Respect the leaf’s taper—vary stitch lengths rather than ending every vein with the same length. A few shorter stitches near the tip suggest thinning tissue and a life-like form. Balance texture with air; too-dense leaves look stiff, while gentle gaps read organic. The phrase How to Create Realistic Leaves with Long & Short Stitch is your blueprint—practice it, and your work will invite admiration.
Define veins and edges for realism
Veins are thin, branching lines; edges are crisp boundaries that define leaf shapes. Define veins to create depth—like tiny rivers through a leaf. Use a lighter thread or a gloss to suggest delicate veins, keeping lines subtle. For edges, aim for a clean, sharp line that follows the leaf outline and any natural serrations. This creates a crisp silhouette that looks grown from the fabric, not sewn on.
Map major veins first, then fill smaller ones. A light tracing line or water-soluble pen helps. Stitch with steady hands; long, gentle pulls create smooth veins, while abrupt pulls can bruise the fabric. Realism loves contrast: veins visible but not overpowering; edges read clearly from a short distance.
If stitching multiple leaves, vary vein angles slightly to mimic real foliage, and keep edge consistency for cohesion.
Leaf vein and edge stitching techniques
For veins, use long and short stitches on mid-veins for controlled thickness. For tiniest veins, try a fine backstitch or a single-pass stem stitch to keep lines crisp. A slightly raised look can be achieved with a satin stitch and light thread color. For edges, backstitch or stem stitch along the contour creates a strong, clean line that won’t fray.
If layering leaves or building a 3D feel, combine stitches: satin or stem along the edge for a solid boundary, then add fine backstitches inside to create tiny vein patterns. Keep pressure even and stitches small to avoid crowding the leaf.
Practice on scrap fabric. Start with the mid-vein, then add branching veins with shorter stitches. Vary lengths to mimic natural texture, but tighten near the edge to keep a sharp boundary. As you reach the tip, shorten stitches to maintain a tapered look.
To keep results consistent, maintain even tension and keep the needle perpendicular to the fabric. If you see puckering, loosen your grip and the fabric slightly. For tiny veins, use a fine needle and thread that matches the leaf’s lower side to keep edges invisible from the front.
Choose stitches for crisp edges and tiny veins
For crisp edges, a simple backstitch works well, creating a clean, continuous line along the contour. A delicate decorative outline can be achieved with a tiny running stitch. For tiny veins, use a fine needle with a thread shade slightly lighter or darker than the leaf’s surface to add depth. A tiny satin stitch along the edge yields a barely-there border that still reads as defined.
If layering leaves or creating a 3D feel, combine stitches: satin or stem along the edge for a solid boundary, then add fine backstitches inside for tiny vein patterns. Keep pressure even and stitches small to avoid overwhelming the leaf’s shape. Pace yourself with small, deliberate stitches and step back to check alignment.
Follow a clear beginner step-by-step plan
You can learn the basics fast with a simple path. Gather supplies: a small embroidery hoop, a sharp needle, and two or three threads in your chosen colors. Keep your workspace calm so you can focus on each stitch. Treat this like a recipe: measure, thread, test a stitch, then repeat. A well-organized setup makes your fabric a canvas, not a puzzle.
Set a clear goal for each session. In the beginning, master the feel of the fabric and the tension of your stitches. Pause and check your work every few minutes. If a stitch looks uneven, gently tighten or loosen it to correct. Treat each step as a small win to maintain momentum.
Practice with purposeful repetition. Use scrap fabric to practice long and short stitches until you can create smooth curves and clean edges. Keep notes on tension, stitch length, and color blending so you can reproduce your results. This plan is a repeatable method for any project, including techniques in How to Create Realistic Leaves with Long & Short Stitch.
How to Create Realistic Leaves with Long & Short Stitch
Long and short stitches give leaves texture and depth. Start by choosing two greens that blend well. Thread your needle with one color for the base and another for shading. Hold the fabric taut and place a light, even line along the leaf center. With long stitches, cover the vein area first, then fill with shorter stitches toward the outer edge to create natural variation. Switch colors slightly and stagger stitches so the leaf looks alive, not flat. Follow the leaf’s natural veins and curves, letting longer strokes run along the length and shorter ones fill gaps. Keep stitch length consistent to avoid a patchy look, then finish with a fine satin stitch along the edge to smooth the outline.
Fix gaps and finish for lasting results
Ensure your decorative stitches stay durable over time. Start with a solid base and fill any gaps immediately with a matching thread and a tiny backstitch or running stitch to secure the edge. Trim close but not too close to avoid fraying. Lightly press on a low setting to set the stitches, then let the piece rest before testing. Finishing neatly keeps color crisp and leaves deliberate, not loose or sloppy.
Assess fabric tension. If leaves look puckered or loose, adjust bobbin and top thread tension until stitches lie flat. Practice on scrap fabric to dial in the feel, then apply settings to your project. A smoother outline and fewer gaps come from consistent tension.
Seal the edges to prevent lifting. A light applique or satin stitch around the leaf outline protects the shape, especially on items that will be handled or washed. Don’t overdo it; you want resilience without stiff corners. With the right finish, leaves stay crisp and colors stay bright.
Common fixes and tension advice for your leaves
If a leaf shows uneven stitch length, reset and re-thread both the needle and bobbin. Test on a single leaf to confirm balance, then apply to the whole piece. If a leaf edge frays, switch to a smaller stitch length or a tighter finishing stitch to trap fibers neatly.
If you see skipped stitches, slow down and guide the fabric rather than tug. Stabilize the area with a chalk mark or temporary spray adhesive, then stitch slowly to place each thread. If a leaf gathers in the middle, replace a dull needle and rethread with clean hands. For multi-color leaves, plan color order to minimize thread breaks; anchor base veins first, then layer lighter shades on top. If edges don’t align, blend transitions with a fine satin stitch.
Pressing, cleaning, and care to keep color and shape
Always press leaves from the back to avoid a shiny front that disrupts stitch texture. Use a low heat setting and a clean pressing cloth. If colors dull after washing, a gentle fabric conditioner or distilled-water rinse can help preserve brightness. Dry flat away from direct sun to prevent fading or warping.
Keep tools clean. Wipe needles and scissors after each project to prevent rust and snagging. If color transfers to light fabric, test a hidden area with a damp cloth before washing the whole piece. Proper care keeps decorative stitches vibrant for future projects.
Troubleshoot and care quick guide
- Uneven stitches: re-thread, test on scrap, adjust tension.
- Gaps at edges: switch to tighter edge stitching or a satin finish.
- Fraying edges: seal with a light edge stitch or small zigzag.
- Color fading: wash gently, dry away from sun, store out of direct light.
Closing note
How to Create Realistic Leaves with Long & Short Stitch is a practical, repeatable approach you can apply to any leaf embroidery project. By planning colors, balancing threads and fabric, and using deliberate stitch direction and layering, your leaves will read as natural extensions of the fabric—alive with light, shadow, and subtle texture.

I’m Sophie Caldwell, the author behind granaboom.com, and I believe hand embroidery is one of the simplest, most relaxing ways to create something beautiful with your own hands. I started this blog to help beginners learn hand embroidery without feeling overwhelmed by complicated instructions or “perfect” results.
Here you’ll find beginner-friendly guides to decorative embroidery stitches, along with clear step-by-step practice ideas and patterns you can use to build confidence. My focus is on making the learning process easy: simple explanations, helpful stitch combinations, and small projects that look polished even when you’re just starting out.
Welcome to granaboom.com—grab your hoop, choose a few colors, and let’s stitch one line at a time.