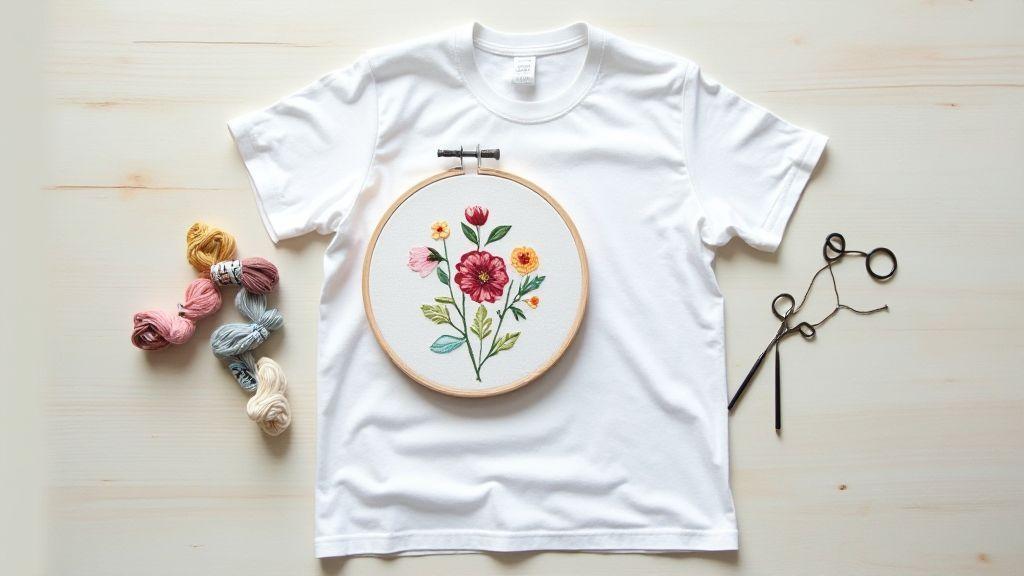
How to Add Embroidery to a Plain White T-Shirt
How to Add Embroidery to a Plain White T-Shirt: Quick Start
- Start with a simple, bold design (a single word, a small icon, or a clean line drawing) for clear readability on white.
- Aim for about 4–6 inches wide for a tee you wear often; keep it to two colors max for durability.
- Test the scale on paper or fabric before stitching, and choose high-contrast thread to make the design pop.
- If you’re wondering How to Add Embroidery to a Plain White T-Shirt, this quick-start guide will help you plan and execute a clean, lasting look.
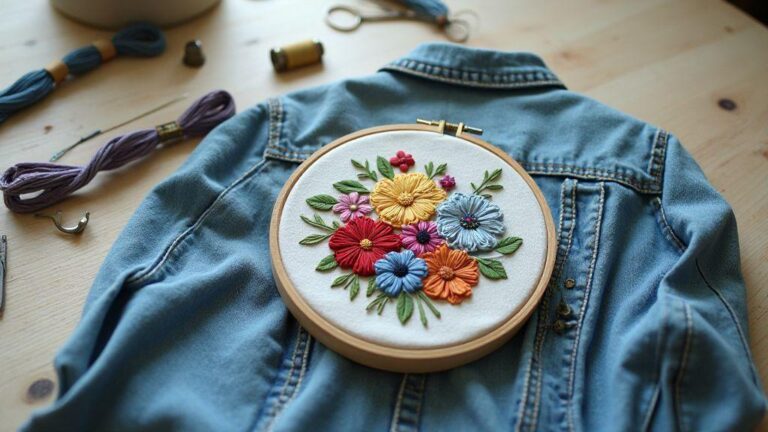
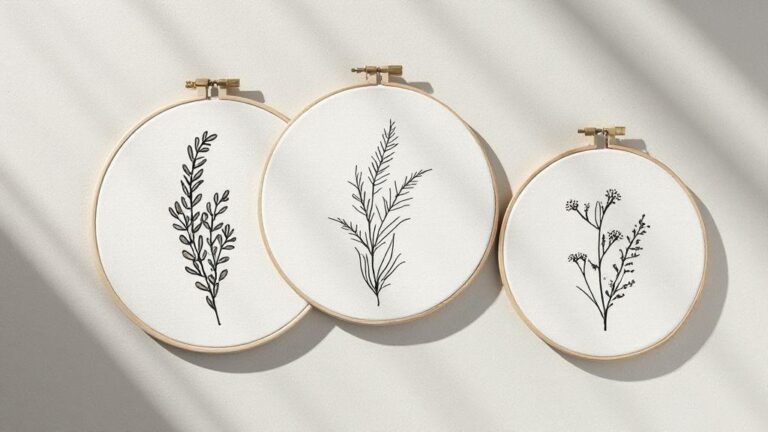
Choose a Simple Design for Your White Tee
You want a design that reads clearly on a plain white tee, so keep it bold and uncluttered. Start with a single focal element, like a word, a small icon, or a simple line drawing. Bold lines and high contrast stand out best on white fabric, and they’re easier to stitch accurately. Think about what you love—the personal touch will keep you motivated. If you’re unsure, sketch a few options first, then pick the one that looks balanced at a small size. Less is more here; a clean design will wear sharper and longer.
Consider size: for daily wear, 4–6 inches wide ages well; larger designs can be bold but harder to embroider neatly on a standard tee. If you choose text, pick a sturdy font with thick strokes. Test the scale by printing a mock-up or outlining the space with a fabric marker. Your aim is readable from short distance, not a poster on your chest.
Pick colors you love that pop on white. Usually two colors keep embroidery clean and durable. Poly/ cotton blends in thread give a slight sheen that catches the eye. If you’re new, start with one color for the main shape and add a second color for small accents.
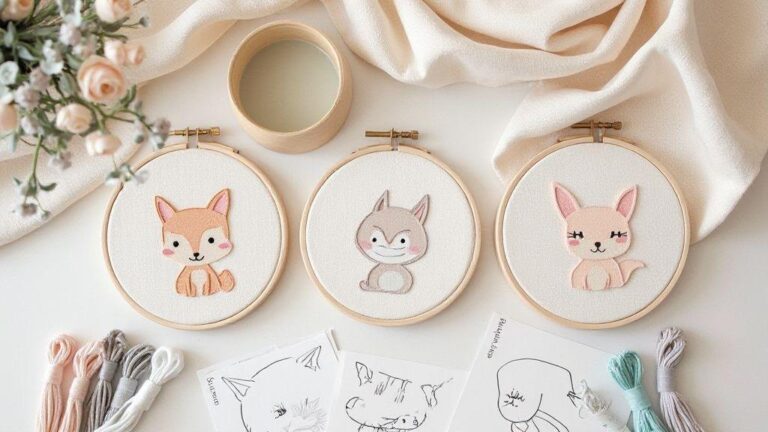
Find Simple Embroidery Designs for T-Shirts
Look for designs that stitch cleanly and don’t require complex fills. Seek graphics with solid fills and simple outlines to minimize thread changes and needle passes. Classic silhouettes like a leaf, heart, or a bold emoji translate well to embroidery on a white tee. A small, well-placed motif can add personality without clutter. Keep the design centered and avoid skinny lines that can break with wear.
Choose designs with crisp, high-contrast shapes. Avoid intricate shading or fine text that won’t hold up after washing. If you’re using machine embroidery software, convert simple clip art into a stitch outline and adjust stitch density to keep the shape full but not bulky. If hand embroidering, pick bold satin stitches or simple backstitches—these are beginner-friendly and look polished on a white tee. You’ll feel proud when your tee looks neat and professional.
If you don’t have a ready-made design, create your own by combining simple shapes. A circle with a small leaf, or initials inside a bold frame, can be personal and easy to sew. Print the design on paper and use a light transfer method to place it on your tee for accurate alignment.
Match Pattern Scale to Your Tee
Scale matters: too big will overwhelm the shirt; too small can vanish in the fabric. For a standard adult tee, aim for about 4–6 inches wide. For a child’s tee or a fitted style, scale down to about 2–4 inches. Center the design in the chest area or upper center so it sits naturally. If pairing with other bold pieces, keep embroidery modest to complement, not compete.
When placing, imagine a tiny horizon line across your chest. Centering is key; use a tape measure to ensure equal margins from the collar and sides. If unsure, create a quick paper template of the exact size and pin it onto the shirt to visualize placement. Planning now saves rework later and keeps your project looking pro.
Gather Tools and Best Thread for T-Shirt Embroidery
You’re about to create clean, lasting shirt art, so gather the right tools. Start with a simple kit: a gentle embroidery needle, small scissors, tweezers, and a hoop that fits your design on the tee. Thread choice matters as much as the needle; you want a thread that behaves on knit fabric and won’t snag. Choose a brand you trust or a beginner set to keep stitching smooth.
Test stitch on a scrap piece of similar fabric before the real shirt. This helps you see how the thread sits, whether it skips, or if the needle size feels too large for the knit. Think of it as a quick dress rehearsal—no surprises on the garment. Keep a small spool of backup color nearby in case you tweak the design.
Comfort matters. If you’re a beginner, start with a light, even weave that’s easy to handle. For complex patterns, consider a tighter hoop and a sharper needle that can handle several layers. Your feel for how the thread slides through the fabric will guide your final setup, helping you avoid snagging and messy backstitches.
Pick Needles, Hoops, and Threads You Trust
Your needle choice directly affects stitch quality on a t-shirt. Use a sharp or micro-tip needle with a medium-size eye to glide through cotton knit. For beginners, 70/10 or 75/11 is a safe starting point. If you’re working with a stretchy knit, a ballpoint needle helps prevent runs. Always thread with clean, smooth ends to avoid snags.
Your hoop should hold fabric flat and keep stitches in place. A tight, even grip is essential, but don’t over-tighten. If the tee stretches, try a slightly larger hoop. For thicker designs, a larger hoop can be more forgiving and keep the fabric taut without pulling the knit. Keep the hoop clean to prevent texture issues.
Threads matter too. Polyester threads are strong and colorfast; rayon can look shiny but may shed color over time on a tee. For a soft hand, consider cotton embroidery threads, but test colorfastness first. Choose a palette you’ll wear, so your threads stay true to the design and your style.
Choose Stabilizer for T-Shirt Embroidery
Stabilizers are your hidden ally. For a plain t-shirt, cutaway stabilizer provides a stable base; tear-away can work for light embroidery but may require careful removal. Start by testing on a scrap tee to see how stabilizer interacts with your thread and needle.
Placement matters. Place the stabilizer on the inside under the embroidery to support stitches from behind. If you see warping, pause, adjust the stabilizer, and re-hoop. The goal is a flat surface that guides a smooth stitch line. More stabilizer isn’t better—use enough to support, not so much that it bunches or shows through.
Buy Quality Supplies Within Budget
Set a modest budget and prioritize quality where it matters: durable threads, sturdy needles, and reliable stabilizers. Look for beginner bundles that include a few colors, a basic hoop, and a couple needles. Save time choosing by sticking to what works for your fabric. Don’t overspend on tools you won’t use yet.
Check for sales and pack deals, especially around holidays. If a single color thread works well on your tee, buy more of that shade. Inspect threads for fraying or dye issues before you start. A small investment in decent tools now pays off with cleaner stitches and fewer rewinds.
Transfer Patterns and Prep Your Knit Tee
Prepare your fabric and pattern properly. Choose a smooth tee, wash and press to remove sizing that could cause marks to wander. Align pattern pieces as you would on paper: pin or tape to stay flat, and trace lines with chalk or an erasable pen. If the tee is highly stretch-oriented or open-weave, stabilize with underlay behind the knit so lines don’t bleed.
Gather transfer tools and test fabrics. A light-colored chalk on dark knit can leave faint lines, so opt for tailor’s chalk or a water-soluble marker that rinses clean. Tape the pattern to the tee and pin extra references to hold everything in place. Practice transfers on scraps first to see how lines behave. The right transfer method depends on fabric stretch and texture; you want a line that won’t smear or vanish when you iron or sew.
Mark alignment points for stitching. Note seams, hems, and motifs so you can rotate and wear your garment comfortably. If multiple layers are planned, sketch rough guides to keep everything balanced. The goal is crisp, repeatable placement for a polished final tee.
Methods to Transfer Patterns to T-Shirt
There are several reliable ways to move patterns onto knit fabric. Tracing with a light box or window and erasable markers provides precise lines without harming the knit. For dark or busy fabrics, erasable transfer paper can work well; press gently to reveal a clean outline. Freehand tracing with tailor’s chalk is good for simple shapes. Pin the pattern and baste around the edges to prevent shifting.
Heat-based transfers can be a game changer but test on a scrap first. Low heat settings activate adhesives without causing puckering. A temporary spray adhesive can hold pieces in place before stitching, especially for curved edges. A modern option is using a water-soluble stabilizer on the wrong side of the knit; trace on the stabilizer, stitch through both stabilizer and tee, then rinse away the stabilizer for crisp edges. Always test on a scrap first to ensure line quality and fabric behavior.
Embroidering on Knit Fabric
Embroidering on knit fabric requires a gentle touch. Use a ballpoint needle and a lightweight stabilizer to prevent side-to-side stretch. A smaller hoop or hand-holding the fabric can help keep lines even; let the fabric’s stretch guide stitch length. Start with a simple outline or backstitch for borders to establish a rhythm before filling larger areas. If stitches sink into the knit, tighten the machine tension and shorten stitch length slightly. Choose contrasting thread colors with appropriate stitching density to preserve the fabric’s drape. Align embroidery with a seam line or solid knit area to avoid warping. After finishing, press from the back with a thin cloth to protect stitches, and trim loose ends.
Finish motifs with a subtle satin or backstitch along the perimeter for a clean edge, especially on stretch fabrics. A light steam helps set stitches; test first to avoid color bleed. Practice on a scrap before committing to the tee. The result should be durable, soft, and ready to wear.
Test Placement on Scrap Fabric
Before committing to your knit tee, test placement on a similar scrap. Lay out patterns and adjust for balance on the garment. For large motifs, measure from key points like shoulder or collarbone to ensure symmetry. Lightly mark reference points to translate to your tee confidently. Check transfer marks on the scrap; if they smear, adjust your method. If embroidering, test stitch density and tension on scraps until stitches lie evenly. Once satisfied, mirror the measurements to your tee and proceed with transfer and embroidery.
Learn Hand Embroidery Stitches for T-Shirts
Hand embroidery adds texture and personality to a plain tee. Start with stitches that are easy to master and work well on cotton tees: back stitch for outlines, satin stitch for fills, and French knots for texture. Practice each stitch on scrap fabric before applying to your shirt.
When moving to a real shirt, keep your hand steady and the fabric taut. Secure the hoop, choose a simple pattern first, and pick colors that pop without overpowering the base. If the T-shirt is white, select stitches that won’t show through too much. The goal is to have fun and build confidence with each stitch.
Simple Stitches: Back, Satin, French Knot
Back stitch creates clean outlines. Satin stitch fills shapes with a glossy block of color. French knots add small raised dots for texture. Practice on a simple shape, then fill and embellish. If your T-shirt is thin, use light thread on dark fabric or vice versa to ensure visibility. You’ll see texture and depth grow with each stitch.
How to Embroider a White T-Shirt by Hand
For high contrast on a white tee, transfer your design with a water-soluble pen. Use a stiff backing and secure the fabric in a hoop. Stitch from the back to keep the surface clean, using short, even stitches. Secure threads from the back when finishing. Rinse transfer marks, iron gently from the back, and adjust any uneven stitches. Your shirt will tell its story stitch by stitch.
Machine Embroidery Tips for Your Cotton Tee
Cotton tees benefit from a simple, bold design that reads clearly even with some movement. Use a sharp embroidery needle and mid-weight thread for durability. Stabilizers should hold without stiffening the entire fabric; tear-away is convenient for many projects, but cutaway can be kinder to stretch. Test a small area first. Hoop the tee flat and square to prevent twist. A water-soluble topper helps with tiny details or shading. If the design pulls, reseat the hoop for clean, consistent stitches.
Machine Embroidery on Cotton Tee Settings
Use a standard 1.0–1.5 mm stitch length to avoid puckering. Set a medium tension and select the cotton/knit fabric setting, then fine-tune. Always do a quick test swatch before starting. A well-hooped tee yields clean embroidery across the area.
How to Add Embroidery to a Plain White T-Shirt with a Machine
Plan placement first: decide whether the design sits on the chest, center front, or sleeve. Choose a bold, high-contrast thread color that pops on white. Load a tearaway stabilizer and hoop the tee. Stitch slowly with moderate needle pressure. After finishing, trim stabilizer, press lightly, and check for loose threads. For a finishing touch, consider a small satin stitch border to frame the design.
Use Cutaway or Tearaway Stabilizer
Cutaway stabilizer is good for stretch or dense designs; it remains behind the fabric. Tearaway is easy to remove for lighter designs on cotton tees. Start with tearaway for quick projects and re-evaluate if distortion appears after washing.
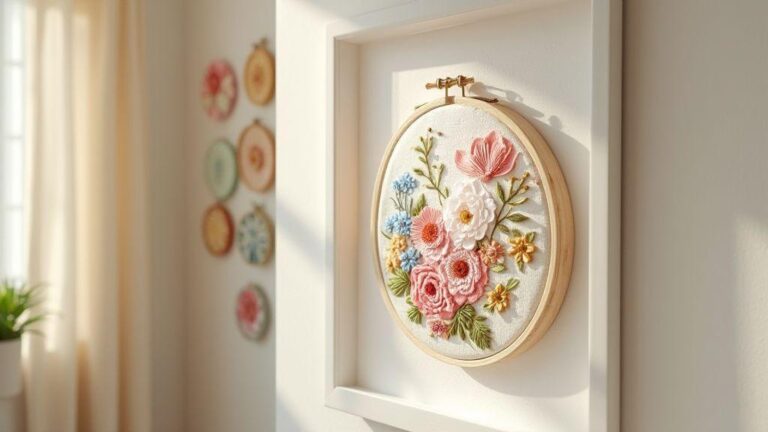
Finish and Care for Your Embroidered Shirt
Careful finishing preserves color and fabric. After embroidery, trim threads close to the knot and weave ends into the back. A clean back helps the embroidery lie flat and keeps it comfortable against the skin. If many colors are used, double-check knots and secure any loose ends.
Finish is like tying a neat bow on a gift: the right trim, a secure back, and a neat front keep your shirt looking professional after washing. Treat your finished design with respect to extend its life.
Trim Threads and Secure Your Stitches
Clip threads close to the knot but leave enough length to weave in. Weave ends through several back stitches before trimming to prevent loose threads. For small areas, tuck threads under existing stitches with a blunt needle. Reinforce any loose stitches with a tiny stitch or two.
Secure stitching prevents unraveling. Run your fingers along the embroidery to feel for snagging ends and fix them before wearing.
Washing and Drying: Finishing and Care for Embroidered Shirts
Wash inside-out on a gentle cold cycle with mild detergent. Avoid bleach and fabric softener if possible. Reshape while damp and dry flat or on a wide hanger. If using a dryer, choose the lowest heat and monitor for shrinking or damage. Drying flat helps embroidery stay flat and crisp.
Contain stains gently; use a fabric-safe stain remover and avoid rubbing. After washing, inspect for loose threads and re-secure if needed. Proper care helps colors stay bright and stitches last longer.
Press and Store Gently
Press from the back with a low-heat iron, using a thin cloth or pressing sheet to protect stitches. For dense designs, a linen or mercerized setting helps keep fibers stable. If fabric is delicate, a parchment barrier can work. Let the fabric cool before wearing or folding.
Store your shirt flat or on a wide hanger, away from direct sunlight and heat. If folding, place tissue between folds to prevent creasing on the embroidery. A breathable cotton bag keeps the shirt clean and colors vibrant.

I’m Sophie Caldwell, the author behind granaboom.com, and I believe hand embroidery is one of the simplest, most relaxing ways to create something beautiful with your own hands. I started this blog to help beginners learn hand embroidery without feeling overwhelmed by complicated instructions or “perfect” results.
Here you’ll find beginner-friendly guides to decorative embroidery stitches, along with clear step-by-step practice ideas and patterns you can use to build confidence. My focus is on making the learning process easy: simple explanations, helpful stitch combinations, and small projects that look polished even when you’re just starting out.
Welcome to granaboom.com—grab your hoop, choose a few colors, and let’s stitch one line at a time.