Free Celestial Embroidery Patterns: Sun, Moon, and Stars
Where you can download Free Celestial Embroidery Patterns: Sun, Moon, and Stars
You want crafting magic without hunting all over the web. You can find Free Celestial Embroidery Patterns: Sun, Moon, and Stars in a few reliable places that keep things simple and clear. Start with a dependable archive or a craft blog that posts new designs regularly. Look for patterns labeled clearly, in common file formats like SVG, PNG, or PDF. The best options offer a quick preview, easy download, and a short note on how to use the design on fabric or in a hoop. Collect a small set of favorites so you don’t lose track of the ones you love, then grab a perfect pattern in minutes and start stitching faster.
For a fast start, search for sun moon stars embroidery pattern and filter by free downloads. You’ll find sites with simple outlines for beginners and more detailed designs for seasoned stitchers. A solid mix helps you practice basic stitches on sunny days and try metallic threads for night skies. Keep file quality in mind; clean lines make transfers easier. With practice, you’ll finish many projects in a weekend using these patterns.
If you’re new, print a few samples first. Print quality matters because crisp lines help you see where to stitch next. Save copies of designs so you can compare sizes or print larger versions. When you’re ready, you’ll feel the difference between rushing and enjoying the process. Your space will fill with tiny suns, delicate moons, and starry arcs, all stitched by you.
Trusted sites for free celestial embroidery patterns
Choose sites that clearly state usage rights. Look for patterns with a simple license note or a brief FAQ about personal versus commercial use. Trusted sources offer high‑resolution files and easy download buttons. If a site asks you to join or share on social media for access, it’s often more about traffic than clarity. Favor sites with direct downloads in common formats like PDF or PNG so printers and software don’t fight you. With reliable sources, you save time and avoid rights surprises, focusing on pattern selection and stitching.
A pattern library organized by theme—Sun, Moon, and Stars—makes it easy to compare options for cohesive projects. Read user comments when available; fellow stitchers often note file size or compatibility tips. A trusted site treats you like a partner, and you’ll feel that care with every download.
How to check download license and print rights
Always check the license before printing or stitching. Look for phrases like personal use only or non-commercial use so you know what’s allowed. If a design lets you use it for crafts you sell, note that in your plan and stay within the rules. If the license is vague, skip it or contact the site for clarity. Clear licenses keep you confident and out of trouble.
Print rights matter just as much. Some patterns let you print multiple copies for your own projects; others are limited to a single print. If you’re building a small collection of sun, moon, and star projects, a license that allows multiple prints is a big win. Understanding print rights helps you plan future projects without worry.
Quick printable celestial embroidery designs tip
When you print, choose the highest quality option and print at actual size. This keeps details crisp for stitching. Use light, sturdy fabric and a sharp needle to match the line weight. If a design is too intricate to start with, print a simplified version or an outline to practice first.
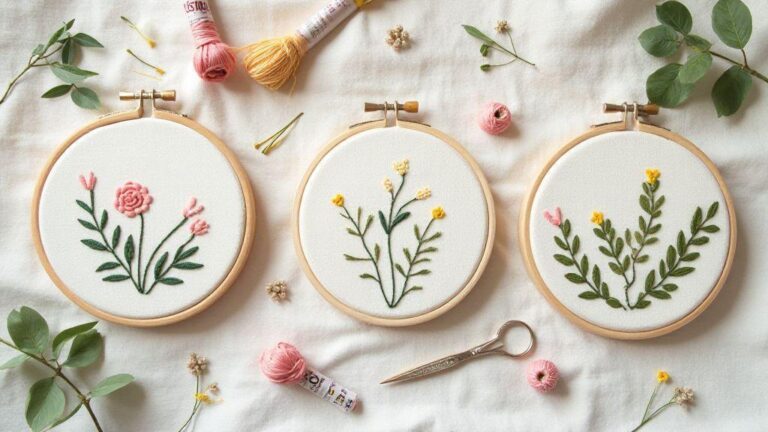
Choose beginner celestial embroidery patterns for easy starts
You’re just starting out, so you want patterns that boost your confidence, not overwhelm you. Beginner-friendly celestial designs give clean shapes, clear stitches, and quick wins to build momentum. Look for patterns with simple lines, large color fields, and minimal detail. Patterns that label stitch types and include a short color guide help you know exactly what to thread where.
Patterns with basic stitches like backstitch, satin stitch, and a few French knots for stars are ideal. If a design includes a tiny amount of texture, that’s a plus but not required. Your goal is practice, not perfection, so pick something you can finish in one sitting or a single hoop.
Also seek designs with printable transfers or clean, large outlines you can trace. Clear outlines help you stay inside the lines and reduce frustration. A straightforward layout means you can finish and admire your first celestial piece without fighting transfer errors.
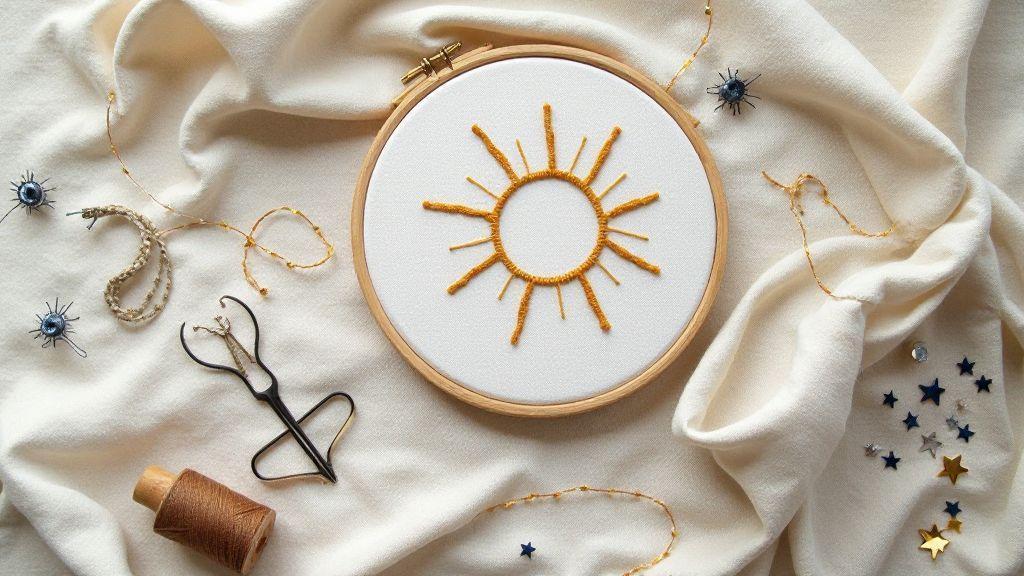
Pick a free sun embroidery pattern you can finish
A free sun design that’s finishable is a perfect starter project. Look for a bold sun shape, simple rays, and abundant solid color space to practice straight lines and neat satin stitches. If a color-by-number guide is included, you’ll have a quick roadmap and fewer decisions at the hoop. A finished sun in a single session gives you a satisfying sense of accomplishment.
Check for a beginner tag or level notes. A good beginner sun should keep the curve smooth and rays evenly spaced so you can build confidence in symmetry. Print a larger version to trace and scale down as you stitch if you’re unsure. A friendly sun—perhaps with a simple face—adds charm and motivates you to start the next celestial piece.
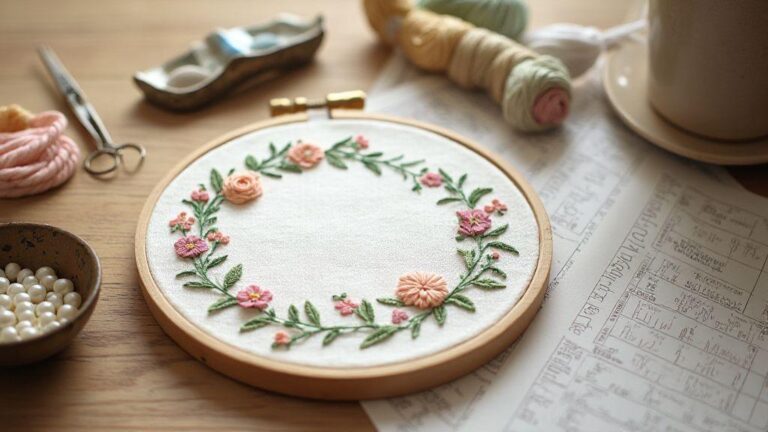
Try a free moon embroidery pattern and free star embroidery pattern together
A combined moon and star project is a smart progression. The moon’s soft curves help you practice, while the tiny stars refine control. Start with a crescent moon and a handful of stars in simple stitches like backstitch and French knots. Keep the scale calm by using a single hoop size and matched thread colors for a cohesive look. Sketch a light guide on fabric if you’re unsure where to place elements.
With a steady rhythm, you’ll learn spacing and balance, finishing a serene night-sky scene. If you’re uncertain about placement, test a layout on paper before stitching. A cohesive design reads clearly and feels intentional.
Start with one hoop and simple stitches
Begin with a single hoop and a small design. This approach keeps your workspace uncluttered and your mind focused. Use basic stitches to build muscle memory: backstitch for outlines, satin stitch for fills, and a few French knots for stars. Fewer stitch types speed progress and reduce frustration.
Choose comfortable fabric and thread colors you love. A smooth fabric with good grip makes stitching easier. If tension worries you, practice on scrap first before moving to the main piece. Keep ends neat as you go; trim and weave threads to prevent snagging later. A finished single-hoop project builds a solid base for bigger patterns.
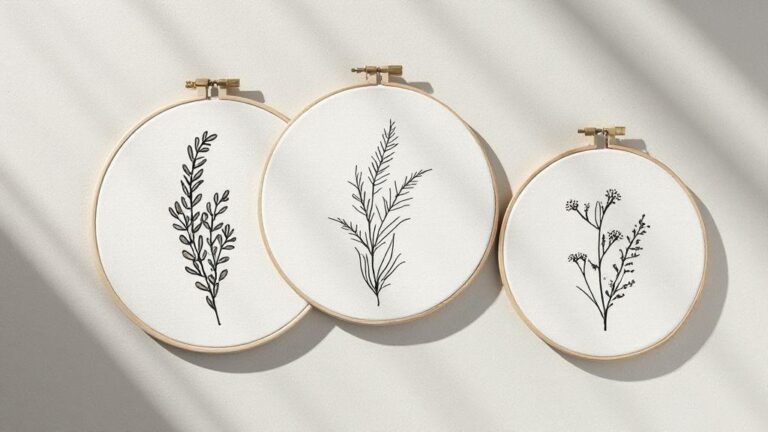
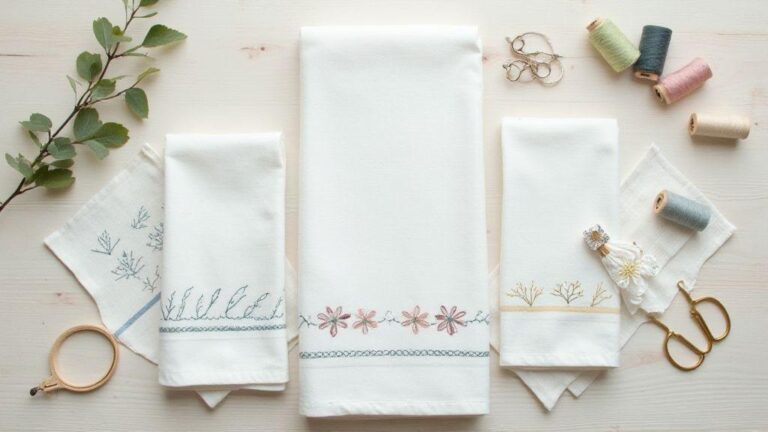
Use printable celestial embroidery designs and sun and moon embroidery template free
Printable celestial embroidery designs give you a treasure trove of options. Print ready-made sun, moon, and stars patterns at home or resize templates to fit sleeves, totes, or pillow covers. Look for designs with clean lines and strong contrast so stitches sit evenly. Print test pages to confirm size on your fabric before committing.
With sun, moon, and star motifs, you’ll find bold, graphic looks and softer, dreamy outlines. If you’re unsure, start with a simple sun or crescent moon to practice basic stitches, then layer smaller stars for balance. Consider fabric weight—lighter fabrics need finer lines, heavier fabrics can handle thicker stitches. The right printable design becomes your plan, guiding every stitch.
If you want to mix elements, print two templates and overlap them to visualize the composition. Save a layout as a reference for future projects. Test ideas on paper to make embroidery easier, and keep a small notebook to jot placement notes for future celestial pieces.
Resize and print a celestial embroidery pattern download safely
To resize safely, open the pattern in a simple viewer and use print settings to scale. Print a small test swatch first to verify the final size. Always choose a high‑resolution download so lines stay crisp when enlarged.
Print on plain paper before committing to fabric to confirm placement. If the image appears blurry, adjust sharpness or resize again. Once you’re happy, transfer to tracing paper or iron-on transfer paper if you use those methods. A well-sized template becomes your map—treat it with care and stitch with confidence.
If the pattern is too large for your fabric, crop edges while preserving core shapes. If you’re transferring to a smaller surface, simplify details to keep them legible. The goal is to have a template you trust for steady stitching.
Transfer templates to fabric with tracing or iron-on paper
Tracing is a simple method to move a design. Pin the fabric over the printed template and trace with a water-soluble pen or chalk, then wash away marks later. This method is forgiving for beginners and keeps the fabric flat.
Iron-on transfer sheets offer a quick transfer option. Place the sheet waxy side down, set the printed template on top, and press with a hot iron following the sheet’s instructions. For dark fabrics, a light transfer pen helps you see lines before stitching. Both methods give you a precise starting point so sun, moon, and stars align.
Whichever method you choose, double-check alignment before stitching. A quick overall view helps you catch misplacements, and the template stays secure as you work.
Best printable file types for embroidery
The most reliable printable file types are high‑quality PDFs and PNGs. PDFs stay sharp when resized; PNGs keep clean edges for tracing. If you only have an image option, choose a high‑resolution PNG or JPG and avoid very small files that blur when enlarged. Always download from trusted sources to keep your computer safe and your designs clean.
Learn stitch techniques for sun, moon, and stars embroidery patterns
You’ll master simple stitches that bring sun, moon, and stars to life. You don’t need fancy tools—just a hoop, a needle, and a steady hand. Practice each stitch to see the pattern pop, and use these techniques as your celestial toolkit.
Plan briefly before you stitch: lightly outline the sun, moon, and stars, then choose thread colors early to switch smoothly between stitches. A rhythmic sequence helps you move from one stitch to the next with confidence.
When you finish, you’ll see how the stitches work together. Satin stitch for sun fills contrasts with long-and-short shading; backstitch gives moon crisp edges; tiny French knots sparkle for stars. These stitches support each other to form a cohesive celestial scene you can reuse on future patterns.
Stitches that make suns shine: satin and long-and-short
Start with satin stitch to create a bold, solid sun. Keep stitches even and close to avoid gaps. Use long-and-short stitches to add gentle shading along the sun’s curves, with highlights at the top and softer tones below. Finish with a few short stitches along the rim to sharpen the edge. The sun should look radiant and dimensional.
Easy star and moon stitches: backstitch and French knot
For the moon’s clean outline, use backstitch with tight, steady strokes. For stars, use French knots—tiny but bright. Practice on scrap fabric to ensure even spacing and consistent knots, then apply to your main piece. Consistency makes the moon smooth and the stars pop.
Turn Free Celestial Embroidery Patterns: Sun, Moon, and Stars into gifts and home decor
These patterns are perfect for gifts and home decor. Print at the right size, choose bright threads for sun motifs, and cooler tones for moons to set calm vibes. Transform a digital pattern into a tangible keepsake your loved ones will treasure. A sun on a throw pillow or a moon and stars on a wall hanging brightens any room.
Plan small, doable projects for each pattern. For gifts, consider quick finishes like patches, keychains, or mini hoops. For home decor, try fabric placemats or framed hoop art. Printable templates and pre-cut fabric save time and let you add personal color choices, turning Free Celestial Embroidery Patterns: Sun, Moon, and Stars into meaningful handmade items.
Finish with care: frame simply, hoop neatly, or sew edges on a pillow. Add a note about why you chose the design to personalize the gift. Display your pieces in visible spaces or gift them in a pretty box with a bow. With planning, you can repeat this process for holidays and birthdays, turning Free Celestial Embroidery Patterns into a steady stream of handmade joy.
Make patches and clothing with sun, moon, and stars embroidery patterns
Patch designs elevate jackets, backpacks, or hats. Print at the right size, trace onto stabilizer and fabric, and stitch edges neatly with backstitch or satin stitch. Choose thread colors that pop against the fabric. Patches finish quickly and make great gifts.
For clothing, place a star or moon motif on a tee or denim sleeve. Transfer the design and stitch with a steady hand. Use stabilizer for beginners and switch to a small hoop to keep stitches even. Experiment with sizes and colors to discover your favorites, then tailor designs for different garments.
For patches, cut with a small border and blanket stitch the edge to secure it. For clothing, a border of tiny running stitches can frame the design. Aim for durability plus charm, choosing fabrics that withstand laundering. With a simple approach, you’ll build a collection of sun, moon, and stars pieces you’ll wear proudly or gift with pride.
Create hoop art and pillow covers from printable celestial embroidery designs
Hoop art upgrades a room quickly. Mount a printable celestial design in an 8-inch hoop, add a fabric border, and frame as-is or back with complementary fabric for a polished finish. Stretch the fabric evenly so the pattern stays crisp and vibrant.
Pillow covers make a bigger impact. Print the design to the right size, then trace or transfer onto fabric for a larger canvas. Use satin stitch or long-and-short for bold sun shapes, and a soft outline for moons and stars. Insert the embroidered panel with a hidden zipper or envelope opening for clean lines. Your home will feel brighter and more unique thanks to your celestial touch.
These projects are forgiving and repeatable. Use the same fabrics and threads for a cohesive collection, or mix colors for a dreamy space vibe. The more you practice, the quicker you’ll finish each piece, building a mini collection of hoop art and pillow covers that tell your story.
Fast gift-ready project plan
- Pick a celestial design you love and print it at the correct size.
- Choose a plain fabric you already own to keep costs down.
- Use a simple stitch (backstitch or satin stitch) and bright thread colors to make the design pop.
- Finish in one sitting: mount in a hoop or sew into a small pillow cover with a quick edge finish.
- Add a short note about why you chose the design to personalize the gift.
Customize Free Celestial Embroidery Patterns: Sun, Moon, and Stars to match your style
Transform Free Celestial Embroidery Patterns: Sun, Moon, and Stars into something that feels like you. Start by choosing a central mood—bold and bright, calm and pastel, or vintage and dusty. Scale elements, swap in a favorite color family, or add a tiny border to frame the design. A larger sun becomes a bold wall piece, while a smaller moon tucked into a pillow reads intimate and cozy. Your space will tell you what to try first, so trust your gut and go with it.
Then think about the surface you’ll stitch on. For a kid’s backpack, brighten the palette with clean lines. For a room wall hanging, consider softer shading and nuanced tones. For a tote, push contrast so the pattern pops from afar. Remember, these patterns are your playground—don’t be afraid to push elements to stand out or blend in depending on where you’ll showcase them. Your choices set the scene, and you’re the artist of your own celestial story.
Finally, consider finishing touches. A satin stitch outline or tiny bead dot can make sun rays glitter. A blues-and-violets blend on the moon can feel dreamy. A sprinkle of metallic thread for stars adds sparkle. The key is balance, not overload; aim for a highlight that feels intentional and uniquely yours.
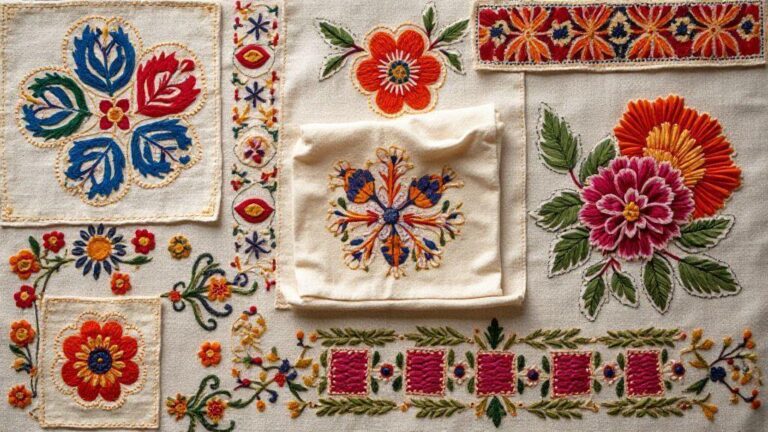
Mix and match elements from different celestial embroidery pattern downloads
You can mix elements from different downloads to create a custom scene. Start with a bold sun, then borrow a crescent moon from another download to frame it. Large sun rays can pair with smaller stars for an airy composition; a muted palette and softly curved lines create harmony.
Try pairing textures too: satin-stitch sun with a chain stitch moon adds variety, and backstitch stars give a crisp twinkle. Build a cohesive piece rather than a patchwork of parts. Maintain consistent line weight and spacing, and balance darker elements with lighter colors. With a little planning, your collage becomes a seamless tapestry that feels like one designed piece.
Choose threads and colors that suit your room or outfit
Threads and colors tell your story, whether for a cozy room or a bold outfit. Warm spaces respond to earthy oranges, soft golds, and creams; cooler rooms glow with blues, purples, and silvers. For garments, consider how lighting will affect the fabric—metallics can catch the light beautifully.
Keep a small color map on your worktable: a main sun color, a secondary moon color, and a couple of accent colors for stars. This helps you stay consistent as you stitch across the pattern. If you want a pop, add a bright contrast color for a few star details. Let your eyes guide you—your room or outfit will tell you when the palette feels right.
Keep scale and spacing balanced for clear designs
Balance scale and spacing so the design reads clearly from a distance and up close. Decide on the overall size (wall art vs. a patch on a tote) and size the main elements accordingly. If the sun is large, keep the moon and stars proportionally smaller so nothing competes for attention. Equal spacing between elements helps the eye move smoothly across the piece.
Test on scrap fabric first. If rays feel too wide, adjust before committing to the final fabric. A small adjustment can make a big difference in the final embroidery’s cleanliness.

I’m Sophie Caldwell, the author behind granaboom.com, and I believe hand embroidery is one of the simplest, most relaxing ways to create something beautiful with your own hands. I started this blog to help beginners learn hand embroidery without feeling overwhelmed by complicated instructions or “perfect” results.
Here you’ll find beginner-friendly guides to decorative embroidery stitches, along with clear step-by-step practice ideas and patterns you can use to build confidence. My focus is on making the learning process easy: simple explanations, helpful stitch combinations, and small projects that look polished even when you’re just starting out.
Welcome to granaboom.com—grab your hoop, choose a few colors, and let’s stitch one line at a time.