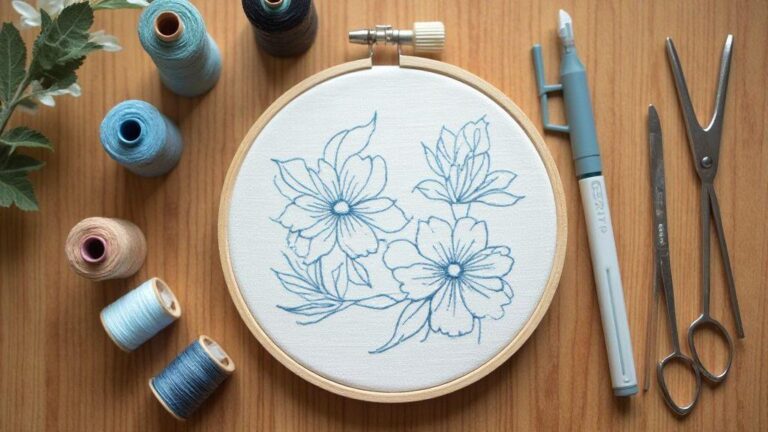
Embroidery Needles Explained: Which Type Should You Use?
Types of embroidery needles
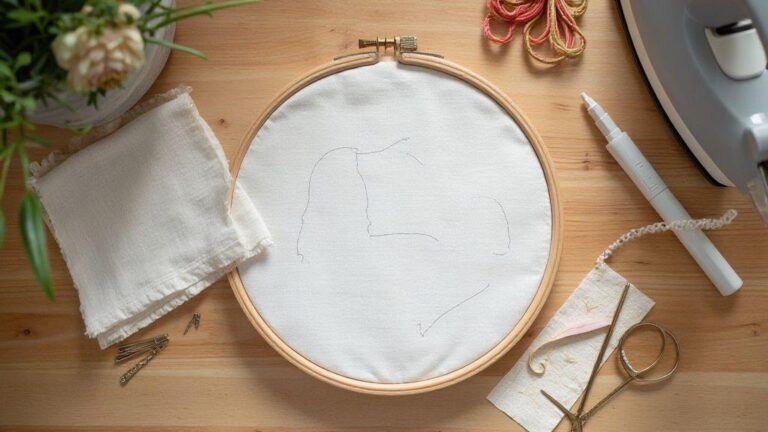
When you start hand embroidery, choosing the right needle is half the battle. Embroidery Needles Explained: Which Type Should You Use? sits at the core of your progress, so you want to pick wisely. Needle types differ in eye size, point shape, and thickness, and those details change how your thread moves through fabric. For delicate fabrics, opt for a finer needle to reduce resistance; for thick or bulky threads, choose a sturdier option. The key is matching the needle to your project. This guide shows how each needle type behaves so you can stitch with confidence from hoop to knot.
You’ll feel the difference in control when you pull a thread through fabric. A needle that fits your thread and fabric keeps stitches neat and even. If you notice snagging, skipping, or pulled threads, you’re likely using the wrong needle. Take a moment to assess the fabric’s weave, the thread weight, and the stitch you want, then pick a needle that fits. Your future self will thank you when you don’t have to redo a row because the needle was off.
Practice helps you feel the right needle in your hand. Start with a basic pack that covers crewel and embroidery tasks, then add specialty needles as you tackle new projects. The goal is smooth gliding, clean edges, and less hand strain. With the right needle in your toolkit, you’ll enjoy every stitch more.
Difference between crewel and embroidery needles
Crewel needles are sharp and sturdy, built to handle thick wool or cotton threads. They have a longer eye and a thicker shaft, which makes them strong enough to push through heavier fabrics without bending. If you’re stitching with chunky yarns or multiple strands, crewel needles give you leverage to keep stitches uniform. They’re forgiving for beginners because they resist bending and aren’t finicky about exact sizing—think of crewel needles as the workhorse of your toolkit.
Embroidery needles are finer and more delicate. They have a smaller eye and slimmer shaft, designed for smooth passage of finer threads like cotton floss or silk. If your fabric is lightweight or you’re doing delicate satin stitches, embroidery needles help prevent large holes or fabric distortion. They’re made for precision, which keeps stitches neat and tight. Use embroidery needles for thin fabrics to maintain clean edges and avoid fraying.
A practical rule: choose crewel needles for chunky threads and thicker fabrics, and switch to embroidery needles for finer threads or lighter fabrics. If you’re unsure, test a small stitch on scrap fabric first. If the thread threads through easily and the fabric shows no punctures, you’ve got the right needle.
Tapestry vs embroidery needle
Tapestry needles are blunt-pointed and have a large eye. They glide through woven fabrics like Aida cloth or canvas without splitting threads. If your project uses woven fibers and a loom, tapestry needles reduce damage and keep even tension. They’re great for laid work or projects where you’re not piercing densely woven material. If you’re new to embroidery and your project involves fabric with larger holes, a tapestry needle helps you control stitches with less risk of tearing.
Embroidery needles are sharp or fine-tipped, designed to pierce fabric cleanly. They help you thread through tighter weaves and small holes with precision. If you’re stitching on cotton or linen with a fine thread, an embroidery needle lets you push the thread through smoothly without creating loose holes. The choice often comes down to fabric weave: tapestry for looser, woven fabrics; embroidery for tighter weaves and finer threads. Your comfort matters, so try both on scrap fabric to feel what fits you.
How each needle works for fabric
Each needle has a job: it guides your thread through the fabric with minimal resistance. A crewel needle’s thick shaft helps it push through heavier fibers and fabrics without bending, keeping stitch length even. An embroidery needle’s finer point and smaller eye reduce fabric damage and let you place stitches with precision. A tapestry needle’s blunt tip glides between threads, protecting woven fabrics from snagging or tearing.
When you pick a needle, consider the fabric’s weave, thread type, and stitch. You want a needle that minimizes fabric damage and prevents fraying. If the needle is the wrong size, you’ll see skipped stitches or holes that look split. If you feel resistance, switch to a needle with a larger eye or thinner shaft. Your fabric will thank you with cleaner, tighter stitches.
Choose needles by your thread
You’re learning hand embroidery, and the right needles can make or break your stitching. When you pick needles by your thread, you prevent frayed threads, skipped stitches, and hand fatigue from pushing through hard fibers. Think of the needle as the gatekeeper between you and a clean, smooth line of stitches. Start by matching the needle size to your thread, then test on a scrap to see if the thread glides without snagging.
Choosing needles by thread also means better control. If your thread is thin, use a fine needle so the eye doesn’t bend it or cause bunching. For thicker threads, a sturdier needle keeps your fabric from tearing and stitches neat. The needle’s eye should feel comfortable on the thread, not like you’re fighting to thread it. You’ll notice fewer breaks and smoother color runs as you improve.
As you grow, you’ll notice certain fabrics and techniques demand different needles. Cotton floss needs a slightly larger eye than a steel-wrapped thread, so stitches stay clean and the thread doesn’t fray. Silk threads glide with a slender eye, while heavy canvas benefits from a strong, longer needle. Keep a small kit with a few options, and you’ll be ready to switch on the fly.
Needle selection for embroidery floss
Your embroidery floss deserves the right needle, or you’ll see fuzzies and pulled fibers. Start with a sharp needle for tightly woven fabrics so the point slips in cleanly without snagging. For a looser weave, a tapestry needle can be gentler on the fabric, helping you keep threads straight and even. Your floss has color and texture, so the needle should never fight it.
When you pick a needle, check the eye size against your floss. If the eye is too small, threading becomes hard and the floss may split. If the eye is too big, threads can slip and tangle. A good rule: your floss should pass through the eye with a little resistance, not a full tug. This balance keeps stitches tidy and mood steady.
Consider needle length too. Shorter needles give better control for small details, while longer needles help with long, flowing stitches. For variegated or multi-strand floss, a slightly longer needle can feed the thread more smoothly. Try a few combinations and note what feels easiest for your grip and speed.
Best needles for embroidery floss
Test a few popular options to find your best needles for embroidery floss. A good starter pick is a size 7 or 8 for light to medium floss on cotton fabrics; it’s forgiving and easy to handle. If your fabric is rough or you’re stitching densely, opt for a medium-length sharp needle to pierce without straining the fibers. Keep a couple of these in your kit for quick swaps.
For thicker floss or when working on harder surfaces, try a tapered or tapestry needle with a larger eye. The larger eye prevents fraying as you pull through dense material. If you’re on delicate linen, a refined sharp needle gives precision without tearing. Rotate through needles as you practice to discover what your hands and projects prefer.
If you ever feel a snag or tug that doesn’t seem right, pause and switch needles. Sometimes an eye-size tweak changes everything, turning a struggle into a smooth stitch. Your toolkit should include a few sizes and styles so you can adapt quickly.
Match eye size to floss thickness
Eye size should match your floss thickness. If the eye is too small, you’ll fight the thread and risk fraying. If it’s too big, the floss can wobble and stitches won’t look neat. For single-strand floss, a small-to-medium eye works best. For multiple strands, go up a size so your thread can pass through without bending or catching.
Test by threading a bit of floss and running it through a scrap fabric. It should slide with light resistance, not drag. If you can push the floss through without pulling or tugging, you’ve found the right match. Your stitches will lay flat and clean, and your fabric will thank you.
Embroidery needle sizes guide
Embroidery needles come in many sizes, and the numbers jump from small to large. You want the right fit for your thread and fabric, or stitches will look uneven or frayed. Needle size is like choosing a straw for a drink—the wrong size makes pulling material through smoothly nearly impossible. You’ll feel the difference once you pick the right size: smoother stitches, fewer snags, and less frustration when learning.
When you start, you’ll typically use fine threads on light fabrics. A too-big needle can leave holes, while a too-small needle can bend and slow you down. Clean entry and exit for your thread is the goal. With practice, you’ll know which projects want smaller or bigger needles based on how your fabric behaves and how your thread sits on the cloth. Your stitches will look more even when you match needle size to material.
As you gain confidence, you’ll notice heavier fabrics or thicker threads need sturdier needles, while delicate fabrics need slender ones. Your hand will learn to sense resistance and adjust. Keep a few sizes handy so you can switch quickly as your project changes. Choosing the right size keeps embroidery smoother and mood up.
How size changes stitch feel
Needle size changes how the thread sits in the fabric. A larger needle creates bigger holes and can push threads apart, making stitches feel looser. A smaller needle makes smaller holes and can compact threads, giving a tighter look. You’ll feel the difference in glide and resistance, guiding you to the right size next time.
Size also affects fabric scoring. Bigger needles can leave marks on delicate fabrics, while small needles reduce risk but may slow you down if the thread needs extra force. You’ll notice crisper lines with a proper fit and less wasted thread. Test stitches to gauge whether you should move up or down a size. Your control over stitches improves as you tune needle size to your material.
Choosing the right size is about balance. Seek smooth flow, not tension that snaps your thread. If stitches puckered, try a smaller needle. If holes appear or fabric wears quickly, switch to a larger needle. Practicing with different sizes helps you feel what works best for each project.
Choosing the right embroidery needle for strands
When working with multiple strands, you need a needle that clears them cleanly. A too-narrow eye can fray or snag every strand, while a roomy eye lets strands pass with less resistance. For thin strands, use a finer needle with a smaller eye to keep the thread aligned. For thicker strands, a larger eye helps the thread glide through without fraying. Your goal is to move freely without bending threads or catching fabric.
Consider the point style too. Ballpoint versus sharp points change how the needle enters fabric. A sharp point is great for tightly woven fabrics, while a ballpoint slides through knits with less snag. For a bundle of strands, a sturdier needle lowers the chance of breaking or bending. You’ll notice stitches stay neat when the needle cooperates with your thread’s thickness. Pick a needle that respects the thread’s texture and your fabric’s weave.
For beginners, start with mid-range eyes and thin-to-medium points. This setup handles most common floss and embroidery floss blends well, giving you a comfortable learning curve. Your confidence grows when the tool fits your thread like a glove.
Start with mid sizes for practice
Begin practice with mid-sized needles that handle common threads and fabrics. This keeps your feel balanced: not too stiff, not too loose. You’ll be able to see your stitches clearly and learn how to adjust tension without fighting the needle. Mid sizes are your training wheels for embroidery confidence.
As you practice, map out what works best for you. If your fabric likes heavy thread, keep a larger eye needle handy. If your thread splits or frays, switch to a smaller eye. The goal is consistent stitching, not struggle. Starting mid-size gives you a solid baseline to build on.
Conclude your practice with a quick note: which size felt easiest for most stitches? Keep that size as your default for similar projects, and transitions will feel natural.
Pick needles for each stitch
When you start hand embroidery, the needles you choose can make or break your stitches. You’ll notice your fabric glides smoother, your stitches sit neatly, and frustration drops when your needles are right for the job. Think of needles as extensions of your fingers: the shape and size influence how you pull thread through fabric. This section helps you pick the best needles for different stitches so your work stays tidy and your hands stay happy. Remember: the right needle saves time and headaches.
Needles for satin and long stitches
For satin and long stitches, you want a needle that creates long, clean holes without tearing the fabric. A sharp, straight needle with a medium or fine eye helps your thread glide through without snagging. Milliner or crewel needles are common choices, but a sharp tapestry needle can work on thinner fabric. Look for a long shaft and a sharp point to slip through fibers smoothly. If you see fiber lift or puckering, switch to a thinner eye or finer point. Keep a few sizes on hand for quick changes as you switch fabrics or thread weights.
Needles for counted cross-stitch and tiny holes
For counted cross-stitch and projects with tiny holes, use a needle that threads easily and slips through tight fabric without widening holes. A blunt or rounded tapestry needle works well here, with a small eye so the thread doesn’t fray as you pull through many fibers. On Aida or evenweave, a size 24–26 tapestry needle is a common starting point. The goal is a precise, tiny entry point that won’t split fibers or create large holes.
When counting stitches, the needle should feel light in your hand. If you feel resistance, the fabric is pulling or the thread frays—switch to a finer needle. This keeps counted designs crisp and reduces post-stitch fixes. Your speed improves as you build muscle memory for the right needle size with each fabric.
Point type matters on fabric
The needle point affects how clean stitches sit on the fabric. For woven fabrics with small holes, a sharp point pierces cleanly with minimal drag. For delicate or tightly woven fabrics, a fine sharp point preserves fibers while you pull the thread through. If your fabric has loose threads, a sharper point might snag, so a slightly rounded or blunt point can prevent damage. Always test a needle on a tiny scrap first to see how the point interacts with your thread and fabric. The right point type keeps edges neat and prevents fraying.
The wrong point can widen holes or split fibers. Your aim is consistent, small holes that disappear as you stitch. Try different point types on scrap fabric to feel the difference, then keep notes so you know exactly what to grab next time. The right point matters, especially when moving from thick to thin threads or from natural to synthetic fibers.
Care and store your needles
Careful handling helps you finish projects smoothly. Keep needles clean and dry after use to prevent rust. Wipe away thread bits and oils, then store them so sharp points are protected. A tidy kit means fewer replacements and more confident stitching.
Store needles simply and safely. Separate sharp needles from dull ones to avoid accidental pokes and fabric damage. Don’t leave them loose in a drawer; the points can nick threads. Check for rust or bent tips every now and then. When not in use, keep a tidy set—organized tools make embroidery easier and more enjoyable.
Hand embroidery needle tips for safety
Handle needles with calm hands and be mindful where you place them. Use a pincushion or magnet mat to pick up needles one by one. If kids are nearby, store needles out of reach in a closed container. Thread slowly and in good lighting; keep a bandaid handy just in case. If a needle bends, replace it rather than trying to bend it back. Your safety is worth a moment of patience.
How to keep needles sharp and rust-free
Keep needles sharp and rust-free by storing them in a dry, clean environment. After finishing, wipe each needle and store it in a dry container. Low humidity helps, and if you see rust, replace the needle. Sharpening isn’t practical for most hand embroidery needles, so swap when needed. Rotate needle types to prevent wear on a single needle.
Simple storage ideas to protect needles: use a small labeled container with foam or cork inserts, or a magnetic holder with care to avoid attracting loose threads. For travel, use a compact case with compartments to prevent tip-to-tip contact.
Buy the best needles for beginners
When starting with hand embroidery, the right needles can mean the difference between frustration and flow. Look for needles labeled embroidery or embroidery floss needles, not general-purpose pins. They should have a longer eye and a slightly rounded point to ease threading and fabric entry. A good starter set includes different lengths and eye sizes so you can test what works best. Keep a small pin cushion with a few spare needles so you’re never mid-stitch without the right tool.
Choosing the best needles isn’t about price; it’s about fit for your projects. For cotton floss on cotton fabric, a medium-point needle often works well. For delicate fabrics like linen or silk, opt for finer needles to avoid runs or snags. If you’re learning multiple stitches, a mix helps you switch quickly without tugging threads. Your comfort matters—choose a needle that feels steady in your grip.
As you practice, you’ll find you favor certain needles for specific stitches. Keep a kit with a few lengths and eye sizes, plus a couple of spare sharps for stubborn fabric. This way you’re ready for satin stitches or tiny backstitches. Remember, the best needle for you is the one that lets you work without fighting fabric or thread.
Embroidery Needles Explained: Which Type Should You Use?
Embroidery Needles Explained: Which Type Should You Use? is a phrase you’ll hear often for good reason. There are several types, each with a job to do. The most common are tapestry needles, embroidery needles with a sharp point, and chenille needles for thicker threads. For beginners, start with an embroidery needle that has a smooth, long eye for easy threading and a sharp point that slides through fabric without snagging. A good rule: size the needle to your fabric weight and thread thickness to keep your stitches neat.
If you’re stitching on cotton or linen, choose a sharp, medium-length needle for control. For thicker threads or wool, a sturdier needle helps prevent bending or breaking. You’ll learn what feels right as you practice, so keep a small kit with a mix of sizes. The key is matching the needle to your fabric and thread, not chasing trends. Your projects will look cleaner when the needle fits.
A quick tip: test a tiny stitch on a scrap fabric before committing to the whole piece. If the needle glides nicely and your thread doesn’t fray, you’re on the right track. If you notice snagging or resistance, switch to a finer or sharper needle. With time, you’ll know exactly which needle you reach for first for each stitch.
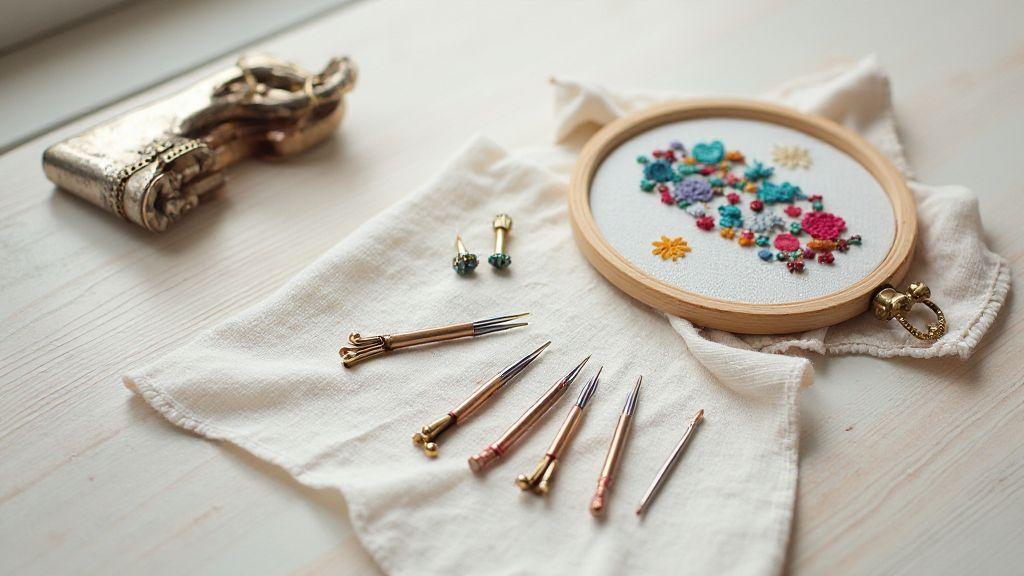
Starter sets and must-have needle types
A starter set should cover your bases without piling up unused tools. Look for a small collection that includes a few embroidery needles in different sizes, plus at least one sharp, one blunt, and one needle with a larger eye for easy threading. Having a basic set means you can tackle satin, backstitch, and French knots without hunting for every tool. The goal is daily practice without frustration, so choose a kit that feels intuitive.
For your kit, start with two embroidery needles (one medium, one finer), a tapestry needle for finishing edges, and a chenille needle if you plan on thicker threads. Add a few needles with larger eyes for easy threading if you’re still learning. Keep a dedicated pin cushion or magnetic holder to stay organized, and label your favorites for quick grabs.
What to buy first: two embroidery needles (one medium, one finer), a tapestry needle, and a small pin cushion. Then you can add a chenille needle or larger-eyed option as you tackle new stitches. As you gain confidence, your go-to needle will emerge, and you’ll refine your kit accordingly.
Embroidery Needles Explained: Which Type Should You Use? serves as a practical guide to help you select the right tool for every stitch. With the right needle, your stitches sit neater, your fabric stays intact, and embroidery becomes more enjoyable from start to finish.

I’m Sophie Caldwell, the author behind granaboom.com, and I believe hand embroidery is one of the simplest, most relaxing ways to create something beautiful with your own hands. I started this blog to help beginners learn hand embroidery without feeling overwhelmed by complicated instructions or “perfect” results.
Here you’ll find beginner-friendly guides to decorative embroidery stitches, along with clear step-by-step practice ideas and patterns you can use to build confidence. My focus is on making the learning process easy: simple explanations, helpful stitch combinations, and small projects that look polished even when you’re just starting out.
Welcome to granaboom.com—grab your hoop, choose a few colors, and let’s stitch one line at a time.