Cutwork Embroidery Tutorial: Creating Lacy Negative Space
Cutwork for beginners
Cutwork is a graceful way to add delicate, lacy shapes to fabric. This Cutwork Embroidery Tutorial: Creating Lacy Negative Space helps you see negative space come to life as you work. Focus on the basics, keep stitches neat, and celebrate each small win. With careful planning and steady hands, simple fabric becomes elegant art—think of it as carving a tiny, pretty window in cloth.
Step-by-step cutwork techniques
You’ll start with a simple, bold design. Transfer the pattern and secure a tight frame to prevent shifting. Carefully cut away the areas you want as open space, leaving enough fabric to support surrounding stitches. Stitch along the edges to form clean, sturdy borders that prevent fraying. Pause to check your work, filling gaps or securing loose threads for balance. This approach makes cutwork feel like a satisfying puzzle.
As you practice, experiment with beam stitches and satin stitches to outline shapes, aiming for consistent stitch length. Plan the negative space so it reads clearly, and adjust tension to avoid puckering. When you finish a small flower or geometric motif, the cut edges pop while the stitches keep everything secure. If you mess up, re-stitch the border or resew a small section—quick fixes, no guilt.
Basic cutwork stitches and tips
Use a few reliable stitches for clean edges: a solid outline stitch to define shapes, a satin fill for small areas, and tiny applique stitches to secure corners. Keep threads smooth by matching stitch direction to the fabric weave, reducing snagging. Trim near stitched edges with a light touch to avoid cutting stitches. Use a backstitch along the cut edge to reinforce the boundary and prevent fraying. Celebrate small wins when stitches lay flat and edges stay crisp after washing.
Begin on scrap fabric to learn tension and cutting depth. Set up a clean workspace, remove loose threads, and keep the bobbin thread even. If an edge wobbles, adjust your grip and reseat the fabric. Patience helps the cutwork line up perfectly, and a simple routine builds confidence quickly.
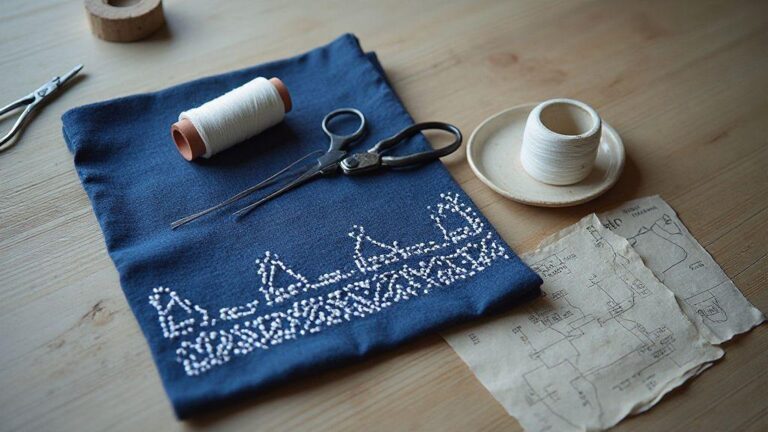
Cutwork embroidery tools
You’ll need sharp small embroidery scissors, a sturdy hoop, and a fine-weight needle. Choose an easy-to-cut fabric like cotton or linen, and pick a thread color that contrasts with the fabric so the holes read clearly. Have a fabric marker to transfer your design and a thimble to protect your finger as you trim near stitches. Store tools so they stay sharp and ready, so you can start whenever inspiration strikes.
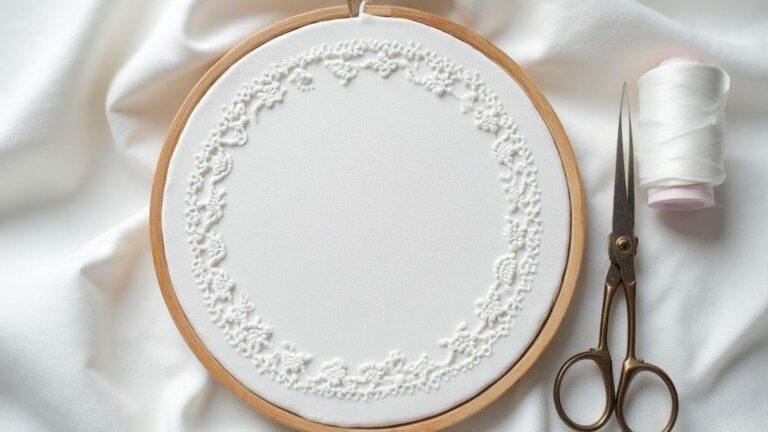
Creating lacy negative space by hand
Airy designs come from leaving intentional gaps. Start with a simple outline and plan where the negative space will live. Think of carving a tiny window in fabric—the space defines the piece.
Choose light fabric and fine thread. Use small, even stitches to outline, then carefully cut away excess within the shape. Edges matter more than the needle: keep edges smooth and the space consistent. As you work, the fabric may thin around cuts, giving a delicate, lacy feel.
Practice on test swatches before committing. First attempts may feel stiff, but with patience you’ll find a rhythm. Secure threads well and avoid cutting too close to stitching. The magic happens when you balance the cut with careful stitching, creating soft, floating shapes that catch the light.
Hand cutwork patterns you can try
Start with simple shapes like circles, ovals, or teardrops. Lightly draw the pattern on the fabric, then cut inside the drawn lines after securing the edges with a few stitches. The goal is a clean inner edge so the negative space reads crisply.
Try a repeating motif like rows of tiny flowers or geometric diamonds. Space is essential—too dense and the lace loses its breath. Practice alternating filled areas with open cutouts to build confidence and see how light plays differently.
When ready, combine different shapes in one piece. Mix circular cutouts with linear gaps to create contrast. This teaches balance across the fabric and helps you develop a signature style. Keep edges steady; a wobble will ruin the lacy effect.
Heirloom cutwork designs and traditions
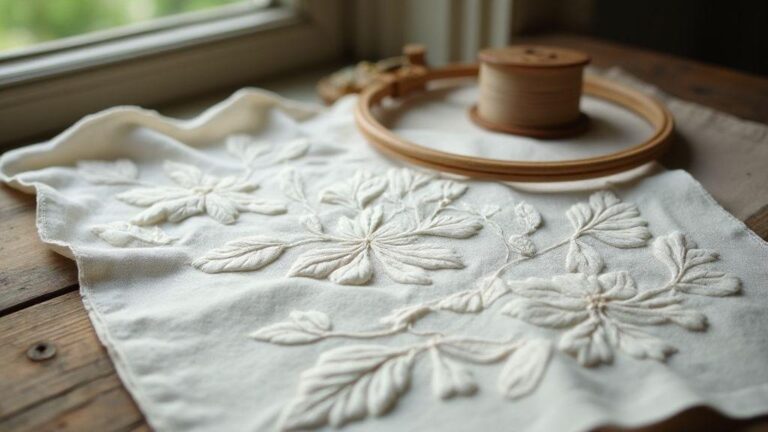
Heirloom cutwork carries a story you can feel in your hands. Traditional patterns often feature floral motifs stitched in fine thread, with negative space as the design’s breath. Study old family linens or museum pieces to see how masters use space to define elegance.
These designs require meticulous handwork and high thread counts. Tiny, precise cuts and equally precise stitches hold the edges. The tradition prizes durability as much as beauty, balancing delicate lace with strong finishing stitches. Embrace the patience this style demands; your piece will carry a long lineage.
Practice reveals variations by region. Some traditions favor bold geometric cuts; others are botanical and free-flowing. Absorb the era’s feel, then translate it into a modern piece while honoring the craft.
Finishing cutwork edges
Finish edges by securing a narrow hem or applying a light satin stitch around each cutout perimeter to prevent fraying and keep negative space crisp. A simple whipstitch can seal the edge without bulk. Test finishes on scrap first; aim for a finish that holds without overpowering the delicate cutouts. For heirloom pieces, a subtle blanket stitch or a denser edge can echo traditional methods. Edges should be tidy so the cutwork remains the star.
Conclusion and introduction to machine work
In this Cutwork Embroidery Tutorial: Creating Lacy Negative Space, you can explore both hand and machine methods. Using a machine for cutwork speeds up projects and yields consistently neat edges, while hand-cut work offers delicate control for organic shapes. The right approach depends on fabric, pattern, and project goals.
Using a machine for cutwork
Cutwork on a machine opens a world of delicate designs with less effort than hand-cutting. It delivers clean holes and even stitching around the cutouts, speeding up larger projects. It’s like upgrading from a pencil sketch to a sharp digital outline—your design stays the same, but the finish is polished. You’ll learn how machine cutwork fits into your embroidery workflow and how to keep every cut neat and consistent.
Machine cutwork isn’t magic; it relies on planning, the right needle, and proper foot. Start with stable fabrics that don’t fray, prep with suitable stabilizers, and let the machine punch holes while you guide the fabric to keep edges smooth. With correct settings, you can create lace panels, borders, or motifs that resemble hours of handwork. If you want clean negative space and tight edges, machine cutwork can be a game changer. It saves time on large pieces, though some fabrics benefit from hand-cutting for a softer finish. Use machine cutwork for repeatable designs and reserve hand-cut techniques for organic shapes.
Machine cutwork tutorial basics
Begin with a stabilizer that matches fabric weight. A heavier stabilizer holds the fabric in place as the machine cuts, preventing distortion. Use a sharp compatible needle and consider a cutwork or pour-cut setting if available. First applique or stitch a decorative outline around the desired cut, then switch to cutting if your machine supports it, or use a separate tool. Practice on scraps to understand how fabric, stabilizer, and thread interact.
Plan your design with clear negative spaces and generous margins to avoid snagging. Thread choice matters: neutral around the cut minimizes visibility, while a contrasting color highlights the lace. If using a manual cut feature, set a shallow depth and test on a sample. Aim for clean edges that aren’t torn, with stitches that hold the hole’s shape.
As you gain confidence, vary densities and stitch types. A satin or buttonhole stitch often borders the cut when finished, keeping edges sturdy. For very small holes, shorten stitch length to prevent gaps. Remove loose threads and press gently to set the cut edge. With time, your muscle memory tells you when you need more stabilizer or a lighter touch.
When you should choose machine over hand
If a project involves multiple repeats, tight tolerances, or uniform edges, the machine is ideal. It saves hours on large pieces like table runners or lace panels and keeps edges neat. For simple shapes or very delicate fabrics, hand-cutting may still be preferable for flexibility and softer finishes. If you’re using a modern stabilizer, machine cutwork delivers a clean, professional look.
For speed or sample production, the machine shines—duplication, quick color changes, and shorter total project time. For heirloom lace with delicate curves, hand work offers ultimate control. A hybrid approach often works best: machine-cut the main pattern, then hand-finish tricky edges.
Safe machine settings for cutwork
Use a sharp needle and the correct cutwork settings for your fabric. Always test on a scrap. Start with light stitch density to prevent perforation, then increase if edges wobble. Stabilizers reduce shifting and keep cuts precise. If your machine has a dedicated cutwork mode, enable it and set depth to skim the fabric. Don’t press too hard; it can tear delicate fibers.
Finish with a secure edge stitch to lock the cut edges. A fine satin or zigzag stitch around the hole helps prevent fraying and keeps negative space crisp. If unsure about fabric reaction, slow down until you’re comfortable. Keep fingers away from the cutting area and unplug the machine when changing needles or feet.
Designing your cutwork patterns
A simple idea can become a bold cutwork pattern with intention. Start with a theme, think about fabric, and decide how much surface you want to show. Block out the main shapes first—large motifs that define the piece—and plan what you’ll remove around them. Clean lines and balanced gaps create an airy feel. Sketch with light lines so you can adjust. Your final design should read clearly from a distance, not just up close.
Consider thread weight and stitch density. Too many small cutouts can warp fabric; too little negative space around edges can look unfinished. Mix solid areas with fine, lacy sections to create rhythm. Pin drafts to a board and revisit later to spot awkward gaps before cutting. The best patterns feel intentional, not accidental.
Finally, test your plan on scrap fabric to see how cutaway areas behave when stitched and pulled. If something looks off, adjust motif size or spacing. Your goal is smooth transitions between solid and open shapes. When you’re satisfied, translate the design to the final fabric. This is where the Cutwork Embroidery Tutorial: Creating Lacy Negative Space comes alive in your hands.
How you place motifs for lacy negative space
Place the largest motifs first as anchors to guide flow. Anchor them where they’ll set the eye and create rhythm for surrounding cutouts. If a big motif sits in the middle, keep the surrounding space light so the negative space can breathe. Balance bold shapes with open air to maintain delicacy.
Think repetition and variation. Repeat a motif, then vary its size or orientation slightly to keep the eye moving. Use negative space to emphasize edges and curves; gentle curves often read more elegant than straight lines. Take photos from a distance to assess overall balance and adjust if motifs shout too loudly or whisper too softly.
Place guidelines carefully so they don’t show in the final piece. Use faint lines or removable chalk to map your layout, transferring only what you need. If a motif feels crowded, scale it down or widen surrounding gaps. The aim is an airy fabric throughout, not overworked. With practice, you’ll instinctively know where to place motifs to keep a breathable look.
Drafting templates and stencils
Draft templates on sturdy paper before cutting or stitching. Outline main shapes clearly, then add seam allowances to sew without losing negative space. Use bold lines for cutting guides and lighter lines for stitching paths. A clean template saves mistakes and keeps edges crisp.
Turn your draft into a reusable stencil. Cut a precise window of the motif and trace onto fabric with fabric-safe ink or chalk. Stencils help you repeat patterns consistently across a piece or multiple pieces. Layered stencils can build depth for a museum-quality look.
Number your templates and keep a reference sheet noting thread types, stitch counts, and cut sizes. These templates become a trusted toolkit for future Cutwork Embroidery Tutorial: Creating Lacy Negative Space projects.
Transfer methods for patterns
Choose transfer methods that leave clean lines and no ghosting. Use tailor’s chalk or a water-soluble pen to trace the template onto fabric. For dark fabrics, apply a light chalk mark that’s easy to see but won’t stain. For intricate designs, print the template at actual size and use a low-tack adhesive sheet to hold it in place.
Another option is carbon transfer paper. Lay the pattern on fabric and gently rub to transfer. Check lines before stitching to ensure alignment. If marks may show after washing, choose water-soluble or erasable transfers. Do a few trials on scrap fabric to confirm marks disappear after completion. Your fabric should carry a precise guide that translates to the final cutwork. Clean transfers save time and keep the piece tidy.
Cutwork styles across the world
Cutwork embroidery uses patterns carved or cut from fabric and stitched around to create delicate, lace-like designs. Styles differ by region in how they cut, stitch, and finish the fabric. Some places favor crisp geometric open spaces; others favor flowing floral trails. Across cultures, the goal remains light, airy details that let fabric breathe. Techniques emphasize precision, patience, and artistry, making each piece feel unique.
You’ll see regional differences in how holes are framed and finished. Contemporary cutwork adds modern twists: smaller holes for subtle texture or bright threads to make patterns pop. The core principle stays the same: cut clean, finish neatly, and back with a sturdy foundation so the fabric feels as if it could float.
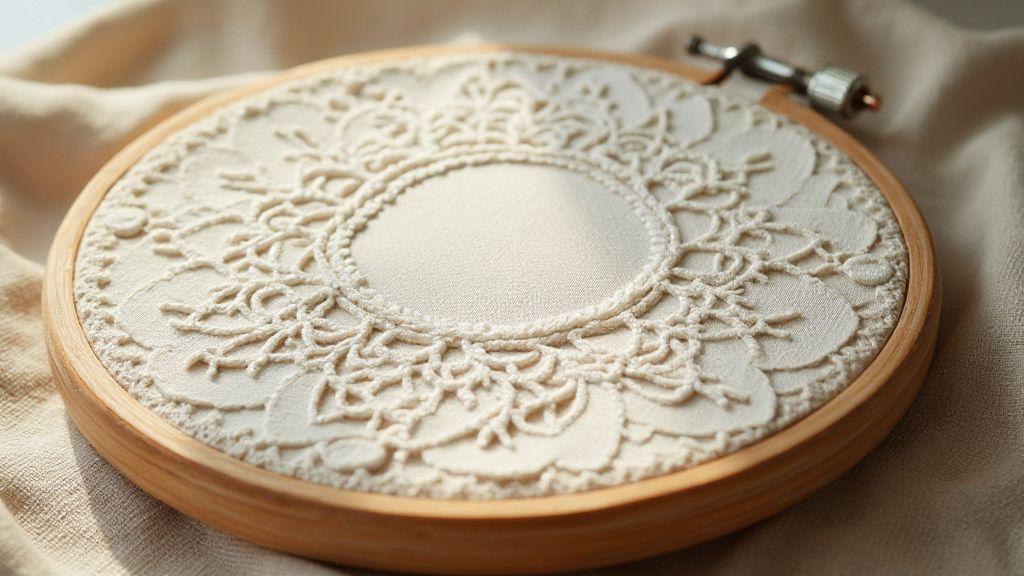
European heirloom cutwork techniques
European heirloom cutwork blends precision with tradition. Start with well-woven linen for crisper edges. Outline shapes with a dense buttonhole stitch before cutting inside the outline to create a sturdy frame. Many pieces use small, consistent holes in the background to form a delicate netting that remains strong.
Backstitching and occasional needle-weaving or petit-point around cut areas are common. Contrasting thread highlights negative spaces, helping the design pop from a distance. The aim is openness balanced with durability so cutwork lasts through years of use and washing. Keep stitches even, move calmly, and don’t rush the first cut for clean lines you’ll be proud to inherit.
Asian and Latin American variations
In Asian cutwork, expect light, airy patterns with seamless negative space and nearly invisible borders. Satin stitches and tiny darning stitches hold edges, giving a gentle glow on textiles such as towels and panels. Align your design with the fabric weave to keep edges tidy through wear and laundering.
Latin American cutwork often features bolder geometric shapes framed with sturdy buttonhole stitches to keep edges crisp. Background fillings vary from tight lattice to open netting, with vibrant color contrasts. Start with a bright thread and a simple motif to feel the rhythm of the cuts before tackling complexity.
Cultural preservation and care
Preserve cutwork by treating fabric with care and planning for longevity. Store pieces flat or rolled to avoid creases that weaken edges. Wash on gentle cycles in a mesh bag with mild detergents. Avoid harsh bleaches that can weaken threads. If repairing a worn edge, re-stitch with a closely matched thread to blend repairs.
Keep tools sharp: dedicate scissors to cutwork, and regularly check needles. Document patterns and notes so you can re-create or extend designs later. Cultural preservation is about sharing techniques and stories with the next maker. A small, careful repair today preserves a cherished heirloom for tomorrow.
Finishing, care, and display
Display your embroidery with care. Choose a frame or display that supports the piece without stressing stitches. For heirloom cutwork, consider glass-front framing or a shallow shadow box to protect from dust. Avoid direct sunlight to prevent color fading. Use acid-free mats and backing to prevent yellowing. Treat display like a museum piece: gentle framing, steady support, and a clean backdrop to let the design shine.
Care begins at the finish. Handle with clean hands and minimize contact with threads. If stabilizer remains on the back, remove it gently with a soft brush. For display pieces, a light archival spray may deter moisture—test on a scrap first. Store in a breathable, acid-free envelope or wrapped in unbuffered cotton. Label with the project name and date.
Plan durable finishes: use backing that doesn’t press through holes, and consider light batting under a fabric mat to soften edges. Display with even support to avoid stressing a single thread. Light cleaning should be a soft brush or lint-free cloth, never a damp cloth. Finishing choices affect longevity, so choose methods that respect fabric and thread.
How you wash and store heirloom cutwork
Heirloom pieces deserve special handling. Dust gently with a soft brush before washing. Test a hidden area with a gentle detergent if slight staining occurs. Use cool water and a mild, pH-neutral soap, soaking briefly to protect delicate spaces. Rinse until no soap remains, lay flat on a towel, and press to remove water. Roll the towel to absorb moisture, then air dry away from direct sun. Lightly press from the back with a clean cloth on low heat.
Store heirloom cutwork with intention. Use acid-free tissue to separate layers and prevent fibers from sticking. Keep pieces flat if possible, or roll with tissue around an archival core. Store in a cool, dry place away from heat and humidity. Check periodically and re-pack if you notice loose threads or tension changes. Thoughtful care today preserves your piece for tomorrow.
Blocking, pressing, and stabilizing pieces
Blocking sets the final shape. Humidify enough to relax stitches and pin the piece to a board at exact dimensions. Use rust-free pins and a light touch to avoid distorting negative spaces. When dry, remove pins and check tension—adjust pin placements if lines look uneven. The goal is crisp edges and balanced gaps, not stretched fabric.
Press gently. Use a pressing cloth between iron and fabric at a low temperature appropriate for the thread. Avoid pressing directly on open cutwork; press from the back if possible or with a barrier. Gentle, even pressure sets the shape without flattening stitches. Stabilizing with a soft interfacing behind the back can help during finishing. Blocking and pressing keep the design airy, not flat.
Repair and conservation tips
Damaged areas can often be saved with patience. For snags, lift the thread and re-stitch from the back with a fine needle and matching thread. If a hole grows, back-stitch from the back to reinforce the edge and prevent further fraying. Conservation favors minimal intervention; replace only affected strands to preserve the original look. Keep notes on changes to remember how the piece evolved.
If issues feel beyond you, consult a textile conservator for professional stabilization. A small, careful repair today preserves the heirloom for tomorrow.

I’m Sophie Caldwell, the author behind granaboom.com, and I believe hand embroidery is one of the simplest, most relaxing ways to create something beautiful with your own hands. I started this blog to help beginners learn hand embroidery without feeling overwhelmed by complicated instructions or “perfect” results.
Here you’ll find beginner-friendly guides to decorative embroidery stitches, along with clear step-by-step practice ideas and patterns you can use to build confidence. My focus is on making the learning process easy: simple explanations, helpful stitch combinations, and small projects that look polished even when you’re just starting out.
Welcome to granaboom.com—grab your hoop, choose a few colors, and let’s stitch one line at a time.