Bullion Stitch Tutorial: How to Make Perfect Coiled Roses
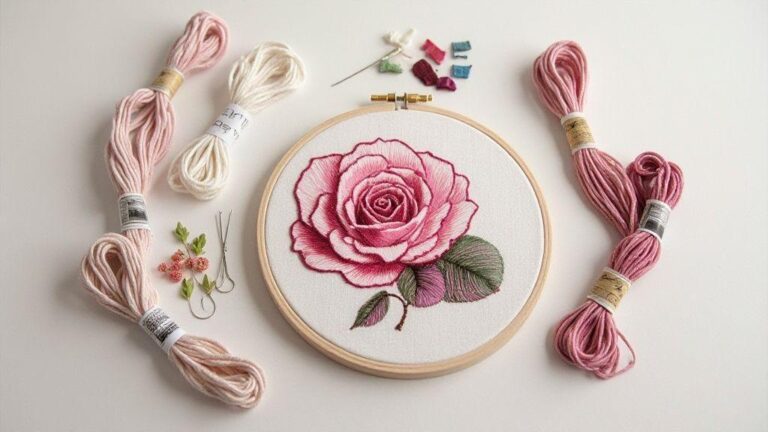
Materials and tools for your bullion stitch roses
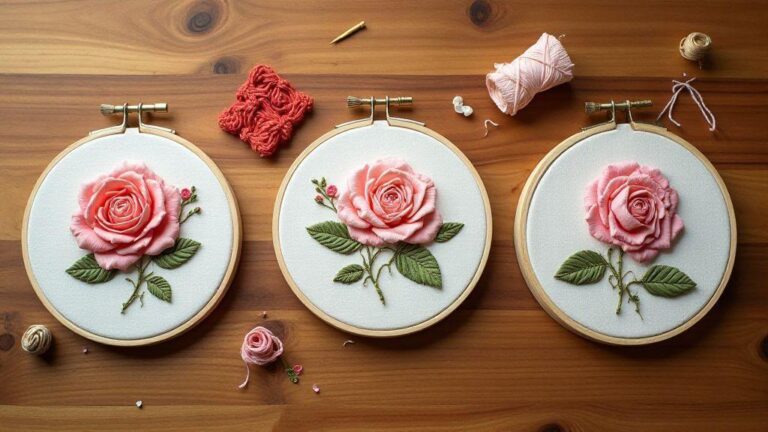
You’ll need a simple setup to make bullion stitch roses look stunning. Start with steady hands and a quiet workspace, then gather just enough tools to keep your needles happy and your fabric secure. Your goal is smooth, even stitches that hold their shape when you bend and fluff the petals.
The right selection helps you stay consistent. A comfortable needle gives you clean stitches, while a hoop keeps the fabric taut so your coils stay neat. Choose threads that glide through fabric easily and won’t shed fibers mid-stitch. Keep a small pair of scissors, a thimble if you like, and a damp cloth for quick tidy-ups. With these basics, you’ll form bullion roses quickly and stay in control as you work through the layers.
As you practice, tools should feel like an extension of your hand. Start with a mid-sized hoop, a sharp but smooth-tipped needle, and a soft, strong thread. Your goal is steady progress, not ceremony. If you sense you’re fighting the tools, pause, adjust, and continue. The fewer obstacles, the sweeter your bullion stitch roses will become.
Best needles, threads, and hoop sizes for bullion stitch tutorial
Choosing the right needle matters. A sharp, fine needle helps you insert and pull threads cleanly, making coils tighter and more even. Match the needle size to your fabric weight for smooth stitching and comfortable handling.
Thread choice sets the mood of your blooms. Silk or smooth embroidery cotton glide through fabric without catching. Lighter weights yield airy petals; heavier threads create bold, dense roses. Test a couple of thread weights on scrap fabric to see what you prefer. Aim for clean coils with a touch of shine or a matte finish depending on your project.
Hoop size influences tension and visibility. A medium hoop fits most bullion rose projects, keeping the fabric taut while leaving room to work around the coils. For tiny projects, use a smaller hoop; for larger designs, choose a bigger hoop to avoid crowding stitches. The goal is even tension across the fabric so your roses sit neatly on the surface.
How to choose thread weight and fabric for coiled rose embroidery
Thread weight guides the boldness of your roses. Start with mid-weight threads if you’re unsure; they balance ease of stitching with a lush coil. For a delicate finish, try lighter weights; for a dramatic look, heavier threads add plush depth. Always test on scrap fabric first.
Fabric choice matters as much as thread weight. Smooth fabrics like cotton poplin or linen hold coils firmly. If the fabric is too loose, your petals may wobble. Choose a light to medium weave with a surface that grips the thread. Matching thread weight to fabric thickness keeps stitches consistent and the design crisp.
Quick kit checklist for beginners
- Needle: sharp, fine, comfortable grip
- Thread: mid-weight to light-weight embroidery threads
- Fabric: smooth, medium weave (cotton poplin or linen)
- Hoop: medium size appropriate for your project
- Scissors: small, precise
- Thimble or finger guard (optional but helpful)
- Waste fabric or transfer sheet for practice
Step-by-step bullion stitch tutorial for coiled roses
You’re about to turn simple thread into elegant, flower-like shapes. This step-by-step guide walks you through making a bullion knot and building your coil into graceful coiled roses. With practice, you’ll finish with clean, even petals that feel satisfying to the touch.
Begin with a strong needle, sturdy thread, and a bead or seed bead if you want a little sparkle. The bullion knot is a tight little core you compress around the thread, expanding into a neat coil. With practice, stitches become delicate petals rather than jagged loops.
Consistency matters more than speed. Treat each chain of stitches as a line of tiny hills you’ll roll into a bloom. If the thread twists, pause and untwist before continuing. A calm pace helps you keep tension even and the coil neat, giving the final rose a polished look.
How to make a bullion knot and start your coil
Slip your thread through the fabric and bring the needle up at the center of your future rose. Wrap the thread around the needle four to six times for a medium bullion knot. Pull the end through the wraps to secure, then slide the knot toward the fabric.
Insert the needle back into the fabric near the knot and pull up a small amount of thread to form the first coil. Pull firmly but not so tight that the thread crowds or breaks. Repeat the wrap-and-pull to create ring after ring. Each wrap sits beside the last, forming a neat line. When you’re satisfied with the first row’s height, prepare to anchor the coil. Keep each pull even so petals align cleanly.
Bullion stitch step-by-step: wrapping, pulling, and securing
Wrap the thread around the needle again to form a thick, rounded bullion. The more wraps you use, the fuller the coil. Pull the thread through slowly and firmly, compressing the wraps into a tight stem. Align the loops so they sit flat, avoiding twists. When you reach the desired height, tuck the needle under the base of the first wraps and pull to secure, locking the coil to the fabric.
Start the next row by repeating the wrap-and-pull from the base, guiding the needle slightly to the side to form a petal around the center coil. Each new coil should kiss the previous one. If you see gaps, adjust your pull and tighten the last wraps a touch more. End by tucking the thread tail to hide it and give a clean finish.
Simple practice drill to build even tension
Practice four small bullion knots in a row on scrap fabric. Keep wraps uniform in thickness and spacing. After each knot, pull until the coil sits evenly against the fabric. If one coil is puffier, even out tension on the next. Repeat until rows align and the coil sits flat. This drill helps your final piece look consistent.
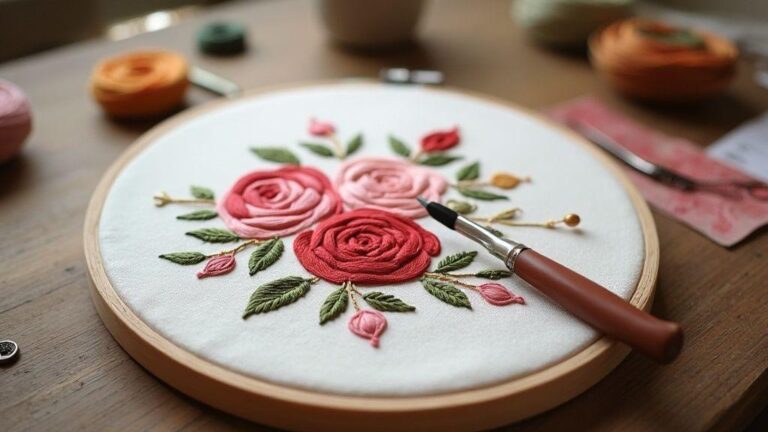
Shaping coiled rose embroidery with bullion knots
You’re about to transform thread into lifelike roses. This method shapes tight coils that fan into petals, giving depth to your embroidery. Start with a tight center, then build outward with controlled coils. Space coils evenly for smooth transitions. The center anchors the bloom, while the surrounding coils create petals. Thread choice, needle size, and fabric all influence the final look—smoother weaves show more detail; linen blends offer a rustic finish. The Bullion Stitch Tutorial: How to Make Perfect Coiled Roses will feel second nature after you shape a few roses and compare results. Focus on tension and spacing to build a small collection you can stitch into any project.
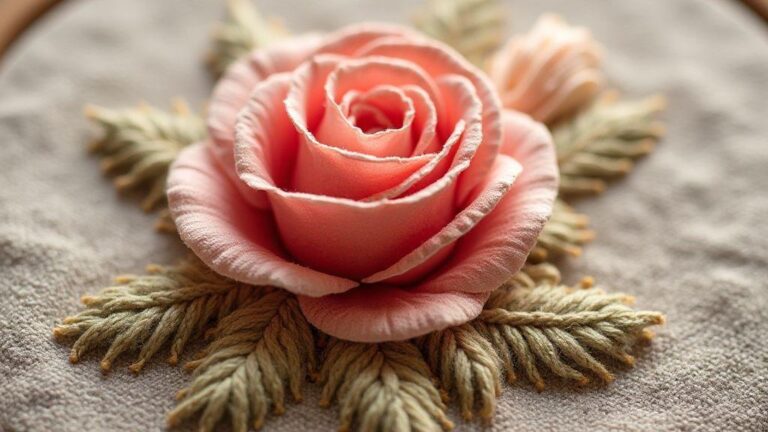
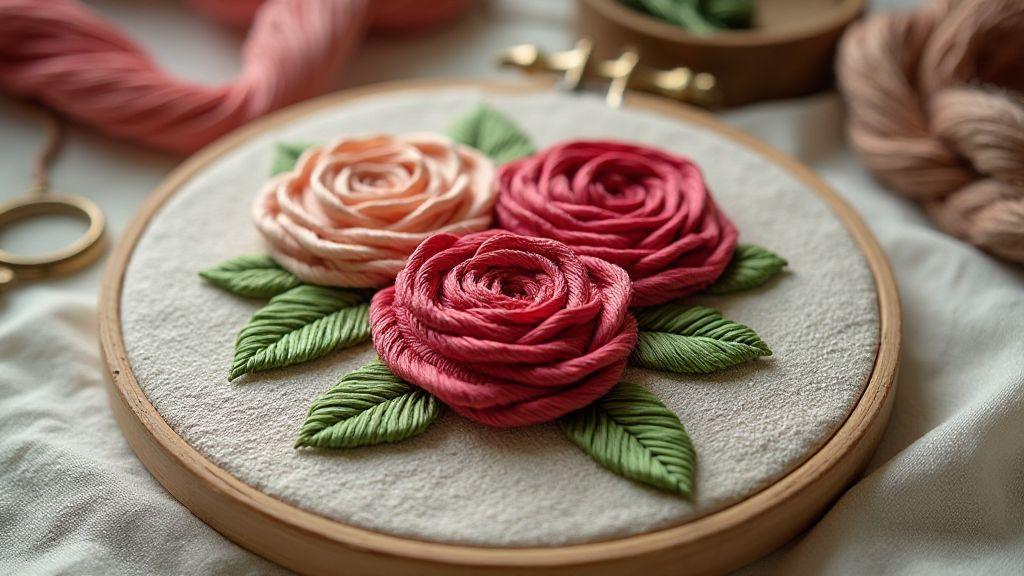
Center-to-edge coil method to form realistic petals
Begin the center as a tight bead, then wrap outward to form petals. Keep the coil as a single piece with consistent loops fanning from center to edge. If gaps appear, slow down and rewrap. Draw a gentle curve as you pull to form a soft spiral. Work one petal at a time, letting coils sit snug against the previous. Stop before outer coils become fluffy to preserve petal shape. Leave tiny spaces between petals for realism. Center-to-edge is about smooth transitions, not sharp corners.
Adjust coil diameter to layer petals and add depth
Vary coil diameter to create three-dimensional depth. Start tight at the center and gradually widen outward. Layer several coils with slightly different widths to build a rose that reads as dimensional rather than flat. Keep spacing even to avoid crowding. Practice widening and narrowing on scrap fabric before applying to your piece. The Bullion Stitch Tutorial: How to Make Perfect Coiled Roses comes to life as you compare layer by layer.
Tip for keeping consistent coil spacing
Maintain a steady rhythm and anchor each coil with a tiny wrap before moving to the next. Use a light touch to avoid flattening coils outward. If the thread frays or kinks, rethread and retry. The goal is a continuous line of evenly spaced coils from center to edge.
Troubleshoot common bullion stitch problems
Tackle tension first: too-tight coils squash; too-loose coils shift. Test on scrap, then adjust. Check needle path and thread direction; keep stitches aligned along the same line. Use fresh thread to avoid snaggy wrapping. If fabric is stiff or slippery, switch to stabilizer or a firmer base. For persistent misalignment, make a quick swatch to identify whether tension, fabric, or technique is the culprit, then patch accordingly.
Fixing loose, twisted, or bunched bullion knots
Tighten wraps, recenter, and re-park the coil. If knots feel loose, ease the pull and redraw. For twists, rethread and re-enter on a straight path. If bunched, lift the tail and rewrap with even tension. Start at a fresh point with a tight repeat wrap to minimize gaps. You may slip the needle under the last complete coil to compact the final wraps, but avoid crushing the coil. Patience and a gentle rhythm will improve these knots.
Preventing thread breakage and avoiding snags
Choose smooth, strong thread for your fabric. Pull slowly and avoid sharp angles. Prepare the fabric with light stabilizer to prevent snags. Check the needle for nicks and burrs; replace if needed. A dab of fabric-safe lubricant on slippery threads reduces drag. Keep your workspace tidy to avoid catching threads on pins. If a snag occurs, lift gently and resume with even pace. The bullion stitch rewards calm technique.
Quick repairs without unpicking your work
Lift problematic coils with a fine needle, then rewrap from the base outward. If a coil is misaligned, nudge back and redraw the wrap. Snags can be snipped and reseated. Bridge gaps with a short fresh wrap, keeping it tight to avoid bulking. After repairs, recheck surrounding stitches to ensure alignment.
Advanced bullion stitch patterns and variations
Explore bold, textured bullion stitches for depth. Balance tension, needle angles, and light to create dimensional roses. Different threads shift the feel: perle cotton for heft, rayon or silk for a satin-like sheen. Combine bullion with French knots to anchor centers and satin stitches to glow around coils. Vary coil height and stagger coil starts to form lace-like textures. Small adjustments in wrap count or spacing can transform flat lines into lively patterns. With practice, you’ll sculpt bouquets that feel alive on fabric.
Combine bullion knot rose technique with French knots and satin
Form your bullion knot rose as the central bloom, then add French knots at the center for a dense eye and anchor the rose without overpowering the coil. Surround coils with satin stitches to soften transitions and add a gentle glow. Keep tension steady to preserve round petals. Test on scrap fabric before stitching on your final piece. This combination yields high-contrast roses that glow from multiple angles.
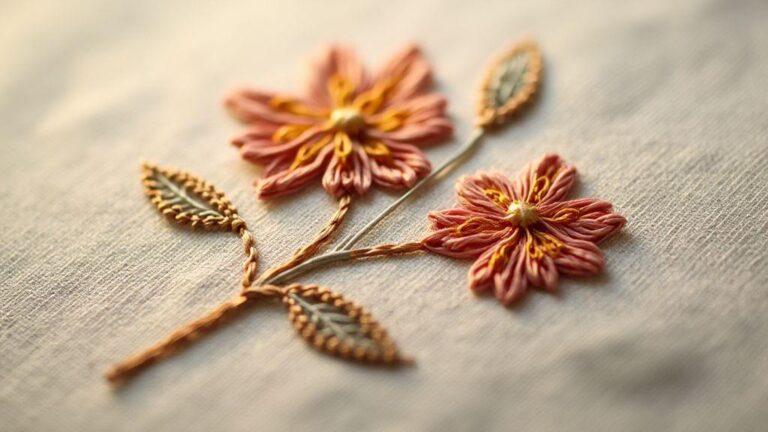
Create spiral, layered, and clustered bullion rose stitch motifs
Craft spiral roses by expanding coils from a tight center in a gentle outward motion. Layer a second set of coils offset from the first for depth. For clusters, group several bullion roses with small satin or straight stitches between them. Vary coil heights between roses to avoid a mechanical look. Mix spiral roses with small French knots for whimsy. Balance the layout so the roses remain the focal point.
Pattern chart for repeating coiled rose designs
Map a repeating coiled-rose pattern on a grid. Start with a central coil, then add adjacent coils to form a two-rose motif. Repeat horizontally and vertically, scaling up by adding more coils per rose while keeping spacing consistent. Plan color shifts for highlights and centers. Practice on scrap fabric until the pattern flows naturally with your hand’s rhythm. Keep stitches aligned with grid lines for a deliberate look.
Finish and care for your bullion coiled roses
Protect your work by letting the piece rest flat after finishing. Gently press with a clean cloth to remove hoop marks, never directly on stitches. Mount on a stable backing to prevent bleed or stretch. A light, clear textile spray can help protect threads; test on scrap first. If you prefer a hand finish, use a tiny amount of fabric-safe varnish around the edges. Display fades are minimized by avoiding direct sunlight and harsh cleaners. Dust regularly with a soft brush or microfiber cloth. A light distance steam can refresh coils; never press hard.
Blocking, pressing, and mounting tips from embroidery coiled roses tutorial
Blocking helps coils hold shape. Lightly mist the piece and lay it flat to shape each rose, then dry completely before mounting. Use low heat and a cloth barrier when pressing to avoid shiny marks. Mount on a non-stretch backing, pin in place, then sew or glue with tiny, fabric-safe stitches. If using glue, apply sparingly away from the coils to prevent stiffness. Framing provides a polished finish and keeps bullion coils crisp and lively.
Washing, storage, and long-term care for perfect bullion stitch tips
For washing, spot clean with mild soap in cool water, dab rather than rub, rinse gently, then air-dry flat. If washing more deeply, test a hidden seam first. Store finished roses in a breathable container with acid-free tissue to separate pieces. Keep away from moisture and extreme temperatures. If any threads loosen later, secure with a tiny dab of fabric glue or a careful stitch. Treat the bullion stitches with care to maintain their look.
Framing and gift-ready finishing steps
Framing adds a studio-grade finish. Use UV-protective glass for sun-exposed pieces. Seal the back with breathable materials and label your project with the Bullion Stitch Tutorial: How to Make Perfect Coiled Roses to highlight the technique used. For gifts, wrap simply and include a short note describing the process. Your recipient gets a ready-to-display piece with a personal touch.
Bullion Stitch Tutorial: How to Make Perfect Coiled Roses
This section highlights what you’ll learn in the Bullion Stitch Tutorial: How to Make Perfect Coiled Roses and why it works. You’ll practice precise knotting, controlled coil formation, and careful layering to create lifelike roses. The tutorial emphasizes tension, spacing, and finishing so each rose remains crisp and bright on fabric or paper. Revisit the steps as you build confidence, and you’ll assemble beautiful rose motifs suitable for a variety of projects. This tutorial-centric approach keeps your technique consistent—from first coil to final display.

I’m Sophie Caldwell, the author behind granaboom.com, and I believe hand embroidery is one of the simplest, most relaxing ways to create something beautiful with your own hands. I started this blog to help beginners learn hand embroidery without feeling overwhelmed by complicated instructions or “perfect” results.
Here you’ll find beginner-friendly guides to decorative embroidery stitches, along with clear step-by-step practice ideas and patterns you can use to build confidence. My focus is on making the learning process easy: simple explanations, helpful stitch combinations, and small projects that look polished even when you’re just starting out.
Welcome to granaboom.com—grab your hoop, choose a few colors, and let’s stitch one line at a time.