Broderie Anglaise: How to Embroider the Iconic Eyelet Pattern
Origins of Broderie Anglaise
Broderie Anglaise: How to Embroider the Iconic Eyelet Pattern is a story you can feel in every delicate stitch. Its bright, airy holes and clean lines give fabric a latticed look while remaining timeless. This technique is practical and calming to work with, bridging fashion and home sewing—a quiet conversation between closet and chambre.
You’ll hear the name in English stitching circles and see it echoed in modern dresses and baby clothes. Its light, breathable look makes even plain cotton sing, which is why Broderie Anglaise remains a go-to for summer outfits and pretty trims. It’s not just a technique; it’s a memory you can wear.
Think of broderie anglaise as a conversation with fabric. Each eyelet is a tiny window letting light through. The whisper of old sewing rooms travels with you as you work with the same stitches that have traveled through time. That connection keeps Broderie Anglaise fresh and relevant today.
19th-century English roots
In the 19th century, Broderie Anglaise evolved from simple work into refined craft, rooted in English cotton. Simple patterns became neat eyelets that are sturdy yet delicate, marking the shift from practice to a garment- and linen-ready technique.
Early pieces balance practicality with beauty, with close, even stitches to prevent fraying. This balance made the technique easy to learn but hard to master, drawing people to refine it. You’ll feel pride in each piece, like earning a badge of careful hands.
As you study examples, you’ll see quiet evolution—from small trims to larger, decorative panels. The 19th century solidifies Broderie Anglaise’s reputation for clean lines and dependable patterning, a doorway to a classic look.
Victorian fashion and eyelets
During the Victorian era, eyelets grew from practical decoration into a sign of fashion sense. On collars, cuffs, and sleeves, they transform plain cotton into something with character. The light eyelets catch the eye without shouting.
Designers used larger panels on dresses and blouses, as lace took a cleaner, more approachable route. The result is crisp and fresh against stiff tailoring, offering a softer balance. It’s a tradition that invites a modern twist today.
At home, try this with Victorian discipline: spacing and tension matter, but the look remains refined and easy to wear. That duality keeps the style appealing today.
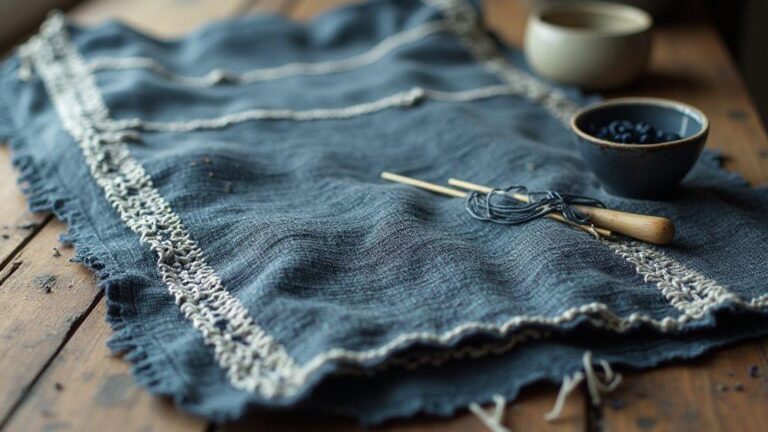
Tools and materials for Broderie Anglaise
You’ll start with the basics, and getting these tools right makes embroidery flow. You want tools that feel reliable, not fiddly. First, pick a sharp pair of embroidery scissors that cut cleanly without snagging. A good light makes details pop, so choose a bright lamp or headlamp you’ll actually use. Have a quality hoop or frame that keeps your fabric steady without strangling it. A thin fabric marker helps you map the eyelets without making a mess. And keep a small pin cushion or magnet tray handy so pins and little threads don’t wander. Your toolkit isn’t glamorous, but it’s the backbone of smooth stitching. Investing in sturdy, comfortable tools now saves you frustration later, especially when you’re working on longer projects.
Beyond the basics, you’ll want a few extras that widen what you can do. A magnifier can be a lifesaver for tiny eyelets and fine stitches, letting you see detail without straining your eyes. A cutting mat and a rotary cutter speed up fabric prep and keep edges neat. If you’re doing a lot of designs, a disappearing fabric pen lets you sketch lines that vanish cleanly after you’re done. Finally, a lightweight stabilizer sits under the fabric to stop it from shifting during your hardest stitches. With the right extras, you’ll feel empowered to try new patterns without fear of messy edges or wonky holes. Your comfort and speed soar when your setup fits you.
Think of your tools as a standard-issue kit for calm, confident stitching. You don’t need every fancy gadget, but you do want what fits your hands and your project. If you’re just starting, a simple hoop, sharp scissors, a fabric marker, and a thin stabilizer are enough to build good habits. As you gain confidence, you can add a magnifier, a tracing wheel, and a couple of specialty needles. Your goal is a clean, even surface that lets your eyelet work stand out. When you have the right tools organized, you’ll find you actually look forward to sitting down with your fabric and threads.
Best fabrics like cotton and linen
Cotton and linen are your go-to for Broderie Anglaise because they behave well and show off the eyelets cleanly. You’ll get crisp stitches and clear holes when the fabric is smooth and not too stretchy. For beginners, cotton poplin or cotton percale gives you a forgiving surface that still holds stitches tight. If you want more drape for blouses or dresses, linen brings a soft, breathable feel and a natural texture that gives your eyelet work character. Both fabrics hold their shape, so your stitches stay neat after washing. Your choice depends on the project: cotton for everyday pieces, linen for airy, warm-weather looks.
If you’re working on a delicate piece, consider a higher thread count cotton that’s tight enough to keep holes neat but not so stiff it fights you. For linen, look for a mid-weight to light-weight option; very coarse linen can stretch and distort eyelets. Pre-wash fabrics before you start to remove any sizing that can push against your stitches. Iron your fabric flat and pin it well before you begin to ensure your pattern sits exactly where you want it. You’ll notice the difference once your eyelets drop cleanly into place rather than pushing fabric around.
When you mix fabrics, you’ll discover how each one changes the feel of your finished piece. Cotton stays bright and easy to sew, while linen adds texture and a more vintage vibe. Your eyelets will look crisp on both, but linen may show slight irregularities that are part of its charm. If you’re aiming for a traditional look, linen is your friend; for a bright summer top, cotton’s polish shines through. Your project, your choice, but now you know what to expect from each fabric so you can plan smarter.
Needles, scissors, and stabilizer choices
Your needle choice matters as much as your fabric. For Broderie Anglaise, use a sharp embroidery needle that fits your fabric’s weave—smaller numbers for finer fabrics, a touch larger for sturdier ones. The right needle glides through the fabric, making clean holes for eyelets and reducing snagging. Pair this with sharp embroidery scissors that cut cleanly at the tip to trim threads without lifting fibers from your work. A quality pair feels like an extension of your hand and makes precise cuts easy.
Stabilizers are your quiet heroes. Place a lightweight, water-soluble stabilizer beneath your fabric when you’re stitching on soft materials or when a lot of eyelets go in close together. It helps keep the fabric flat as you work, then washes away cleanly. If you’re sewing on tougher fabrics or want extra support around the eyelets, a stabilizer with a bit more stiffness can be your best friend. You’ll notice your stitches stay evenly spaced and your holes don’t distort as you sew.
Choice matters more than you think. A fine needle, a sharp pair of scissors, and the right stabilizer keep your eyelets neat and your fabric calm. If you’re unsure, start with a standard embroidery needle, lightweight stabilizer, and good quality scissors. You’ll feel the difference in your first row of eyelets, trust me.
Choosing thread weight and color
Thread weight and color set the mood of your eyelets. For classic eyelets, you’ll usually choose a medium weight that blends well with the fabric without sinking in. If your fabric is light, pick a lighter thread so stitches stay visible rather than sinking into the weave. On a heavy linen, a slightly thicker thread helps the eyelets stand out. Color choice is where you really shape the look: matching thread to fabric for a subtle, almost invisible effect, or contrasting thread for bold, decorative gaps around each eyelet. You’ll want a thread that doesn’t fray easily and holds up to washing.
As you experiment, you’ll find your preferred balance. Neutral tones greet the eyelets softly on light fabrics, while brighter colors pop on darker backgrounds. Remember to test on a scrap first: stitch a few eyelets and check how they sit, how much thread shows, and how the fabric moves. Your goal is clear holes with smooth edges and a thread that doesn’t overwhelm the fabric’s texture. Keep a small color swatch book handy so you can compare how different hues look on your project.
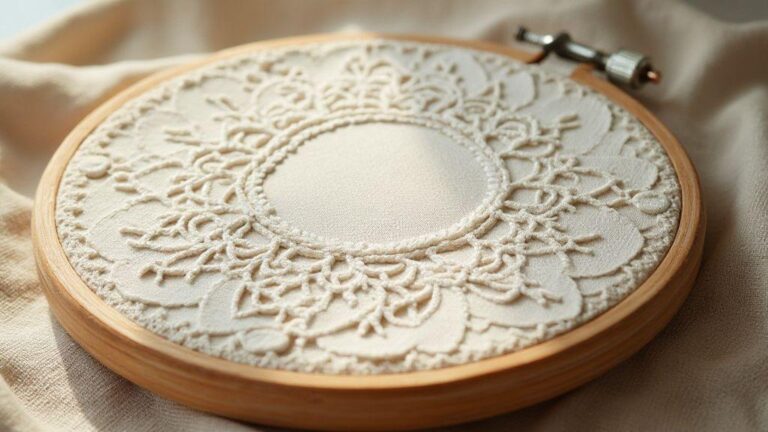
Broderie Anglaise stitches and eyelet embroidery technique
You’ll love how Broderie Anglaise stitches create light, airy designs that look timeless on shirts, dresses, and napkins. This technique uses tiny holes, called eyelets, cut into the fabric and then finished with neat stitching around each hole. You’ll notice the pattern feels delicate yet sturdy, almost like lace built from simple stitches. As you practice, you’ll see the eyelets form little daisies, circles, or floral accents that brighten plain fabric. The beauty is in how easy it is to adapt the pattern to your own preferences—more or fewer eyelets, bigger or smaller motifs, and even mixed shapes. When you keep your threads tight and your fabric taut, the result stays crisp for years.
Eyelets are the star, but the stitches around them do the heavy lifting. The classic technique uses buttonhole stitches to secure the edges of each cut hole, then you build out with tiny satin or fill stitches to shape petals or leaves. You’ll notice that the stitches don’t just close the eyelets; they give the fabric structure so you can wash and wear without the pattern losing its bite. The overall effect feels light and breathable, perfect for summer garments. With practice, you’ll keep your stitches even and your eyelets neatly sized, which makes the whole piece look intentional rather than rushed.
If you’re new, start simple: pick a small area, create a few eyelets, and outline them with tight buttonhole stitches. As you gain confidence, expand to larger motifs or repeat a motif across the fabric. The key is consistency—keep your fabric evenly taut, your thread color matched to the fabric, and your eyelets uniform. Before you know it, you’ll be stitching eyelets with the confidence of a seasoned crafter, and your garments will feel stylish and polished.
Buttonhole stitch to secure eyelets
When you sew around each eyelet, the buttonhole stitch locks the edge and keeps fraying away. You’ll start at one side of the cut, bring the needle to the back, and then loop the thread around the edge with small, tight stitches. The effect is a neat, flat edge that lays clean against the fabric. As you work, aim for consistent stitch length so the boundary around every eyelet looks even and tidy. If you notice your stitches pulling slightly, ease the fabric gently and adjust your tension. The buttonhole stitch isn’t flashy, but it’s the quiet workhorse that keeps your eyelets strong and ready for washing.
A steady rhythm helps a lot here. Think of it like brushing your teeth: steady, small strokes do the job best. You’ll often see two or three wraps around the edge before you pull through to secure the stitch. Use a shade that contrasts just enough to see your work, but not so boldly that it competes with the eyelet itself. If the hole starts to pucker, backtrack a bit and redraw the edge with lighter tension. With practice, you’ll produce crisp, uniform borders that make your eyelets pop.
If you’re stitching on finer fabrics, adjust by using thinner thread and a smaller needle. On heavier fabrics, you can go a touch bolder with your stitch length. Either way, the goal is a smooth, even edge that doesn’t ripple. You’ll know you’ve mastered it when you can complete an eyelet border in one pass and inspect the edge with a confident, straight line along the fabric.
Filling stitches and satin work
Filling stitches and satin work add life to each eyelet, turning flat holes into little blossoms or decorative shapes. You’ll use short, dense stitches to fill petals, or longer satin stitches to create a solid, glossy surface. The trick is planning your design first—sketch a small motif on paper, then translate it onto fabric with light pins or a fabric pen. Keep your stitches parallel and close together for a smooth fill, and avoid crowding stitches too tightly, which can cause puckering. When you step back, you’ll see the eyelets surrounded by a crisp puff of color and texture that pops against the base fabric.
If you want a softer look, go with shorter satin stitches and a lighter thread. For a bolder effect, use longer stitches and a richer color. Remember to weave the thread tails under a few nearby stitches to hide them neatly. If your fabric shows through gaps, add a few extra fill stitches in a staggered pattern to create a seamless surface. Each motif becomes a tiny sculpture on fabric, adding depth without weight.
As you build multiple motifs, keep a consistent scale so the overall pattern feels balanced. You can mix fill stitches with tiny straight stitches to create texture variety—like a tiny quilted effect on a surface you’ll wear or display. With patience, your embroidery gains a confident, finished look that makes your Broderie Anglaise: How to Embroider the Iconic Eyelet Pattern really shine.
Maintaining even stitch tension
Even stitch tension is the backbone of a clean Broderie Anglaise piece. You’ll notice that when tension is right, eyelets stay round, borders stay flat, and fills sit evenly across the surface. If your stitches are looser than you want, you’ll see gaps or a soft, stretched feel. If they’re too tight, the fabric can pucker and lose its drape. The trick is to keep a light, steady touch and to check your work often. After each small section, pause to compare edges and borders; small adjustments now save you from big fixes later.
A practical trick is to treat embroidery like a conversation with your fabric. If your thread seems to resist or bunch, back off a breath or two and loosen slightly. Conversely, if the fabric begins to bobble, ease your grip a bit and flatten the area with your thumb. Use a hoop or frame to keep the fabric taut, but don’t overstretch—just enough to keep stitches uniform. You’ll get a feel for it after a few projects, and your eyelets will stay perfectly round and your borders crisp.
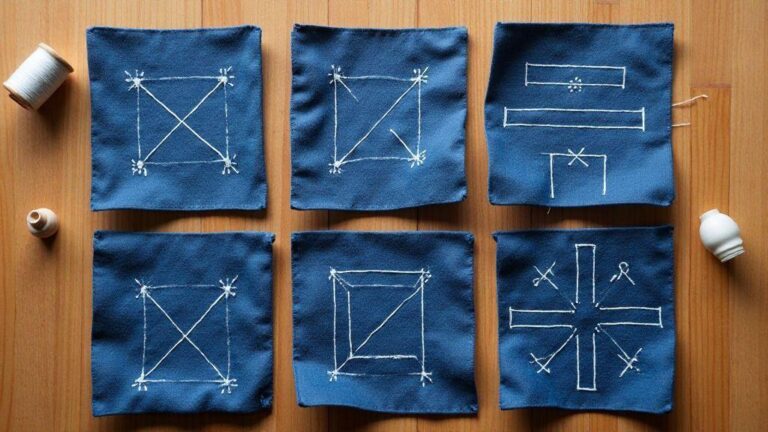
Broderie anglaise pattern transfer and layout
You’ll love how easy it is to get the classic eyelet look when you plan your layout first. Start by choosing a simple pattern that fits your fabric and project, then map out where each hole will go. Think of it like drawing a small map for your future embroidery, so you don’t lose track halfway through. When you transfer the design, keep the scale true to your fabric size; a pattern that’s too big can overwhelm delicate fabric, while something too small might vanish under the stitches. By laying out thoughtfully, you’ll avoid uneven rows and misaligned eyelets, which saves you from redoing work later.
Next, you’ll need to decide how dense your pattern should be. Eyelets spread too far apart look empty, while crowding can make the fabric stiff. A good rule of thumb is to measure the distance between eyelets and keep it consistent across the design. If you’re working on light cotton, a looser layout around the edges helps the fabric breathe. On stiffer fabrics, you can tighten the spacing a touch. This planning step is where you set the rhythm of your entire piece, so take a moment to imagine how the finished embroidery will sit on your garment or linens.
Finally, check your plan on a scrap piece before you stitch the real project. This lets you see how the holes will anchor into the fabric and whether any areas need a touch more space. If you spot a section that looks crowded, move it slightly to keep the pattern balanced. A calm, clean layout prevents puckering and gives you clean, crisp eyelets once you start stitching. Keep your notes or a tiny checklist handy so you can replicate the exact layout on multiple pieces if needed.
Marking tools: pens, transfer paper, templates
You’ll find that the right marking tools make pattern transfer much easier and neater. Start with a light, washable pen to draft your eyelet positions directly onto the fabric. Your lines should be faint enough to vanish with a gentle wash, but visible during transfer. If you prefer, you can use transfer paper to move the design from a paper template onto your fabric—just press firmly and evenly so the marks stay true. Templates are gold for repeat projects; they ensure every eyelet lands in the same spot, which is perfect if you’re making a set of napkins or a family heirloom.
Practice with a scrap fabric first to get a feel for how your marking tool interacts with your chosen fabric. Some fabrics grab ink or leave marks that won’t wash out, so test a small corner. If you’re worried about marks, you can use a light chalk pencil or water-soluble marker as your backup. After you’ve laid down your marks, double-check distances and symmetry. This quick double-check pays off when you start stitching and you don’t chase misaligned holes.
Using backing and stabilizer for cutwork
Backing and stabilizer are your best friends for clean, precise cutwork. A lightweight stabilizer on the back holds the weave steady, so your holes stay round and neat as you cut. If you’re working on a delicate fabric, choose a breathable stabilizer to avoid stiffness. The backing helps prevent the fabric from stretching or shifting during cutting, which keeps your eyelets perfectly spaced. When you press your fabric, use a gentle touch to avoid crushing the fibers or leaving impressions that show through on the front.
If you’re new to stabilizers, start with a simple tear-away or cut-away type, depending on how much texture you want on the back. For tight, dense designs, a stable backing gives you more control and reduces fraying around the edges. When you’re done, remove temporary stabilizers carefully so you don’t tug at the holes. You’ll end up with crisp, clean cutwork that holds its shape beautifully in the final piece.
Safe cutting and hole placement
Safe cutting is all about control and a steady hand. Use sharp, small scissors or a precise craft knife to make clean, round holes rather than jagged cuts. Place your needle holes on the marked spots first, then cut slowly around each hole to maintain even edges. If you notice fraying near the edges, reinforce with a bit of stabilizer or a tiny amount of fabric glue before you cut again. Remember, the cleaner you cut, the more professional your eyelet shape will look.
Pay attention to where you place holes in relation to seams or folds. Don’t cut too close to edges or French seams, or you risk weakening the fabric. Leave a tiny margin to account for stitching tension. If you’re unsure, practice on a scrap sample and compare. Consistent hole size and placement give your Broderie Anglaise a crisp, iconic finish every time.
Step by step eyelet embroidery for beginners
Eyelet embroidery is a bright, friendly stitch that adds tiny, rounded holes to your fabric. You’ll find it in many traditional styles, and it’s a perfect starting point if you want a clean, delicate look. You’ll see how easy it is to create tiny rings that form patterns or borders, just by following simple steps. You’ll notice that practice makes the stitches sit evenly and the edges stay neat. With a little patience, you’ll be surprised at how quickly your fabric gains a light, airy texture. Let’s walk through the basics so you can start stitching with confidence and enjoy the process as much as the finished piece.
You’ll learn to choose the right fabric and thread, transfer your design, and keep your hands steady as you work. You’ll also find tips to correct a wobble in your eyelets and how to avoid pulling the fabric too tight. As you stitch, you’ll hear stories from traditional embroidery that show eyelets appearing in gowns and table linens from many cultures. It’s not just about making holes; it’s about building a rhythm in your hands and a smile on your face when you see the pattern come to life. Ready to dive in? Your first eyelets will feel almost like tiny blossoms blooming on fabric.
You’ll finish with a sense of progress. Your pieces will look lighter and friendlier, and you’ll have a new skill you can use on everything from handkerchiefs to pillow covers. This method is friendly for beginners, yet flexible enough to grow with you as you learn more stitches. You’ll know how to frame your work, keep threads tidy, and enjoy the moment your design starts to take shape. Now let’s get into the steps that set you up for success.
Preparing fabric and tracing the pattern
Before you stitch, you’ll pick a smooth fabric that’s not too stiff—muslin or even-weave cotton works well. You’ll lay your fabric flat and pin it to a small, easy-to-mold hoop so it stays taut. You’ll choose a simple pattern with round eyelets to practice and avoid crowding your first try. You’ll trace the design with a light pencil or transfer method that leaves clean lines but is easy to erase if you shift things a bit.
You’ll mark the center of your pattern and line it up with a natural grain on the fabric so your eyelets stay evenly spaced. You’ll practice transferring lightly; if you press too hard, you’ll mess up the fabric or leave marks that won’t wash out. You’ll keep the pattern small for your first project, so you can see progress fast and avoid mistakes you’ll regret later. When you’re ready, you’ll have a clear guide and a fabric that’s ready to become something you’re proud of.
Cutting eyelets and stitching the edges
When you cut the eyelets, you’ll keep the hole small at first and widen it gradually with your needle. You’ll use a small, sharp pair of scissors or a micro-knife to create clean circles from the traced marks. You’ll hold your fabric taut in the hoop so the edges stay neat and don’t fray as you work. You’ll stitch around each eyelet with a simple satin or buttonhole edge to finish the ring and prevent unraveling.
You’ll keep your thread snug but not pulled tight. You’ll move slowly, checking each eyelet’s size as you go, so your pattern stays uniform from one hole to the next. You’ll iron your fabric gently between steps if the surface looks puckered, then resume stitching with fresh eyes on the pattern. You’ll soon see a neat row of ready-to-stitch eyelets that form a playful, airy design.
Simple practice exercises
Practice 1: Make a small line of five eyelets. Focus on keeping each circle the same size and spacing. Keep your stitches gentle and even, so the row sits flat on the fabric.
Practice 2: Create a curved line of eyelets, like a gentle arc. Watch the spacing as you curve and let your wrist loosen slightly on the bend. The curve should feel natural, not stiff.
Practice 3: Try a tiny flower motif with a central eyelet and four around it. This helps you learn symmetry and how to place eyelets evenly around a center point. You’ll find your hands start moving more confidently.
Broderie Anglaise finishing techniques and global variations
You’ll love how Broderie Anglaise finishes can elevate any garment. Start by choosing a clean, crisp fabric and a pre-washed surface so your eyelets don’t distort later. The finishing technique centers on keeping threads neat and secure, so your piece stays fresh wash after wash. A key move is to trim away excess stabilizer close to the stitching, then press carefully to set the shape. You’ll notice how small tweaks, like using a slightly wider hem on eyelet blocks, make the whole design pop without pulling. When you explore global variations, you’ll see that some cultures blend this style with bold borders, while others keep it delicate and sheer. The result is a versatile technique you can adapt to collars, cuffs, and inserts, all while keeping your fabric’s breathability intact.
In many parts of the world, finishing means more than neat edges. You might encounter hand-rolled hems or tiny buttonhole stitches that secure the outer edge of an eyelet pattern without adding weight. If you’re decorating a summer blouse, consider using a soft, linen blend and leaving a little seam allowance for flexibility. For heavier fabrics, you’ll want a sturdier knot on each motif—think of it as giving the eyelet a small anchor so it holds up in sturdy wear. The beauty of this technique is that it scales: you can keep the finish minimal for a light top or layer more embroidery for a rich, textured look that still breathes. Your goal is balance—realize an eyelet pattern that’s clean yet expressive, and you’ll wear it with pride.
When you mix finishing techniques from different countries, you get a richer Broderie Anglaise experience. You might pair a Swiss-influenced edge with a French-inspired openwork center, or combine a Japanese satin stitch outline with an English eyelet fill. The result is a garment that feels global yet personal. Remember to test your stitches on a scrap fabric first, so you don’t surprise yourself with an edge that peels or puckers. With careful pressing and a light touch on settings, you’ll keep the eyelets crisp and the fabric smooth. Your finished piece should be comfortable, stylish, and ready to wear or gift, with a nod to the world’s embroidery traditions.
Blocking, washing, and pressing tips
You’ll want to block your eyelet work early to prevent distortion. Wet blocking on a clean towel helps set the shape without leaving a crease. Pin the corners and the widest points of your motifs, then let it dry flat. When washing, use a gentle cycle or hand wash in cool water with a mild detergent. Avoid harsh scrubbing, which can break delicate eyelets. If you’re unsure, slip a mesh laundry bag around the garment and wash with similar fabrics. Always air-dry, then press from the back with a warm, not hot, iron. A light blast of steam can help relax any stubborn puckers, but you don’t want to melt the edges of the eyelets.
For pressing, use a clean cotton cloth between the iron and your fabric. This shields the eyelets while guiding heat evenly across the surface. Velvet boards or a padded pressing surface work well if you have them, but a sturdy ironing board with a damp towel can do the job. When you press, target each motif separately to preserve the open, airy look. If you notice any edge curling, a tiny bit of starch on the back can help, just be careful not to overdo it. You’ll notice your eyelets stay defined and your fabric keeps its drape after the wash, making your project feel professional and lasting.
Keep an eye on colorfastness, especially if you’ve used any dye or vintage threads. Test a small corner before full wash, and choose a detergent labeled gentle for delicates. If a stain appears, treat it immediately with a mild, non-abrasive cleaner, then rinse well. Your eyelet pattern should emerge bright and clear after each wash, not fuzzy or dull. By following these steps, you’ll maintain the crisp look that makes Broderie Anglaise so timeless, and your finished piece will travel beautifully from season to season.
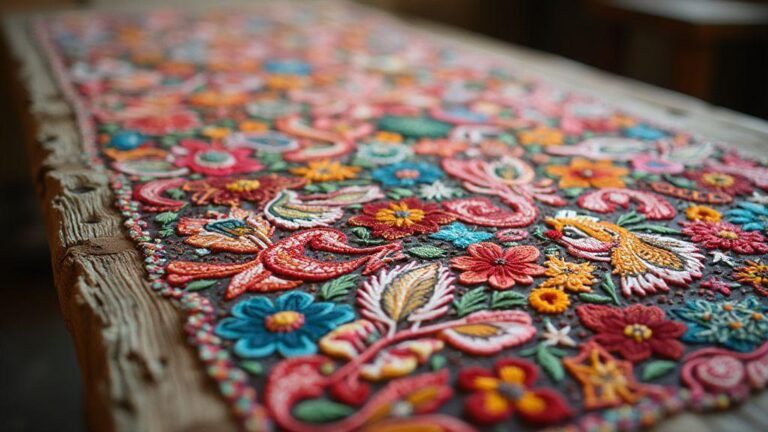
Broderie anglaise and similar eyelet traditions worldwide
You’ll notice that eyelet traditions show up everywhere, but the details differ. In some places, eyelets are larger and more boldly connected with dense outlines; in others, you’ll see tiny, lace-like holes framed by delicate satin stitches. A practical difference is in how the edge is finished: some cultures favor a simple hemmed edge, while others add tiny scallops or decorative borders. You can borrow ideas from these variations to tailor your project—keep the look light and breathable for summer wear, or layer more stitches for a stronger, more formal piece. The key is to keep the eyelet spacing consistent so your pattern reads clean from afar and detailed up close.
As you explore, you’ll also find different motifs that accompany the eyelets. Some traditions favor floral clusters that radiate outward, while others lean toward geometric borders that frame the eyelets like little windows. You can mix a geometric motif with a floral fill to create a modern twist while honoring the original technique. When you stitch with these global influences, you’ll build a repertoire you can pull from for almost any garment or home project. Your eyelets will sing with character—quiet when you want elegance, bold when you want a statement piece.
- You might like the crisp, English-style eyelets for a tailored shirt.
- Or you could try a more lacey, openwork approach inspired by continental traditions for a summer dress.
- For blankets or home linens, a denser fill around the eyelets creates a cozy, heritage look.
An important takeaway is to keep your tension steady and your spacing even. That consistency is what makes Broderie Anglaise and its cousins feel timeless, no matter how you mix in influences from around the world.
Preservation and repair tips
If you want your eyelet work to last, store it flat in a cool, dry place, away from direct sunlight. This helps prevent yellowing and keeps the fabric’s color true. If you notice a loose thread, gently anchor it with a tiny, fine knot on the backside rather than cutting it off. When repairing, match the thread weight and color as closely as possible so the repair blends in. If a motif edge frays, you can reinforce it with a small satin-stitch outline to restore the shape without making the eyelet look heavy.
For vintage pieces, handle with extra care. If you’re cleaning, skip machine washing and opt for hand washing in mild detergent, then lay flat to dry. When you store, roll the garment rather than folding it to reduce creases that might push on the eyelets. If you need to press a repaired area, use a cool iron and a pressing cloth to protect the stitches. You’ll keep your Broderie Anglaise: How to Embroider the Iconic Eyelet Pattern looking fresh for years to come by treating it gently and repairing promptly.

I’m Sophie Caldwell, the author behind granaboom.com, and I believe hand embroidery is one of the simplest, most relaxing ways to create something beautiful with your own hands. I started this blog to help beginners learn hand embroidery without feeling overwhelmed by complicated instructions or “perfect” results.
Here you’ll find beginner-friendly guides to decorative embroidery stitches, along with clear step-by-step practice ideas and patterns you can use to build confidence. My focus is on making the learning process easy: simple explanations, helpful stitch combinations, and small projects that look polished even when you’re just starting out.
Welcome to granaboom.com—grab your hoop, choose a few colors, and let’s stitch one line at a time.