Boro Patchwork and Sashiko: The Art of Visible Mending
Boro Patchwork and Sashiko: The Art of Visible Mending
This guide explores the history, techniques, tools, and sustainable practice of Boro Patchwork and Sashiko: The Art of Visible Mending. Learn how visible repairs become decorative statements, and how small stitches carry big stories.
How you can learn the history of boro patchwork
- Start with simple resources that tell the story of worn fabrics and careful repairs. Look for beginner guides showing stitches, scraps, and what each patch means. When you read, imagine a grandmother describing her clothes from years ago. Note why people mended, what materials were used, and how patches looked on everyday coats and blankets. This makes the history feel close to your own wardrobe, not just a museum display.
- Next, join hands-on classes or online workshops that teach the basics of boro patchwork. You’ll see needles, threads, and cotton up close. Practice slow stitching on scrap fabric, as the masters did. Connecting with teachers or fellow learners helps you hear the stories behind each patch—the village life, the weather, and daily work that shaped these textiles. The goal is to absorb not just how it’s done, but why it mattered.
- Finally, compare sources to build a fuller picture. Look at photos of finished pieces and note how patches reinforce fabric and how seams run across sleeves or hems. Read about the social and economic reasons people mended clothes rather than replacing them. By stitching together these threads, you’ll understand Boro Patchwork and Sashiko: The Art of Visible Mending more deeply and remember it better.
Why rural Japan used sashiko visible mending
In rural Japan, visible mending with sashiko wasn’t just practical—it was a shared skill and a quiet art. Simple running stitches reinforced fabric where it wore thin. The visible lines told a story of thrift, care, and patience, adding character to every garment. This practice turned everyday wear into something with memory stitched in.
Sashiko also served a social purpose. Neighbors mended together, sharing tips and stories as they stitched. The community rhythm kept clothing usable longer and tied families to their land and routines. Patterns—repetitive squares and lines—became a shared language, a way to say, We are here, we endure, without words.
Over time, sashiko patterns evolved with needs and tastes. Simple geometric lines gave way to decorative forms as new fabrics and threads became available. Yet the core idea stayed the same: mend with care, let the repair tell a story, and keep clothing serving daily life.
Edo and Meiji era textile practices
During the Edo period, textiles were woven with care and repaired with the same mindset. Patches extended the life of precious fabrics, turning each tear into a chance to add meaning. In the Meiji era, production and fashion shifts brought varied fabrics and new tools, but the heart of the craft remained: repair first, wear longer, value keepsake patches. The era offered more colors and textures, while the goal stayed—to make cloth last while weaving in daily-life stories.
Cultural context and preservation
Repairing clothes carries cultural weight. You join a long tradition when you mend instead of discarding. Preserving these techniques keeps a link to past communities, their work, and their values. By learning sashiko and boro methods, you help keep storytelling alive—one stitch at a time.
Conservation today blends hands-on practice with scholarly study. Museums, makers, and educators share techniques to keep methods accurate and accessible. Your role is to practice respectfully, document what you learn, and pass on knowledge so future generations can see how people valued durability, beauty, and care.
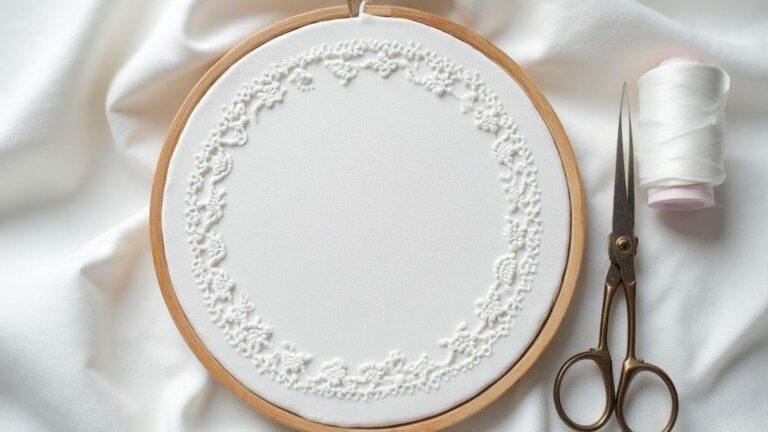
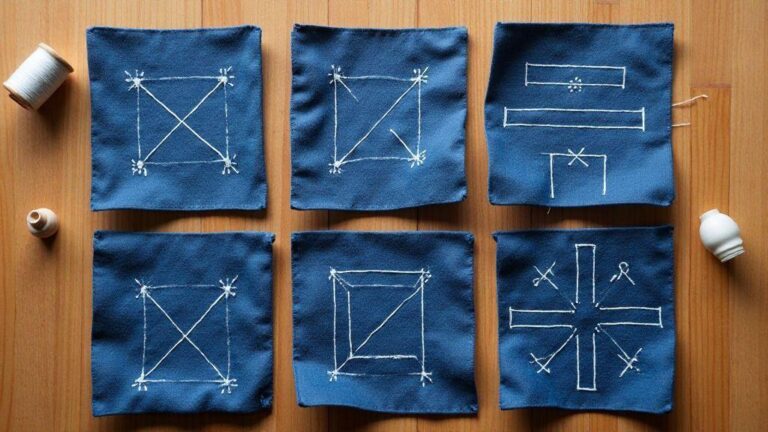
Sashiko stitch patterns you can practice
Sashiko is a traditional repair and decorative technique from Japan. Start with simple stitches that reinforce weak spots and gradually build a repertoire of patterns you can practice right away. The aim is repairs that look intentional, not like excuses for a torn garment. Regular practice builds patience and an eye for detail.
Begin with easy-to-remember patterns: straight lines and small motifs, then move to more complex designs. As you practice, you’ll see how stitches weave together to form durable repairs. Finish with patches that blend with the fabric, as if the garment learned a new trick from you. Key: steady hands, calm rhythm, and practice on scrap fabric before tackling your favorite item.
Adapt patterns to your colors and fabric. Sashiko isn’t about perfection; it’s about resilience and style. Keep a small notebook of tried patterns and adjustments for thread and fabric. With time, your stitches become quicker, cleaner, and stronger, and your mends tell a story of care and skill others will notice.
Basic running stitch for visible mending techniques
The basic running stitch is your first tool for visible mending. It lays down a continuous line that binds fabric and adds a subtle decorative touch. It’s the backbone of your repair—simple, reliable, and strong when stitches stay even. Start on a scrap, then test a small tear on a sleeve.
Small, even stitches with gentle tension create neat, durable repairs. Use the running stitch to outline shapes or add light texture around a patch. Secure thread ends well so your work lasts through wears and washes. This simple technique forms the foundation for more intricate sashiko patterns.
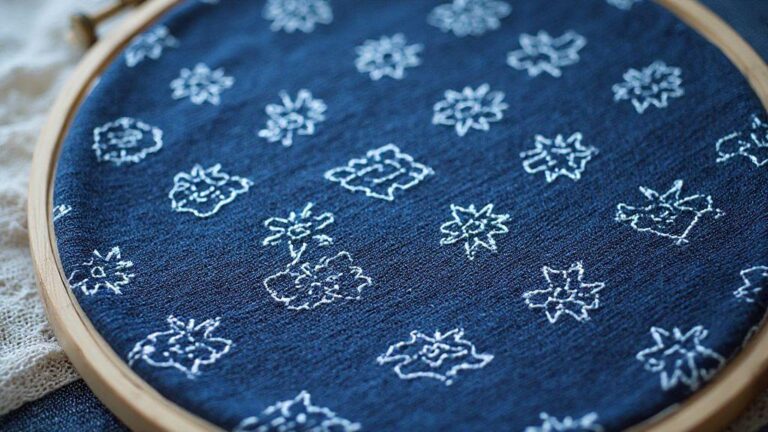
Common geometric and floral patterns
Geometric patterns—lines, squares, and diamonds—create a strong grid that distributes stress away from weak spots. Floral motifs add a natural touch; you don’t need perfect petals—rounded shapes and simple leaves read as flowers in sashiko. Use contrasting thread for emphasis or a tone-on-tone approach for subtle patches. Repeating small motifs creates a big visual impact. Keep tension even and lines aligned with the weave for best results. Over time, you’ll develop a small repertoire of patterns for repairs across items.
Choosing stitches for durability
Choose stitches that lock together and spread stress across a patch. Start with running stitches, add reinforced edges and corners, and use denser stitches in high-wear zones. Consider fabric weight: heavier materials like denim benefit from tighter stitches, lighter fabrics from finer lines. Always test on a scrap first. End sessions with a quick wash test to see how stitches behave when the fabric moves, helping you decide if you need extra rows, longer stitches, or tougher thread. These basics build confidence for future repairs.
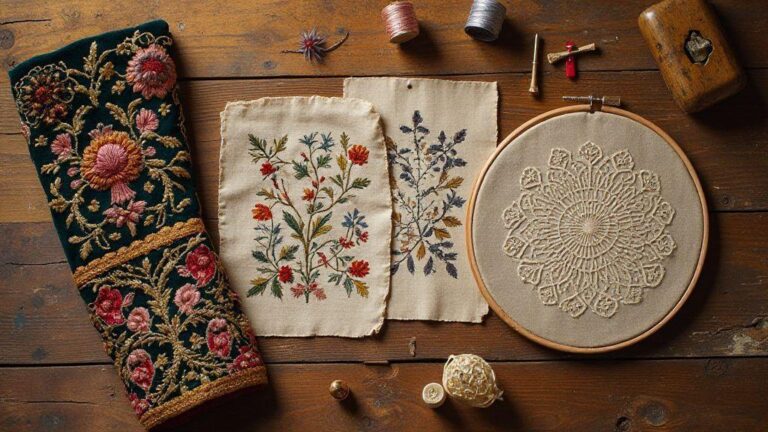
What tools and fabrics you need for Boro Patchwork
Gather the right tools and fabrics for Boro Patchwork. Start with a sturdy needle, sharp scissors, and a thimble. Add a light embroidery hoop to steady the fabric, plus a bag or tray for threads. Choose fabrics like faded denim, linen, and cotton scraps for their weathered, layered look. Keep a few scraps on hand to test tension and stitch behavior. The goal is practical mending that becomes art, guiding you from first patch to finished piece.
When selecting thread, opt for multi-ply cotton or a cotton-poly blend that won’t fray easily. Choose colors that tell a story—muted indigos, warm browns, and soft grays suit a true Boro vibe. Include a rust-proof pin, a needle threader, and an awl for piercing thick layers. Your workspace should feel inviting yet organized so you spend more time stitching. With the right tools, you’ll see visible layers come alive—the signature of Boro Patchwork and Sashiko: The Art of Visible Mending.
As you prep, test stitches on a scrap to gauge fabric behavior after washing. Boro loves imperfect edges, but a consistent stitch length helps. If patching denim, thicker thread is helpful; for light cotton or linen, finer thread keeps things neat. Assemble a portable kit for classes or sewing nights—a pincushion, small scissors, and a compact measuring gauge. Your setup becomes a safety net: you can fix a hole and still make it look intentional.
Best recycled fabrics for upcycled clothing mending
Choose recycled fabrics that match the texture and weight of the original garment. Denim from old jeans blends well with linen or cotton, creating a layered surface with character. Prioritize fabrics with some wear for depth. Keep weights similar when combining fabrics so stitches sit evenly, often resulting in a quilt-like map of your wardrobe’s history.
Using recycled fabrics isn’t just eco-friendly—it’s a design move. Patch placement can tell a story: a sleeve patch over a worn elbow, or a knee patch on favorite jeans. Maintain a color journal to plan the final look before you stitch. The goal is a cohesive patchwork that honors the garment’s past while adding new life through visible stitching.
Always wash fabrics before cutting to reduce shrinkage and prevent later pulling. Test colorfastness if fabrics might bleed. If a patch could bleed, seal it with a light seam or wax pencil. Your upcycled piece will shine when you respect the fabric’s history and let the threads tell a durable, decorative story.
Needles, threads, and traditional supplies
Feel the needle glide through layered fabric. Use a thimble to push through thick patches, and pick a needle size matched to the fabric weight. Heavier denim needs a sturdy needle; lighter linen a finer option. Keep several needle types on hand.
Threads come in many weights and colors, but a solid cotton or cotton-poly blend is best for durability. Choose core colors that echo the garment—blues, grays, earthy tones are ideal for Boro. Add a thread wax or conditioner to keep threads smooth across multiple layers. Traditional supplies like a small Boro brush or chalk markers help plan seams and keep edges aligned. Your toolkit turns worn fabric into wearable art.
If you’re new to Boro Patchwork and Sashiko: The Art of Visible Mending, start with a simple project to learn tension and stitch length. Practice on scrap patches to protect a favorite garment. The right mix of needles, threads, and marking tools makes each session smoother and more satisfying as patches merge into a cohesive piece.
Sourcing traditional boro textiles
Authentic, traditional boro textiles can be found in markets celebrating handmade cloth and vintage fabrics. Look for sellers who describe history, wear, and patching patterns. Ask about fiber content and weight to match patches to your garment. You’ll find pieces that carry stories ready to weave into your project.
Online, read seller notes about origin and age. A trusted description helps you avoid modern reproductions lacking texture and depth. Buy a small amount to test how it stitches and blends with your project. The right textile makes your patchwork a living link to tradition. Sourcing the right fabric is half the craft, and it will show in the final look.
How you can use visible mending for sustainable fashion
Visible mending lets you fix clothes you own and make them stylish again. Choose stitches, colors, and patterns that reflect your personality, turning wear-and-tear into a feature. Repair with intention to cut waste and extend your wardrobe’s life. It’s practical and a statement about quality and care. Start small—mend a jeans knee or a worn sleeve—and grow to more complex pieces. Your clothes become a canvas for creativity, and your closet gains a new story with every repair. Embrace mending as decorative as functional, and you’ll see how easy it is to recycle your favorite garments.
Visible mending also teaches you to evaluate what you own: which fabrics hold up, which repairs look best, and where to invest in sturdier materials next time. By choosing sturdy threads, dense stitches, and careful knotting, you’ll maximize durability. The process slows you down in a good way, letting you savor each piece. It’s not about hiding damage; it’s about highlighting character. As you gain confidence, you’ll add small appliqués or contrasting seams that celebrate wear. Your clothes become personal, and daily choices feel empowering.
Make mending a habit. Keep a small kit with thread, needles, and patches. Spot a loose seam or nick early to prevent bigger problems. The habit reduces waste and saves money over time. More importantly, visible mending connects you to a timeless craft that has sustained communities from scraps and fabric. Your simple stitch can become a small act of care for the planet.
Slow fashion mending tips to save garments
Choose the right thread for the fabric. For denim, use sturdy cotton or polyester thread; for delicate fabrics, a finer thread with a lighter stitch. Matching or contrasting colors can both look intentional. Use sturdy knots to hold repairs through wear and washes. Don’t rush—neat, durable mends look best.
Plan your repair before starting. Decide whether to fix a hole, reinforce a seam, or patch a worn area. Visualize a quick idea, then choose stitches that fit the fabric and goal. A calm approach keeps the repair light on the eye and heavy on durability.
Keep stitches even and tidy. Small, even stitches for patches and straight lines for seam repairs create a clean finish. Align patches with the fabric’s grain for better stretch and wear resistance. Finish with a neat knot or backstitch to prevent unraveling.
Sustainable textile repair practices you can follow
Use repair methods that add strength where needed. Reinforce seams with backstitch or zigzag stitches; choose patches that match the fabric’s texture and weight. Reversible patches offer versatility over time.
Recycle thread and fabric scraps creatively. Tiny scraps suit decorative stitches, may be woven into motifs, or used to embroider a small design. This reduces waste and personalizes the repair.
Practice safe, long-lasting habits: wash garments inside out on gentle cycles, dry flat when possible, and store repaired items carefully. These steps protect mending work and extend wardrobe life.
Repair strategies to extend garment life
Build a mending routine that fits your lifestyle. Set aside weekly time to check for minor issues and fix them before they spread. A proactive approach saves bigger repairs later and keeps your closet cohesive.
Step-by-step Boro Patchwork repairs you can do at home
Fix worn fabric at home using a simple, sturdy method. Layer fabric scraps to reinforce the hole and create a decorative surface. Plan patches and keep stitches even so repairs are strong and tidy. Start with a patch larger than the hole and a backing fabric that won’t stretch unevenly. This method works on jeans, jackets, or a canvas bag, combining style and function in one repair.
Cut a backing patch slightly larger than the hole, then place a decorative front patch over it. Pin patches to prevent shifting. Layering creates a textured look faithful to Boro Patchwork and Sashiko: The Art of Visible Mending. Sew with small, consistent stitches; a basting stitch helps secure layers before final stitching. Finish with a trim and a light press to set the patchwork. You can add decorative stitches around the edge to blend old fabric and patch into a cohesive design. Your garment should be sturdy for daily wear while retaining handmade charm.
Preparing holes and layering patches
Center the hole, cut a backing patch that extends about half an inch beyond the tear, and choose a backing fabric that won’t fray easily. Test a few stitches on scraps to keep tension even and avoid puckering.
Cut a decorative patch larger than the backing patch, then lay both behind the hole. Pin in place, focusing on areas near seams or pockets where stress occurs. Layering adds durability and a bold, woven look that remains cohesive. Ensure patches sit flat and don’t create bulky bumps.
Hand stitching repair techniques for strength
Use small, even running stitches or a backstitch along patch edges. Start at a corner and work around, pulling stitches gently to avoid distortion. A zigzag or satin stitch around the edge locks position and reduces fraying. Weave parallel stitches across the hole to create a fabric lattice that distributes stress.
For heavy fabrics, alternate thread types or use a thicker needle to handle multiple layers. With practice, your hands will move with confidence and the repair will appear almost invisible to casual eyes.
Finishing touches for long wear
Trim close to the knot and press the patch to flatten your work. A light starch can help stitches hold a crisp line. Add a few decorative lines inward from the edge to create a subtle frame tying the repair to the garment’s original style. Test movement and adjust any puckering by re-stitching or adding extra backing.
How sashiko visible mending influences modern design
Sashiko is more than stitching; it’s a statement that imperfections become art. The history shows in every line, and designers listen. In modern clothes, white running stitches on dark fabric resemble tiny murals, inviting you to treasure garments longer and turning wear-and-tear into a story you wear proudly. It’s a nudge toward slow fashion, where repairs are a feature, not a fix.
For contemporary designers, sashiko demonstrates how simple techniques can have bold impact. Geometric patterns and reinforced patches transform fabric into a canvas. The honesty of visible repair invites a rethink of new and why a well-repaired piece can feel more special than something freshly bought. Practical art that fits real wardrobes.
Sashiko-inspired design isn’t about perfect stitches; it’s about intention. The act of mending becomes a creative choice, not a chore. Brands borrow the idea to add one-of-a-kind details on denim, jackets, and bags. A garment ages with you, gaining depth as you wear it. The result is a modern aesthetic rooted in tradition, showing how a simple technique reshapes value and longevity.
Contemporary designers using Boro Patchwork methods
Boro patchwork appears in both high-end fashion and streetwear. Designers layer scraps to build patterns that feel ancient and fresh—patchwork poetry, with patches conveying memories. The craft elevates flaws, highlighting worn edges and decorative seams. Stitches can be bold, sometimes imperfectly perfect, creating textures you can almost feel.
This style thrives in collaborations that blend traditional techniques with modern silhouettes. A kimono shape reinterpreted with denim patches, or a tailored coat with a lattice of tiny stitches, shows respect for the process and yields pieces you’d wear with pride. It’s a bridge between past and present that invites your own stories to mingle with the fabric.
Global trends in upcycled clothing mending
Mending is trending worldwide—practical, stylish, and conversation-worthy. Pop-up shops and online drops feature repaired garments with bold stitches and visible wear that feels alive. The wardrobe becomes a canvas, not a collection to hide. Mending connects communities that celebrate resourcefulness and craft.
Across continents, languages of mending vary: tiny cross-stitches form delicate florals in some places, while heavy patches create geometric grids elsewhere. Color choices reflect local tastes and climates, from earthy browns to bright hues. The result is a tapestry of styles that feels personal and universal.
The message is that upcycling is about reimagining pieces, not throwing them away. Swap fast trends for thoughtful repairs, turning your closet into a living archive. Mending aligns with a growing movement that respects resources and celebrates creativity.
Blending tradition with new materials
Traditional stitches sit alongside modern fabrics and tech-inspired threads, creating a fresh, wearable blend. It’s not nostalgia; it’s practical and beautiful—designed to last.

I’m Sophie Caldwell, the author behind granaboom.com, and I believe hand embroidery is one of the simplest, most relaxing ways to create something beautiful with your own hands. I started this blog to help beginners learn hand embroidery without feeling overwhelmed by complicated instructions or “perfect” results.
Here you’ll find beginner-friendly guides to decorative embroidery stitches, along with clear step-by-step practice ideas and patterns you can use to build confidence. My focus is on making the learning process easy: simple explanations, helpful stitch combinations, and small projects that look polished even when you’re just starting out.
Welcome to granaboom.com—grab your hoop, choose a few colors, and let’s stitch one line at a time.