How to Choose the Right Embroidery Hoop for Your Project
How to Choose the Right Embroidery Hoop for Your Project
Embroidery starts with the right hoop. The hoop you choose helps keep stitches neat, fabric taut, and your hands comfortable. With the right fit, your project stays centered, tension remains even, and transfers, satin stitches, and backstitching become easier—especially for beginners.
Think of hoop size like framing a photo: too small crams the design; too large makes details hard to align. Start with a hoop that fits your design area and allows comfortable access to the stitches. As you gain experience, you’ll develop a feel for what works best.
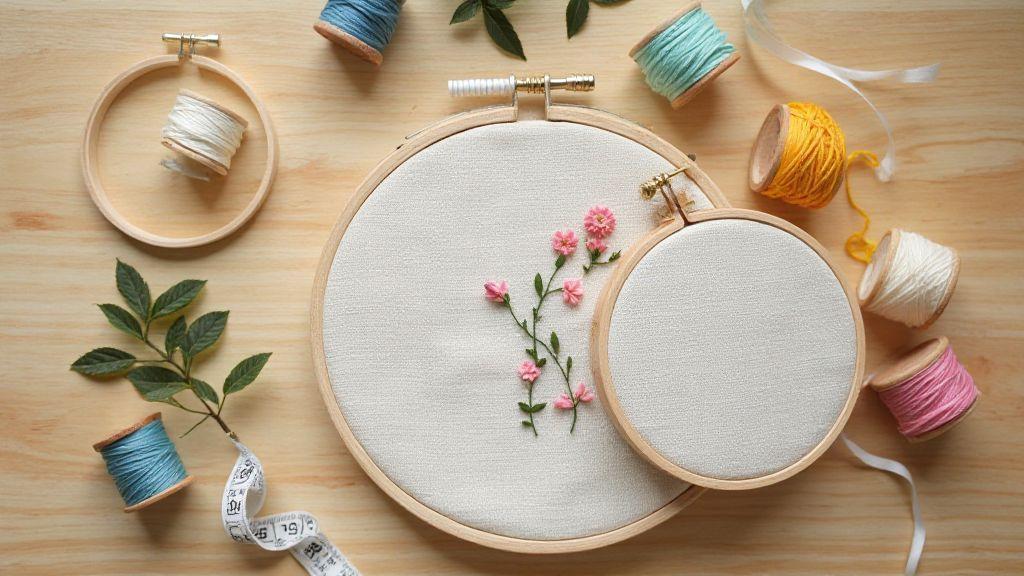
Best embroidery hoop size for your project
For beginners, a mid-range hoop around 6–8 inches works well for most projects, offering a generous work area without excessive wobble. For small motifs, try 4–6 inches to maintain control. For larger projects, 9–12 inches or bigger helps prevent crowding and reduces the need to re-hoop.
If unsure, start with a hoop that covers the central area of your design. You can move to a larger hoop as the pattern grows or switch to a smaller one for detail work. The goal is to keep fabric taut so stitches stay even; test a medium size first and adjust as you gain confidence.
Hoop size by fabric type
Cotton and linen like to lie flat, so a snug but forgiving fit helps maintain tension without distorting the weave. A mid-size hoop is comfortable for these fabrics. Denim or canvas, being sturdier, may require a larger hoop to keep the fabric flat and prevent puckering. For delicate silks or linen that frays easily, use a smaller hoop to avoid crushing the edges and to keep the working area in focus. For stretchy knits or lightweight fabrics, choose a hoop that holds firmly without distorting the warp threads.
In all cases, the fabric should move smoothly within the hoop without slipping or bunching. It’s better to rehoop early than fight a tangled mess later.
Hoop diameter selection guide
Choose a hoop diameter based on your design and workspace:
- Tiny, detail-heavy projects: small diameter to keep your hands close.
- Medium designs: 6–8 inches balances visibility and control.
- Large motifs or blocks of color: 9–12 inches or more to avoid crowding and minimize re-hooping.
Aim for a taut, even pull that preserves thread paths. If you’re unsure, start with a mid-range diameter and adjust as you gain comfort.
Wood vs plastic embroidery hoops
Your first choice often comes down to wood or plastic. Wood feels sturdy and can give a crisper look because of its natural bite on the fabric. Plastic hoops are lightweight, affordable, and travel-friendly, making them convenient for casual or on-the-go stitching.
Your choice depends on how you stitch and where you stitch. For long, steady sessions, wood hoops resist warping and offer reliable tension. For learning, quick projects, or travel, plastic hoops are a practical starter option. Many beginners begin with plastic and then switch to wood as they gain confidence.
Embroidery hoop materials: wood vs plastic
- Wood hoops: typically hardwoods like beech or maple; they offer a natural spring and tactile grip.
- Plastic hoops: made from lightweight polymers; they resist warping and are easy to clean.
Moisture and storage considerations differ. Wood can absorb humidity, which may affect tension over time; plastic resists moisture changes but can become brittle in very cold conditions. Wood rims feel warmer in hand, while plastic rims glide smoothly on fabric.
Pros and cons for grip and finish
- Wood: provides a grippy edge and varied finishes that can enhance control; may warp with moisture.
- Plastic: lightweight, easy to clean, and warp-resistant; can feel slippery and may require a cloth wrap for grip.
Choose based on your typical sessions: long, focused periods favor wood; short, casual sessions favor plastic.
Care for wood and plastic hoops
- Wood: wipe with a dry cloth after use, keep away from moisture, and occasionally wipe with a neutral oil (wipe off excess).
- Plastic: wash with mild soap and water, dry completely, and inspect for cracks or chips.
Adjustable versus fixed hoops
Adjustable hoops let you tighten or loosen fabric as you work, which helps when you plan different projects or sizes. Fixed hoops stay the same size and are straightforward—fewer knobs to adjust, and a steady setup for longer sessions.
Your choice depends on project variety. If you sew a lot of different fabrics or sizes, an adjustable hoop offers flexibility. If you prefer simplicity and consistency, a fixed hoop is a solid starter option. Some stitchers keep a small adjustable hoop for experiments and a fixed hoop for steady, repeatable work.
When to pick each hoop type
- Adjustable: great for learning tension and when you’ll switch fabrics or sizes frequently.
- Fixed: ideal for long sessions and straightforward, repeatable work.
Transportation and workspace also matter: adjustable hoops can be bulkier, while fixed hoops are often more compact.
Tightening and care tips
- Tighten gradually. Test with a light tug to avoid overtightening.
- If fabric puckers, back off one notch and re-tension evenly.
- Clean both hoop types regularly; wipe away thread dust and fibers after each session.
- Store with the fabric loosened to prevent stretching overnight.
- Periodically check screws or clamps and tighten just enough to hold, not crush the fabric.
Achieving tension and stability
Tension affects stitch quality. Start with a calm, even rhythm: overly tight fabric puckers; too loose fabric wobbles. Practice on scrap fabric to dial in a comfortable feel for your hands. Read how the fabric responds as you stitch. If threads snag or pull, pause and re-check the setup. A steady pull and relaxed grip yield consistent, neat stitches.
Embroidery hoop tension and stability
- The hoop should grip without crushing the fabric.
- If the fabric lifts with a gentle tug, you’re at a good tension; if it dent, loosen slightly.
- Use the outer ring to distribute pressure evenly and prevent shifts.
- Choose the right hoop size to match your project. A snug fit with some room to maneuver helps you move your hand freely.
- Keep hoops clean and dry. Oils can reduce grip over time; wipe before and after stitching. Take breaks during long sessions to re-tighten and reset.
Stabilizers and fabric prep
Stabilizers provide a base for delicate fabrics or tricky stitches. Match stabilizer weight to fabric and stitch type. For light fabrics, a sheer stabilizer helps keep stitches visible; for dense stitches or loose fabrics, stabilizers prevent warping and puckering.
Prep the fabric: wash and press flat according to care labels. Use temporary spray adhesive or removable tear-off stabilizers to hold stabilizer in place. Always test a small area first.
- Tear-away stabilizers: stitch, then tear away excess.
- Cutaway stabilizers: best for woven fabrics to stay solid after finishing.
Preventing slippage
Slippage undermines neat stitches. Secure the fabric, use a light grip, and guide rather than tug. If the fabric shifts, re-tighten and reseat. Keep the top edge taut as you begin each stitch row to reduce slack and keep lines aligned. Draft a mental line before stitching and follow with steady hand movements.
Travel and portable hoop choices
Travel light and you’ll finish more projects. Look for hoops that lock firmly, pack flat, and stay stable on trains, planes, or cafés. A simple round hoop with a solid clamp is reliable for beginners. Pack a spare set of clamps or a tiny screwdriver for on-the-road adjustments. Lighter is better for long trips.
Portable embroidery hoops for travel
Prioritize compact size and dependable grip. Quick-release clasps that don’t jam threads and a reliable tension system help you stitch smoothly on the move. Round hoops are common and easiest to learn with; other shapes fit tight spaces.
Choosing lightweight hoops for trips
Materials like lightweight plastic or aluminum reduce weight without sacrificing grip. Consider the inner hoop size for visibility and maneuverability. Test a short row to feel how the grip behaves during real stitching.
Packing and storage tips
Pack hoops in a slim, padded pouch. Keep needles and small tools in a separate pocket. Roll fabric around a pencil or dowel to protect the embroidery area. Store threads on labeled bobbins or mini organizers. If flying, carry a small needlecase and declare sharp items if required. A tidy setup saves time and prevents losing pieces.
Finishing, framing, and machine fit
Embroidery is as much about presentation as stitches. After finishing, smooth pulled threads and trim loose ends. Use a light spray of water or a tiny dab of fabric glue to tame frayed edges, then press with a low-heat iron. When framing, choose mats or window mounts to give the embroidery room to breathe, and select glass or acrylic that minimizes glare. A simple wooden hoop frame provides rustic charm, while a sleek metal frame suits modern décor. Ensure the embroidery sits flat and straight in the frame. If you plan to hang it, test the weight with hardware before mounting.
Embroidery hoop finishing and framing tips
Start with a clean hoop and remove stabilizer remnants. Frame with the fabric taut but not stretched, using acid-free tape along the inner edge if needed. A backing can hide threads; consider a felt backing for a polished finish. Choose frame color to complement your palette. Use discreet mounting hardware so the focus stays on the embroidery itself.
Hoop compatibility with machine embroidery
Hoop choice matters whether you stitch by hand or machine. Some machine hoops fit hand-stitched elements, but check inner diameter and clamp depth to ensure compatibility with both fabric and stabilizer. Test with a practice piece to confirm feeding and stitching before starting the real project. If combining hand and machine work, stabilize carefully: tear-away for machine parts and fabric backing for hand sections.
Preparing hoops for display
Remove the piece from the hoop and press gently from the back. Re-hoop with the design centered and use a clean backing to prevent show-through. Add a thin line of acid-free tape for a crisp border and mount on a frame with a mat to separate from the glass. For display, choose a complementary frame color and test the hardware and weight to ensure stability.
This guide on How to Choose the Right Embroidery Hoop for Your Project covers size, materials, types, and practical tips to help you achieve clean, confident stitches from start to finish.

I’m Sophie Caldwell, the author behind granaboom.com, and I believe hand embroidery is one of the simplest, most relaxing ways to create something beautiful with your own hands. I started this blog to help beginners learn hand embroidery without feeling overwhelmed by complicated instructions or “perfect” results.
Here you’ll find beginner-friendly guides to decorative embroidery stitches, along with clear step-by-step practice ideas and patterns you can use to build confidence. My focus is on making the learning process easy: simple explanations, helpful stitch combinations, and small projects that look polished even when you’re just starting out.
Welcome to granaboom.com—grab your hoop, choose a few colors, and let’s stitch one line at a time.