Geometric Embroidery Patterns: 8 Free Modern Designs to Download
Find Geometric Embroidery Patterns: 8 Free Modern Designs to Download for Your Projects
Geometric embroidery patterns turn plain fabrics into bold, practical pieces you can quickly customize. A clean, modern design gives you confident first stitches and a polished finish. Exploring these eight free designs shows how clean lines and simple shapes create striking results on items from tote bags to wall hangings. For inspiration, Geometric Embroidery Patterns: 8 Free Modern Designs to Download can guide your projects.
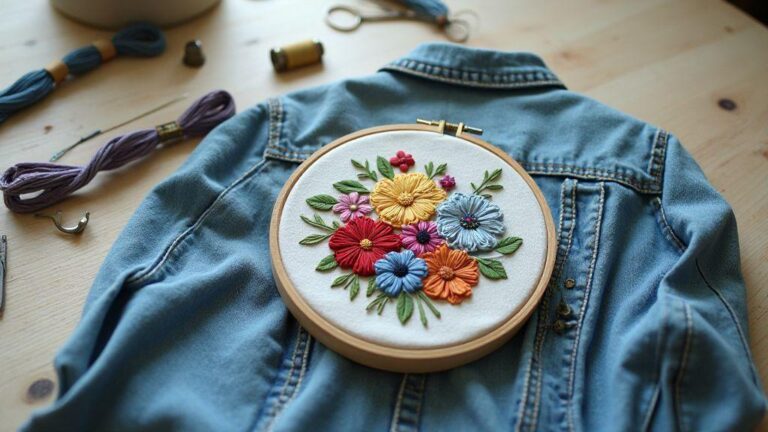
You’ll notice that the best modern patterns are easy to resize and adapt to your fabric. Scale a pattern up for a pillow or down for a small patch on a denim jacket—the flexibility invites experimentation without wasting materials. With the right design, you can practice spacing, color blocking, and stitch technique in one go.
As you download and try each pattern, keep a little notebook: what you liked, what you changed, and how the fabric behaved. This will save time on future projects. If you feel stuck, you can return to a trusted design and tweak it to fit your current project. The goal is to make embroidery approachable, not overwhelming.
Trusted Sites for Your Geometric Embroidery Patterns
You want reliable sources that provide clean, ready-to-use files. Reputable sites usually offer patterns in common formats (like PDF for print layouts and PNG for previews) and note licensing rules. Look for designs labeled free for personal use, with clear stitching instructions and color suggestions. Trusted sites minimize guesswork and help you stitch with confidence.
Clear previews and a simple download flow are a good sign. If you can view multiple angles and a quick stitch guide, you’ll know what you’re getting. Some sites include basic color palettes that pair well with geometric shapes, helping you plan faster. Community-tested patterns with notes on fabric types or stitch counts are especially helpful, and a small library of free designs alongside tutorials is a big plus for ongoing projects.
How You Can Spot Quality Modern Embroidery Designs Free
Quality free designs typically have crisp lines and clean proportions. Zoom in: jagged edges signal low resolution or poor vector work. A good pattern provides a clear color guide or suggested color blocks, so you don’t guess which threads work well together.
Look for simple, scalable shapes. Geometric patterns shine when they resize without losing symmetry. Heavy, irregular spacing or odd angles are red flags. File formats like PDFs or SVGs are friendlier for resizing; PNGs work for previews but can blur when scaled up.
Always read the instructions. A short, straightforward guide that covers fabric type, thread counts, and stitch types shows the designer cares about your experience. Quick access to a stitch list or backing notes helps you stitch with confidence from the start.
Quick Checklist Before You Download
- Confirm the file format is editable (PDF, SVG, or high-res PNG)
- Check for a clear color guide or palette
- Ensure the pattern has clean, proportional lines
- Look for notes about fabric type and recommended stitches
- Verify licensing allows personal use
- Preview the design to confirm it matches your taste and project size
Print and Use PDF Embroidery Pattern Download for Your Hoop
You’ll get clear, ready-to-use PDFs that fit your hoop. When you print, set the scale to 100% (not fit-to-page) to avoid distortion. Use sturdy printer paper or cardstock so the pattern stays flat as you transfer it. If color accuracy matters for your project, print a quick color test first to ensure lines align with your fabric grid. Once printed, tape the pattern to your fabric or use trusted transfer methods to bring the design to life without guessing.
Your finished printout becomes a handy reference. Mark adjustments you plan to make, like centering shifts or size tweaks for your fabric. For multi-layer or thick fabrics, keep the PDF handy to re-check placement before stitching. A reliable PDF pattern saves time and reduces mistakes, especially when juggling several projects.
If you’re sharing patterns, save copies in your project folder. Name them by hoop size and pattern name so you can grab them quickly next time you stitch. The more organized you are, the faster you’ll finish projects and enjoy the process. And remember, keeping a clean, labeled folder helps you find the exact Geometric Embroidery Patterns: 8 Free Modern Designs to Download later without hunting for the file.
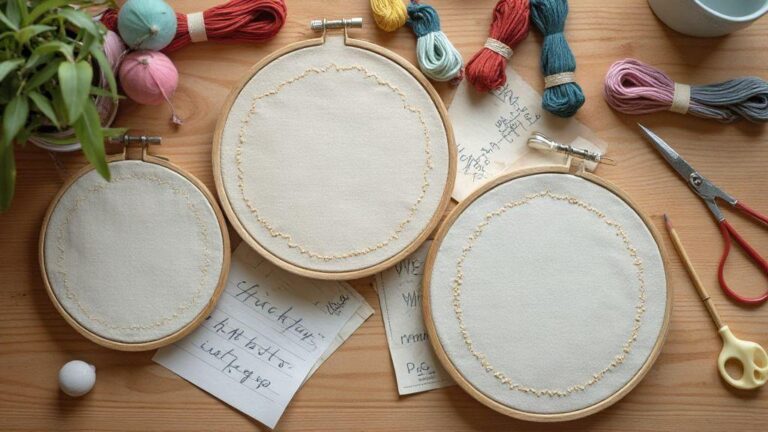
How to Resize Downloadable Embroidery Patterns for Your Hoop
Start by checking the pattern’s recommended hoop size and final dimensions. If you need a smaller hoop, scale the design down evenly to preserve proportions. Use a graphics program or your printer’s scaling option, but keep the scale exact to avoid distortion. Print a test page on plain paper to confirm alignment before cutting into fabric.
If the pattern uses a grid or reference marks, resize carefully to keep those marks in the correct spots. Adjust your fabric placement so the center remains where you want it. If the design becomes too small, consider a different pattern rather than squeezing details away. With careful resizing, your geometric shapes stay crisp on every stitch.
Save a copy of the resized pattern with a clear label. This helps you reuse the design later in different hoops and keeps sizes separate to avoid confusion.
Choose Printable Geometric Embroidery Designs That Fit Your Fabric
Pattern choice should match your fabric’s weight and weave. Heavier fabrics benefit from bolder lines; lighter fabrics handle finer details. Start with simple geometric sets and test on a scrap swatch before committing. If your fabric has a bold pattern, pick designs with larger shapes so the embroidery reads clearly.
Scan your fabric for color choices that pop against the base cloth. Bold contrasts make shapes stand out; softer tones provide a refined look. If unsure, print a tiny sample on fabric swatches to visualize how it will appear on your project. Selecting designs that align with your fabric’s temperament saves time and reduces costly missteps.
Keep your goal in mind: whether you want a playful tote mark or a classy pillow edge, the right printable geometric designs make your fabric look intentional. You’ll stitch with more confidence when the pattern complements the fabric before you thread your needle.
Save Paper and Scale Templates
Print only the templates you need and keep a small, labeled stack of sizes. When you scale templates, record the exact percentages for future projects, so you don’t guess again. A neat, layered system helps you switch between hoop sizes without redoing work from scratch.
Pick Tools and Stitches for Your Minimalist Geometric Embroidery Designs
Choose tools that fit a minimalist vibe: light, simple, and reliable. A small embroidery hoop keeps fabric taut without obstructing clean lines. Pick a needle that slides smoothly through your fabric, and select threads that stay crisp and bright. Test different tensions on a scrap to keep lines straight and even. Keep a notebook to note which tools yielded the cleanest results for each project.
Thread choice matters as much as fabric. For geometric designs, use threads with smooth finish and a touch of sheen for crisp color blocks. Satin or cotton embroidery floss in solid colors works well; a matte thread can yield a modern, flat look. Choose a tight weave fabric so stitches sit neatly without sinking. Tools are the first step to a tidy, bold geometric look.
Keep your setup simple: a dedicated pin cushion, small scissors, and a fabric pen for pattern transfer make the process easy. A stable workspace helps you place thread bobbins and needles within reach. Minimal setups speed up completion and keep lines clean.
Best Threads and Needles for Your Geometric Embroidery Patterns
Thread choice can make or break a geometric look. Favor threads that glide smoothly and don’t fray at edges. Solid, even thickness creates crisp, boxy shapes. On dark fabrics, bright, saturated threads keep shapes from blending in. For needles, choose a sharp or micro-type needle that fits your fabric and allows clean piercing for straight edges. A smaller needle helps you control tight corners.
Pair the right thread with the right needle, and your lines stay tidy. For beginners, start with 3- to 6-strand floss split into two or three strands for balance. For crisper lines, stitch with a single strand or short segments to avoid tangling. Re-threading often helps with tight angles—perfect edges come from fresh threads. You’ll feel the difference as you craft square shapes and straight lines with confidence.
Simple Stitches You Can Use for Contemporary Geometric Stitch Patterns
A few stitches can create bold shapes. The running stitch outlines geometric blocks softly. Satin stitch fills shapes with solid color for a clean, modern look. For crisp diagonal edges, try a backstitch to lock the line and keep corners sharp. A straight stitch can form the backbone of larger patterns, giving you control over line width and height.
To add texture without losing the minimalist vibe, blend stitches within a single pattern. Alternate satin and backstitch to create subtle panels, or run a border with a satin fill inside. Practice on scrap fabric to get tension and spacing right, then apply your rhythm to the project. Your patterns will read as clean, modern, and confidently geometric.
Keep a Stitch Guide with You
Carry a compact stitch guide so you can reference stitches on the go. You’ll stay consistent when switching between shapes. A quick note on how you used each stitch helps you reproduce the look later or share it with friends who want to try Geometric Embroidery Patterns: 8 Free Modern Designs to Download.
Transfer Free Geometric Embroidery Templates to Your Fabric
Free geometric embroidery templates turn into stunning fabric designs with simple, hands-on steps. Your fabric becomes a canvas, and these templates offer clean lines, sharp shapes, and a modern look. Clear transfer methods help you get the layout right the first time, so your stitches line up and your project progresses smoothly.
Templates save time and ensure consistency. Printing templates at the correct size locks in exact shapes, reducing mistakes and increasing success. Choose a method that fits your fabric and tools, then stick with it so every piece looks cohesive.
If you’re new to geometric embroidery, start with a simple shape like a hexagon or triangle. As you gain confidence, scale up to more complex designs. The goal is to get the pattern onto fabric cleanly and evenly so your stitching sits where you want it.
Methods You Can Use: Tracing, Iron-On, and Water-Soluble Pens
- Tracing: Slow but precise. Use a lightbox or sunny window, place the template on fabric, and trace with a washable pencil or thin marker. Lines stay light until you’re ready to stitch, good for light fabrics where marks won’t show.
- Iron-On: Fast transfers. Print or cut the template and press with a dry iron onto fabric per transfer paper instructions. Use low heat and a pressing cloth for delicate fabrics.
- Water-Soluble Pens: Draw directly on fabric, stitch over the lines, then rinse away. No transfer marks remain, ideal for light or dark fabrics where pencil marks would show.
How to Center and Hoop for Accurate Alignment
Measure and mark the fabric center, then align the template to that point. Use a ruler to ensure vertical and horizontal lines are true so shapes stay balanced as you stitch. Hoop fabric snugly but not so tight you distort fibers. If the fabric shifts, re-check alignment and re-secure the hoop. Practice to save frustration later and keep shapes exact and clean.
Test Transfer on Scrap Fabric
Always test transfers on scrap before working on the project. If marks show through, switch to a lighter transfer method or adjust tension. A quick test saves time and prevents waste on good fabric.
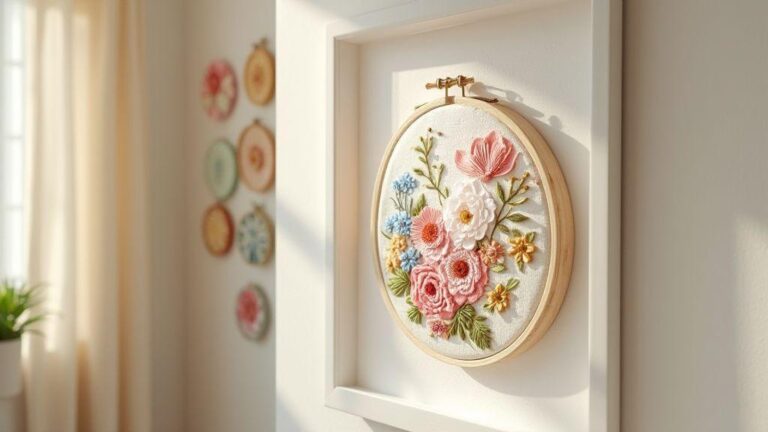
Make Free Modern Hoop Art Patterns Into Gifts for Your Home
Free modern hoop art patterns make thoughtful, on-trend gifts. Start with patterns in colors the recipient loves, then scale to fit a favorite frame size. Add a personal touch with initials or a meaningful date while maintaining a clean, modern vibe. A ready-to-hang hoop can instantly warm a room.
Personalize the finish by swapping thread colors to match their decor palette and selecting matte frames for a sleek look. If you’re short on time, a bold single-hoop piece can make a strong impact in a hallway or kitchen. Keep the pattern simple and the colors cohesive with their space so the gift feels thoughtful, not chaotic.
Presentation matters. Include a small card with care instructions and tips, so the recipient knows how to keep the thread vibrant. A note about why you chose that pattern can turn a simple hoop into a cherished keepsake.
Turn Downloadable Embroidery Patterns Into Wall Art You’ll Love
Downloading patterns gives you instant options for wall art you’ll want to display. Choose patterns with clean lines and ample negative space so they read well from a distance. Use a single background color and a few bold thread shades that echo your room’s palette for a crisp, modern look. Keep the hoop size in mind as you stitch to center the design on the wall. If the pattern feels dense, skip a few stitches to let the design breathe. Mount with a slim, neutral frame to let the embroidery shine. Hang at eye level away from direct sun to prevent fading. If you’re gifting, add a short note about the pattern and how it fits their space.
Frame and Finish Minimalist Geometric Embroidery Designs for Display
Framing adds a cohesive look to minimalist geometric embroidery. Start with a simple frame and a neutral mat to keep lines crisp. A white or black frame usually works best, but a textured mat in a quiet palette can add subtle personality. Finish edges cleanly to prevent loose threads from showing. If using a hoop with a visible edge, use a fabric backing or thin spacer to reduce glare and create a flat, professional finish. Arrange multiple pieces in a grid or lineup for a balanced display that feels intentional.
Simple Finishing Tips for a Clean Edge
- Press and secure fabric before trimming excess threads
- Use small, sharp scissors for clean cuts
- Seal the back with a simple backing to hide knots and stabilize the piece
Learn With DIY Geometric Embroidery Tutorials and Printable Templates for Your Skill Level
Geometric embroidery is about bringing shapes to life with thread. Start simple; printable templates let you transfer designs cleanly every time. Tutorials provide step-by-step guides, photos, and printable templates you can print and pin to your workspace. As you stitch, your eye for balance and symmetry grows, making patterns feel like second nature.
If you’re chasing crisp geometric lines, these tutorials help you map grids, select a focal point, and break larger shapes into manageable segments. The templates act as your road map, helping you keep proportions right from the first stitch. Since you’ll want repeatable results, you’ll also learn how to hoop fabric, manage thread tension, and finish with clean edges. You don’t need perfect skill to begin—just start, use the templates, and let confidence grow.
When you finish a project, you’ll see how small steps add up to a beautiful piece. The templates are reusable tools for future projects: adjust colors, swap motifs, or scale designs to fit different fabrics. Practicing with tutorials helps you recognize reusable patterns, saving time and keeping embroidery fun and approachable.
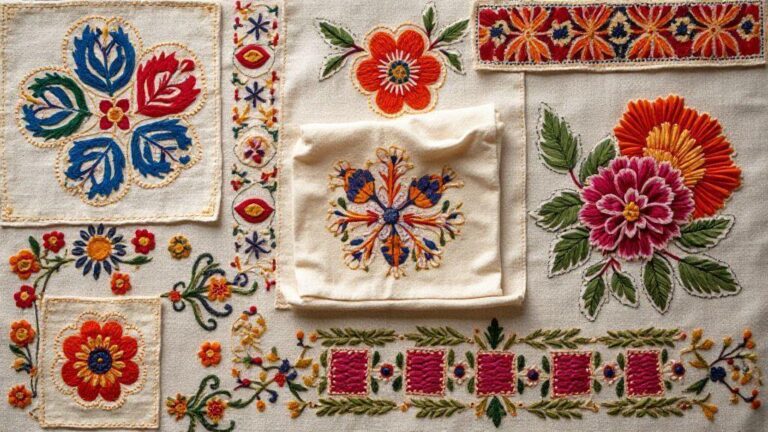
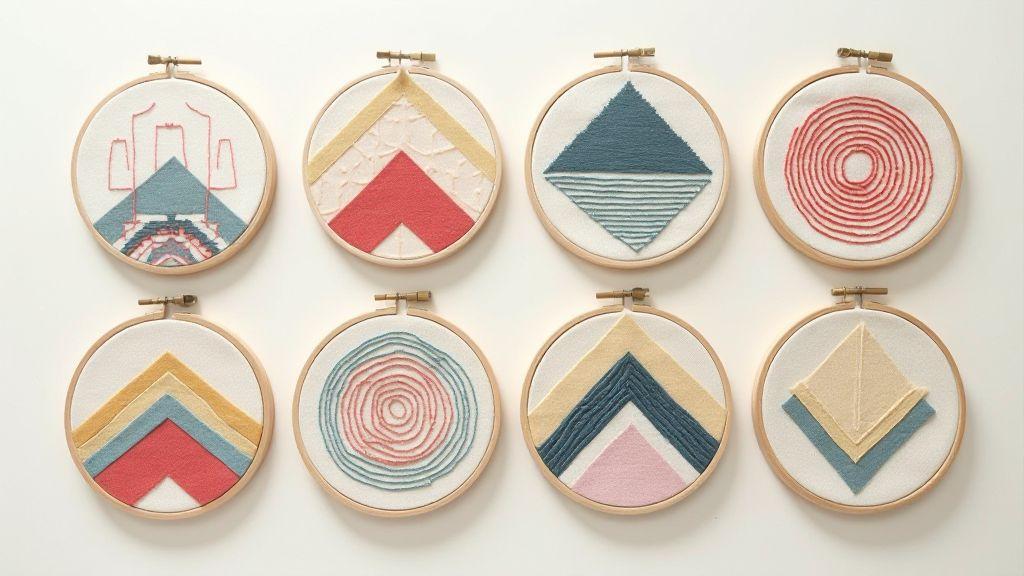
Step-by-Step for Geometric Embroidery Patterns: 8 Free Modern Designs to Download
These eight designs are crafted for quick wins and long-term keepsakes. Each comes with a clear step-by-step flow so you can finish a modern look without getting stuck. The PDFs are ready to print, letting you pin them to your workspace and stitch along. Small, deliberate stitches accumulate into bold, contemporary patterns that feel fresh and clean.
As you work, focus on spacing and alignment. The templates give crisp guides for centering shapes, aligning rows, and maintaining even gaps. Learn how to switch color blocks without losing the pattern’s rhythm. The goal is a clean, professional finish you can display or reuse. You’ll gain the confidence to modify designs later—swap colors, tweak sizes, or combine them into larger compositions.
Where You Can Find Free Geometric Embroidery Templates and PDF Embroidery Pattern Download
A curated collection of free templates and PDFs awaits. Look for clean vector outlines and printable layouts to transfer designs easily to your fabric. Many templates include hoop placement guidelines and suggested stitch order, helping you stay on track as you learn. Choose templates that match your current skill level and preferred fabrics to keep practice focused and progression steady.
If you want to build a small library of go-to designs, save links to your favorites and organize them by difficulty or theme. When you finish one project, you can pick the next template that challenges you just enough to grow without overwhelming you. The right templates save time by providing ready-to-use patterns you can print in minutes and start stitching right away. Your future projects will thank you for a tidy library of reliable designs, including Geometric Embroidery Patterns: 8 Free Modern Designs to Download.
Track Progress with a Project Journal
Keep a simple project journal to log what you stitched, what you learned, and which templates you used. Note the design name, fabric, hoop size, thread colors, and any tweaks. A quick photo beside each entry helps you see your growth over time. Your journal becomes a personal map of improvement, guiding you to choose better templates and refine techniques for future projects.

I’m Sophie Caldwell, the author behind granaboom.com, and I believe hand embroidery is one of the simplest, most relaxing ways to create something beautiful with your own hands. I started this blog to help beginners learn hand embroidery without feeling overwhelmed by complicated instructions or “perfect” results.
Here you’ll find beginner-friendly guides to decorative embroidery stitches, along with clear step-by-step practice ideas and patterns you can use to build confidence. My focus is on making the learning process easy: simple explanations, helpful stitch combinations, and small projects that look polished even when you’re just starting out.
Welcome to granaboom.com—grab your hoop, choose a few colors, and let’s stitch one line at a time.