5 Classic Sashiko Patterns and How to Stitch Them
Start with sashiko beginner patterns
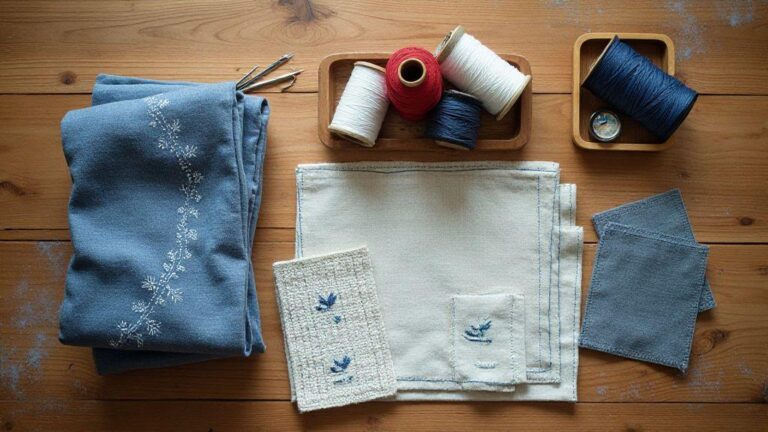
Sashiko is a simple yet powerful way to decorate fabric. You’ll start with easy patterns that build your confidence while still looking impressive. Begin with small, straight lines and basic geometric shapes to learn control and needle placement without overwhelm. As you stitch, your hands remember the rhythm and your fabric gains a living texture of tiny, deliberate stitches. Choose patterns that fit your fabric and project so you stay motivated and see progress fast.
When selecting beginner patterns, think about the story you want your piece to tell. A motif that nods to a place you love or a color combo that makes you smile can keep you engaged. Keep thread tension even and don’t worry about perfect symmetry at first—your skills grow with each stitched line, and your final piece will look precisely as you imagined—only better, because you earned it with practice.
If you’re unsure where to start, look for simple, repeatable shapes like lines, squares, and basic floral motifs. These patterns are forgiving and easy to mirror or rotate to fit your fabric. Remember to snip threads neatly and press your fabric gently when you’re done; a neat finish makes even simple sashiko look polished and intentional.
Traditional Japanese sashiko motifs
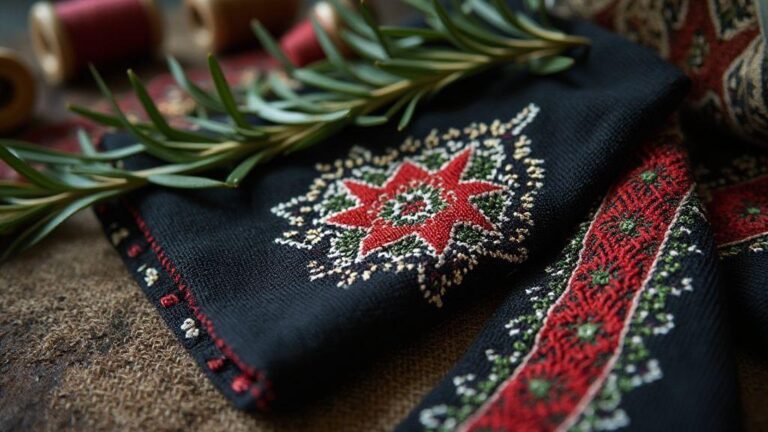
Traditional motifs carry meaning and a sense of history that adds depth to your stitching. You’ll enjoy the contrast between clean, straight lines and soft fabric, and you’ll feel connected to generations of makers who stitched these designs by hand. Common motifs include geometric lattices, waves, and simple flowers, chosen for calmness and balance. When you stitch these, your piece becomes a quiet conversation with the past.
If you want symbolism, choose motifs that reflect nature or daily life—waves for resilience, a grid lattice for order. It’s not just about looks; it’s about the feeling each stitch creates. As you gain confidence, you can mix motifs to tell your own story while honoring traditional meanings. The more you practice, the more patterns translate across fabrics, colors, and uses.
To keep things approachable, start with one motif and repeat it across a small panel or sleeve. Repetition teaches consistency and rhythm—two key sashiko skills. Before you know it, you’ll switch between motifs with ease and weave your personal touch into each piece.
Where to find sashiko pattern templates printable
Printable templates are a lifeline when you’re learning. They give you a clear guide so stitches stay even and shapes stay true. You can find grids, motifs, and complete panels that fit a beginner’s pace. Print a few options and keep them in a folder for quick access during projects.
When you print templates, choose a size that matches your fabric and project. For a small pouch, pick a tiny motif; for a wall hanging, use a larger design. Use light, erasable markers or tailor’s chalk to transfer the pattern to your fabric, then start stitching with confidence. Having templates handy means you’ll stitch more often and progress faster.
If you’re unsure about quality, compare a few options. Look for clean lines, clear borders, and easy-to-read grids. A good template saves frustration and helps you build muscle memory with each stitch.
5 Classic Sashiko Patterns and How to Stitch Them
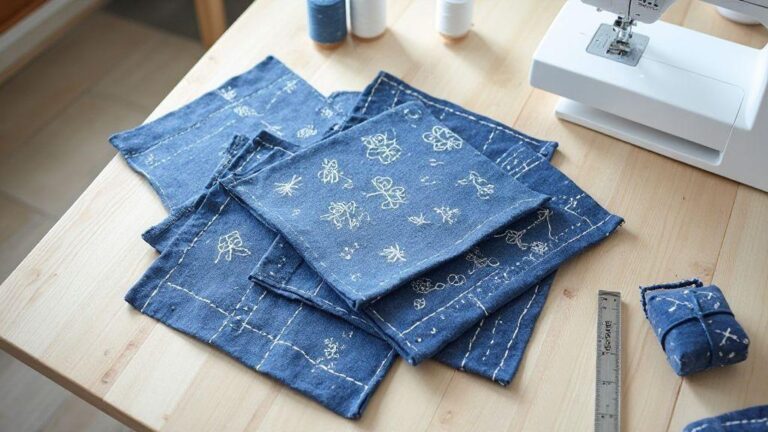
You’ll discover five classic patterns that pair beautifully with Kikko practice, and you’ll learn exactly how to stitch them to weave tradition into your projects. This guide highlights practical steps to keep stitches even and fabric stable. Your goal is to blend these patterns into your work, letting each one inform the next as you build confidence. Remember, practice makes perfect, and your hands will thank you for the steady rhythm you develop. In this section, the 5 Classic Sashiko Patterns and How to Stitch Them include Asanoha, Kikko, Shippo tsunagi, Sayagata, and a fifth pattern you can choose to explore, such as Hishi.
Asanoha sashiko pattern tutorial
You’ll learn the iconic Asanoha motif, with star-like leaves that are decorative and historically meaningful. The geometric lines guide your hand and mind, helping you keep layout, spacing, and grid consistent for a balanced look. The result is a calm, ordered rhythm on fabric that invites you to stitch again tomorrow.
Asanoha is forgiving if you keep stitches even and the grid lightly drawn. Start with a simple tote, small panel, or garment repair. The almost-rhythmic pattern helps center your attention and enjoy sashiko’s quiet focus. By the end, you’ll understand the logic behind the leaves and how lines connect to form a cohesive whole.
Your goal is clarity and control: keep stitch length consistent and lines straight for a deliberate finish. If unsure, step back to check the overall flow of the pattern. A steady pace beats rushing, especially with a classic like Asanoha that thrives on symmetry.
Your step-by-step Asanoha layout
1) Begin with a clean grid on your fabric. Lightly mark intersections for even spacing.
2) Draw the central star with diagonal lines; use a light chalk and run your stitches along the lines.
3) Add surrounding leaf shapes, keeping points equal from neighbors. If a line looks off, pause and adjust.
4) Check alignment after the first row; hold up to light to spot skew, then correct gently.
5) Finish with outer-edge stitches to seal the pattern. Tie off securely at the back.
Stitch spacing and angle tips
- Use a consistent stitch length and practice on scrap fabric until you’re reliable.
- Hold the needle at a comfortable angle for straighter lines.
- Use short interior stitches and slightly longer edge stitches for crisp boundaries.
- If a line drifts, slow down and realign. Patience pays off with sashiko.
- Step back every few lines to confirm symmetry.
Asanoha practice grid template
A ready-made grid helps train muscle memory. Print or draw evenly spaced squares, mark the central axis and leaf points, and drill the pattern in sections before tackling a full piece.
Kikko sashiko: how to stitch
You’ll get clear, practical steps to master Kikko, with the tiny interlocking squares creating a calm, lattice look. Start with simple supplies: fabric, a sashiko needle, and sturdy thread. Keep stitches even and hands relaxed—rhythm matters more than speed. The repeating geometry yields a meditative pattern on fabric, growing your technique with each pass.
To begin, anchor your thread with a small knot and start at the starting corner. Move in straight lines to form each kikko cell, ensuring intersections are clean. If a stitch slips or lines aren’t straight, adjust tension and reseat the needle. Equal stitch length and even spacing give the grid its crisp look. With practice, your hands find a natural rhythm.
Kikko pattern origin and shape
Kikko patterns come from protective sewing traditions. The repeating interlock resembles a tiled lattice, echoing armor designs. The shape requires clean intersections, even spacing, and consistent angles. The square grid is versatile across fabrics and projects, and the pattern guides your hand toward precision and patience.
Simple intersection stitch order
Plan your grid and mark intersections. Start at a corner, run a straight line, then cross perpendicularly at the next intersection. Continue this up–across–down–across sequence with even tension. As you go, every new line rests against the previous ones. If you miss an intersection, lift and reorient, then continue from the last clean point.
Kikko template for your practice
Print a grid with evenly spaced squares or draw one on muslin and pin it. Follow the simple intersection order, ensuring lines meet at grid points. A template helps maintain spacing and straight lines, especially when you’re new to sashiko.
5 Classic Sashiko Patterns (continued)
This section continues to explore the five classic patterns and how to stitch them, integrating what you’ve learned from Asanoha and Kikko as you practice Shippo tsunagi and Sayagata, with a fifth motif of your choice such as Hishi.
Shippo tsunagi sashiko guide
Shippo tsunagi ties circles into sashiko practice, forming a calm, rhythmic design that breathes life into fabric. It’s a simple circle language you can apply to patches, garments, or accessories. The result is a timeless motif that stitches up with a calm, repeatable tempo.
Shippo tsunagi uses linked circles to create a continuous field. Each circle sits against the next, like beads on a string. Even spacing and steady rhythm keep circles neat and sized, helping the fabric stay stable as you work. Color choices influence the look: a single color keeps lines clean and modern, while two shades can make the rings pop.
How shippo repeats create circles
Begin with a small arc, extend it, and let the next arc meet with a soft join. Keep stitch length consistent and work calmly. Space circles evenly; test on scrap fabric first. With practice, you’ll stitch without counting and the circles will glow with quiet confidence. You can scale circles, stitch in a single color, or layer them with other patterns for texture.
Recommended stitch lengths
Aim for about 1.5 to 2 mm per stitch for crisp lines. Start at the lower end if you’re new, then ease into longer stitches as you improve. Use basting threads to map the path if needed, then switch to sashiko thread and pull tight enough to secure without distortion. If fabric wrinkles, press gently and continue. Density options range from tight and bold to light and delicate; keep tension even.
Sayagata sashiko pattern instructions
Sayagata is a protective symbol built from repeating interlocking triangles. Choose sturdy yet comfortable fabric, and keep stitches uniform. Lightly transfer the design with carbon, washable pencil, or water-soluble pens. Start slow and steady, then grow confidence as lines become more precise.
How to transfer the Sayagata design
Mark the grid and triangles lightly on fabric. Secure in a hoop or frame for a tight surface. Mirror lines if the piece is reversible. When stitching, follow the marked lines rather than forcing the thread around corners. If a line fades, re-mark carefully and continue.
Using Sayagata for visible mending
Sayagata makes repairs look intentional. Place the mend where it’s strongest and easiest to stitch. Match stitch length and tension to surrounding fabric, anchor with a backstitch, then lay Sayagata lines around the repair. Press from the wrong side to set stitches.
Sashiko running stitch techniques and tools
The sashiko running stitch creates a clean grid-like pattern that looks traditional yet fresh on modern projects. Start by feeling the rhythm: uniform stitches along the fabric with a relaxed grip. A thick cotton thread creates bold lines; a small, sturdy needle passes through fabric smoothly. Use a light fabric with a grid or chalk guide to keep stitches even. A thimble protects your finger on longer projects.
Sashiko thread and needle tips
Choose a sturdy, matte thread for consistent lines. A slightly thicker thread helps visibility and counting. Use an embroidery needle with a sharp point and a balanced shaft for smooth passage through fabric. Thread length should be manageable to reduce tangling. Small habits—knotting lightly, trimming ends, and storing threads properly—keep stitches neat and comfortable.
Choose your sashiko thread and needle
Your choice depends on how bold you want your lines. Thicker thread creates strong, visible stitches; for lighter fabrics, a finer thread preserves subtlety. Balance durability and ease of piercing with the right needle. Practice on scrap fabric to feel how the thread moves and whether you need a longer or shorter needle for your space.
Tension, rhythm, and neat spacing
Maintain consistent tension to avoid puckers or loose loops. A steady rhythm with evenly spaced grid gaps keeps the pattern legible. If you wobble, slow down and realign before continuing. Tight, even stitches yield a crisp, professional finish. As you progress, your eye will appreciate the neat spacing and growing confidence.

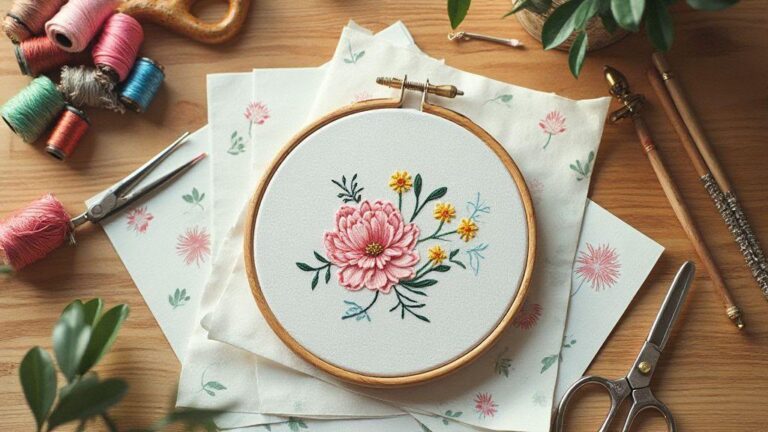
I’m Sophie Caldwell, the author behind granaboom.com, and I believe hand embroidery is one of the simplest, most relaxing ways to create something beautiful with your own hands. I started this blog to help beginners learn hand embroidery without feeling overwhelmed by complicated instructions or “perfect” results.
Here you’ll find beginner-friendly guides to decorative embroidery stitches, along with clear step-by-step practice ideas and patterns you can use to build confidence. My focus is on making the learning process easy: simple explanations, helpful stitch combinations, and small projects that look polished even when you’re just starting out.
Welcome to granaboom.com—grab your hoop, choose a few colors, and let’s stitch one line at a time.