Hitomezashi Sashiko: The Grid-Based Technique for Geometric Patterns
Hitomezashi Sashiko: The Grid-Based Technique for Geometric Patterns
Hitomezashi Sashiko sits at the crossroads of practicality and artistry. Born from mending and everyday labor, it has grown into a modern craft celebrated for clean lines, quiet elegance, and a grid-driven logic that any stitcher can learn. The emphasis is on precision, patience, and the beauty of simple, repeating stitches that transform well-worn fabrics into meaningful pieces you can wear or pass down.
Origins and cultural role of Japanese sashiko embroidery
Sashiko began as a practical method to extend the life of clothing, protect fabric, and keep families warm. Over time, these tiny stitches became a shared language of community, care, and resilience. The craft blends utility with aesthetics, turning worn textiles into pieces with story and meaning.
In communities across Japan, sashiko mending was a humble, collective practice. It valued steady hands, careful repetition, and thoughtful detail—qualities that added warmth to winter garments and durability to workwear. Today, sashiko is more than repair; it’s a bridge to tradition and a quiet nod to generations of rural craftsmen and homemakers who kept the needle moving. Practicing sashiko keeps a living memory in each panel you stitch.
Roots in rural mending and workwear
Sashiko began where mending mattered most: rural homes and farms. Simple white thread on dark fabric extended the life of everyday workwear. Stitch by stitch, the practice teaches patience and imbues garments with a second life. This practical origin gives sashiko a grounded, honest feel.
The mend-and-wear ethos turns plain fabrics into sturdy, useful pieces. Each repair becomes a small, deliberate act of resilience, with a methodical rhythm that can feel meditative after a long day. Over time, menders developed motifs and a quiet language of symbols—patterns that tell stories or carry wishes for safety and good fortune. The heritage is alive in every repaired garment, reminding us that value comes from care as much as cloth.
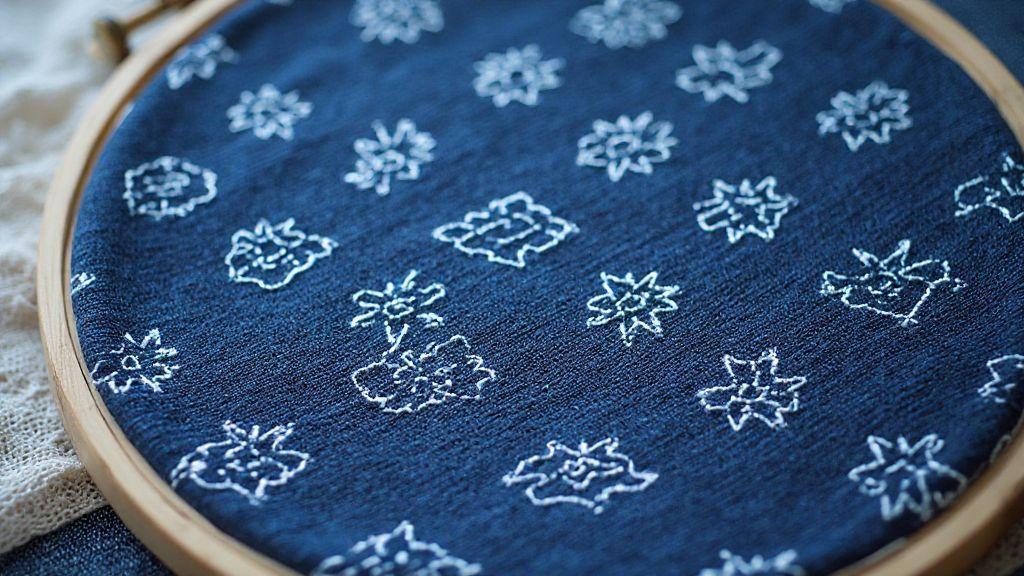
Common motifs like asanoha and seigaiha
Asanoha (hemp leaf) reads geometric and strong, suited to sturdy textiles. Seigaiha (sea waves) evokes calm continuity, like water flowing across fabric. Stitching these motifs connects you to a long tradition of visual communication shared by travelers, farmers, and craftsmen.
These patterns balance structure and exploration. Asanoha’s repeating diamonds provide clear practice lines, while seigaiha invites curves and rhythm. The motifs are not random; they carry meaning you can feel as you sew. Together, they show how sashiko blends beauty with purpose, giving each piece a sense of place and a village heartbeat that you can carry into your work.
Hitomezashi: the grid-based approach
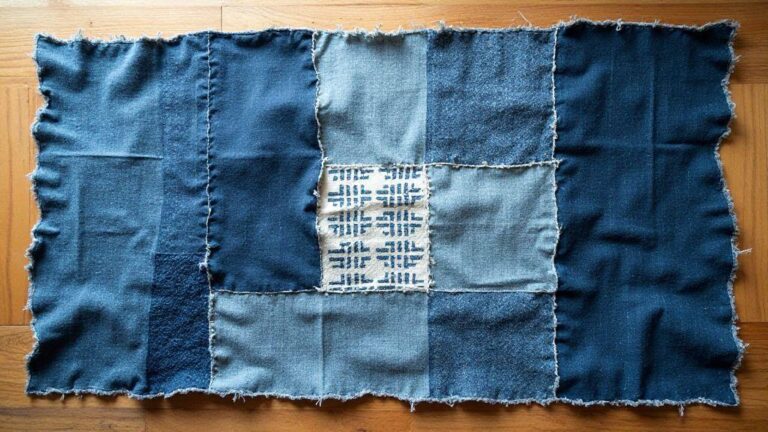
Hitomezashi—sometimes called eye-joke stitching—introduces a distinct, grid-based method. Rather than following freeform patterns, you create pixel-like designs with even lines that form geometric, repeating shapes. The grid guides your rhythm and spacing, delivering precise results with minimal tools.
This style trains the eye: you anticipate how light threads cross and how small shifts affect the overall pattern. It’s addictive in a quiet way—one stitch at a time moving toward crisp, grid-like designs you’ll be proud to wear or display.
Hitomezashi Sashiko: The Grid-Based Technique for Geometric Patterns explained
This grid-driven approach yields clean, repeatable geometry. A fixed grid of vertical and horizontal threads anchors the design, while your stitches lock the motif in place. It’s forgiving for beginners: the grid provides rhythm and spacing guidance, keeping patterns consistent and decorative at once.
From the start, the grid dictates stitch count and placement. Your fabric becomes a map, with each intersection a cue for the next move. The goal is steady, even tension and letting the grid do the heavy lifting. With practice, you’ll move from a single motif to larger fields, discovering a code you can reproduce across fabrics and projects.
How the sashiko grid-based technique counts stitches
Stitches are counted by rows and columns using the grid as your guide. Each intersection tells you where to place a stitch, promoting even spacing and predictable progress. A calm rhythm helps prevent mistakes, and the design becomes faster to execute as you gain confidence. The grid-based count method makes complex patterns approachable by giving you a clear map rather than improvisation.
Spacing matters: stitches too close crowd the pattern, while stitches too far apart soften it. The grid helps you maintain consistent distance, keeping shapes crisp. Precision here is about rhythm and reliability, not flawlessness. With practice, counting becomes fast and you retain the clean lines that define Hitomezashi.
Running stitch rhythm and pattern buildup
The running stitch forms the heartbeat of the design. Start with a slow, even pace to embed the motion, then let the pattern unfold as you gain confidence. The rhythm creates visual continuity, letting geometric shapes emerge block by block. You can adjust density to shift the look from delicate to bold, all while preserving the grid’s integrity. As lines align and squares or diamonds sit evenly, you feel the satisfaction of a well-executed grid-based pattern.
Core stitch steps for beginners
- Start with a clean grid and secure threads at the edges.
- Mark the starting point clearly and follow the grid methodically.
- Work in small sections to prevent mistakes.
- Use a light or contrasting thread to keep symbols and lines legible.
- Practice on scrap fabric to gain confidence before your main piece.
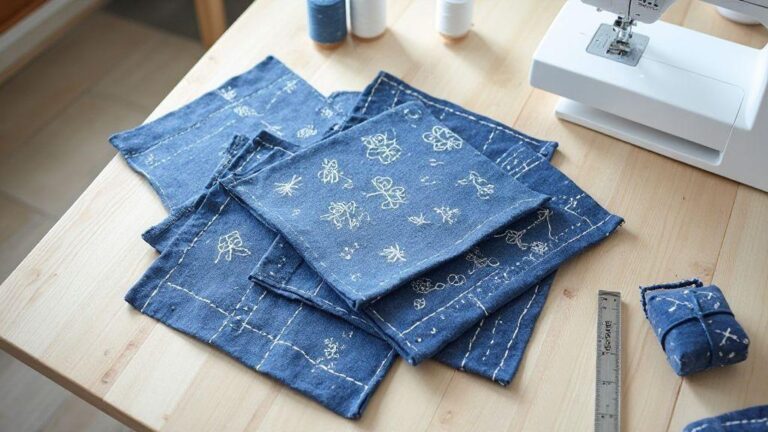
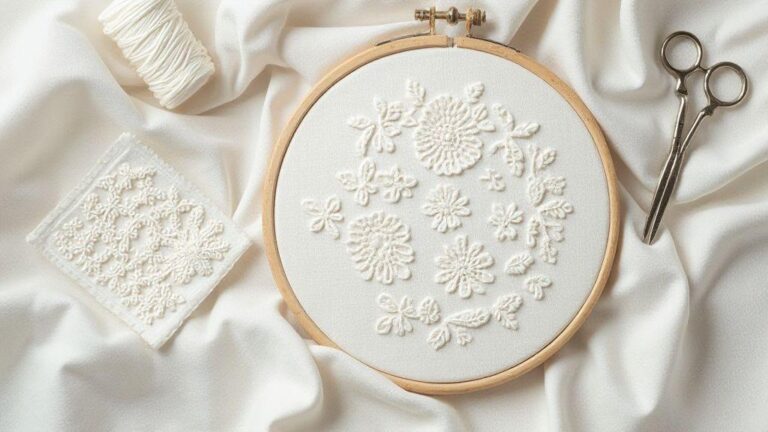
Tools, fabric, and thread for Hitomezashi sashiko patterns
Hitomezashi Sashiko: The Grid-Based Technique for Geometric Patterns relies on simple tools and careful material choices. The right setup makes your lines crisp and steady.
Needles, thimbles, and sashiko thread choices
A fine, sharp sashiko needle helps threads lie cleanly on the fabric. A comfortable thimble gives you steady push and consistent catches. For thread, use a sturdy sashiko thread that resists fraying and splitting; indigo thread is classic, but white or contrasting colors can highlight patterns. The aim is thread that moves smoothly and creates crisp lines at grid intersections.
Experiment with thread weights to find what suits you. Lighter threads yield delicate lines; heavier ones produce bolder shapes. If you’re new, start with a mid-weight thread to learn control before experimenting with heavier or finer options.
Best fabrics and using indigo cloth
Indigo cloth is favored for its strong contrast and grid clarity. Choose a tight weave cotton or linen that resists stretching and snagging, with a smooth surface to reduce drag. If pure indigo isn’t available, deep blues or navy fabrics still provide a classic look and clear line definition. Avoid bulky or overly stretchy fabrics, which can blur the pattern.
Essential supplies checklist
- Sharp sashiko needles sized for your fabric
- Comfortable thimble
- Sturdy sashiko thread in indigo and a contrasting color
- Tight-weave fabric (cotton or linen), preferably indigo or deep blue
- Pins or clips to hold fabric
- Light-marking tool (chalk or washable pencil)
- Small scissors
- Optional needle threader
Reading and using sashiko pattern charts
Sashiko charts simplify complex designs into actionable steps. Treat a chart as a map: align your fabric, place stitches as shown, and let the grid guide your rhythm. Start with patterns that match your skill level and print or trace a clean copy to keep near your project. Track progress with light marks to keep your place.
Charts aren’t just pretty drawings; each square or symbol encodes stitch type, length, and placement. Read charts in the intended order—traditional sashiko often flows right-to-left and top-to-bottom, while grid-based patterns may be more linear. Keep your chart clean and mark completed sections to avoid losing your place.
How grid charts map to stitches
Grid charts translate each square into a specific stitch action. Practice on scrap fabric to feel the rhythm, then apply it to your main piece. As you stitch, you’ll notice consistent spacing and diagonals forming the motif. The grid helps you adjust tension and length precisely, ensuring edges and corners align. With time, you’ll predict thread length per row and reproduce patterns across fabrics.
Common chart symbols in Hitomezashi patterns
Hitomezashi charts use simple symbols to denote stitches and thread actions. Dots may indicate running stitches, short lines indicate passes through the fabric, and curves mark turning points. Symbols vary by designer, so check the legend on each chart. As you stitch, the rhythm behind the symbols emerges: clusters of dots form lines of tiny stitches, bold marks signal longer passes. Treat each symbol like a musical note that builds a cohesive pattern.
Simple chart tips for your project
- Keep fabric flat and taut in a hoop or frame
- Mark the starting point clearly and follow the grid
- Work in small sections to prevent mistakes
- Use contrasting thread to keep symbols visible
- Practice on scrap fabric before the main piece
Practical projects with sashiko quilting patterns and mending
Sashiko is more than decoration; it’s a practical tool to fix, reinforce, and elevate clothing and home items. Choose patterns that suit the fabric and wear, so repairs are durable and deliberate. The grid-based designs help keep tension even and lines clean, turning mending into a creative act.
Visible mending and garment repair with Hitomezashi
Visible mending lets you tell a story with stitching. Map a simple design over a worn area and use the grid-based patterns to create clean, deliberate lines. The repair becomes a feature that adds texture and interest, proving that careful stitching can enhance a garment’s character and longevity.
Quilt blocks and home decor using geometric sashiko designs
Geometric sashiko translates well to quilt blocks, cushions, table runners, and wall hangings. Start with a small panel to understand how the pattern reads on different fabrics, then scale up for larger projects. The crisp lines and grid structure create a modern, minimalist feel that complements a range of decors.
Project ideas to try today
- Mend a favorite jeans elbow or sleeve with Hitomezashi patterns for quick satisfaction
- Create a single geometric quilt block to study pattern flow
- Sew a decorative pillow cover featuring a grid-based sashiko motif
Learning resources, tutorials, and modern sashiko motifs
A world of practice awaits. Begin with clear guides that break down stitches and show fabric, thread, and needle choices. Look for resources that highlight modern sashiko motifs you can use right away, not just traditional patterns. Read charts carefully and imagine how your stitches will flow along them—the hands-and-eyes connection starts here.
Hitomezashi stitching tutorial videos and guides
Good tutorials demonstrate rhythm and the grid’s influence on stitches. Look for step-by-step coverage of fabric setup, thread handling, and spacing. Practice with a cloth to feel the rhythm, and use downloadable diagrams or printable grids when available. Slow-motion shots help you study the clean lines and spacing.
Books, workshops, and pattern collections for practice
Books offer patient explanations with clear photos and diagrams. Workshops provide hands-on feedback and tips you wouldn’t get from a book alone, while pattern collections give fresh motifs to practice. Combine these resources to build a steady learning loop: small victories add up to confident stitching.
Hitomezashi Sashiko: The Grid-Based Technique for Geometric Patterns is both guide and doorway—a way to approach fabric, thread, and rhythm with calm focus and craft-focused curiosity.

I’m Sophie Caldwell, the author behind granaboom.com, and I believe hand embroidery is one of the simplest, most relaxing ways to create something beautiful with your own hands. I started this blog to help beginners learn hand embroidery without feeling overwhelmed by complicated instructions or “perfect” results.
Here you’ll find beginner-friendly guides to decorative embroidery stitches, along with clear step-by-step practice ideas and patterns you can use to build confidence. My focus is on making the learning process easy: simple explanations, helpful stitch combinations, and small projects that look polished even when you’re just starting out.
Welcome to granaboom.com—grab your hoop, choose a few colors, and let’s stitch one line at a time.