Holiday Embroidery Patterns: Free Designs for Every Season
Pick your seasonal free patterns
You’re in control of your stitching journey, and choosing the right seasonal free patterns is your first big step. A well-chosen design can turn a slow afternoon into a satisfying project with a tangible reward at the end. Look for patterns that match your skill level and the fabrics you already own, so you don’t waste time chasing pieces you’ll never finish. When you choose thoughtfully, you’ll feel confident starting and proud when you finish.
Consider your current goal—decorating, gifting something heartfelt, or simply enjoying a quiet moment. Your reason helps you pick motifs that feel personal. If you’re busy, choose simple designs that finish quickly; if you have more time, opt for a slightly larger design with a few cute details. The right pick makes embroidery feel like yours from the first stitch.
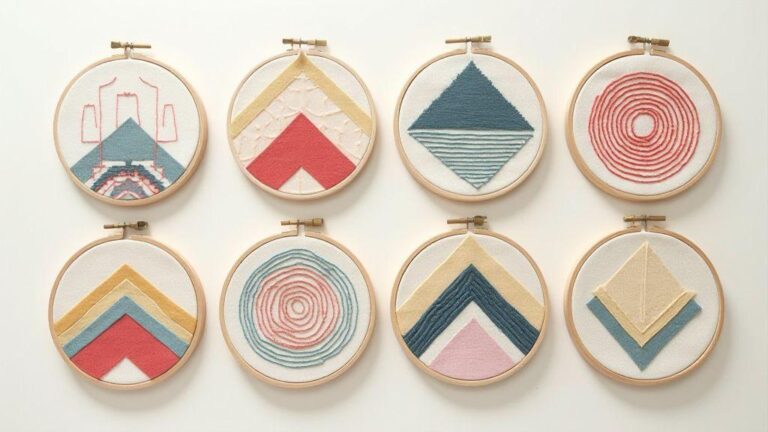
Keep a small folder of favorites and note which you actually completed. This prevents chasing every new pattern and builds a reusable library. You’ll notice your preferences emerge—tiny woodland motifs or clean geometric shapes. Your pattern history guides future projects.
Holiday Embroidery Patterns: Free Designs for Every Season offer year-round inspiration, helping you build a practical, personal library you can reuse.
Find free holiday embroidery patterns by season
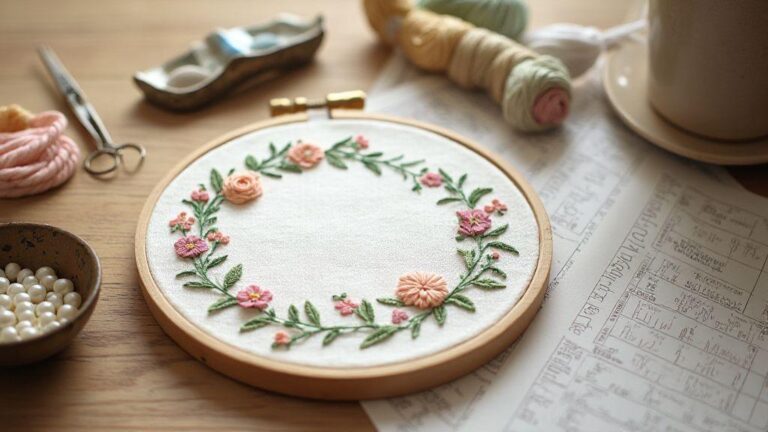
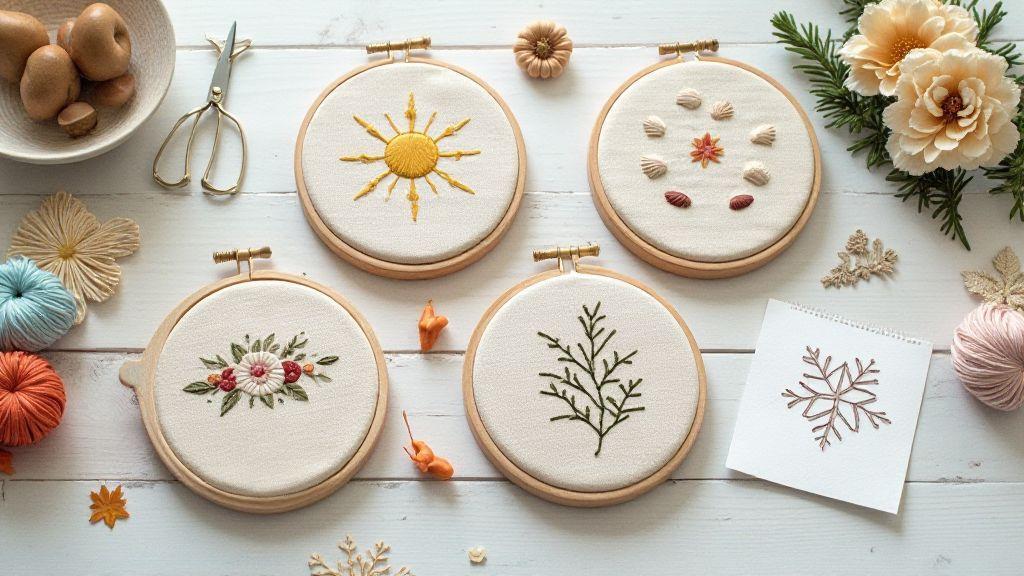
Seasonal patterns come and go, but stock a few reliable options. In spring, florals and fresh colors brighten a room. Summer patterns can be breezy—seashells or sun hats. Fall leans warm with pumpkins and leaves, while winter shines with snowflakes and cozy scenes. Seasonal selections stay relevant and easy to display together.
If you’re short on time, grab one or two quick designs per season. You’ll have a ready rotation that keeps needlework moving without repetition. Also look for patterns using a small set of stitches you know well—that makes the process smoother. Free patterns that clearly list materials help you plan your stash so you’re not running to the store mid-project.
Save patterns that fit your home decor or gifting goals. If your living room is minimal, choose clean lines and simple color palettes. If you love color, pick vibrant scenes that make a statement. Your seasonal embroidery becomes part of your personal style, not just a hobby.
seasonal embroidery designs free for quick projects
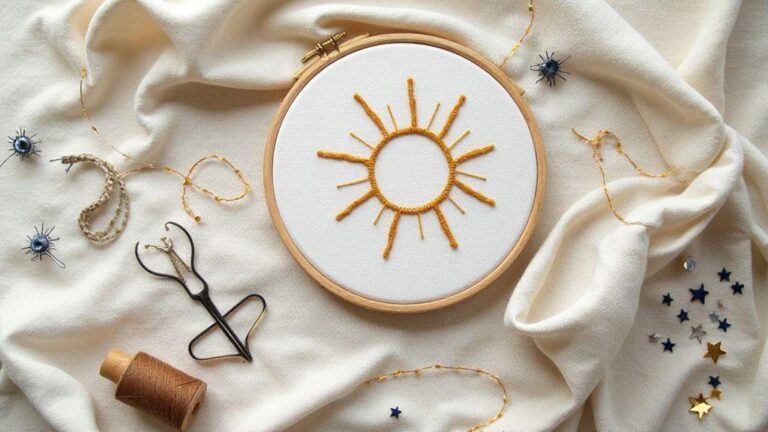
For a project you can finish in a day, look for small motifs and simple borders. Quick projects are great for gifts on short notice or when teaching someone new. They’re also ideal to test a new thread brand or fabric. A few neat stitches and a charming finish are incredibly satisfying.
Choose patterns with 1–2 colors and basic stitches. Fewer moving parts means faster completion. Patterns with clear, simple lines and minimal detailing save time. If unsure, sort patterns by estimated time and start with the fastest to build momentum.
Keep your storage and tools ready for quick starts—clean threads, a small hoop, a comfortable workspace help you dive in. When a project is quick, you’re more likely to finish, keeping motivation high and skills sharp.
Quick tips for choosing motifs
Choose motifs that feel personal, not just popular. A design that resonates stays in your memory long after stitching. Look for clear outlines and a color palette you already love. This saves you from buying extras you won’t use. Pick patterns with generous, straightforward instructions so you’re not hunting for missing details during a stitch.
The right motif fits your space, time, and hands. When you find it, you’ll notice faster progress and greater pride in the finished piece.
Download from trusted sources
You’ll find plenty of options, but you want sources you can trust. Start by looking for sites that specialize in embroidery and crafts, not just general freebies. Check author bios, up-to-date content, and a solid privacy policy. A reputable source also tends to offer licensed designs or clear usage guidelines, so you don’t run into surprise restrictions later.
Pay attention to file quality and formats. If you’re using a modern embroidery machine, you’ll want standard formats like PES, DST, EXP, or PEC. If you’re printing patterns for tracing or hand embroidery, PDFs with clean outlines are ideal. A trusted site will label the format clearly and provide instructions for use, saving you time.
Look for updates and community feedback. Patterns with positive notes about easy stitching and clear motifs are a good sign. Repeated complaints about illegible lines or missing sizes suggest you should move on. Your goal is a smooth start to your project, not a scavenger hunt for the right version.
DIY holiday embroidery templates free from reputable sites
Great templates aren’t always free, but reputable sites offer generous freebies that are beginner-friendly. Seek designs labeled beginner-friendly with simple shapes, clear outlines, and minimal color changes. When you download, save the original files in a dedicated folder so you can reuse or adapt them later without hunting down the link again.
Check if free templates come with stitch suggestions or a mini instruction guide. A good template pack often includes color lists or tips that help you avoid common mistakes. If you love a design, try tracing it onto fabric with a water-soluble pen first to prevent redoing a section if you misplace a stitch.
Look for designs that scale well. Bigger motifs suit wall hangings or pillow fronts, while smaller ones fit ornaments or bookmarks. If a site offers multiple sizes within the same template, that’s a big plus for reuse across several crafts.
Where to get Christmas embroidery patterns free legally
Legality matters as much as quality. Look for patterns released under permissive licenses like public domain, Creative Commons with attribution, or site-specific free-use terms. A clear license note on the download page signals you’re allowed to use the design for personal projects and share with friends.
Newsletter or blog designers often offer free patterns to subscribers, giving you seasonal freebies and tips while staying within legal bounds. If you’re unsure about a license, treat it like a restaurant menu—read the rules (or ask) before you start using the design for gifts or sales.
Consider compilations from reputable craft magazines or embroidery associations. They usually feature free, properly licensed patterns for personal use. Even if you don’t print them right away, saving those links gives you a treasure chest of Holiday Embroidery Patterns: Free Designs for Every Season to pull from when the mood hits.
Check licenses before you print
Always verify the license on the download page. Look for explicit statements like for personal use only or may not be redistributed. If a design requires attribution, note the designer’s name and include it in your project notes. If a site offers an opt-out for commercial use, respect it; you’ll avoid trouble and keep your crafting fun intact.
Match projects to your skill level
You’ll find this is the most practical part of your embroidery journey. When you pick patterns that fit your abilities, your confidence grows and you finish more projects. Start with easy, small designs to build movement and needle control. As you gain rhythm, you’ll handle more stitches and tighter details. Keep a running shortlist of patterns that feel doable and compare them to your last project. If you can finish it in a weekend, you’re on the right track. If not, scale back and try again with a simpler motif. Your goal is steady progress, not perfection.
Your workspace and mood matter, too. Choose patterns that match how you sew on a given day. On a sleepy morning, pick a simple outline; after work, you might tackle a richer design with more colors. By aligning patterns with your energy, you’ll see fewer skipped sessions and more completed projects. Remember, you’re building a library of skills, not chasing a single masterpiece.
When you feel stuck, pick the right level of difficulty next. If you’re a beginner, look for shapes with clear lines and few color changes. If you’re intermediate, try designs with small fills and a couple of textures. This approach keeps your hands steady and your progress steady too. The right match saves time, reduces frustration, and makes your embroidery more enjoyable.
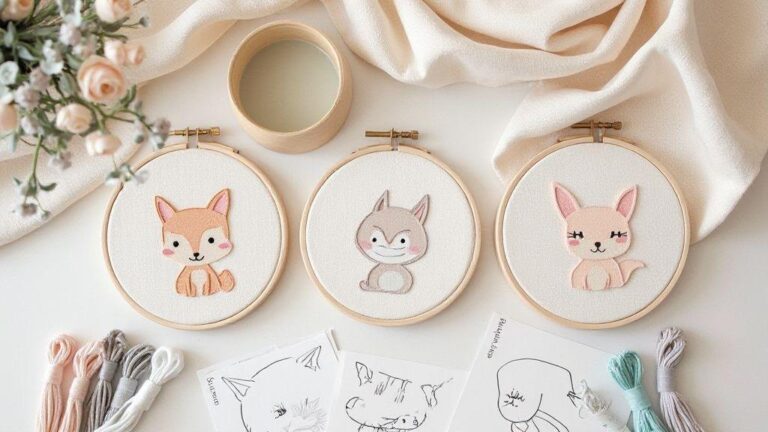
Easy free holiday embroidery patterns for beginners
Starting with easy patterns helps you practice basic stitches and neat finishing. Look for designs with bold outlines and large color blocks so you can complete a project in one sitting. Free patterns online often come with simple color suggestions, making thread shopping easier and cheaper. You’ll gradually learn to read a pattern key, break the work into manageable steps, and finish with a clean backstitch edge that looks crisp on any fabric.
As you work, you’ll notice repeat shapes training your hands. Circles, hearts, and stars teach you to keep a steady stitch length and avoid puckering. Treat each pattern as a mini-challenge: stay inside the lines and keep stitches even with minimal thread breaks. These small wins compound into real skill, and you’ll feel your confidence rise with every finished piece. When you’re ready to level up, you’ll already have habits that make complex projects feel approachable.
Holiday Embroidery Patterns: Free Designs for Every Season can be your go-to phrase here, and you’ll rely on it as you collect more beginner motifs. Keep a list of your top three designs for quick rotation and practice. Before you know it, you’ll have a tidy set of ready-to-use patterns you can adapt for gift tags, napkins, and tiny wall hangings. Easy projects today pave the way for bigger, more detailed work tomorrow.
Advanced seasonal embroidery designs free for detail work
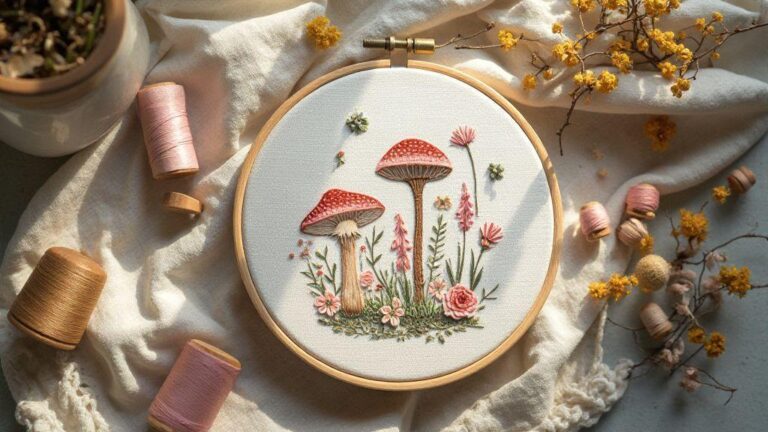
When you move into advanced designs, you trade simple fills for texture, shading, and fine line work. These patterns demand precision and patience, but the payoff is rich color changes, smoother blends, and a professional look. Start with a motif that has clear shading regions or delicate stitches like satin and long-and-short. Break the design into sections and tackle one area at a time to stay focused.
Textures are your friend. Try combining stitches—backstitch for outlines, satin for smooth fields, and split stitch for soft texture. Keep thread tension even and fabric taut with a small hoop. If a section is stubborn, pause, rethread, and approach it with a fresh mind. The result is clean lines and subtle gradients that mark a pro-level finish.
As you practice, build a mental map of how much detail to push into a design without losing readability. Choose patterns with a defined focal point so your eye isn’t overwhelmed. Balance color choices, use highlights sparingly, and keep the composition cohesive. With time, your advanced projects will look polished, and you’ll feel the difference in every stitch.
Gather the right tools and materials
You’ll save time and frustration when you start with the right tools. Gather a sharp fabric scissors, a lightweight hoop that fits your fabric, and a tapered needle that glides through cloth smoothly. Have a few colors of thread that match your patterns, plus a water-soluble fabric pen to trace designs without leaving a mark. Keep a small pair of snips for threads and extra bobbins so you’re not reloading every few stitches. When you lay out your workspace, choose a well-lit, flat surface and a tight, clean mat to protect your fabric.
Next, consider the types of threads and stabilizers. For long wear, choose quality embroidery floss or stranded cotton that won’t fuzz or split. A light fusible stabilizer helps your fabric stay steady, especially on knits or delicate cloth. If you’re doing free patterns, grab a wash-out pen so you can erase lines after you finish. Have a small tray for pins and an eraser for the fabric pen to quickly correct mistakes.
As you set up, keep a simple systems sheet. Label your hoops, threads, and patterns, and note any tips about your holiday embroidery projects. A quick checklist in your notebook or phone helps you track what you’ve completed and what you still want to try. When your tools are ready, you’ll dive into the patterns faster and with more confidence.
Best supplies for free embroidery patterns and long wear
For free embroidery patterns, choose fabrics that lie flat and stitch cleanly. Start with cotton or linen and pair with a light stabilizer if the fabric is stretchy. Use thread colors that read clearly and keep extra shades for shading. A compact embroidery hoop helps maintain even tension. For long wear, invest in high-quality threads that resist fraying and fading. A fine needle helps you reach tight spaces on delicate fabrics.
For larger projects, keep a palette of key hues and a small set of metallic threads for accents. Metallics add sparkle but require practice. A reliable fabric marker that washes out cleanly is handy for tracing multiple motifs. Finally, stock small scissors, straight pins, and a pincushion to move faster and keep fabric pristine.
Before you begin, set up a tidy work zone with your most-used supplies within easy reach. Clear away loose threads and wipe the workspace. A clean start makes every stitch feel deliberate and precise, especially with free designs you’re excited about.
How to transfer patterns to fabric with DIY holiday embroidery templates free
Transferring patterns is easier than you think once you pick the right method. Use a light box or bright window to trace with a water-soluble pen. For bulkier fabrics, print the pattern on light transfer paper and press with a warm iron for crisp lines. You can also pin the pattern and trace with washable marker or chalk to erase later.
Keep patterns large enough to be seen clearly but small enough for your project. If stitching on a tote or pillow, use a stabilizer to prevent puckering. For dense areas, stitch along traced lines slowly to prevent thread buildup. If you need more practice, start with a small motif and work up to full scenes. You’ll build muscle memory for handling free designs and see faster results.
Always test a tiny corner first. If the transfer shows through or smears, switch methods. With the right templates and careful tracing, your holiday designs stay neat and ready to shine.
Turn patterns into gifts and decor
You’ll unlock a world where your favorite patterns become thoughtful gifts and cozy decor. Tailor a design to fit a person’s style and room. A simple set of embroidery patterns can become a tiny DIY kit—swap thread colors, adjust size, and sew a piece that feels uniquely theirs. Your handmade items become conversation starters and reminders that you cared enough to create something personal.
One motif can cross into several projects—framed wall art, pillow covers, or festive ornaments—saving time and keeping a cohesive look across your home. Gifting handmade pieces adds warmth that only you can give. Start with one simple pattern and a small project to build confidence fast, then batch several gifts in a weekend without burnout.
Use Christmas embroidery patterns free for ornaments and stockings
Christmas embroidery patterns free can transform plain fabric into festive keepsakes. Begin with woodland scenes or snowflakes on sturdy burlap or linen for longevity. Use bright reds and greens for a traditional feel, or metallic threads for sparkle. Tailor each ornament to the recipient’s colors, hobbies, or memories you share.
Ornaments aren’t the only option—stitch a small motif on a hoop for a hanging centerpiece, or embroider names along cuffed stockings for a personalized touch. Free patterns invite experimentation—try a different stitch for texture or layer colors for depth. Your tree will tell a story that’s all your own.
If you’re pressed for time, choose quick-to-stitch designs and small hoops to finish several ornaments in an afternoon. They also work well as gift sets you can mail to faraway friends.
autumn embroidery patterns free and Halloween embroidery designs free for table art
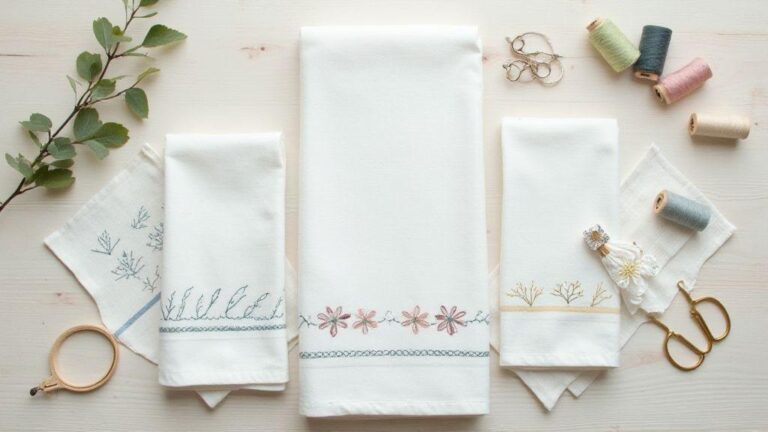
Autumn embroidery patterns free open the door to cozy pieces for a table or mantle. Think pumpkins, leaves, and acorns on a linen runner or placemats, using warm oranges, greens, and browns. Add a border stitch to frame the centerpiece for quick, impactful updates.
Halloween embroidery designs free bring a playful edge to table art—friendly ghosts, bats, or pumpkins on runners or napkins. Pair bold black or orange with neutral tones for a modern twist. These designs also adapt well to wall art or small framed pieces.
Start with one bold motif and add smaller accents for depth. Layer textures—like a burlap base under a cotton stitching top—for more character. A single pattern can transform an entire tablescape with minimal effort.
Sizing and framing ideas
Size patterns to fit the space you’re decorating or gifting for. For ornaments and small table pieces, 4×4 or 5×7 inches work well; for table runners or larger wall art, 8×10 inches or bigger is better. Match frame colors to thread tones to tie the look together, especially with metallics or variegated threads.
Choose simple wooden frames in light or dark finishes that reflect the piece’s mood. Use acid-free mat boards and mounts that don’t press the stitching flat. If gifting, include a small care card behind the frame for a polished touch. Ready-to-hang pieces with tidy backs feel professional.
Table art works on non-traditional canvases too—embroidery on cork, canvas tote bags, or linen napkins. These surfaces offer unique textures and uses while staying practical. Store unfinished patterns flat or rolled to avoid creasing threads for future projects.
Print, scale, and respect rights
You want your embroidery to look true to the original design. Print a crisp template at the intended size and check that reductions or enlargements stay accurate. Respect licenses: use only patterns you’re allowed to print or share and keep license notes for each file. Build a personal library of templates confirmed free for personal use to avoid surprises later.
Separate personal-use patterns from any you might sell or gift. Even free designs can have limits, so label each season and license clearly. This helps you quickly find the right template when designing a holiday gift or decor item and prevents time-wasting mix-ups.
Printing and rights are linked: print quality affects sizing, and respecting rights prevents misuses. Keep printer settings consistent with the original dimensions to maintain accuracy. Respecting both allows you to focus on creativity, not paperwork.
Copyright basics for free embroidery patterns for every season
Two common categories exist: patterns you can use freely for personal projects and those with more restrictions. If a pattern is public domain or explicitly free for personal use, you can print and stitch it for your items. If attribution is required or non-commercial use only is stated, follow those rules to the letter. Always check the license or ask the creator if unsure. Note that some free designs limit commercial use, such as selling items stitched with the pattern.
Seasonal patterns may have extra notes about holiday usage. Some creators allow free printing for personal decor; others restrict distribution or alterations. If printing multiple designs for display, keep a folder with license terms for each file. Honoring the terms keeps the pattern ecosystem healthy and ensures more free designs in the future.
How to scale seasonal embroidery designs free without distortion
Scale designs by measuring the final stitched area and comparing to the pattern’s original size. Scale evenly in width and height to avoid distortion. Use a uniform step, like 100%, or calculate exact percentages for a specific hoop size. If you resize in a photo editor, lock the aspect ratio. Print a test on plain fabric first to confirm crisp lines.
Some patterns with fine lines or tiny details may require adjustments. Shrinking too much can crowd stitches; enlarging too much can spread them out. Redraw critical parts by hand or use tracing methods that preserve proportion. You’ll learn which parts tolerate wiggle and which require precision so your final piece matches the original design.
Printing settings for crisp templates
Aim for true-size printing with no fit to page. Print a test on regular paper to verify scale before using fabric. If lines look faint, switch to higher resolution or ensure actual size is selected. Test on light, non-resist fabric to ensure the template sits flat for accurate tracing. After testing, print the final version on sturdy paper or tear-away sheets for repeated use. Crisp templates save time and prevent misaligned stitches—especially for holiday designs that must look neat on gifts and decor.
Conclusion: Holiday Embroidery Patterns: Free Designs for Every Season
With thoughtful pattern selection, license awareness, and a well-organized workspace, you can enjoy Holiday Embroidery Patterns: Free Designs for Every Season year after year. Build a personal library, finish more projects, and gift handmade warmth that lasts. These patterns work for beginners to advanced stitchers, offering flexible options for gifts, decor, and everyday joy.

I’m Sophie Caldwell, the author behind granaboom.com, and I believe hand embroidery is one of the simplest, most relaxing ways to create something beautiful with your own hands. I started this blog to help beginners learn hand embroidery without feeling overwhelmed by complicated instructions or “perfect” results.
Here you’ll find beginner-friendly guides to decorative embroidery stitches, along with clear step-by-step practice ideas and patterns you can use to build confidence. My focus is on making the learning process easy: simple explanations, helpful stitch combinations, and small projects that look polished even when you’re just starting out.
Welcome to granaboom.com—grab your hoop, choose a few colors, and let’s stitch one line at a time.