Minimalist Line Art Embroidery Patterns — Free Download
Minimalist Line Art Embroidery Patterns — Free Download sources
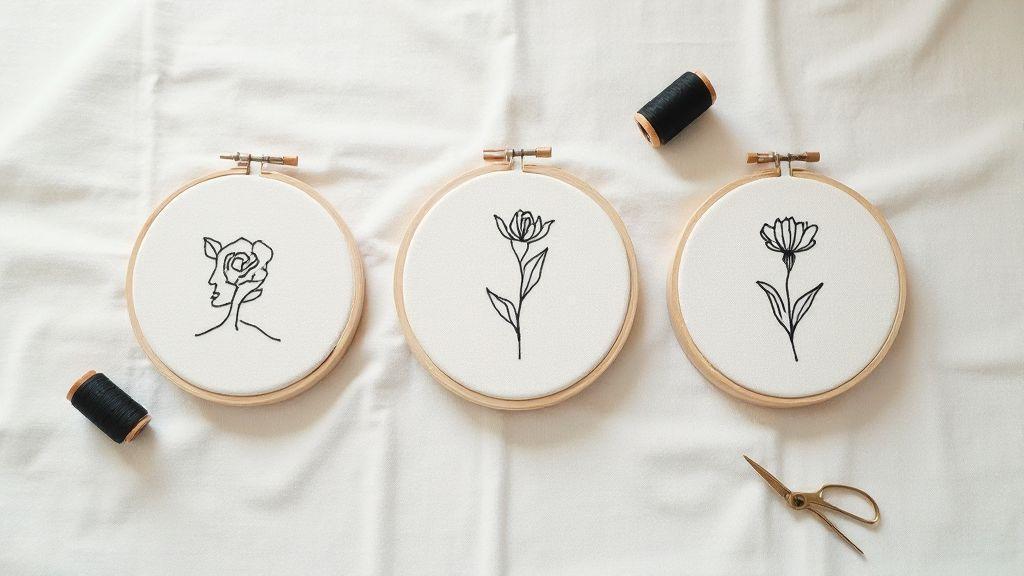
You’re after clean, simple designs you can stitch quickly. Minimalist Line Art Embroidery Patterns — Free Download gives you that crisp look without the fuss. Here are sources offering free options you can start using today. Some patterns print-ready, others are outlines you can trace onto fabric. The aim is to get you stitching with confidence, not hunting for hours.
You’ll find patterns focusing on single-line portraits, simple landscapes, and basic shapes. These designs work well with thin thread and tight stitches, keeping your hoop neat. Look for patterns that use a single continuous line or a few clean curves to plan your stitches and choose the right needle and floss.
Think about how you’ll use these patterns. Many suit wall art, cards, or tote bags. Download a few options, print them at your desired size, and try them on scrap fabric first. You’ll quickly learn which lines you like and which you’d adjust. Minimalist Line Art Embroidery Patterns — Free Download makes stitching feel approachable from the start.
Sites with free minimalist embroidery patterns
When starting out, look for patterns labeled free and minimalist. Browse collections with thumbnail previews showing clean line work. Click through to see whether the pattern is a printable PDF, an SVG, or a simple image. For beginners, PDFs with a clear outline you can trace are ideal. If you’ll digitize later, SVG files offer scalable lines that stay sharp.
A practical tip: save patterns you like in a dedicated folder. Name files by modifier (e.g., minimalist-line-portrait-1.pdf) so you can grab the exact look you want. If unsure about the license, choose patterns clearly marked for personal use. That keeps projects safe and speeds you toward stitching Minimalist Line Art Embroidery Patterns — Free Download.
Downloadable line art embroidery patterns in common formats
Choose formats you can open right away: PDF, SVG, and PNG. PDFs are great for clean outlines, SVGs scale without quality loss, and PNGs work for quick tracing. If unsure, start with a PDF for printing and try an SVG for later resizing.
Open files with crisp, uninterrupted lines easy to stitch. Skip patterns with jagged edges or overlapping lines. Verify transfer methods—interior or exterior tracing, transfer paper, or water-soluble pens—so you’re ready to stitch. Safe patterns respect licenses and make your project smoother. Minimalist Line Art Embroidery Patterns — Free Download should guide you confidently from start to finish.
How to spot safe downloadable line art embroidery patterns
Trustworthy sources matter. Check the site: reputable craft blogs, university or library digital collections, and established embroidery communities tend to vet their files. Look for clear licensing terms and a plain download button. Watermarks or heavy ads can be a red flag.
Inspect the file: PDFs should have vector-based outlines if you plan to scale. SVGs should be clean without embedded fonts or clutter that complicates transfer. For PNGs, choose high resolution so lines stay crisp at your intended size. If edges blur when you zoom, skip it. Your time is valuable, and safe patterns respect that.
How to print and transfer line art embroidery designs free
Printing and transferring line art efficiently helps you focus on stitching. Start with a bold, simple design so lines stay crisp when transferred. Select a method that suits your setup—printer type, fabric, and iron heat all matter. Test a small section to confirm line weight is easy to follow while you stitch. Minimalist Line Art Embroidery Patterns — Free Download give you clean lines to guide your work, even if you’re new to embroidery.
Print at high contrast (black-on-white) and test on sturdy paper. Tight weaves hold lines best; loose weaves can blur. Keep your workflow simple to preserve the integrity of every stroke.
When you finish, you’ll have a printable pattern ready to transfer. If you wobble, reprint a fresh copy and continue. This saves time and builds confidence with every project.
Printing tips for simple line embroidery patterns printable
Print a clean template with bold, black lines. Use standard Letter or A4 paper and the highest print quality. For fine lines, print at 600 dpi or higher on plain white paper. Preview on screen to catch missing sections before printing.
Use heavier paper or tracing paper for better results. Tracing paper lets you tape the design over fabric and trace directly, reducing alignment issues. Keep lines bold and continuous to simplify transfer. Print a practice version to verify clarity before the full pattern.
Scaling patterns without losing line detail
Scale patterns carefully to preserve line density. When enlarging, ensure line thickness remains proportional; too much enlargement can blur details. Multiply both width and height by the same factor and re-check line quality. For designs with many small elements, print in sections and reconnect on fabric rather than stretching one large image.
When scaling down, maintain essential line weight by avoiding extreme reductions. Test a small print first and compare with the original. If a line becomes faint, switch to higher-contrast print or thicker paper. The goal is legibility so you can stitch confidently.
Transfer methods: tracing, iron, water soluble paper
Choose a transfer method that fits your fabric and comfort level. Tracing works on light fabrics—trace lines with a pencil or erasable pen. For firmer guidance, use an iron-on transfer: print the design on regular paper, place it face-down, and press with a hot, dry iron. For delicate fabrics, try water-soluble paper—trace or press, then rinse away the paper after stitching.
Test on a scrap swatch first to ensure the line stays clear and won’t smear. With practice, you’ll gain speed and consistency, and Minimalist Line Art Embroidery Patterns — Free Download will come to life on your fabric.
Best supplies for modern minimalist embroidery templates free
The right tools make minimalist line work pop. Start with a clean workspace and select items that keep lines crisp and steady. A smooth fabric, sturdy hoop, and fine needle work together like gears. Choose comfort and control: a hoop that sits flat, a needle sized for thin threads, and fabric that doesn’t pucker with light tension. With these choices, stitches become more precise and templates easier to follow.
For fabrics, pick tight-weave cotton or smooth linen for sharp lines. A small, portable hoop is handy for drafts, while a larger hoop works for bigger pieces. Use thread colors with enough contrast to see the lines clearly, then switch to a single color for a true minimalist look if you prefer.
Keep a simple kit: fine-tiber thread, a sharp size 7 needle for tight lines, and a small pair of scissors. A lighted magnifier can help you see tiny segments without straining your eyes. The right setup makes Minimalist Line Art Embroidery Patterns — Free Download feel approachable and enjoyable.
Fabrics and hoop choices for clean line work
Fabric choice sets the stage for crisp lines. Choose medium-weight cotton or smooth linen that doesn’t stretch much. A tightly woven fabric reduces puckering and keeps lines sharp. Test a small swatch to see how the weave behaves. For hoop size, pick one that fits your project—smaller for precise lines, larger for open contours. Tighten just enough to hold the fabric flat without marks.
Hoop setup matters too. Unless you want impressions on the surface, don’t over-tighten. If you’re working on delicate fabrics, consider a stabilizer on the back. The goal is flat fabric, even stitches, and a clear line to follow. With calm handling, your Minimalist Line Art Embroidery Patterns — Free Download will shine.
When you stitch, keep your hands relaxed and let the hoop guide your movements. If you see puckering, loosen the tension and recheck the fabric’s grain. The aim is calm, clean lines that read as a single continuous stroke in your minimalist pattern.
Thread types and needle sizes for simple line art
For simple line work, use a thread that glides through fabric without tangling. One strand of high-quality cotton or polyester works well for crisp lines; two strands can be used for shading, but one strand keeps the look clean. Choose a color that contrasts with your fabric so lines pop.
A slim needle helps you weave precise lines without leaving visible holes. A size 7 or 8 is a good match for mid-weight fabrics; a finer needle suits tighter weaves. Practice stitches on scrap to dial in tension and find your sweet spot. Stitch steadily, following the line you want to trace.
With the right needle and thread, Minimalist Line Art Embroidery Patterns — Free Download will look clean and professional.
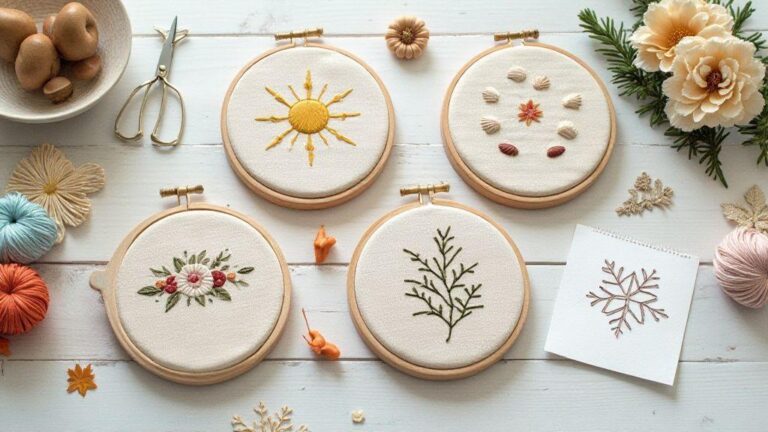
Easy projects using easy line art embroidery patterns free download
These patterns are designed for speed and satisfaction, so you can finish a project quickly. Start with tiny, confident stitches and let the clean lines shine on totes, napkins, and wall hangings. The emphasis is on simple lines over complex fills, making it easier for beginners to complete a piece.
Beginners can use a single color and still achieve a crisp look, then add more colors later. Each project centers on steady, continuous lines, easier to manage than dense fills. If you stray, back out and start a fresh line—the beauty is in the simplicity. Following the downloadable templates helps you reproduce a clean, modern vibe on your fabrics, boosting confidence with every stitch.
Keep a small notebook to capture tips for future pieces. The simplest stitches—backstitch for outlines, running stitch for thin lines, and stem stitch for subtle texture—build a steady rhythm. With practice, you’ll develop a calm, meditative stitching flow. The finished piece will be neat, minimalist, and ready to gift or frame.
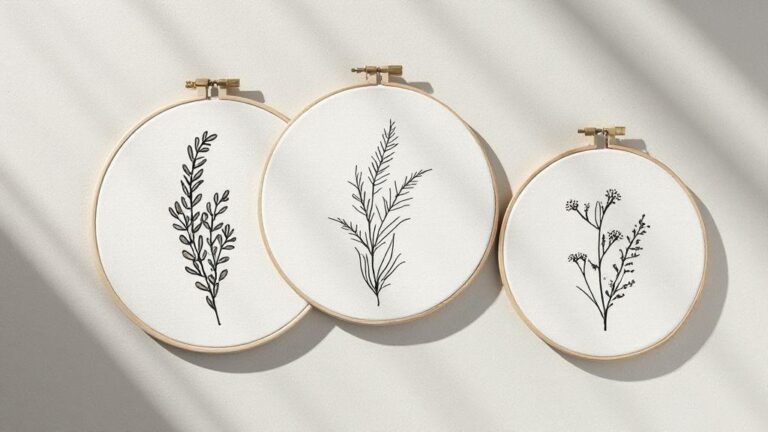
Starter motifs and templates for beginners
Starting with basic curves and circles builds a strong foundation. Use these starter motifs to build skill, then layer in small flourishes as confidence grows. Templates are designed to be traced easily, avoiding time-consuming transfers. This approach keeps your hands busy and your mind focused on clean lines and smooth stitches.
Practice with the included starter templates to improve hand control and stitch size. These motifs are simple but polished when mounted on a pillow cover or bookmark. For a fresh look, try swapping colors or adding a single dot of color at the end.
As you progress, customize motifs by scaling them or rotating shapes to create new compositions. Keeping lines minimal ensures your embroidery remains versatile across fabrics and finishes. You’ll feel more in control with each new piece.
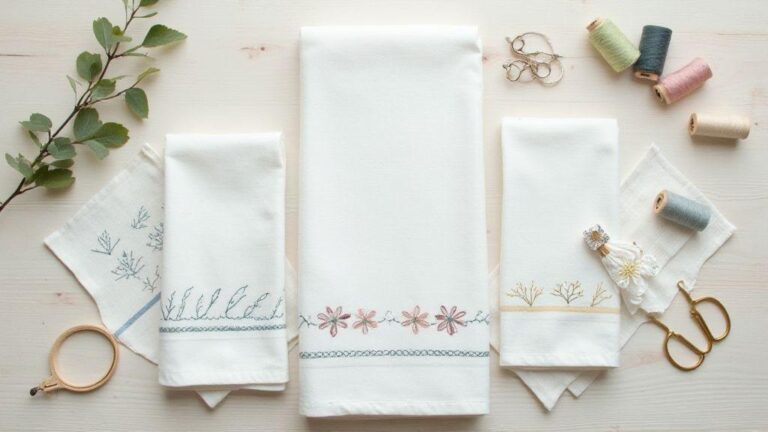
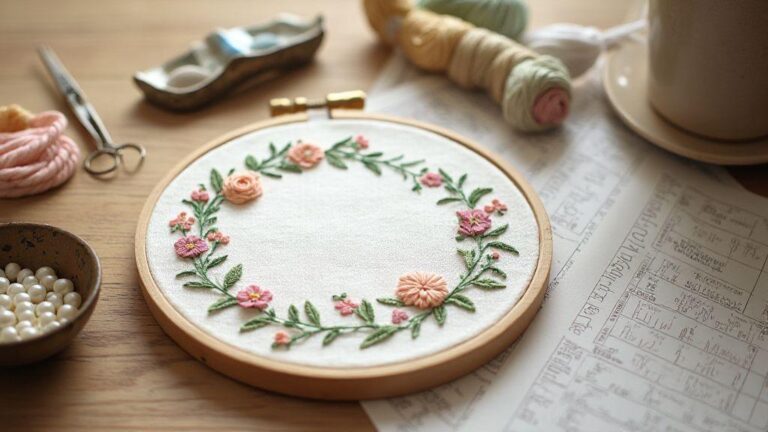
Quick gifts using minimalist floral embroidery line patterns free
Gifting becomes memorable with minimalist floral line art. Create delicate stems and petals with clean, continuous lines for a modern, chic look. These patterns work well on tea towels, tote bags, or a small wall hanging, and most can be finished in under an hour.
Minimalist flowers are forgiving and quick, with stitches kept light and even for a soft look that suits linen and cotton. A simple bouquet line on a coaster or mug rug can become a cherished keepsake. If unsure what to pick, choose a single-stem design with a tiny blossom for elegance and calm. Pair it with a note and a ribbon to elevate the gift. The patterns are flexible, so you can tailor size and color to the recipient.
Printable templates and starter kits to practice
Grab printable templates to practice anytime. Print, pin, and stitch directly over the outlines with confidence. A starter kit keeps essentials organized: fabric swatches, a few skeins of thread, a compact hoop, and a simple guide card. With a kit, you can practice the moment you have a spare minute.
Templates are designed for quick tracing and neat results. The clear lines translate well to fabric, letting you focus on stitch control. Save progress by labeling templates with notes on stitch length and tension for smoother sessions. This setup helps you stitch fast and well, without overwhelm.
Stitches for line art: outline line embroidery design free download tips
Outline line embroidery looks best with the right stitches and steady tension. Start with a simple pattern that relies on clean borders, then map stitches along the outlines. Practice on a scrap first to see how slight direction changes affect the final look. The goal is a steady rhythm that keeps the line continuous.
Move your needle with care. For line art, minimize gaps while keeping stitch length uniform. If you use a hoop, keep it snug but not crushed to avoid distortion. Along the edge, favor backstitches or running stitches that align the stitch with the edge. Stitch slowly and consistently to keep the line crisp. If wobble occurs, pause and realign.
Thread choice matters: a single strand often gives the neatest outline; two strands can add weight for bolder designs. Always test on a scrap to confirm how the line reads from a distance. If you want a softer look, a single strand with a touch of water-soluble glue along the edge can help guide your hand. The result should be a clean, even line that holds its shape.
Backstitch and stem stitch for crisp outlines
Backstitch creates tight, continuous lines with a deliberate feel. Start with a small knot, then stitch backward along the edge, keeping stitches evenly spaced and the thread taut. Slow, steady work yields a perfect edge in any minimalist design.
Stem stitch adds a gentle curve to outlines. Start with a forward stitch on the edge, then pull back toward the start, letting the stitch taper naturally. Keep the width consistent to preserve the line’s flow, and use light tension so the line remains clean rather than ropey.
Running stitch and split stitch for modern looks
Running stitch offers a light, airy line that reads like a sketch. Keep stitches short, evenly spaced, and aligned with the outline. For a bolder effect, you can tighten the thread slightly in spots, but test first. The simple rhythm of running stitches yields a contemporary, clean look—perfect for Minimalist Line Art Embroidery Patterns — Free Download.
Split stitch provides a continuous line with subtle texture, heavier than running stitch. Start with a small forward stitch, then split the thread as you return. Aim for evenly spaced splits and straight lines. You’ll achieve a modern line that still feels handmade.
Legal use and PDF minimalist embroidery patterns free
Legal use means understanding what you can do with free minimalist embroidery patterns. Free PDFs often come with private-use and/or commercial-use licenses. For personal projects, gifts, or home decor, you’ll typically be fine. If you want to sell items made from the pattern, check the license for commercial use requirements, such as attribution or fees. Always read the terms and respect any attribution or display requirements. If unsure, contact the designer for clarification. Licensing varies by creator, not by the craft world.
Verify the file format and usage rights. If a PDF says free for private use, treat it as for home use only. If it allows commercial use with attribution, you can sell items but must credit the designer. Keep a record of the license text so you can prove your rights if needed.
When in doubt, look for a license summary or FAQ in the download folder. If you need a second opinion, reach out to the designer. Treat every free PDF as a contract: know the rules, follow them, and keep your crafting joyful and legal.
Private use vs commercial license for free minimalist patterns
Free minimalist embroidery patterns often offer private-use or commercial-use rights. Private use covers decorating personal items or gifts, not selling items made from the pattern. If you plan to learn and stay personal, private use is usually enough, but watch for attribution notes.
Commercial licenses let you sell stitched items, with rules such as crediting the designer or paying a fee, and sometimes limiting production. They provide flexibility but come with obligations. If you run a shop or craft blog, a commercial license is often worth it. Save the license text for proof of rights.
Treat each free pattern as its own contract. A private-use label doesn’t automatically grant sale rights. If you want to test sales, ask the designer about a commercial license. A quick written agreement keeps projects smooth and compliant.
How to organize and backup free minimalist embroidery patterns
Organization saves time and keeps projects moving. Create a dedicated folder for free minimalist embroidery patterns, clearly labeled (e.g., Minimalist Emb Pattern Library). Inside, separate files by designer, license type (Private or Commercial), and project status. A simple subfolder structure helps you find things fast: Designer → License → Private or Commercial → PDFs. Include a notes file with license type, download date, and attribution requirements. This habit makes it easy to stitch with confidence.
Backups are essential. Save a copy of every pattern on an external drive or another cloud service. Consider a weekly backup. Keep a version history in case terms change. Your future self will thank you for staying organized.
Naming files and saving printable patterns for reuse
Use a consistent naming system to scan files quickly. A good format is DesignerNameProjectNameLicenseTypeVersion.pdf. For example: SketchLineLeafMinimalistPrivatev1.pdf. Include the license type to avoid mixing private and commercial rights. A clear file name saves edits and reprints later.
Alongside filenames, keep a notes file describing attribution requirements and printing sizes. If you plan to reuse patterns, mark them as Ready to Reprint or In Use. Build a reliable, reusable digital library for your Minimalist Line Art Embroidery Patterns — Free Download.

I’m Sophie Caldwell, the author behind granaboom.com, and I believe hand embroidery is one of the simplest, most relaxing ways to create something beautiful with your own hands. I started this blog to help beginners learn hand embroidery without feeling overwhelmed by complicated instructions or “perfect” results.
Here you’ll find beginner-friendly guides to decorative embroidery stitches, along with clear step-by-step practice ideas and patterns you can use to build confidence. My focus is on making the learning process easy: simple explanations, helpful stitch combinations, and small projects that look polished even when you’re just starting out.
Welcome to granaboom.com—grab your hoop, choose a few colors, and let’s stitch one line at a time.