7 Budget-Friendly Embroidery Kits That Are Actually Worth It
How you pick a starter kit
Choosing a starter kit is a small decision with big payoff. You want a kit that feels simple at first but leaves room to grow. Look for clear instructions, a few easy patterns, and basic tools you can reuse. A kit that hits these marks helps you build confidence each time you stitch. If you’re unsure, choose one with a practice fabric swatch and a single color palette to keep things calm while you learn the stitches.
Your first kit should give you a sense of progress, not overwhelm. You’ll want the stitches broken down step by step, with close-up photos or short videos you can follow easily. Check that the kit includes a pair of small scissors, a hoop that fits your fabric, and enough floss to finish a couple of small projects. When you feel comfortable, you can switch to projects that use more colors, but for now, simplicity wins. A good starter kit is like training wheels: supportive, not scary.
If you’re shopping with a budget, prioritize clarity, not quantity. A well-made kit with fewer pieces but better quality will teach you the fundamentals faster than a big bag of random stuff. Your goal is steady practice, clean stitches, and a path to more complex patterns later. Keep your expectations realistic, and you’ll stay excited instead of frustrated.
Starter embroidery kits on a budget: what to expect
On a budget, you’ll typically get fewer colors and simpler designs—basic floss, a plain hoop, and a straightforward guide. These kits teach the same stitches at a slower pace, with smaller projects that can be finished in a weekend. This is ideal for testing the waters without wasting supplies.
Budget kits can be a smart starting point because they force you to focus on technique. You’ll learn how to pick threads, count stitches, and keep your fabric flat in the hoop. You may miss fancy fabrics or extra accessories, but you’ll gain clear, repeatable steps and a path to upgrading gradually without feeling like you wasted money.
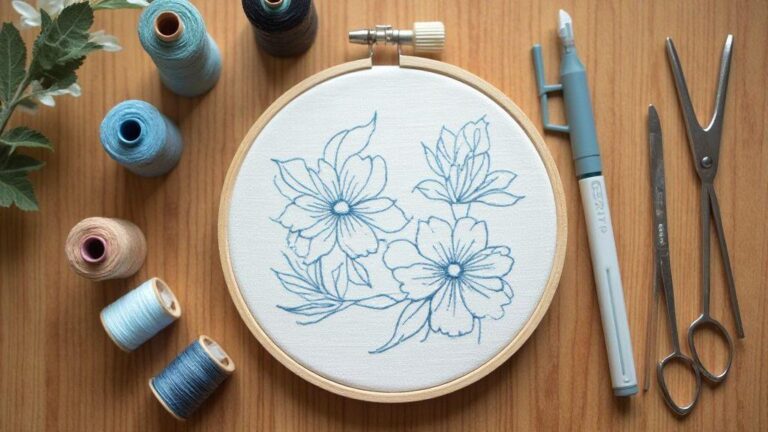
When you compare budget kits, read the instructions first. Look for a stitched example that shows the finished look so you know what to aim for. If the kit lacks a clear photo, choose another option. The project should nudge you toward the next level, not away from it.
Materials to check before you buy
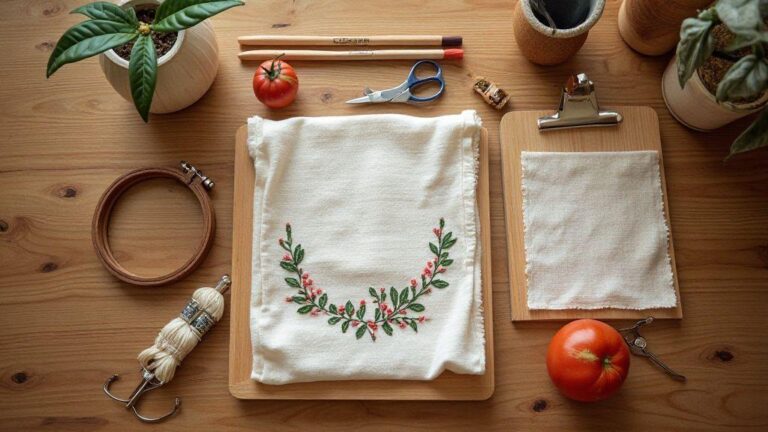
First, check the fabric type. A simple cotton or even-weave fabric makes learning easier. Avoid stiff, rough, or very slippery cloth for now; you want something that grips your needle and holds stitches nicely. Next, look at the hoop size. A mid-sized hoop that sits comfortably on your desk is ideal for beginners. A loose hoop makes stitching harder, and a tight hoop can warp fabric over time.
Floss quality matters too. You don’t need brand-name threads, but ensure the floss colors come in solid skeins that won’t tangle easily. Fewer colors with clean, distinct shades help you learn shading and counting instead of fighting knots. Finally, inspect the guide. A good beginner kit includes simple, numbered steps and clear diagrams. If any part of the guide seems vague, that’s a red flag.
Quick checklist for first-time buyers
- Clear, illustrated step-by-step instructions.
- Hoop, fabric, and a basic floss set in a few colors.
- Fabric that’s easy to handle (not too stiff or slippery).
- Small, simple pattern to practice stitches.
- Printable or downloadable pattern for extra practice.
How you finish your first project
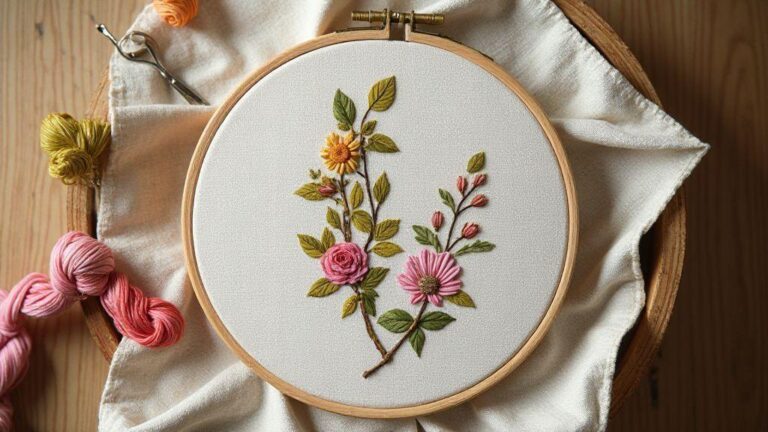
Your first project should feel rewarding, not painful. Choose a simple motif, like a flower or initial, and stitch at a relaxed pace. Use a handful of basic stitches and finish with a neat backstitch to seal the edges. As you complete it, you’ll notice your hands getting steadier and your color choices improving.
When you’re done, take a picture and compare it to the guide. If the result isn’t perfect, don’t worry—your goal is to learn, not to be flawless. Every stitch teaches you something: tension, spacing, color balance. Keep your first kit’s extra skeins handy so you can practice small touches or rework areas that bug you. The practice adds up, and soon you’ll be ready for 7 Budget-Friendly Embroidery Kits That Are Actually Worth It as your next step.
What each kit should include
You want a kit that makes starting embroidery easy, not frustrating. A solid kit should lay out the basics in a friendly way so you can see progress quickly. Look for clear instructions, simple patterns, and tools that actually work for beginners. The most helpful kits give you a quick project you can finish in a few sessions, so you stay motivated and don’t feel overwhelmed. When you open the box, you should feel ready to stitch, not search for extra supplies.
A good kit usually includes a few essential tools and high-quality supplies that won’t frustrate you. Expect a small hoop, enough embroidery floss in a few colors, a needle or two, and a simple fabric piece. Some kits add a thimble or a tiny pair of scissors, which saves you a separate shopping trip. A beginner-friendly booklet or link to short, plain tutorials makes learning less scary and more fun. If you see vague pictures or big words you don’t know, that kit isn’t doing you any favors.
The right kit also keeps you from buying too much at once. You’ll want a balance between quality and price. A kit overstuffed with colors you’ll never use can feel chaotic. Choose one that focuses on a small, manageable project with clear steps. You’ll thank yourself later when you finish and can move on to something slightly more complex without buying a whole new set of tools.
Budget-friendly embroidery supplies you’ll find
You’ll notice budget-friendly doesn’t mean junk. You can get great basics without breaking the bank. Look for smooth, even threads, a sturdy hoop, and easy-to-hold needles. A simple pre-washed fabric keeps you from fighting with tangled threads and puckers. Budget-friendly options often come in sets that bundle a few colors, which is perfect for a starter project.
You’ll find affordable threads that still give you clean, bold stitches. If a kit uses cheap floss that frays as soon as you pull it, skip it. Instead, pick threads that glide through fabric smoothly and don’t shed much lint. A basic hoop that sits flat on the fabric will save you headache and time. Don’t overlook measuring tools—simple rulers or a marking pencil can keep your stitches neat without costing a lot.
The best value shows up in simple patterns that teach several stitches in one project. Cheap kits that only offer one tough technique can stall you fast. Favor kits that mix a few easy stitches, like running, backstitch, and satin, so you feel progress and learn without needing a pro-level setup. Your pocket will thank you, and your hands will thank you too.
Cheap embroidery kits with patterns vs plain fabric
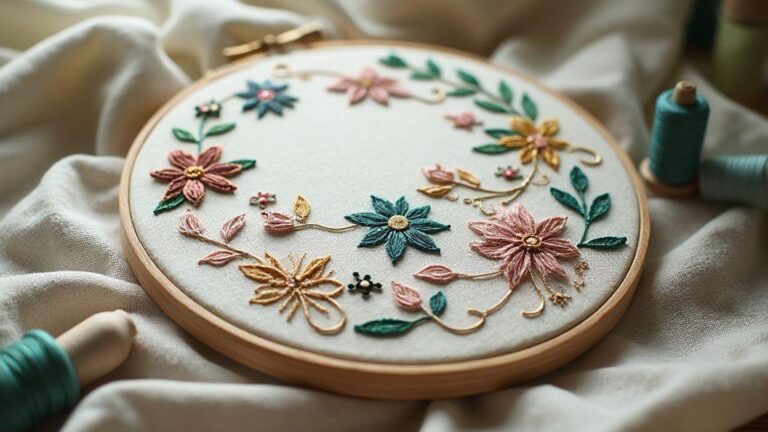
Patterns provide guidance and confidence, especially for beginners. A kit with a simple pattern gives you a clear goal, a sense of success, and a path to the next project. If you can follow the shape and color blocks, you’re building transferable skills. Plain fabric can be a low-pressure way to practice stitches before you tackle a real design.
If you choose pattern kits, ensure the pattern is beginner-friendly—large shapes, bold outlines, and limited color changes help you learn one stitch at a time. Too many tiny details can overwhelm you. Plain fabric lets you doodle a design later and stay within your comfort zone. Either choice should feel welcoming, not intimidating, so you stay curious and keep stitching.
You’ll also want to balance your choice with the included thread colors. Pattern kits with mismatched or excessive colors can waste time. Plain fabric kits with a starter color set let you practice first and then you can add more thread later as you gain confidence. The right balance keeps you motivated and reduces waste.
Spot missing items before you buy
Before you click buy, check for the basics you need to start right away. Look for a hoop that fits the fabric you’ll work on and a couple of needles in different sizes. Make sure there’s enough embroidery floss in a few colors you can actually use on the project. If the kit omits scissors or a marking pencil, you’ll end up buying them separately and adding cost to your plan.
If you see a kit that promises everything you need, read the fine print. Some sets miss critical pieces, like a proper needle size for beginners or fabric that’s too stiff to sew comfortably. Avoid anything that makes you improvise with household items. You want to feel supported, not stressed, from day one.
A quick skim of reviews or a quick peek inside the box can save you time and money. Look for mentions of missing items, poor fabric quality, or colors that fade after washing. If you spot repeated issues, it’s a red flag to pass and choose a kit that’s more complete and reliable.
Find kits under $20
You don’t need to spend a fortune to start hand embroidery. A complete kit under $20 can include a hoop, floss, needles, patterns, and a simple guide. When you see all-in-one set, check the contents so you’re sure you’ll actually begin stitching right away. An under-$20 kit should provide a clear path from beginner to confident stitcher without overwhelming extras. Look for a simple motif—like a flower or heart—that helps you learn basic stitches quickly. You’re buying momentum: a small, complete starter set under $20 can kick off your new hobby with confidence, not confusion.
If you shop online, compare pricing per item in the bundle. Some kits seem cheap but hide extra costs for shipping or replacements. Choose kits that clearly list what’s inside and show close-up photos of the fabric and floss colors. A simple starter kit helps you build habit and progress without overspending.
Think about your space and routine. A compact kit travels well for weekend projects, and a basic hoop that sits flat on a desk makes practice easier. If you want to build a routine, pick a kit that fits your style—bright colors for quick motivation or a calm palette for mindful stitching.
Embroidery kits under $20: real choices
There are real options that work for beginners and stay under $20. Look for color-coded floss, a titled pattern, simple instructions, and a sturdy hoop. A good starter kit teaches the basic stitches—backstitch, running stitch, satin stitch—without jargon. You’ll know you picked a winner when the materials feel friendly, the pattern is easy to follow, and the color guide is clear. Some kits include a practice fabric square to test stitches first, which helps you build confidence fast.
Low-cost embroidery kits worth buying for beginners
When you find a kit that looks promising, check for a clear project goal. A beginner-friendly design—like a small flower, leaf, or simple animal—lets you practice stitches in a real piece rather than a sampler. Look for a kit that guides you through each step, not just a pattern page. The best under-$20 kits give you a quick sense of accomplishment, so you’re motivated to finish and move on.
A simple how-to guide with diagrams is a strong value signal. If it shows how to place the needle, hold the hoop, and count stitches, you’ll master fundamentals faster. Look for color labels and a few extra needles or a spare hoop; those details extend the kit’s usefulness beyond one project. You’ll get more mileage from a well-thought-out starter set than from something that only looks cute.
How to judge value fast
To judge value quickly, skim the contents list for a hoop, a few skeins of floss, a couple of needles, a clear pattern, and basic instructions. If the kit advertises beginner-friendly or includes tips, that’s a big plus. Compare two under-$20 kits by the number of colors, the size of the finished design, and whether extra tools are included. A kit with more colors and a larger, clearer pattern usually offers more practice and better results.
Consider the finish. If the project yields a neat, display-worthy piece, you’ll feel your money was well spent. If the fabric is stiff or the stitches look wonky, you’ll want something better next time. Your time matters, so pick the kit that promises smoother learning and a more enjoyable first project. The best value isn’t the cheapest—it’s the kit that gets you stitching confidently, with less frustration, on day one.
Best cheap kits for beginners
You’re just starting out, so you want kits that don’t break the bank but still teach you the basics well. These options offer clear instructions, simple projects, and all the essentials in one package. Look for clear diagrams, a few easy stitches, and a small project you can finish quickly. A color key or pattern guide helps you know what to stitch next, keeping you motivated.
Value isn’t in flashy fabric or big hoops—it’s in the step-by-step learning. A good cheap kit uses sturdy floss, simple needles, and a cotton or linen fabric that’s easy to handle. If you’re serious about turning this into a hobby, choose a kit that highlights a handful of stitches in a tiny design. That keeps your hands moving and your frustration low.
Check reviews for how well the kit teaches. Look for photos of beginners with finished projects, not just the packaging. A solid beginner kit guides you through stitches, provides color-coded threads, and offers a simple project you actually want to finish. Your goal is steady progress, not perfection on day one.
Affordable embroidery kits for beginners that teach stitches
You’re aiming to learn stitches fast, so pick kits that name the stitches plainly and show you exactly how to do them. A well-made beginner kit includes a small pattern that uses a few stitches, like backstitch, running stitch, and satin stitch, so you can practice without getting overwhelmed. The fabric should be easy to pierce, so you can see where your thread goes. A clear color key saves time and stress.
The best kits also include a simple project you’ll finish in a weekend. The needles, hoops, and floss are sized for beginners, so your first stitches feel comfortable. A good guide walks you through each stitch with step-by-step photos or diagrams, plus tips on knotting ends and avoiding crowding stitches. With those details, you’ll build confidence fast.
Inexpensive doesn’t mean flimsy. Look for sturdy hoops or frames and quality but affordable floss. If a kit mentions easy patterns and practice pages, that’s a signal you’ll get the practice you need without extra cost. You want to look back after a week and see real improvement.
Value embroidery kits for adults to try
You deserve a kit that feels like a step up without costing a fortune. Value kits for adults often pair a nicer pattern with clear instructions and a handful of stitches to master. They offer a sense of accomplishment while staying beginner-friendly. Look for a color chart, enough thread to finish the design, and a sturdy hoop or frame that won’t wobble.
These kits typically feature more varied designs than ultra-basic options but remain manageable. You’ll practice a few twists and turns that help you understand how threads behave on fabric. The best value kits also point out common mistakes and how to fix them, saving thread and frustration. If you want a project you can frame or gift later, this is the sweet spot.
Why these kits help you learn
These kits provide the right tools and clear guidance, so you’re not staring at a blank fabric wondering what to do. They break learning into small, doable steps, building skill with each stitch. You’ll see steady progress, which keeps motivation high and hands steady. The right kit makes practice enjoyable, not tedious.
Where to buy budget embroidery kits
You want options that are easy to use and affordable. Look for budget kits that include a basic hoop, fabric, needles, floss, and simple patterns. Bundled kits save time and money by eliminating extra shopping trips. Choose beginner-labeled kits with clear, simple designs, extra practice sheets, or a small how-to guide to make your first projects doable.
Reading reviews helps you find dependable budget kits. Look for real photos of finished projects, colorfast threads, and smooth fabric. If a kit includes color-coded charts and a return policy, you’ll feel more confident starting your first piece.
Shop based on price and support. Large online retailers carry inexpensive starter kits, while craft-stores offer occasional sales. In store, you can feel the fabric and test the hoop. Online, compare shipping times and bundles that include extra needles or floss. The goal is a kit that’s simple, complete, and easy to replace as you grow.
Affordable hand embroidery kits review sites to read
Look for reviews that break down what’s inside—from fabric type to hoop size. Check for notes on beginner-friendliness, color clarity, and stitch ease. A good review will mention step-by-step instructions and a basic how-to for common stitches. Seek honest feedback that helps you pick confidently.
Trustworthy reviews highlight both pros and cons. If colors are nice but fabric is thin, you’ll know how it might affect your first project. If the price is low but the needle quality is poor, you’ll catch that early. You’ll also see comparisons—like this kit is better for beginners because of simpler patterns and clearer directions. Use these contrasts to steer toward options that build your confidence.
A practical tip: look for reviews showing a before-and-after of a simple design you recognize. Real results help you picture your progress. If a site notes return policies or warranty tips, that’s a plus for a beginner.
Where to find starter embroidery kits on sale
Sales pop up around holidays and season changes, so set alerts for favorite shops. Starter kits often bundle extra floss or a bigger hoop during a sale. Clearance events can upgrade fabrics or needles without increasing your budget. That lets you practice more stitches without buying a whole new kit.
Check store newsletters or social pages for coupons and flash deals. Some retailers offer buy-one-get-one-free on beginner kits, a good way to build a starter set with variety. When you spot a sale, act quickly—stock moves fast.
Online marketplaces offer daily deals and bundles. Compare price-per-item to see real savings. If you’re patient, you can assemble a solid, budget-friendly stash that maintains your momentum without paying premium prices.
Use kits to build real skills
You’ll start with kits because they give you a clear path from day one. A good starter kit hands you a simple pattern, the right cloth, and visible colors for practice. With guided projects, you won’t guess which stitch to use or how tight to pull. You’ll build confidence quickly as you complete small, satisfying pieces. The momentum helps you notice how threads behave on fabric and keep practicing with intention.
Kits also cut setup time. You’ll have exactly what you need, so you can start right away and keep momentum. Finishing a project in a kit gives you a sense of progress that motivates you to try the next project and level up your technique. So choose a kit with clear instructions and simple patterns, and you’ll see results fast.
As you work, kits encourage exploration. You’ll try new colors and stitches in a low-stress way and discover which tools feel best to you. This hands-on exposure helps you plan the next steps with input from your own hands, not just a tutorial. You’ll learn by doing, and that real-world practice sticks.
Basic stitches you’ll learn from starter kits
You’ll start with running stitch, a backbone that builds control and even tension. With practice, your lines become smoother, and you’ll use running stitch as the base for other stitches.
You’ll also learn back stitch, which creates a clean outline and helps define shapes. It’s forgiving and easy to fix if you wobble. Paired with running stitch, it gives crisp edges to letters and borders, making even beginner work look deliberate.
In addition, most starter kits include satin stitch and French knots. Satin stitch fills shapes with smooth color, while French knots add tiny textures for dimension. Practicing these together helps you see texture and shading come alive as a beginner.
Upgrade tools with budget-friendly embroidery supplies
You don’t need expensive gear to improve fast. Start with a basic hoop, comfortable needles, and a handful of floss colors. A hoop that keeps fabric taut helps you achieve cleaner stitches, and ergonomic needles reduce hand fatigue during longer sessions. A few simple tools can noticeably improve control.
Budget-friendly options can still be high quality. Look for beginner-sized needles, sturdy scissors, and easy-to-read floss color codes. Buy a small color set that mixes well, then add more as you grow. The key is consistent practice with reliable basics that won’t derail your momentum.
If you’re curious about the best options, scan reviews and compare a few affordable kits. Quality doesn’t have to mean flashy—it means dependable, easy-to-use tools that keep you stitching. Your goal is steady practice, not perfect gear.
Practice plan to improve fast
Set a bite-sized schedule: 15 to 20 minutes a day, five days a week. Short, steady sessions beat long, sporadic marathons. In each session, pick one stitch to focus on and complete a small practice piece, like a leaf or a letter, before moving on. Track progress with a simple checkbox system to stay motivated.
Start with a warm-up: quick lines and loops to loosen your hand. Then run a series of even stitches along a line, focusing on consistent tension and spacing. Finish with a tiny practice project that uses the stitch you’ve been working on. Finishing something you can show off at week’s end gives you a clear signal you’re advancing.
Push your challenge gradually. Each week, add a subtle new element—stem stitch, a satin-filled shape, or a French knot cluster. Keep a simple sketch of your upcoming project so you know where to place stitches. If a day is rough, shorten the time and repeat your favorite stitch. The plan should feel doable, not overwhelming, so you keep stitching and stay curious.

I’m Sophie Caldwell, the author behind granaboom.com, and I believe hand embroidery is one of the simplest, most relaxing ways to create something beautiful with your own hands. I started this blog to help beginners learn hand embroidery without feeling overwhelmed by complicated instructions or “perfect” results.
Here you’ll find beginner-friendly guides to decorative embroidery stitches, along with clear step-by-step practice ideas and patterns you can use to build confidence. My focus is on making the learning process easy: simple explanations, helpful stitch combinations, and small projects that look polished even when you’re just starting out.
Welcome to granaboom.com—grab your hoop, choose a few colors, and let’s stitch one line at a time.