Botanical Embroidery: How to Stitch Herbs and Plant Sprigs
Get started with botanical embroidery for beginners
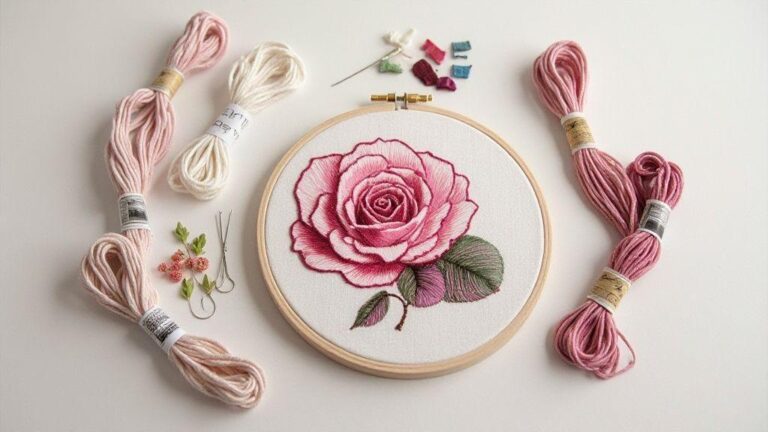
Embarking on botanical embroidery turns simple stitches into tiny living art. Each stem and leaf becomes a quiet, therapeutic moment as you stitch. Start with a calm mindset, choose a small, friendly design, and allow imperfect but charming stitches to emerge. The joy is in the process as much as the finished piece, and you’ll gain confidence with every loop and knot you learn.
Your first project should feel approachable. Pick fabrics that aren’t too stiff and a hoop that holds tight without crushing the cloth. Use a single thread color for the outline, then layer in one or two greens for leaves. As you practice, you’ll discover which stitches suit each part of the plant, and how light touches and straight lines can make a sprig feel alive on fabric.
Remember, perfect symmetry isn’t required to make a botanical scene sing. Your hand brings personality to the embroidery, which is what makes Botanical Embroidery: How to Stitch Herbs and Plant Sprigs feel special. You’ll refine your eye for scale, spacing, and how a satin stitch can mimic rounded herb leaves. Stay patient, and you’ll soon have a pocket of herbs that brightens any fabric.
Choose botanical embroidery patterns you can stitch
Pick patterns with clear, simple shapes to build confidence quickly. Look for small herb sprigs, single leaves, or tiny bouquets that fit inside a hoop without crowding. Try staples like rosemary sprig, thyme stem, or basil leaf—these are forgiving for beginners and yield immediate results. When selecting patterns, imagine how they’ll sit on a napkin, a pillow, or a tote to stay motivated.
Match pattern complexity to your growing skill. Start with one-page designs showing main stems and a few leaves, then move to designs with tiny seeds or delicate stippling for texture. If a pattern uses multiple colors, begin with a limited palette: a main leaf color, a vein color, and a tiny highlight. Limiting choices helps stitches flow smoothly and keeps the piece cohesive at the start.
Keep your goal in mind: a finished piece you’re proud to show. Think of your design as a garden in miniature on fabric. Visualize it blooming under your needle to help you stitch with intention. You’ll learn which stitches suit which shapes, turning simple lines into living textures you’ll want to touch.
Follow a simple herb embroidery tutorial you can use
Begin with a gentle outline of your stem using a split stitch for neat lines and even tension. Switch to a satin stitch for leaves to give them a soft, rounded look. If you need a fine detail, return to backstitch for crisp lines. As you stitch, you’ll develop a rhythm that feels meditative rather than stressful.
Add texture with a light French knot to represent tiny buds or seeds. It’s about the small, imperfect charm that real herbs carry. Layer colors gradually to avoid crowding. If you make a mistake, you can pull it out and rework it—the learning happens in the redo.
By following a simple herb embroidery approach, you’ll complete a stem, several leaves, and a few sprigs that sing. The process will feel natural, and your confidence will grow with each completed pattern.
Prep fabric, hoop, and transfer lines
Set up your fabric in the hoop so it stays flat and taut. Lightly press to remove folds, then transfer lines with a light pencil or water-soluble pen, keeping marks airy and easy to follow. When you stitch, start with a simple outline and fill in motifs along the transfer lines. If spacing needs adjustment, fix it early—the hoop helps keep tension steady, and neat spacing becomes evident as you work. When done, wash away transfer marks and admire your herb garden in stitch form.
Learn the stem stitch for plant stems
The stem stitch creates a smooth, slightly raised line that can bend with your design. Stems grow with tiny turns, so stitch with a steady rhythm to avoid stiff lines. Use bold threads for a crisp stem, or lighter threads for a delicate look.
Find your comfortable rhythm: avoid pulling the fabric taut or yanking the thread. Start with a short back-and-forth motion, then re-enter to keep the line smooth. If a line veers, realign by pulling back to the path before continuing. Alternate thread shades to suggest light catching the stem’s surface. Let the stitch flow with the leaf attachment points for a realistic finish. Practice on scrap fabric until you’re confident, then bring that steady hand to your project.
How you stitch stems with the stem stitch
Two moves make the stem stitch easy: bring the needle up to the left of the line, pull to form a small backward slant, then insert ahead and to the right, pulling the thread through to form the next segment. Keep stitches short to avoid jagged edges, but long enough to feel continuous. For a thicker stem, place two parallel stem stitches side by side.
Control is your friend. If your line shifts, gently realign and continue. Alternate light and dark threads to create depth, and align the stitch to the curve where leaves attach. Small adjustments add lifelike character. Practice on scrap until you’re steady, then apply the skill to your project.
Use stem stitch for your herb and plant sprigs
Herbs and sprigs benefit from gentle arcs rather than straight lines. Trace the main axis with stem stitch, then add fine secondary lines for smaller branches. Vary stitch length to suggest growth, keeping tension even for a cohesive bouquet.
Veins or color changes along the stem add depth. A second shade along the edge can create shadow and realism. Pair stem stitch with seed stitches or lazy daisies for buds to make your arrangement pop against the fabric.
Practice stem stitch on scrap fabric
Draw curved stems on a scrap, then add a few small offshoots to mimic leaf attachment points. Stitch slowly for even tension and consistent length. If a line feels off, adjust entry points to keep a natural curve. This practice helps you learn needle angle and hand pressure before committing to the final piece.
Different fabrics grab thread differently—linen and cotton hold longer lines well, while silk offers a softer, fluid look. Test both to see what you prefer. Keep stitches neat and your thread snug but not tight. Repetition builds the muscle memory you’ll rely on for future botanical projects.
Use embroidery stitches for leaves
Leaves bring life to your projects when stitched thoughtfully. Plan leaf placement first, then select stitches. Consider leaf shapes—broad and rounded, or narrow and pointed. Start with a light touch and refine texture later. Botanical Embroidery: How to Stitch Herbs and Plant Sprigs helps you spot natural curves and vein directions so leaves feel real, not stiff.
Keep threads smooth and edges neat. If a line wobbles, pause and reorient. Aim for clean edges and gentle shading to suggest light on the leaf. Practice tension on scraps first to ensure the final leaves stand out without overpowering the whole piece. Your hands guide the design, and care shows in every stitch.
As you finish, assess balance. Leaves should complement flowers or other motifs. If one leaf reads brighter, soften it with a lighter thread or satin fill. Repeating this approach across the project builds confidence in spacing and rhythm for a natural, cohesive pattern.
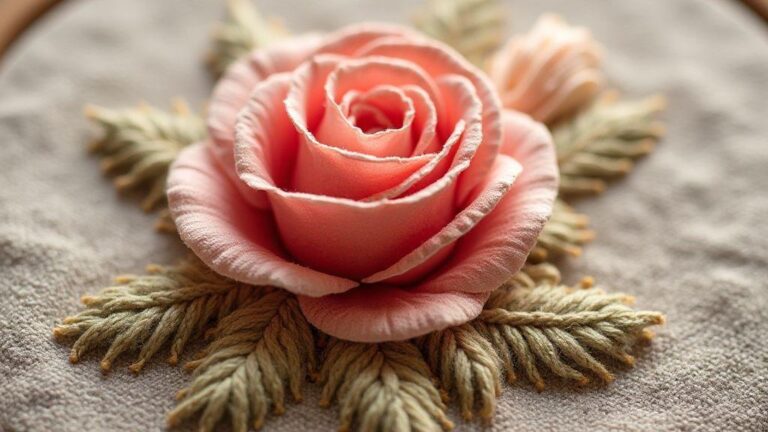
Stitch leaf shapes with fishbone and satin
Outline the leaf with a fine, even line, then fill the center with a fishbone pattern, letting ribs run along the leaf’s length. Keep edge stitches short to avoid spilling beyond the outline. Switch to satin stitch for the outer area, placing threads closely to create a glossy field. Use longer stitches on larger leaves and shorter ones on smaller shapes to maintain uniform texture. Blend a second color along vein lines or edges for depth.
Some leaves respond better to fishbone; others suit a tight satin sheen. Keep a color that matches the fabric for a seamless result, reserving a brighter shade for subtle highlights at leaf tips.
You add veins and texture with backstitch and split stitch
Veins and texture bring leaves to life. Use backstitch for a crisp midrib, then branch out with smaller veins. Keep stitches straight and closely spaced to mimic a leaf’s natural network. Split stitch adds a delicate texture along the leaf surface. Work slowly, letting the thread split into two strands to create tiny ridges. Pair backstitch veins with split stitch edges for depth. Coordinate color choices with the design so shading remains cohesive. Practice on a swatch to dial in tension and spacing.
You add veins and texture with backstitch and split stitch (alternative)
For extra depth, add a fine outline around the leaf with backstitch in a slightly darker color. A few short split stitches along the edge mimic serration, giving the leaf definition without overpowering the piece. This approach makes leaves read as refined and realistic.
Try leaf stitch samples on swatches
Test leaf ideas on swatches before committing to a large piece. Use separate swatches for fishbone, satin, backstitch, and split stitch to compare. Observe how each technique reads from a distance and how light affects them. Choose the leaf stitches that harmonize with the rest of the embroidery, not overpower it. Let swatch results guide final decisions on size, density, and color palette.
Make French knot herb embroidery accents
French knots add tiny herbal touches to your fabric. Think of each knot as a small bud perched on a stem or leaf. Match knot color to the herb’s shade for subtle ground color on linen, cotton, or denim. Knots sit like seeds, giving a lived-in, garden-fresh feel. Keep tension steady; even knots read as neat buds, not loose specks.
Placement matters: dot tiny buds along a stem or tuck them into leaf corners for a natural vibe. When stitching rosemary, thyme, or oregano, pair knot color with the herb’s shade. Keep the background simple so the knots stand out. A few deliberate knots convey growth, texture, and aroma without crowding the design.
You add tiny herb buds with French knots
Experiment with sizes by adjusting wraps and tension. Fewer wraps yield smaller knots; more wraps yield bulk. Keep the thread parallel to the fabric and avoid twisting. Uniform wraps create uniform buds across the design. For tension, hold the thread under gentle pressure and snug just enough so the knot sits flush with the fabric. A calm hand yields tidy, aligned buds.
Secure knots and hide tails
When a bud is complete, secure the thread tail on the wrong side with a small stitch. Clip the tail close, leaving a tiny bit if you’re unsure about tension. Weave the tail through nearby stitches on the back to hide it. For delicate fabrics, use a fine-tail method to minimize bulk and keep the front crisp. A neat backside helps your herb buds stay sharp and prevent snagging. If layering multiple buds, plan anchors where stems cross or where leaf edges create natural retreats for tails to hide.
Design a green palette for foliage
Pick a palette that makes leaves feel alive. Start with a natural green base, then add lighter and darker tones for depth. Think of floss as the skeleton of the piece: contrast without shouting. Use mid-tone greens for most stems and leaves, with olive or forest greens for shadows. Add subtle accents like lime or moss to keep the embroidery fresh. The goal is harmony, not a crowded rainbow.
Map your palette on paper first. Label shades and note which are for veins, edges, and highlights. This helps when stitching around a cluster of herbs or a rosemary sprig. A touch of cool green can balance warm greens, producing a natural look. If unsure, test a tiny leaf in several greens side by side to see what reads best on your fabric.
You choose green tones and accent colors that work
Select greens that work well together. Start with a mid-tone green for most work, layering lighter greens for highlights and darker greens for shadows. A touch of olive or moss deepens the depth. Keep accents quiet: pale lime or chartreuse can lift the overall look without stealing attention from the leaves.
Think about light and shading. Stitch veins in a slightly darker shade than the leaf body, then blend edges with a lighter tone. If the fabric has texture, let it contribute to shading by catching light differently. If you’re new to greens, buy small skeins in three to five tones and test them on scrap fabric. Label swatches to avoid mix-ups later.
You mix cotton and silk floss for depth and sheen
Mixing fibers changes the feel of your embroidery. Cotton floss provides matte, solid coverage for leaves and stems, while silk adds a soft sheen that catches light. Use cotton for base shapes and veins, reserve silk for selective highlights. Balance the texture: start with cotton, then add a fine silk along edges or central veins. A little silk gives a sense of translucency without overwhelming the piece.
Test on natural fabrics like linen first, as silk will settle nicely there. On evenweave fabrics, the contrast may be more pronounced, so test a small area. The goal is depth and light, not a disco ball of color. You’ll love how the mix makes each leaf feel tactile and lush.
Label and store floss by value
Label floss by value for quick access. Group greens from darkest to lightest and keep accents nearby. A labeled drawer or card system helps you see the tonal ladder at a glance, reducing mid-project hunting.
Storing by value aids shading planning before you begin. With a clear gradient, you’ll design leaves with more intention, reduce wasted thread, and keep your workspace calm. A tidy system helps you stitch faster and with more confidence. Labeling also helps if you teach a class or share your project—others can follow your approach and your embroidery feels polished.
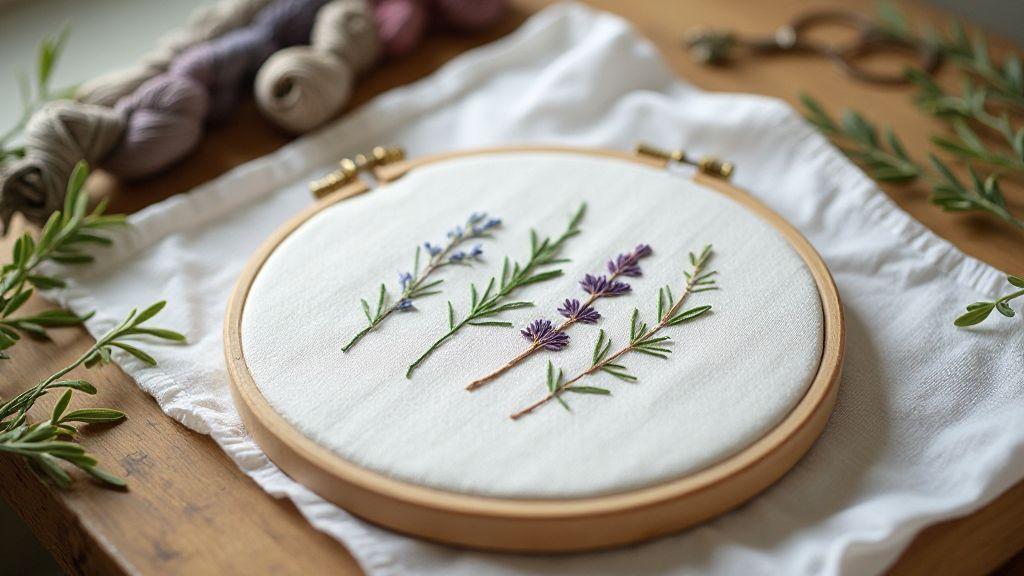
Design herb sprig hoop art and embroidered herb sprigs patterns
Create a fresh botanical vibe by weaving herb sprigs into hoop art. Start simple with a few sprigs of mint, rosemary, and thyme arranged in a gentle arc. Use a calm color palette—soft greens, dusty blues, and olive—to keep the piece soothing and cohesive. Picture the hoop hanging in a kitchen, inviting compliments while you cook.
Transfer ideas to fabric with a clean layout. Draw light pencil marks, then place sprigs so they flow with the hoop. Use different stitches to add texture: light backstitch for stems, satin stitch for leaf bodies, and French knots for tiny buds. If spacing feels tricky, lay out paper templates first to keep the design balanced.
As you stitch, step back often to check balance. Sprigs should be evenly weighted across the hoop, not crowded on one side. If a stem looks too long, shorten or bend the curve slightly to mimic natural growth. Secure threads neatly at the back so nothing pulls loose over time. The finished hoop should feel calm and organic, like a tiny garden you can carry.
You arrange and stitch plant sprigs for balanced hoop art
Plan the layout by laying out the sprigs to achieve natural balance. Place a main stem near the center and add smaller sprigs on either side to create a gentle arc guiding the viewer’s eye. Use light pencil marks that won’t show through the stitches. Focus on texture and variety: rotate stitches on each sprig (backstitch for stems, split stitch for slim branches, satin stitch for leaves). If one sprig feels crowded, adjust its length or position to keep the flow balanced. A few small tweaks can make the whole piece feel intentional.
Before finishing, step back and view the hoop from several feet away. If one side reads heavier, adjust stitch density or add a small leaf on the opposite side to restore balance. The aim is a calm, natural arrangement with room to breathe—an unforced symmetry earned through thoughtful placement.
Transfer embroidered herb sprigs patterns to fabric cleanly
Place your fabric flat and align the hoop to see the design clearly. Trace sprigs with a washable fabric pen, keeping lines light and continuous. You’ll still make small adjustments as you work, which gives the final piece a handmade touch.
Stitch with the fabric secured tightly to avoid puckering. Work from the center outward to keep tension even. If you make a mistake, gently lift the stitch and re-stitch to keep the fabric clean and avoid fraying at leaf edges. Using a high-contrast thread for the initial outline can help you spot errors early and maintain precision.
As you finish each sprig, recheck alignment with your original trace. Minor shifts happen, but a quick readjustment before binding off keeps patterns clean. Gently press from the back after finishing to flatten raised stitches, then remove the fabric from the hoop to admire your clean transfer and steady lines.
Block, trim, and frame your finished hoop
Block your hoop art to set its shape and remove wrinkles. Lightly wet the fabric and pin the hoop to a cork board or clean towel until dry. Trim loose threads close to the back and ensure the fabric sits flat within the hoop. A neat back makes your piece look professional and ready to hang.
Botanical Embroidery: How to Stitch Herbs and Plant Sprigs is a practical, creative guide for turning herbs and plant sprigs into stitched art. With careful planning, patient practice, and a thoughtful palette, you can create living-looking embroidery that feels fresh, natural, and refined.

I’m Sophie Caldwell, the author behind granaboom.com, and I believe hand embroidery is one of the simplest, most relaxing ways to create something beautiful with your own hands. I started this blog to help beginners learn hand embroidery without feeling overwhelmed by complicated instructions or “perfect” results.
Here you’ll find beginner-friendly guides to decorative embroidery stitches, along with clear step-by-step practice ideas and patterns you can use to build confidence. My focus is on making the learning process easy: simple explanations, helpful stitch combinations, and small projects that look polished even when you’re just starting out.
Welcome to granaboom.com—grab your hoop, choose a few colors, and let’s stitch one line at a time.