How to Embroider a Classic Rose: 3 Different Methods Compared
Rose embroidery methods compared
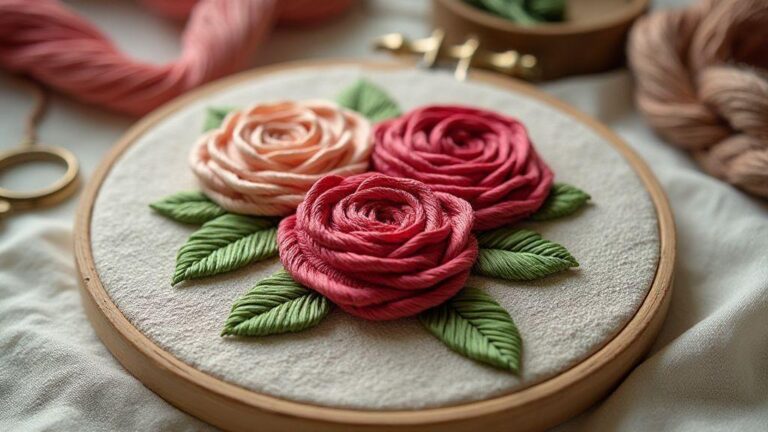
You’ll love comparing how the rose can be stitched. Each method changes the final bloom’s look and the time it takes. One method may fit your timeline, while another suits your hand’s comfort. Side by side, blooms gain personality—from bold satin to airy outlines or textured fills. The aim is to match your project to your skills and mood, so you finish with a rose you’re proud of.
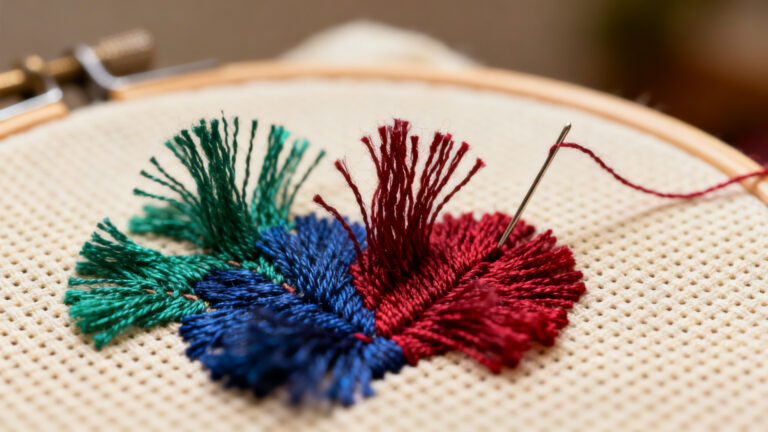
Texture and technique shape the result. Satin stitches give a smooth, shiny finish; stem stitches create slim, graceful lines like real vines; fly stitches suggest delicate, misty petals. Fabric, thread weight, and hoop tension influence how these details read, so pick a method that fits how you like to work and how much time you want to invest.
Speed, control, and mood matter too. Quick methods suit scraps or practice pieces; more deliberate stitches yield depth and a museum-quality bloom. Some techniques require planning—laying out petals before stitching—while others are forgiving and flow with the thread. With practice, you’ll move between methods as you would choose colors in a garden.
A method’s mood should match the project. A tight, glossy rose suits modern pieces; a looser, stitched rose adds rustic charm to vintage looks. You can even mix styles on one piece for a dynamic bouquet. The key is to pick a method that conveys the feel you want, not just the fastest route to finish.
How to embroider a classic rose: quick method guide
If you want a simple, bold rose fast, this quick method guide is for you. Start with a small center of satin stitches, then add petals with short, overlapping strokes radiating outward. Keep stitch length even for a balanced bloom. Use a single color with a subtle outer-shade to let the rose pop without overpowering your project.
Place a few leaves with simple stem stitches to frame the rose. Let each stitch breathe for a natural look. If you’re new, practice on scrap fabric first to gain confidence before stitching on the real piece. This method delivers a clean, confident line and bright finish.
Rose embroidery tutorial: three methods at a glance
Here’s a quick apples-to-apples view of three popular ways to sew a rose. Satin stitch rose for smooth, solid petals and gloss; back-stitch outline rose for a crisp silhouette ideal on bold prints; textured long-and-short rose for soft depth and realism, though it takes a bit longer.
Each method has a rhythm. Satin stitches require neat rows and even tension. Back-stitch outlines reward clean lines and contrast. Long-and-short texture roses demand patience but give eyes-catching depth. You can combine methods on one piece for a strong center and lighter outer petals.
Choose a method by time and skill
If you’re short on time, satin stitch rose offers quick, bold results. If you’re new to embroidery, start with the back-stitch outline to build control without heavy filling. If you love texture and have more time, try long-and-short shading. Pick the method that fits your current skill and enjoyment.
Tools and materials for a classic rose
You’ll need a sharp needle, good light, and a comfortable hoop. Choose a needle size that suits your fabric; a 7–9 embroidery needle works well for cotton or linen. Have embroidery floss in natural rose tones and a few greens for the leaves. Keep scissors handy for clean snips, and use a hydrated fabric marker or wash-away pen to transfer the design. A thread organizer or small containers help colors stay tidy and easy to grab.
Having the right tools makes a quiet difference. A well-lit workspace reduces eye strain, and a sturdy hoop keeps fabric flat for even stitching. You don’t need fancy gear—just reliable basics. If your grip tires, switch to an ergonomic needle grip or take short breaks. The goal is smooth stitches, not perfection on the first try.
When gathering materials, choose colors that feel natural to you. A classic rose uses warm pinks or reds with subtle shading, plus muted greens for the leaves. Layer threads in thin, slow passes to bring the rose to life. Don’t rush; best work grows with time and light threading, not heavy pulls or crowded stitches.
Classic rose embroidery techniques to learn
Satin stitch fills petals for a smooth, glossy surface; practice long, even passes that skim the fabric, keeping stitches parallel and close. Add a touch of split stitch for delicate veining. French knots give tiny centers that look like pollen specks. Maintain even tension so the rose sits softly on the fabric.
Master stem stitch for the stems to create a gentle, continuous line. For shading, use a light blend of two threads, darker on the edge and lighter toward the center. Try lazy daisies or small fly stitches to imply tiny petals tucked behind the core. Test threads on a scrap first to see how colors blend and how the fabric accepts each stitch. Keep linen taut but not overly stretched for a soft, dimensional look.
Best stitch for embroidered rose by fabric
On light cotton, satin stitch yields a clean, velvety surface. On silk or satin, it glides smoothly for a lush rose. On rougher linen, add edge texture with split stitches to prevent gaps. For felt or heavy wool, use tighter stitches and shorter lengths to avoid bulk. On denim, combine satin petals with stem outlines to keep the design from riding up. Always test a small swatch to confirm behavior with your fabric.
Your choice shapes the final look: vintage roses benefit from longer satin stitches with soft shading; modern roses benefit from crisp edges and defined outlines. Your fabric guides your technique; your eye guides the result. Try a few scraps until you find the approach that feels right for your project.
Prep your hoop and transfer the design
Mount fabric in the hoop with grain running straight and without slack. Lightly trace the design with a wash-away marker, transfer paper, or water-soluble pen. Secure the hoop and test-stitch a tiny dot to ensure lines read clearly. Check tension—fabric should be tight enough for clean stitches but not so tight it puckers. Start with the outer petals and work inward to control shading and proportion. Remove guide marks with a damp cloth when you’re done.
Bullion knot rose tutorial
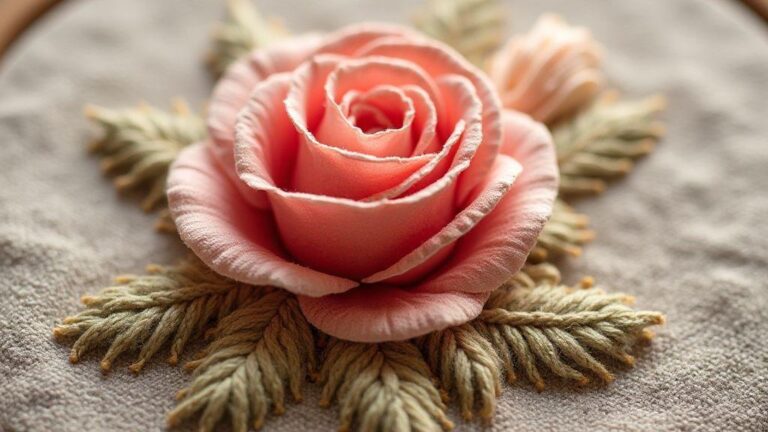
You’ll learn a bullion knot rose to create layered, curved petals and a gentle sheen from metallic or silk threads. Begin with a small center and spiral outward. For a bold look, use a thicker thread; for a delicate finish, choose a finer floss. Your bullion knot rose becomes a tiny sculpture you can wear on fabric.
Set up your fabric and hoop to keep things still. Anchor a tiny knot at the base, then wrap the thread around the needle to form each bullion knot. Keep wraps neat and consistent, guiding tension with your non-dominant hand. Build a spiral by placing each knot beside the last. If a knot twists, adjust your grip and rewrap with steady tension.
Finish by flattening the knots lightly from the back and securing thread ends behind the fabric. With practice, bullion knots become more uniform, giving a graceful, dimensional rose.
Bullion knot basics and step order
Anchor a short thread, wrap around the needle to form the bullion knot, and repeat in a steady rhythm. Plan the center first, then radiate outward in layers, letting each knot sit beside the last to form a spiral.
Petal count and thread choices for bullion knots
Decide petal count based on desired size (4–6 for a compact bloom, more for fullness). Silk or metallic threads create a shiny look; cotton floss yields a softer finish. Thicker threads make petals more pronounced; thinner threads yield wispy petals. Test colors and weights on scraps before committing.
Keep tension even when wrapping bullion knots
Hold the wrap snug but not tight; guide with your non-dominant hand. If wraps collapse, ease off and realign. Consistent tension ensures petals lay nicely and the rose reads cohesive. Practice knots on scrap fabric to dial in your touch.
Woven rose stitch method
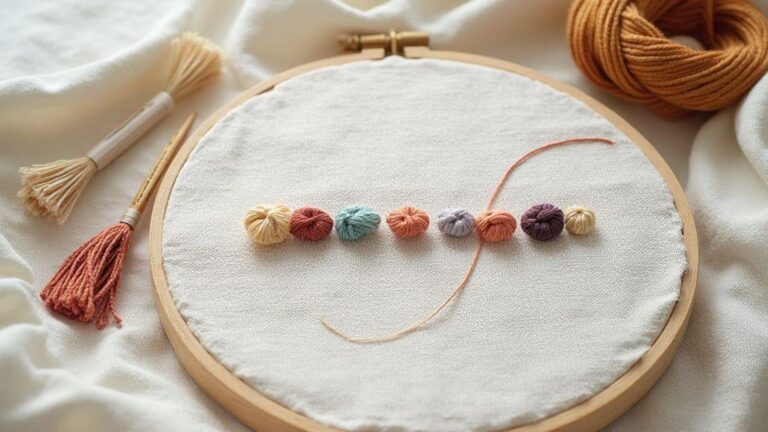
The woven rose stitch adds a delicate, dimensional bloom with tiny thread petals spiraling toward a center. Keep your thread tension consistent and stitches small enough to stay neat but large enough to show the weave. The result is a soft, vintage charm on your fabric.
Begin with a small center (often a French knot), then weave tiny arcs around it in a controlled spiral. Use a fine needle and thread for a delicate look. For extra shine, a single strand of silk or rayon adds subtle luster. Practice on scraps to dial in spacing and tension before the final piece.
Woven rose stitch step-by-step
Start with a tiny center, then lay down a stitch and wrap to form the first petal. Each new layer weaves under and over adjacent stitches to build a spiral. Maintain even tension as you work, rotate the fabric for comfort, and finish with a backstitch to secure. If crowding occurs, tighten the arc and widen the spacing on the next pass. For a fluffy look, use longer arcs and a looser weave. You can switch to satin for outer petals to add sheen. Practice makes progress; your first woven rose will be gorgeous and unique.
Woven rose vs lazy daisy rose stitch
Woven roses sit closer to the fabric with a tighter, layered look, delivering depth and a vintage feel. Lazy daisy roses are faster, with more open space and a flatter profile—great for quick pieces or larger motifs. Test both on scraps to see which matches your design and tempo.
Center finishing tips for woven roses
Finish the center with a tight French knot or seed stitch to anchor spokes. Add a few tiny backstitches near the center to mimic natural texture. For durability, seal the back with a light fabric glue and press from the back. Woven roses stay neat and ready to shine on any project.
Ribbon rose embroidery tutorial
Ribbon roses bring elegance with silk texture and the gentle bend of each petal. This beginner-friendly guide focuses on basics, ribbon choice, and steps that produce a tidy, durable rose.
A good ribbon rose relies on consistency: smooth petals, sturdier stems, and a balanced overall look. Whether embellishing a hair clip, headband, or decorative hoop, these techniques translate to other floral stitches. Focus on ribbon feel, stitch rhythm, and anchor points.
Aim for a flat rose with naturally curling petals and a neat finish. Keep threads snug, stitches evenly spaced, and ribbon edges clean. Practice to build muscle memory for faster, more precise roses.
Ribbon rose basics and ribbon choice
Choose satin or sheer ribbon that holds shape but isn’t too stiff. A narrow width (3/8″ to 1/2″) yields delicate petals; a wider ribbon gives a bolder rose. The color should complement your project. Inspect the ribbon for a smooth surface with no frays. A fine sharp needle or needle tweezer helps you catch the ribbon without damage, and thread should blend with the ribbon color for seamless stitching.
With the right ribbon and steady rhythm, your rose grows from a flat knot into a blooming circle of petals.
Beginner-friendly rose embroidery steps with ribbon
Start with a small center bead or knot to anchor the first loop. Keep the center tight and centered. Form a small petal by wrapping the ribbon around the center and securing it. Make each base stitch in a circle to keep petals uniform. Add layers, each layer slightly wider than the last, letting the ribbon curl toward the center to mimic a real bloom. Tie off when satisfied with the petal count and shape. If irregularities appear, gently adjust by folding or pinching the edges to even the curve. Practice to determine which ribbon widths and petal counts yield your preferred style.
Anchor and trim ribbon without fraying
Anchor the ribbon with tight stitches at the base, keeping them small and centered so they don’t show on the petals. Trim ends close to the final stitch. A dab of clear nail polish or fray check on cut ends helps prevent fraying, especially on synthetic ribbons. Cut ends at a slight angle to reduce exposure. For multiple layers, ensure anchors stay secure under the bottom petals. A secure anchor helps the rose hold its shape through wear or washing.
Troubleshooting, finishing, and care
Catching mistakes early and finishing with a protected edge yields the best look. Check hoop tension and needle tension; if stitches are uneven, adjust top thread tension and rework in small motions. Keep a light touch to avoid puckering. Test on scrap fabric first. Consistency in stitch length and direction helps the rose sit flat.
Finish by trimming threads close to the knot and securing the end with a small backstitch. A touch of fabric glue on the back can keep layers from shifting, but avoid bulk on delicate fabrics. If edges fray, finish with a clean overcast or zigzag stitch before starting the rose for a smooth foundation.
Care is simple: hand wash in cool water with mild detergent, lay flat to dry away from direct heat, and press from the back with a low heat setting using a pressing cloth. Store embroidered roses flat or rolled in tissue to prevent creasing. If sewing onto a garment later, finish the garment edges first so the rose rests on a smooth surface.
Fix common mistakes like puckering or loose knots
Puckering arises from fabric pull or off tension. Loosen hoop tension slightly and re-stitch with lighter passes. Use shorter stitches and keep fabric taut but not stretched. If puckering persists, re-hoop with a larger hoop or switch to longer stitch lengths in that area.
Loose knots mean the tail isn’t secured. Stitch a few short locks to anchor ends, then tuck the tail under several back stitches before trimming. If a knot slips, add a tiny dab of fabric glue behind the knot on the back to keep it secure without stiffness. Practice on scraps to build confidence.
Washing, pressing, and storage for embroidered roses
Wash gently with mild detergent in cool water; avoid aggressive scrubbing. Rinse well and press while slightly damp to set the shape. Turn the fabric inside out if the rose sits on the garment exterior, and place in a delicate bag if machine washing is necessary. Use a low heat setting and a pressing cloth to protect stitches. Store flat or rolled in acid-free tissue to prevent creasing. If you plan to sew the rose onto a garment later, finish the garment edges first for a smooth resting surface.
How to Embroider a Classic Rose: 3 Different Methods Compared — Final thought
Whether you choose satin stitch for a lush, modern bloom, back-stitch outlines for bold silhouettes, or long-and-short texture for depth, this guide helps you compare methods and craft a classic rose that suits your fabric, time, and style. With practice, you’ll master each method and be ready to create stunning rose embroidery on any project.

I’m Sophie Caldwell, the author behind granaboom.com, and I believe hand embroidery is one of the simplest, most relaxing ways to create something beautiful with your own hands. I started this blog to help beginners learn hand embroidery without feeling overwhelmed by complicated instructions or “perfect” results.
Here you’ll find beginner-friendly guides to decorative embroidery stitches, along with clear step-by-step practice ideas and patterns you can use to build confidence. My focus is on making the learning process easy: simple explanations, helpful stitch combinations, and small projects that look polished even when you’re just starting out.
Welcome to granaboom.com—grab your hoop, choose a few colors, and let’s stitch one line at a time.