How to Do Hardanger Embroidery: Your First Step-by-Step Project
Plan Your First Hardanger Project
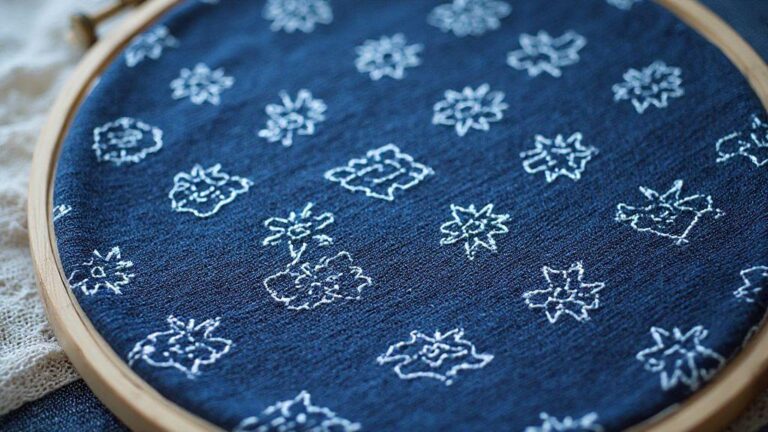
You’re about to dive into a beautiful tradition, and planning is where the magic starts. The first step is to pick a beginner pattern you genuinely love, because that spark will keep you going when threads tangle or beads refuse to behave. Look for simple shapes—flowers, small motifs, or borders with clean lines. When you see a design that makes you smile, you’ll stay motivated through the tiny stitches and careful counting.
Set simple goals for time and size, and you’ll stay steady without burning out. Break your project into tiny chunks: one small motif per session or 15 minutes of stitching, for example. Write those goals down and check them off as you go. If a week is busy, you won’t feel overwhelmed because you’ve given yourself tiny targets. This approach also helps you notice progress, which is half the fun of learning a new embroidery style.
Choose a beginner Hardanger project kit that fits your pace. A good kit includes clear instructions, the right fabric count, and all the tools you’ll need, so you don’t waste time searching for the little things. If you’re unsure, pick a kit with a simple pattern and labeled materials. That way you can focus on learning the stitches instead of hunting for threads or beads.
Pick a beginner hardanger pattern you love
You’ll learn faster when you pick a design you genuinely like. Look for patterns with clear, large shapes and simple weaving spaces. A pattern that clicks with your taste—whether it’s a delicate flower, a geometric border, or a tiny scene—will feel less like work and more like a small project you’re excited to finish. If you see a motif you’ve admired in other crafts, that connection can push you to try a new stitch or technique with confidence. Don’t worry about perfection in the first go; the joy is in trying.
Choose patterns that show the main features of Hardanger without overloading you with complex cutouts. You’ll build skills step by step, and the satisfaction of finishing a simple piece will give you the confidence to tackle more intricate designs later. If you’re unsure, start with a pattern that includes labeled sections and a clear color guide. That clarity makes the first stitches feel natural, not mysterious.
Set simple goals for time and size
Your plan works best with tiny, achievable goals. For example, aim to complete one motif in a week or finish a small border in one sitting. Keeping goals small helps you stay consistent, even when life gets busy. Track your progress in a notebook or on your phone, so you can see your improvement over time. If a session doesn’t go as planned, adjust your goal rather than skipping the project entirely—maybe switch to tidy up the edges or count stitches more carefully next time.
Balance speed with accuracy. In Hardanger, counting and neat finishing matter as much as speed. Set a timer for short, focused practice—say 20 minutes—and then pause to line up threads and check your tension. That rhythm keeps your stitches neat and your motivation high. Remember, every little bit you complete adds up to a finished piece you’ll be proud of.
Choose a beginner hardanger project kit
A starter kit can be the difference between frustration and flow. Look for kits that include a clearly explained guide, pre-cut fabric, and labeled threads. The kit should also list the tools you’ll need so you’re not left hunting for a needle or a correct-sized hoop. If you’re new to Hardanger, a kit with a simple pattern and generous photo steps helps you see how the stitches come together. That visual aid makes the learning curve softer and the first results more satisfying.
If you want flexibility, pick a kit that lets you swap colors or adjust the pattern a bit. The sense of control—being able to tweak a design to your taste—keeps you engaged. Also check the fabric count; a mid-range count is usually forgiving for beginners. A well-mitted kit saves you time and reduces frustration, which means you’ll stay focused on learning the technique rather than hunting for missing pieces.
Gather Tools and Materials
You’ll feel confident starting your embroidery journey when you gather the right tools. A well-chosen set keeps mistakes small and your stitches steady, especially when you’re exploring different traditions and styles. Think of your tools as your trusted companions on this colorful path—they should feel good in your hands and be easy to replace if needed. Your mission is to assemble what you need, then you can focus on the craft itself.
Your first step is to understand what you’ll regularly use. You’ll want a tidy space where you can lay out threads, fabrics, and needles like a tiny, organized shop. When you have a dedicated spot, you’re less likely to skip steps or rush, which helps your results look neat and even. A simple setup makes it easier to switch between styles as you study embroidery from around the world, from counted thread to more freehand traditions.
As you box or bag your gear, label things if it helps you remember why you chose them. That habit saves you time later and keeps your progress steady. When you’ve got your tools ready, you’ll be ready to dive into the specifics of materials and techniques without delays or confusion.
Choose fabric and thread for counted thread embroidery hardanger
Your fabric choice sets the tone for your Hardanger work. You’ll typically pick a tightly woven fabric like evenweave or Aida with a clean, even grid. The key is a fabric that helps your counted stitches stay precise and neat, so your design remains crisp as you work through the pattern. You’ll notice that the fabric holes guide your thread paths, keeping the counted stitches uniform.
Thread selection matters just as much. You’ll often use a stranded cotton or perle cotton that sits neatly in the weave without fraying too easily. A strong, smooth thread helps you keep the tension even across the many tiny stitches that form the open areas characteristic of Hardanger. You’ll find that lighter colors can make the design pop against the fabric, while darker hues add depth. Choosing the right color balance will make your piece come alive, especially when you mimic traditional patterns from different cultures.
To make your life easier, test a small sample on the back of your fabric. You’ll see how the thread sits, how the tension feels, and how the stitch looks in your chosen light. This quick test saves you from surprises once you start your main project. Remember to keep a few color options handy so you can swap if the palette isn’t quite right.
Select needles, sharp scissors, and a hoop
Needles are your direct link to precise stitches. For counted thread and Hardanger, you’ll want fine, sharp needles that pass cleanly through fabric without creating snag marks. A comfortable needle that glides smoothly helps you keep your lines exact and your hands steady as you follow the counted grid. You’ll notice a big difference when your needle feels right in your fingers and moves with minimal resistance.
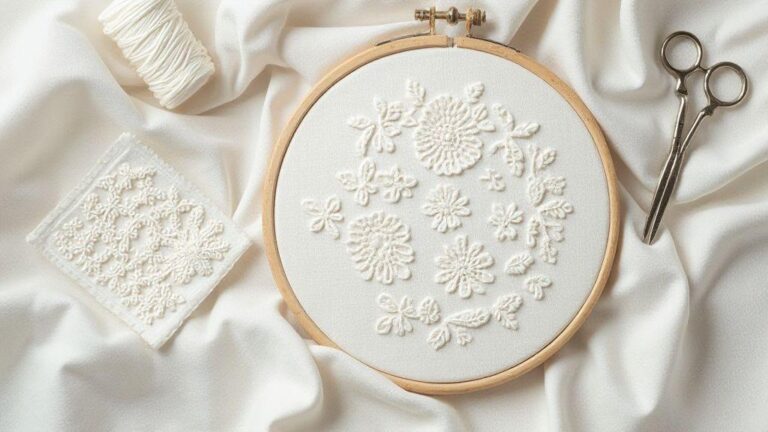
Sharp scissors are essential for clean cuts and quick snips. You’ll want a small, sharp pair that you can control easily, so you don’t accidentally nick the fabric or fray threads. A well-cut edge gives you a neat starting point for each stitch, which matters in a counted stitch project where precision adds up. Having a dedicated pair for embroidery keeps mess and dull blades out of your project bag.
A hoop keeps your fabric taut and ready. You’ll likely use a stable size that fits your pattern and your workspace. The hoop helps you maintain even tension, so your stitches stay consistent across the design. If you’re new to Hardanger, you’ll appreciate how a good hoop reduces crinkling and helps you see your grid clearly as you work.
Stock the essential tools before you start
Before you begin, gather these essentials: a sharp pair of embroidery scissors, a pointing or fanciful needle threader if you use one, a snug hoop, and a tidy tray for threads. You’ll save time when you don’t have to pause to search for a misplaced tool. Keep a small notebook or erasable marker to note stitch counts or color changes as you go. This simple habit prevents mistakes in complex counted designs.
Master Kloster Blocks and Basic Stitches
You’ll start with the basics, and that’s what makes the rest easier. Mastering kloster blocks gives your embroidery a bold, decorative face, and it also teaches your hands to move with confidence. When you place the stitches carefully, your fabric breathes and your thread looks intentional. Think of kloster blocks as the frame for your design, holding your more intricate stitches in place and guiding your eye. As you practice, you’ll notice how even spacing and clean edges make your whole piece feel polished, not rushed. You’ll feel the rhythm in your fingers as you work, and that rhythm is the secret to fast, steady progress.
Next, you’ll want to lock in the basic stitches that form the backbone of many embroidery projects. Satin stitch gives you smooth, shiny fills, while long and short stitches add gentle shading. Woven bars create a sturdy, textured line that can mimic vines or stems. These techniques are versatile; with a bit of practice, you can use them in all kinds of designs. Your goal is to let each stitch sit neatly on the fabric, with no gaps or pull. When you get one stitch right, it makes every other stitch easier to place.
Finally, consolidate your skills by combining kloster blocks, satin stitches, and woven bars in simple patterns. Your confidence will grow as you see how a few well-placed blocks can anchor a whole motif. Keep your tension even and your strokes steady, and your pieces will look crisp rather than hurried. Remember, the real magic is consistency, not speed. With each session, you’ll stitch more cleanly and with more control, and your projects will start to feel truly you.
Learn kloster blocks hardanger one block at a time
You’ll approach kloster blocks in bite-size steps. Start with one clean block, then add a second and a third as you feel comfortable. The key is even spacing and precise placement. When you keep the edges crisp, your design reads clearly and looks professional, even on simple fabrics. You’ll discover that the blocks don’t just look pretty—they guide the flow of the design. Your hands will learn the rhythm of each block, and your brain will start predicting how they’ll line up with neighboring stitches. This one-block-at-a-time method keeps frustration low and momentum high.
As you practice, you’ll notice how the density of the blocks affects your overall look. Too many blocks can feel busy; too few can look sparse. You’ll find a balance that matches your style and the fabric you’re using. If you make a misplaced block, don’t stress. You can lift it out and replace it with a correct one, and your second attempt will feel smoother. The goal is to train your eye to see the spaces between stitches as part of the pattern, not as a mistake waiting to happen. Your confidence grows the moment you complete a single flawless kloster block.
Practice woven bars and satin stitch with a hardanger stitches guide
A dedicated practice session with woven bars and satin stitches really pays off. Start with a straight, even bar, then add a few crossbars to create depth. The woven effect is all about tension and alignment; keep your threads calm and your fabric flat. Satin stitches shine when you fill shapes with smooth, uninterrupted lines. Take your time to line up each stitch so the surface looks even from edge to edge. A simple guide helps you track your progress and avoid drifting into uneven fills. You’ll see your pieces come together faster as your hands get used to the rhythm and the feel of the fabric underneath.
Using a hardanger stitches guide keeps you honest. It acts like a map in your workspace, reminding you where to place each stitch and how long to make it. If you slip, you can compare your work to the guide, adjust tension, and correct course. With repetition, your satin fills become almost automatic, and the woven bars stay crisp. This steady practice builds a foundation you can rely on for larger projects, letting you move on without fear.
Drill the core stitches until they are steady
Keep drilling the core stitches until your movements feel natural and your stitches sit flat. Repetition is your friend here; it trains your eyes to spot wonky edges and your hands to correct them without thinking through every step. When you drill, you’re not aiming for speed—you’re aiming for consistency. With a steady pace, your embroidery will start to look balanced and professional, and you’ll enjoy the process more each time you sit down to stitch.
Learn Cutting and Filling Techniques
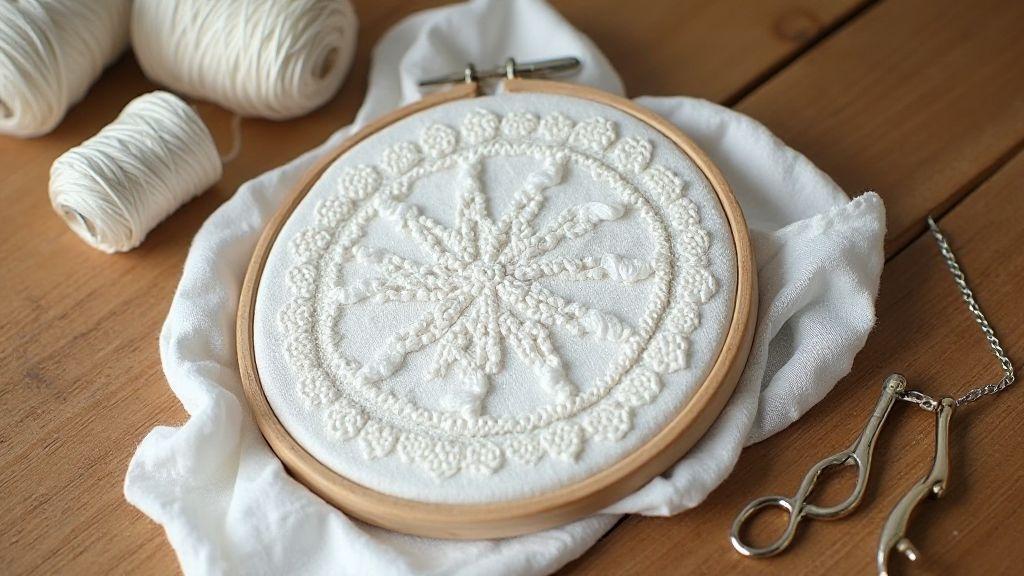
Cutting and filling are the heart of Hardanger embroidery. You’ll learn to cut clean shapes, then fill them with precise stitches that create shimmering holes. Think of your fabric as a canvas and your scissors as tiny painters. With steady hands and focus, you’ll transform simple cloth into delicate lace-like patterns. You’ll notice the small decisions matter: how wide you cut, how you anchor threads, and how you pull threads taut but not strained. Your goal is consistency and elegance, not speed. When you steady yourself and plan your cuts, you’ll see your design come to life in a way that feels almost magical.
The core idea is balance. You need clean, even cuts and neat fillings that read as one design. Start with a light touch and practice on scrap fabric until you’re confident. Pay attention to thread tension; too tight and your holes pucker, too loose and the design sags. You’ll also learn to plan where each cut will go, so your patterns line up with your stitches. As you gain experience, you’ll recognize how small adjustments in cutting angles or stitch density change the overall look. Your confidence grows with each completed motif, and your projects start to feel more like a conversation with the fabric.
Practice turns technique into habit. Keep your scissors sharp and your surface steady. You’ll see that the best results come from slow, mindful cuts and deliberate fillings. If a hole isn’t perfect, you correct it in the next row rather than forcing it. Your goal is symmetry, clean lines, and a restful rhythm across the fabric. With each piece, you’ll build your own sense of how to do cutting and filling in a way that suits your style, while honoring the traditional look you’re aiming for.
Follow safe hardanger cutting techniques step by step
Begin by choosing a design and preparing your fabric. Mark your cut lines lightly so you don’t overcut. Keep your fabric taut in a hoop or frame to prevent shifting. Use sharp, small scissors and cut slowly, stopping at the base thread to avoid tearing. This careful approach protects your work from mistakes that are hard to fix later.
Next, reinforce the edges around your cut with a row of small stitches. This prevents fraying and keeps the hole neat. Maintain even spacing between stitches so the edge looks uniform. If you observe irregular gaps, pause and readjust your tension before continuing. Your goal is a clean outline that guides your fillings and ensures the holes stay perfectly shaped.
Finally, test the balance of your cut with a light hand. If the fabric shows puckering, loosen tension around the area and rework the edge. You want a crisp, stable hole that remains true as you add the next rows of stitches. With practice, you’ll cut with confidence and your work will have that classic Hardanger crispness.
Add fillings and needleweaving for neat holes
Fillings fill the holes with decorative texture. Use light, even stitches to create a smooth surface inside each cut. Needleweaving adds a lattice look that strengthens the hole and gives it a finished feel. Keep your stitches small and even so the hole stays neat and consistent across the design.
As you weave, pay attention to how the threads cross. Avoid crowding the same area with too many stitches; this can create bumps. Instead, distribute the work evenly to maintain a flat, elegant surface. The result is a delicate balance between openness and structure, which is the hallmark of traditional Hardanger fillings.
With each filled hole, your project gains depth. The subtle interplay between empty space and stitched texture catches light in a gentle way, which is exactly what you’re aiming for. Your stitches should look intentional and calm, not rushed. When you finish, your holes feel like tiny windows into the fabric.
Protect your fabric and fingers when you cut
Always place a protective mat under your fabric and work with a steady hand. Use a thimble or finger guard to shield your skin as you guide the scissors near the fabric edge. A firm, quiet stance helps you control each cut, especially around tight curves. If the fabric starts to lift, pause, realign, and press down gently to settle it back in place.
Choose sharp scissors and keep them clean. Dull blades make uneven cuts and rough edges. A clean cut means a tidy hole and a better overall look. By guarding your fabric and your fingers, you ensure your hard work stays intact and easy to finish. Safety and precision go hand in hand here, and your results will show it.
Follow a Step-by-Step Beginner Project
Embarking on your first embroidery journey can feel big, but a simple, clear project makes it doable. You’ll learn by doing, and each small win will boost your confidence. In this step-by-step beginner project, you’ll develop steady hands, a patient eye, and a folder of handy techniques you can reuse on future pieces. Let’s break it into easy bites you can handle tonight.
When you start, pick a small, simple design and a soft fabric. Use a light thread that’s easy to see and a needle that glides without snagging. Your goal is consistency: even stitches, even tension, and a calm mind. If you get stuck, pause, breathe, and check that your fabric isn’t puckered. Small, steady progress beats rushing and frustration.
As you practice, you’ll notice how the rhythm feels. You might feel your shoulders ease, your eyes slow down, and your mind settle. That’s the magic of a focused beginner project: it teaches patience while you create something you can be proud of. Your finished piece will prove you can learn and keep going.
Read patterns and count threads for hardanger step by step
Reading a Hardanger pattern starts with choosing the right fabric and threads. You’ll notice the pattern shows where to cut and where to needle lace. Count threads in your fabric so you know exactly where to place each stitch. This makes the design precise and neat. If you see a block with 4 threads, count to four before placing your first stitch. Your accuracy today saves you trouble later.
Next, mark the fabric lightly so you don’t overscore. Use an erasable pencil or a water-soluble pen and test on a scrap first. Read the symbols in the pattern carefully—the paper will tell you which stitches go where and how many threads to leave between them. If a line says 4 threads apart, you’ll lay the stitches with that exact space for a clean, airy look.
Finally, check your tension before you start each section. You want stitches that sit flat and don’t pull the fabric. If your threads twirl or your fabric puckers, loosen a bit and read the pattern again. Small adjustments now keep the final work tidy and professional-looking. Remember, clarity in reading patterns saves you time and frustration.
Use a hardanger embroidery tutorial to guide each stage
A good Hardanger tutorial walks you through each stage with clear pictures or videos. Use it as your map. Watch the steps once, then again as you work, pausing to try each move. The tutorial acts like a patient teacher who explains where to start and how to progress.
When you reach a tricky part, replay that segment. Tutorials often highlight common mistakes—like skipping the count or misplacing a motif. Pay attention to those tips and pause to fix your setup before you move forward. Having a guided plan makes you less likely to stumble and more likely to finish with confidence.
As you complete each stage, compare your work to the tutorial’s sample. Are your stitches even? Are the gaps the right size? Use the tutorial as a reference point, not a strict judge. Your own piece will look unique, and that’s a good thing. The goal is steady progress, not perfection on the first try.
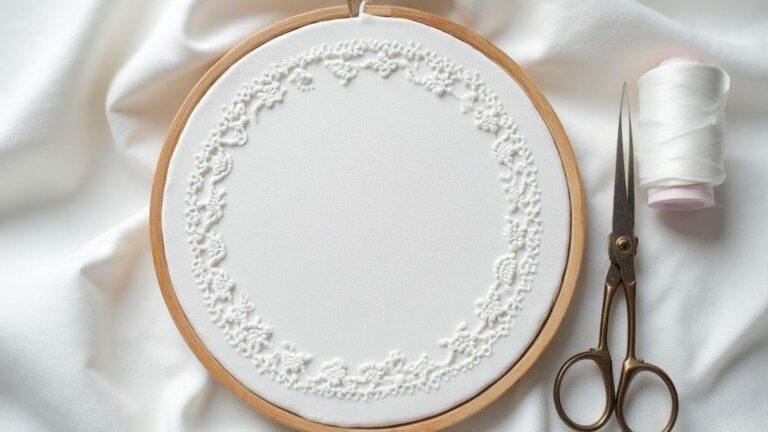
Finish edges, wash, and press gently
Finish edges with a neat, secure backstitch so the fabric won’t fray. Then wash your piece gently in cool water with a mild soap to remove oils and any marks. Rinse well and roll it in a towel to remove excess water. Lay it flat to dry away from direct heat.
Press your work gently. Use a low heat setting and a pressing cloth so you don’t crush the stitches. Iron only on the back, or with the piece face down on a soft towel. A light, careful touch will set the stitches and give your Hardanger an even, crisp look. You’ll love how fresh and professional it feels when you’re done.
Troubleshoot and Grow Your Skills
You’re here to grow, and that starts with fixing the little things that trip you up. When your fabric slips, your stitches drift, or your patterns don’t line up, it’s easy to blame yourself. But the right fixes let you move forward with confidence. Start by checking your fabric grip and hoop tension; a gentle, even pull keeps kloster blocks straight and your work flat. If you notice wobble, re-straighten the thread path and re-anchor your starting knot. Consistency is a habit you build, not a snap of inspiration. Practice on scrap cloth first, then apply what you learn to your project. You’ll see how small adjustments add up to clean, even embroidery.
Next, you’ll want to map your progress and spot weak spots early. Keep a simple log: note the stitch type, fabric, needle size, and thread color each time you practice. When a block goes uneven, ask yourself where the tension shifted or where you changed the stitch length. Patterns aren’t just guidelines; they’re a system you can tune. If your kloster blocks go out of alignment, re-measure and re-mark the grid before your next pass. By tracking patterns and mistakes, you’ll cut the time you spend debugging and gain the nerve to test bolder designs. Your skill grows as your confidence does.
Finally, set realistic goals and celebrate tiny wins. You’ll feel progress when a stubborn edge finally lies flat or a new stitch catches cleanly on the first try. Build a habit of finishing threads neatly and trimming at the exact point you planned. When you see steady improvement, you’ll know you’re on the right path. Your journey from frustration to fluency isn’t a mystery—it’s consistent practice, clear notes, and a brave try at every new border.
Fix common errors so your kloster blocks stay even
You’ll run into common missteps that throw off your kloster blocks. The most frequent issue is uneven tension. If you pull too tight, the blocks pucker; if you’re too loose, they sag. Find your sweet spot by testing tension on scrap fabric first, then apply that handle to your main piece. A simple trick is to practice a few rows with a single color before switching threads. This keeps your focus on stitch length rather than color changes, so your blocks stay neat and aligned. When blocks start to drift, re-tie and restart from a clean base line rather than trying to force it back into place.
Another frequent error is miscounting stitches between each block. If your spacing looks off, pause, count, and re-mark your guide lines. Use a light erasable marker and a clear ruler. Your aim is a consistent grid so each kloster block sits evenly within the design. If edges snag or get pulled, re-anchor the fabric with a fresh hoop grip and slow your pace. Finally, dye or fiber differences can change how your stitches sit. Test your thread on a hidden edge first to see how it behaves, then commit to the main piece. You’ll keep those blocks tidy and symmetrical.
If threads fray or knots show through, switch to a smaller needle or a smoother thread. A blunt needle can tug on fabric and distort your stitches, so swap to the needle size recommended for your cloth. When your backstitch peeks through, switch to a lighter thread or bury the ends more deeply. Small adjustments like these stop problems before they start and let your kloster blocks stay even from edge to edge.
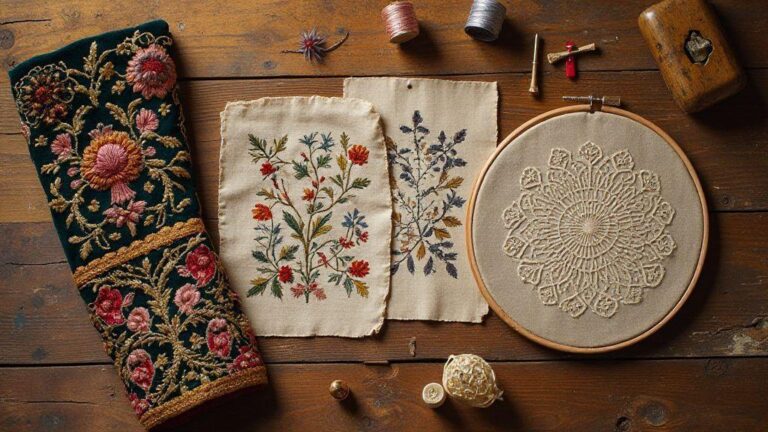
Try harder designs after hardanger for beginners and new patterns
When you’ve mastered the basics, you’re ready to stretch your skills with slightly tougher designs. Start with patterns that add a few new shapes or a different stitch, but stay within your comfort zone. This keeps your confidence high and your frustration low while you learn. Try a border that uses a mix of satin and cross stitches alongside your hardanger work. You’ll notice how combining techniques can give your project a richer texture without overwhelming you.
Next, push a bit further by introducing geometric patterns that require precise counting and steady hands. A simple lattice or decorative gaps can teach you about hole placement and symmetry without exploding your workload. If you stumble, backtrack to a simpler version of the pattern and rebuild confidence step by step. The key is to pick projects that scare you just enough to grow, but not so much that you quit. Your hands will learn to guide the thread, and your mind will learn to read the pattern more quickly.
If you want to keep momentum, document what changes when you move to harder designs. Note how tension, needle size, and fabric choice affect your results. You’ll see patterns emerge, and your confidence will grow as you recognize why certain settings work for certain stitches. You’ll find that your practice not only improves technique but also speeds you up so you can finish with a smile.
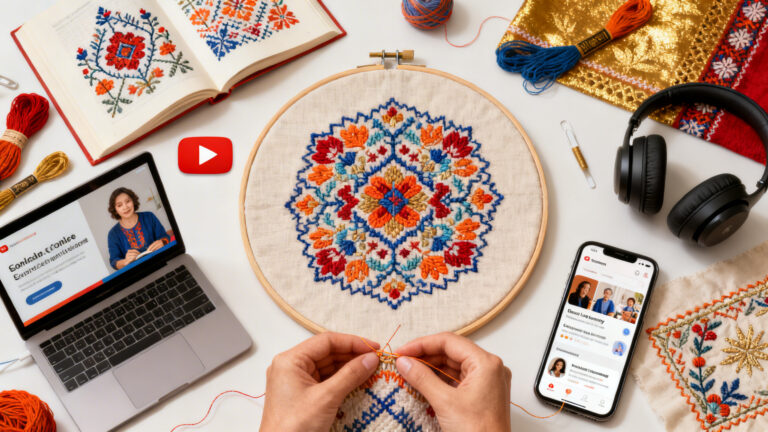
Join a class or use an online hardanger stitches guide
Joining a class or following an online hardanger stitches guide gives you real-time feedback and structure. In a group, you’ll hear tips you wouldn’t think of alone, and you’ll see demonstrations that clarify tricky steps. A guide provides clear steps, slow demonstrations, and a library of common stitches so you can replay each move until it’s natural. Whether you learn best in person or at your own pace, you’ll gain a roadmap that takes you from shy beginner to confident student.
If you can’t find a local class, an online guide works just as well. Look for guides with step-by-step photos or short videos, plus practice projects you can finish in a weekend. Practice along with the guide, pausing to try each stitch before moving on. You’ll want to bookmark the essential techniques so you can return whenever you need a refresher. Remember, structure turns confusion into clarity, and guidance turns uncertainty into progress.
How to Do Hardanger Embroidery: Your First Step-by-Step Project
You’ll start strong with a simple project that teaches the core moves. Pick a small piece with a few geometric cuts and a handful of stitches. Begin by transferring a light, clean pattern to your fabric, then set up your hoop and tension, ensuring even grip. Work through the hollowed areas slowly, checking your alignment as you go. When you finish, you’ll see how each cut and stitch plays a part in the whole design.
As you wrap up, take a moment to review your edges and the symmetry of your blocks. If something looks off, retrace the row and adjust your tension. Your first project isn’t about perfection; it’s about learning the rhythm and making it yours. You’ll carry these lessons into every new pattern you tackle, and your confidence will grow with every stitch you complete.
Quick Start: How to Do Hardanger Embroidery — Step-by-Step Checklist
- Start with a beginner pattern you love and a kit that includes clear instructions.
- Gather the right fabric, threads, needles, and hoop; test a small sample first.
- Learn kloster blocks and basic stitches in bite-sized steps.
- Practice cutting and filling with a guided approach to keep holes crisp.
- Read patterns carefully and count threads to place stitches accurately.
- Use a tutorial to guide each stage, then compare your work to the guide.
- Finish edges, wash gently, and press with care to set stitches.
- Track progress, adjust goals, and celebrate small wins as you progress through How to Do Hardanger Embroidery: Your First Step-by-Step Project.

I’m Sophie Caldwell, the author behind granaboom.com, and I believe hand embroidery is one of the simplest, most relaxing ways to create something beautiful with your own hands. I started this blog to help beginners learn hand embroidery without feeling overwhelmed by complicated instructions or “perfect” results.
Here you’ll find beginner-friendly guides to decorative embroidery stitches, along with clear step-by-step practice ideas and patterns you can use to build confidence. My focus is on making the learning process easy: simple explanations, helpful stitch combinations, and small projects that look polished even when you’re just starting out.
Welcome to granaboom.com—grab your hoop, choose a few colors, and let’s stitch one line at a time.