Whitework Embroidery Techniques: Broderie Anglaise, Mountmellick & More
Key whitework embroidery techniques
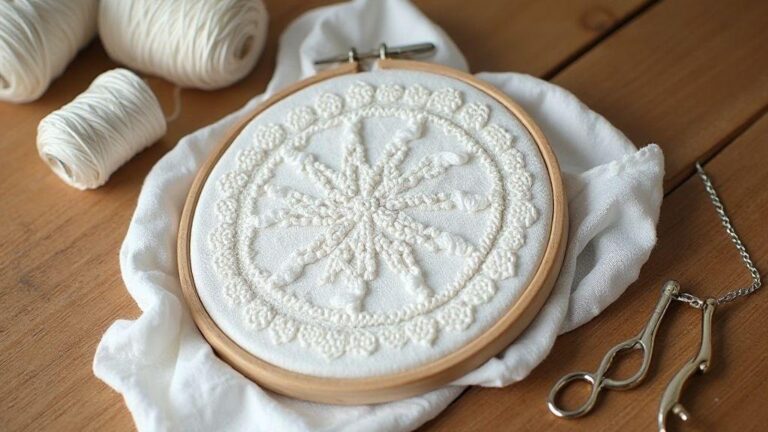
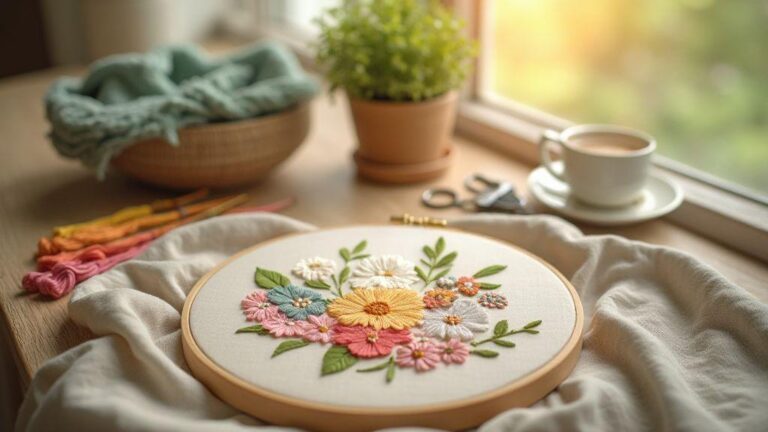
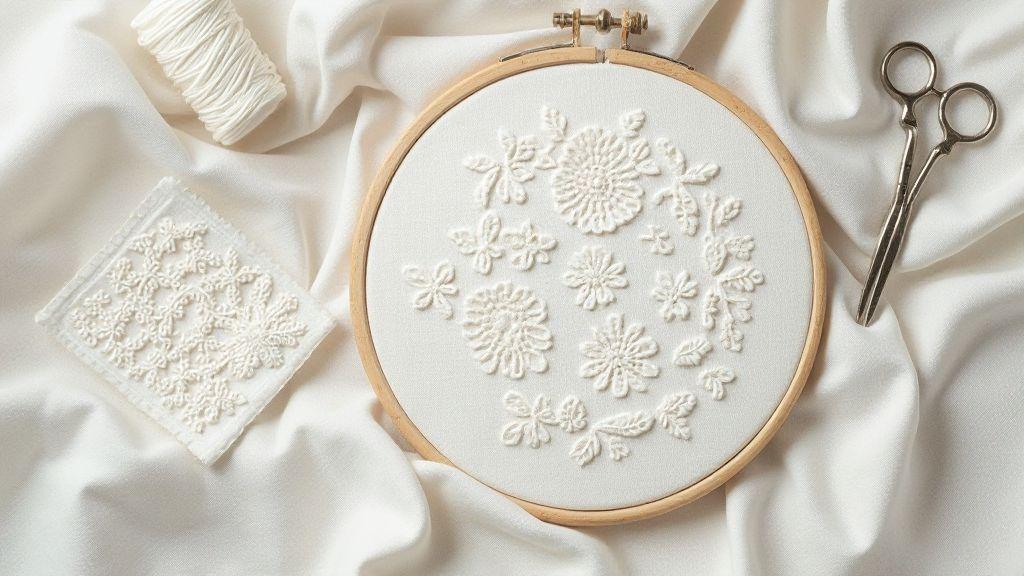
Whitework embroidery uses delicate stitches on white fabric to create light textures and patterns—found in heirloom linens, blouses, and table runners, often carrying family stories in the stitches. With simple tools—a hoop, a sharp needle, bright white thread—the beauty lies in the contrast between fabric and tiny stitches, inviting a calm, focused practice that becomes part of the design. A classic feature is the use of negative space; the fabric breathes around the stitches, and varying densities—tight satin stitches beside open eyelets—bring the piece to life. It’s a quiet art that reads as timeless when tensions stay even and the patterns are clean.
As you grow, you’ll see how traditional whitework relies on restraint and balance. Modern takes honor the heritage while adding whimsy or minimalism. Your own style can lean into crisp lines or softer, bubbled textures. The core remains the basics—counting threads, keeping even stitches, and respecting the fabric you choose. Whitework Embroidery Techniques: Broderie Anglaise, Mountmellick & More will feel like a conversation between you and your fabric.
Broderie Anglaise patterns basics
Broderie Anglaise is built from small, neat holes created by pulling threads and outlining them with stitches. Tiny eyelets appear in floral or geometric groups. Start with a simple border or a single flower on sturdy cotton to learn spacing and evenness. Keep your fabric taut in a hoop so holes stay round and edges crisp.
Often you’ll outline the cutouts with a satin stitch to define the shape. The contrast between the smooth fill and airy cutouts gives this style its sparkle. For a decorative touch, add tiny stitches around the edge to create a lace-like frame. Don’t rush the pull—threads should lie flat and tidy.
Accuracy matters more than speed. Measure cutouts carefully and check spacing mid-design to keep it balanced. When finished, gently press from the back with a clean cloth to set the stitches. Broderie Anglaise will look clean, classic, and ready to elevate linens, blouses, or tableware. Whitework Embroidery Techniques: Broderie Anglaise, Mountmellick & More sit nicely in this lineage.
Mountmellick embroidery stitches overview
Mountmellick embroidery builds texture with thick, raised stitches on sturdy fabrics like linen or wool blends. Raised clusters create a three-dimensional look that catches light differently from flat stitching. The technique invites you to press the needle into the fabric and build up layers.
A mix of chain stitches, outline stitches, and padded fills forms broad floral motifs and borders. The result is rustic yet refined, with warmth in the thread depth. It works well on wall hangings, cushions, or garment panels. Start with a simple motif and a single fill to gain confidence; observe how the raised areas catch light differently from the surrounding fabric. With care, Mountmellick pieces feel sturdy, tactile, and distinctly yours.
Pulled thread and cutwork techniques
Pulled thread and cutwork involve removing some fabric threads to create delicate openwork, then outlining and filling the holes to keep edges neat and centers airy. Begin with a light outline on muslin or linen, pull threads to form spaces, and outline the holes to hold shape as you add stitching.
The effect is clean and precise: counting threads and keeping tension even ensures uniform cuts. A well-executed piece features a crisp lattice or dotted shapes that read as light and elegant. Patience pays off—practice on scraps first, then move to your main piece. You can vary density around cut areas to create subtle shading for napkins, collars, or decorative panels. Pulled thread and cutwork can be the quiet star of a project when treated as tiny sculptures of fabric and thread.
Tools and fabrics for whitework projects
You’ll gain confidence with a clean, organized workspace and a compact, high-quality toolkit. A sharp pair of scissors, a marking pencil, a fabric pen, and a comfortable thimble are essentials to plan, trace, and protect your fingers as you work through fine stitches.
Fabric choice sets the tone. Smooth, even weaves help stitches lie flat. Cotton and linen are favorites, holding threads well and resisting warping. Linen blends can offer a slightly stiffer feel that supports intricate patterns. A high thread count helps white-on-white contrast stay crisp, but test swatches first to gauge behavior after washing. A stabilizer can help on very fine fabrics, but avoid over-stiffening.
Choose needles, threads and yarns for you
Needle choice drives the clarity of your stitching. Sharp needles suit linen and cotton, allowing smooth passage through fabric. Start with a comfortable size and move to smaller gauges as your tension improves. For threads, cotton embroidery floss or perle cotton provide sheen and strength. A single strand can suffice for very fine work. When working with white on white, thread color helps readability, so choose threads that lay cleanly without tangling. A touch of yarn can add texture if kept consistent with your look. Manage thread tension gently to avoid puckering.
Quality threads improve coverage and reduce fraying ends. If stitching heirloom pieces, consider colorfast threads that resist fading after washing. A small amount of thread conditioner or beeswax helps prevent frays and eases threading on longer runs.
Best fabrics for whitework heirloom sewing
Heirloom whitework benefits from fabrics that forgive and endure. Tight, even weaves in linen or high-quality cottons give long-lasting results. Linen offers natural texture and drape that ages beautifully; smooth, medium-weight cotton gives a stable surface for complex patterns. For a traditional look with a slight sheen, choose fabrics with a natural glow that makes white stitches pop. Plain-weave cottons are forgiving for modern or casual feels. Stabilizers are helpful on very fine fabrics, but balance is key so stitches stay crisp without stiffening the piece.
Consider wash care: you want fabrics that resist yellowing and hold brightness after multiple cleanings. Test swatches to see how your chosen washing method affects the fabric and stitches.
Hoops, stabilizers and finishing tools
Hoop choice affects tension and stitch accuracy. A steady hoop keeps fabric taut without crushing it, giving clean, even stitches. For delicate whitework, a smaller hoop offers better control; a lightweight magnetic hoop is handy for quick positioning, but switch to a traditional wooden hoop for longer sessions. Stabilizers help manage fabric movement on tricky areas. Water-soluble stabilizers are useful for delicate designs you’ll remove later; tear-away stabilizers suit permanent pieces.
Finishing tools complete the kit. A needle threader saves frustration with fine threads; a seam ripper fixes tiny mistakes without harm to the fabric. Finish with a gentle press from the back to set stitches, and a light starch can help crisp the fabric. A soft brush removes loose fibers before framing or gifting.
How Broderie Anglaise patterns are stitched
Begin with crisp fabrics like cotton lawn or batiste so eyelets sit cleanly. Use a fine sharp needle and a hoop to keep the fabric flat. Plan your pattern with simple, repeatable shapes—petals, tiny daisies, leaves—so eyelets stay evenly spaced. The fabric relaxes as you stitch, and the design begins to pop.
Stitch a satin edge around each eyelet to seal the cut edge, pulling threads tight for a crisp hole. Small, even stitches along the edge help maintain uniform spacing. Regularly check tension—too loose, and eyes droop; too tight, and fabric pucks. With practice, the eyelets become a neat heartbeat in the fabric.
As you progress, keep motifs evenly sized and spacing light. A gentle steam over a cloth can set stitches without flattening texture. The white-on-white contrast creates soft shadows that make the design feel alive.
Eyelet and cutwork step-by-step
Mark a clean outline for the eyelet, cut a small hole inside, and use buttonhole stitches around the edge. Layer satin stitches around the outside to define the border. Insert threads through the fabric to elevate the cut area with even, short stitches along the inner edge. Secure the end behind the work and trim loose threads. Finish by pressing from the wrong side on low heat to keep edges flat; if the center puffs, re-stitch the inner edge a touch tighter.
Simple motifs and pattern repeats
Choose a small motif—one flower or a leaf cluster—that you can repeat. Start repeats in precise spots and maintain consistent spacing. Uniform stitches inside each motif keep the fill balanced and the eyelets proportionate. Repetition builds muscle memory for cleaner, faster stitching across the piece.
Mark guide lines lightly to ensure alignment, and aim for harmony rather than patchwork. Repeating motifs helps your hands learn the rhythm, making the final piece feel cohesive.
Clean edges and small finishing tips
Finish inner edges with a narrow satin stitch before cutting to seal the fabric and prevent fraying. Press gently from the back to avoid flattening stitches. Trim stray threads close and secure ends with a subtle knot beneath the satin edge. For a crisp overall look, use a light touch and avoid over-stretching the cloth in the hoop. Store finished pieces flat or rolled to protect delicate edges.
As you wrap up, remember to celebrate your progress in Whitework Embroidery Techniques: Broderie Anglaise, Mountmellick & More.
Mountmellick floral motifs and raised stitches
Mountmellick uses bold floral motifs lifted from the fabric with raised stitches. Raised satin, backstitch outlines, and short, overlapping fills build petals that stand out against flat areas. Ground with a light linen or cotton, and use a slightly thicker satin to help petals pop. Balance is key: place raised petals against flat areas to maintain contrast, and outline stems with a fine stitch to anchor blooms.
Layer lighter and darker threads for subtle shading without overcomplicating the design. Maintain even tension and work in a grid-like pattern so motifs stay neat. A light press sets texture without flattening raised parts.
Raised satin, buttonhole and stem use
Raised satin gives petals a soft, curved edge that catches light. Practice on scraps to calibrate stitch height. For stems, switch to a neat buttonhole stitch for a sturdy, clean line. Add a few short straight stitches at the base of each petal for tiny shadows, and define leaf veins with back stitches. Keep satin stitches slightly shorter than anticipated to keep the surface lively.
Finish motifs with a fine chain or stem outline, then layer extra short satin stitches for depth. Symmetry helps Mountmellick designs feel deliberate; use mirrored elements along a central axis for a balanced look.
Working wool on cotton cloth
Working with wool on cotton gives Mountmellick a rustic, warm feel. Wool adds weight to raised areas, while a tight cotton base keeps stitches from sinking. Choose a wool thread that isn’t bulky and a fine-worsted yarn for contrast. The wool’s natural sheen catches light differently from cotton, creating subtle color shifts that enrich the motifs.
Keep tension even but allow fabric to relax between sessions. Press gently to set fibers and store flat to keep wool from bending out of shape. If you’re new to mixing fibers, test a small sample first to see how wool affects the raised stitches and the base fabric.
Care and storage for Mountmellick pieces
Care for Mountmellick by hand-washing in lukewarm water with mild detergent. Avoid agitation that can crush raised stitches. Gently rinse and press water out between towels, then lay flat to dry away from direct sun. Iron on low with a pressing cloth to protect texture; a light steam can refresh the glow and lift raised areas.
Store pieces flat in a breathable bag with tissue between layers to prevent snagging. If folding is necessary, place a soft cloth between folds to preserve depth. With care, Mountmellick flowers stay crisp, dimensional, and display-ready.
Pulled thread and needle lace whitework methods
Two timeless methods—pulled thread work and needle lace—offer texture without heavy stitching. Pulled thread work uses the fabric’s own threads as part of the design, while needle lace sits on top of the base fabric to form a delicate lace panel. Both integrate beautifully on cuffs, collars, and table linens for a light, elegant finish.
A small project is a good start: a linen napkin with a pulled thread border, then a cotton blouse with a tiny needle lace motif. Steady hands and clean, even stitches help you blend the two techniques into stylish combinations. The goal is texture without weight, and with practice you’ll weave both approaches into harmonious pieces.
Pulled thread embroidery methods explained
Pulled thread work marks a simple outline and selects which threads to pull. Some threads remain to anchor patterns, while others are drawn toward the center or along the outline. Satin, back, and running stitches define edges, while satin fills small areas for a smooth surface. Balance is crucial—pull too tightly and fabric puckers; too loosely and the design loses crisp edges. Practice on a swatch to learn how tension shapes the final form.
Needle lace whitework motifs and uses
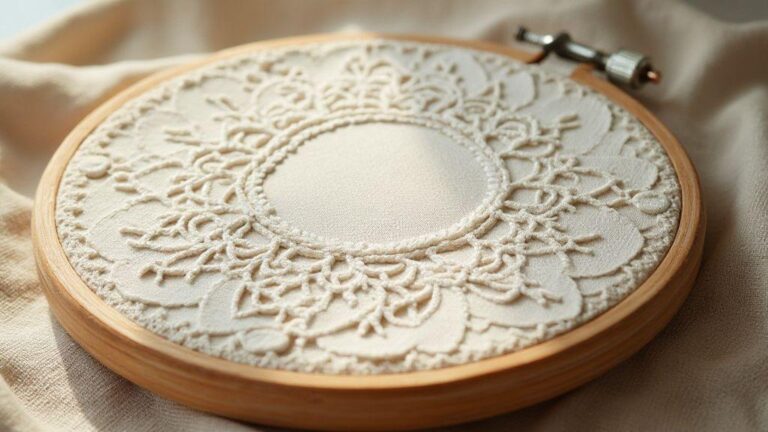
Needle lace creates motifs that seem to float on the fabric—tiny lace nets filled with stitches to form leaves, flowers, or geometric shapes. Stitched directly onto the base, these motifs provide a clean, continuous design that can adorn collars, cuffs, or decorative panels. Choose motifs by scale and rhythm: a single large motif elevates a garment, while a repeating border creates a refined edge. Use fine threads and small needles for delicate looks, or slightly heavier threads for a bolder statement.
Needle lace works well on linen tea gowns, handkerchiefs, and heirloom linens where you want texture without heavy coverage.
When to combine pulled thread and lace
Combine pulled thread with lace when you want both structure and openness. Start with a pulled thread framework to set negative space, then overlay needle lace motifs for delicate detail. The result is contrast: pulled threads provide shape while lace adds airiness and complexity. For collars or cuffs, try a pulled thread outline with tiny needle lace motifs along the edge to highlight the design while keeping the garment light.
With practice, you’ll weave pulled thread and lace into a single, harmonious piece that showcases Whitework Embroidery Techniques: Broderie Anglaise, Mountmellick & More.
Learn, restore and preserve vintage whitework
Preserve whitework by understanding its history and practicing careful restoration. The charm lies in delicate stitches on white cloth, where texture matters more than color. Caring for vintage pieces protects memories and passes the craft to new hands. Begin gently: handle fabrics with clean hands, use light steam, and test threads on hidden seams first. Your aim is faithful preservation that invites touch and continued use.
Study common stitches and how threads behave on old fabrics. Watch tension to avoid ripping or fading patterns. Map damaged areas to avoid overworking corners. Assemble a toolkit with white or pale cotton threads, fine needles, sharp scissors, and a magnifier for tiny stitches. Label pieces so future restorers understand your process. With steady practice, you’ll recognize how satin stitches catch light or how buttonhole edges hold shape after years. Your growing skill helps keep this tradition alive for others to enjoy.
Vintage whitework restoration steps
Assess the piece to identify weak fibers, loose threads, and stains. Steam gently to relax wrinkles, lay the fabric on a padded surface, and test thread choices on a hidden area. If a thread breaks, weave in a near-invisible replacement matching the original stitch count. Stabilize the design without creating new seams. Align and reattach loose stitches with a fine needle and steady hand; re-create lost motifs on scrap fabric and reattach discreetly. Clean marks and residue gently, then re-block the piece so edges lay flat. Photograph the restoration for reference and label your methods for future reuse.
Where to find broderie anglaise tutorials
Look to trusted sewing communities and museum collections online for step-by-step broderie anglaise guides. Seek diagrams that show classic eyelet patterns and fabric prep, needle choices, and thread thickness. Practice on a small sampler first to compare your work with tutorials and adjust technique.
Then explore projects that progress from simple to more complex motifs. Good tutorials emphasize consistency and working close to the cloth without overworking it. Save tips on tension, spacing, and neat knotting—the tiny details that separate a good piece from a polished one. After finishing a tutorial, reproduce the pattern on a fresh fabric to measure your progress and confidence.
Practice projects to build lasting skill
Choose small, repeatable motifs—eyelets, simple daisies, or a grid of tiny holes—that let you focus on even spacing and clean edges. Uniform stitches and clean thread work help your design read as a single, elegant piece. As you repeat patterns, your hands settle into a rhythm and you’ll notice fewer inconsistencies. Treat each practice session as a step toward mastering Mountmellick or other whitework traditions. Whitework Embroidery Techniques: Broderie Anglaise, Mountmellick & More become second nature with repetition.
Learn, restore and preserve vintage whitework (summary)
Whitework is a patient craft where texture and subtle shadows speak louder than color. By understanding stitches, fabrics, and care, you keep this heritage alive for new makers. The best results come from mindful practice, careful restoration, and a willingness to learn from each piece.
Whitework Embroidery Techniques: Broderie Anglaise, Mountmellick & More offer a rich toolkit for makers today. Embrace the quiet elegance of these techniques, and let your stitching tell a story that spans generations.

I’m Sophie Caldwell, the author behind granaboom.com, and I believe hand embroidery is one of the simplest, most relaxing ways to create something beautiful with your own hands. I started this blog to help beginners learn hand embroidery without feeling overwhelmed by complicated instructions or “perfect” results.
Here you’ll find beginner-friendly guides to decorative embroidery stitches, along with clear step-by-step practice ideas and patterns you can use to build confidence. My focus is on making the learning process easy: simple explanations, helpful stitch combinations, and small projects that look polished even when you’re just starting out.
Welcome to granaboom.com—grab your hoop, choose a few colors, and let’s stitch one line at a time.